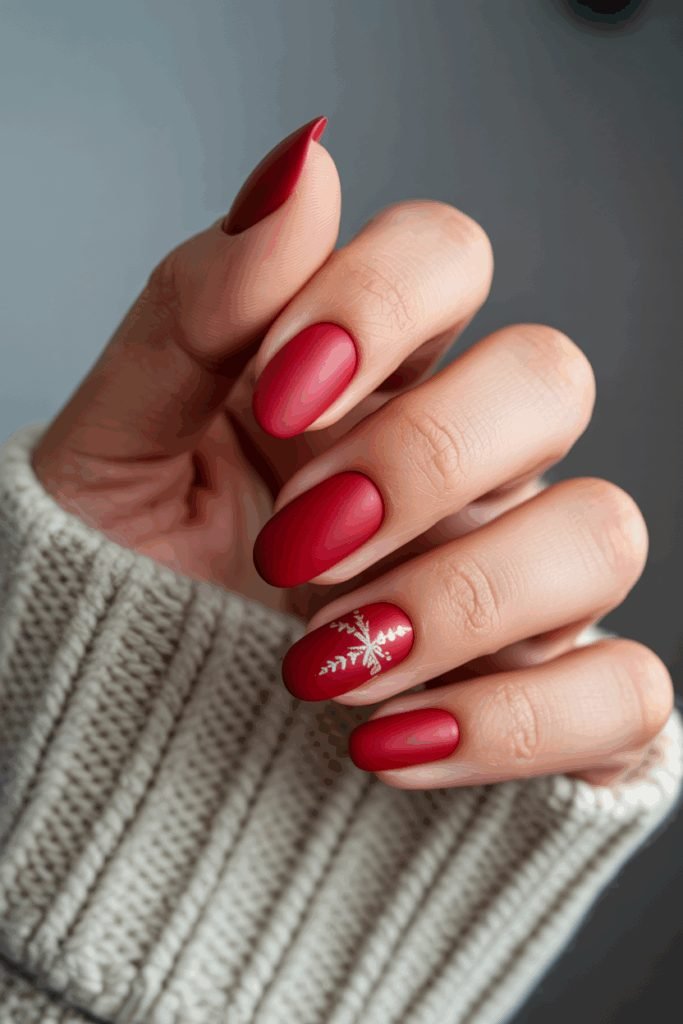
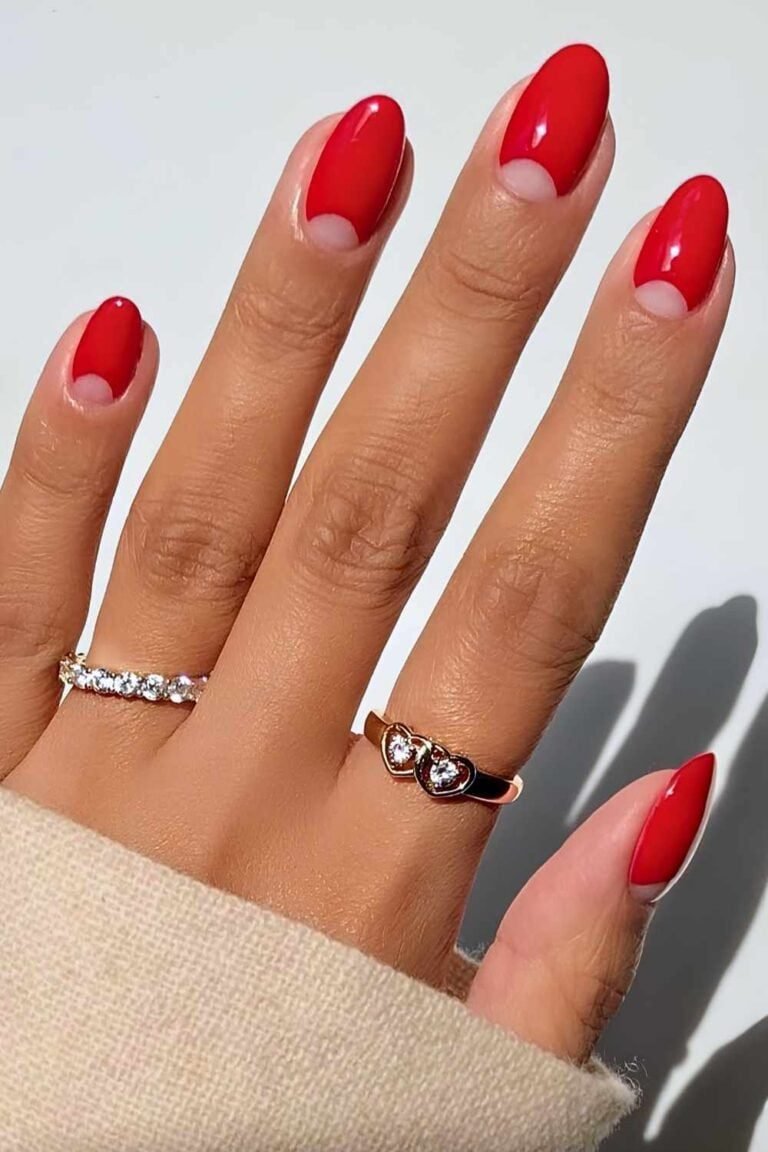
19 Vintage Christmas Nails Glitter You’ll Want To Save Right Now
Glitter is the oldest Christmas nail trick there is. Long before nail art pens and chrome powders, a bottle of sparkly polish was how a manicure got dressed up for December, and that is exactly why it still works. The 19 vintage christmas nails glitter ideas in this list cover the full range of what one good glitter can do. Some sets go all in, with gold, red, or emerald sparkle on every nail. Others keep the shine in one place, on the tips, along a half moon, or on a single accent nail next to matte polish. Shapes run from short and square to long almond, and most of these looks need nothing more than a base color, a glitter polish, and a steady top coat. Plenty of them are old in the best way, built on the red, green, gold, and burgundy shades that filled vintage Christmas cards, shop windows, and wrapping paper. Save the ones that match your nail length and your patience level.
1. Full Gold Glitter On Long Square Nails
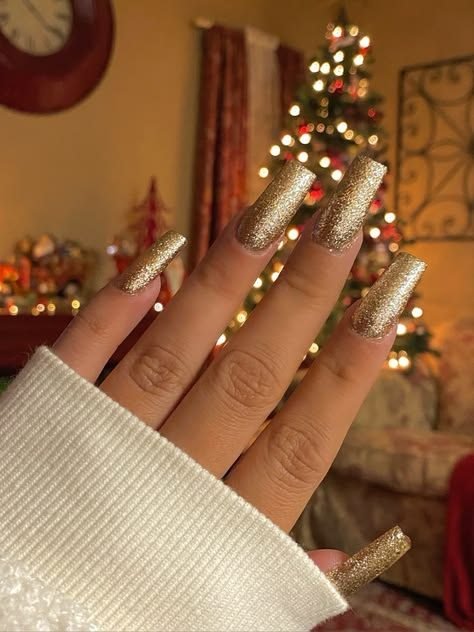
Every nail in this set wears the same dense gold glitter, and the long square shape gives that sparkle a flat, even surface to sit on. The finish looks almost like gold foil from a distance, then breaks into thousands of tiny flecks up close. A lit Christmas tree behind the hand and a cream knit sleeve finish the scene, and the glitter picks up the tree lights in a way plain polish never could.
Gold on every nail sounds like a lot, yet it reads as one clean statement because nothing competes with it. There is no art, no second color, no accent nail. To copy the look:
- Build the glitter in two or three thin coats instead of one thick one, so it stays smooth.
- Run the brush along the free edge to seal the tips, where glitter chips first.
- Finish with a glossy top coat to level the texture and deepen the shine.
2. Full Red Glitter Nails
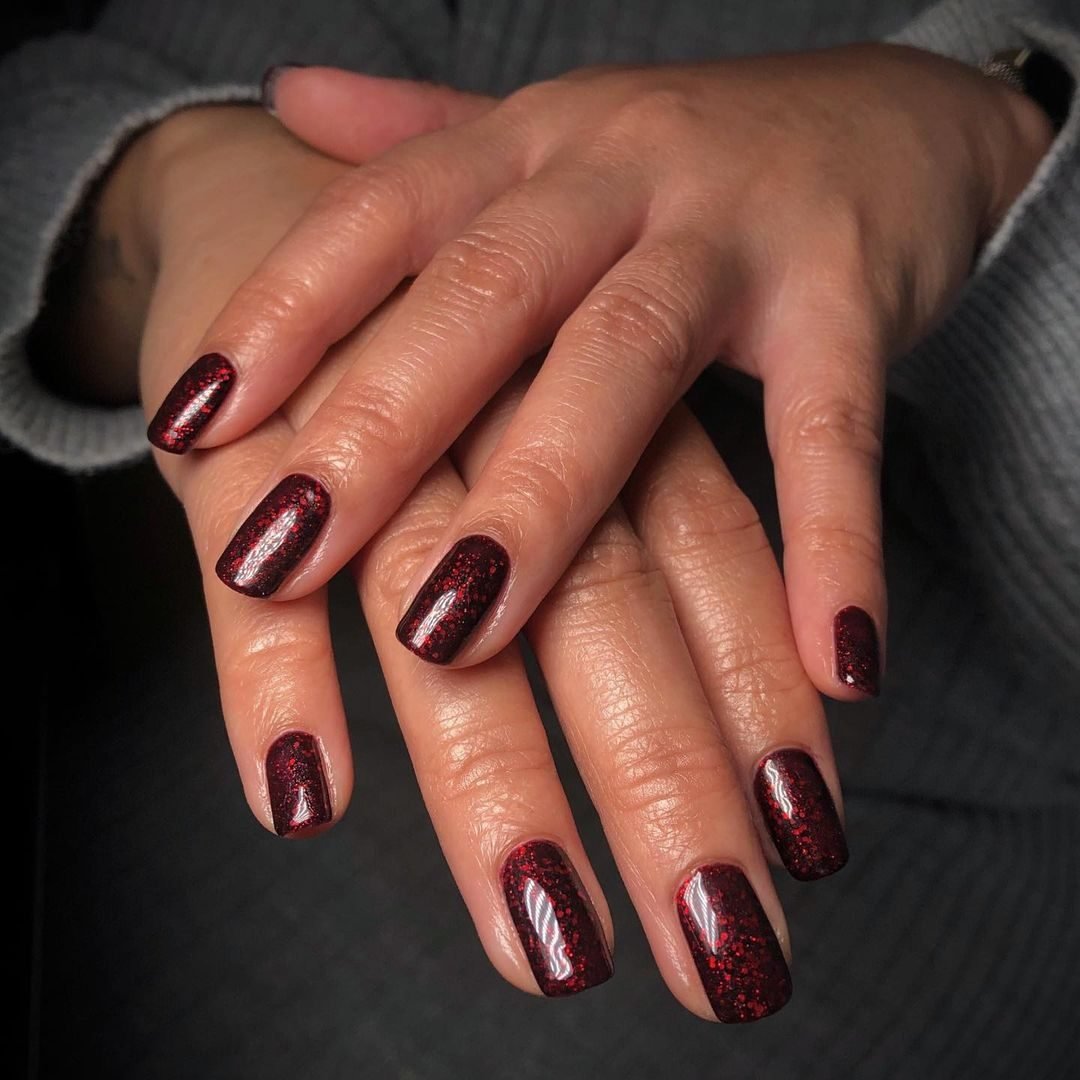
Deep red glitter covers every nail here, worn on short squoval shapes with the hands stacked over a dark sweater. The glitter is fine and packed tight, so the color reads as a rich garnet red with light moving inside it rather than a layer of sparkle sitting on top. Against the dark background, the red does all the talking.
Short nails suit this polish well. The dark red can look heavy on very long shapes, but on a short squoval it stays neat and strong, and the glitter keeps it festive instead of plain. Grow out is also kind with glitter, since the sparkle hides the gap at the base for longer. If your red glitter feels rough after two coats, one layer of a clear builder style top coat, or two layers of regular top coat, will smooth it flat.
💡 Quick Tip
Red glitter stains bare nails fast. Always start with a proper base coat, and removal is easier if you soak a cotton pad on each nail for a minute before wiping.
3. Deep Green Glitter Nails Against The Tree Lights
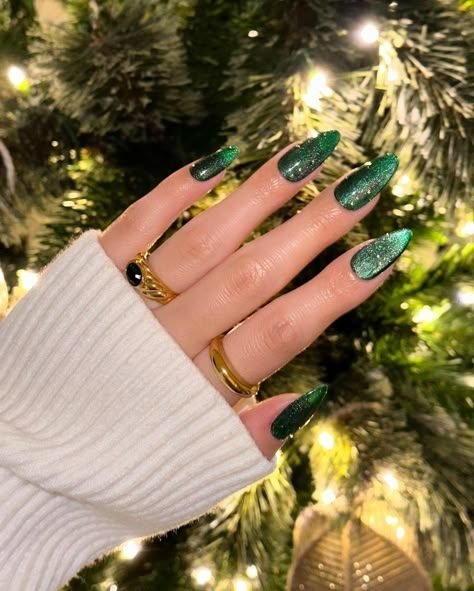
Shot in front of a lit Christmas tree, this set wears a deep green glitter on long almond nails, with plain gold bands on two fingers. The green is dark enough to sit in the same family as the tree branches behind it, and the fine glitter scattered through it catches the same warm points of light. A plain white ribbed sleeve keeps the frame simple so the color stays the subject.
Green is the color people hesitate over, and this photo is the argument for it. The shade is jewel deep rather than bright, which keeps it grown up, and the almond shape softens the boldness. It pairs well with gold jewelry, as the rings here show, and it makes a strong change for anyone who wears red every single year. One coat of glitter over a matching dark green base gives the deepest result with the least texture.
4. Deep Red Nails With Gold Glitter Tip Edges
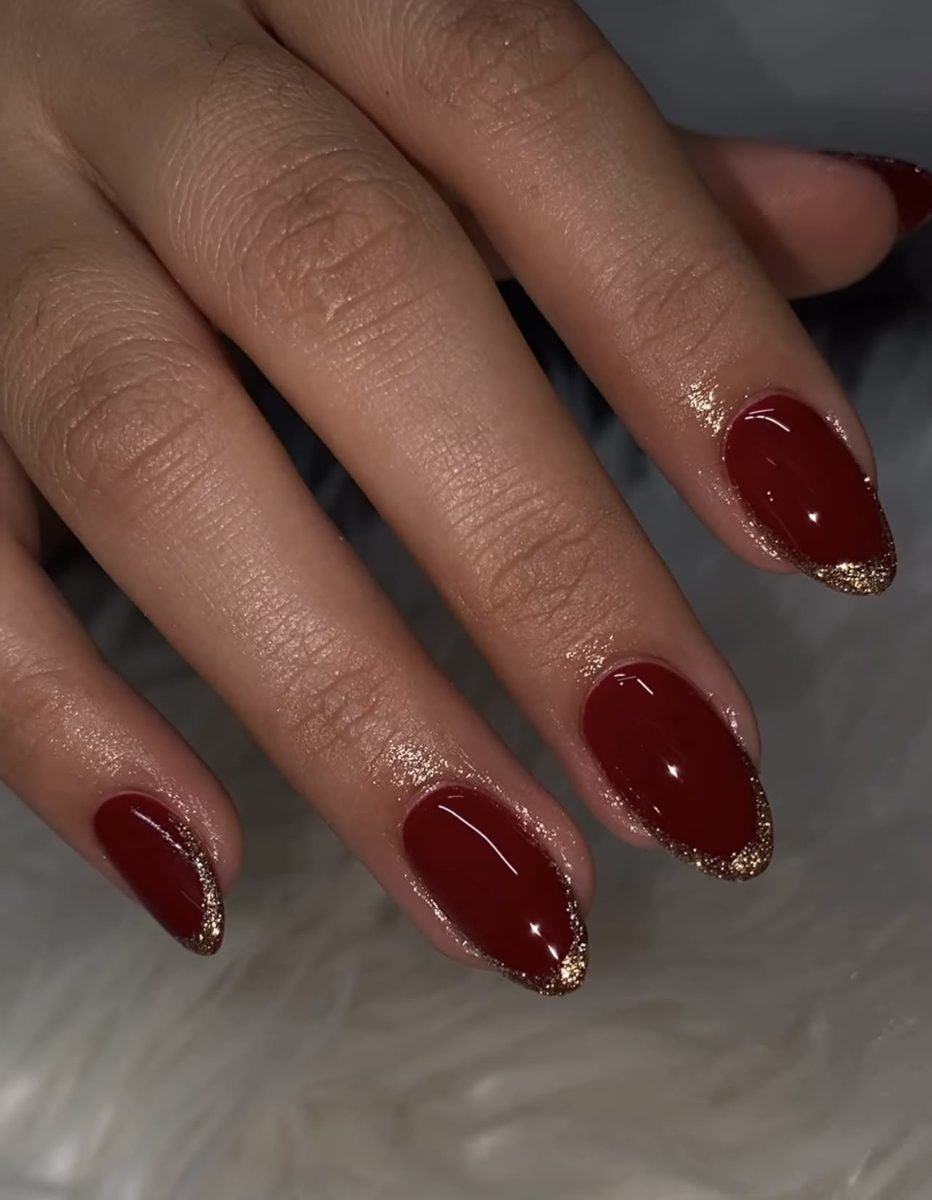
Glossy deep red almond nails carry the shine in one narrow place here: a fine edge of gold glitter tracing the very tip of each nail. It works like a French manicure drawn with a much thinner line, and from a normal distance the nails look like plain polished red. The gold only shows when the hand moves and the edges catch light.
That restraint is the whole appeal. The set suits someone who wants a Christmas detail that still fits a work week, and it is forgiving to apply because a slightly wobbly thin line reads as texture in glitter. A fine liner brush or the corner of a makeup sponge both work for the edge. Keep the red underneath fully dry first, or the glitter will drag streaks of color into the line.
Paint two coats of deep red and let them dry completely.
Trace the tip edge with gold glitter on a fine liner brush, following the natural curve.
Seal with top coat, wrapping the edge so the thin line does not wear away first.
5. Red Glitter Ombre Fade Nails
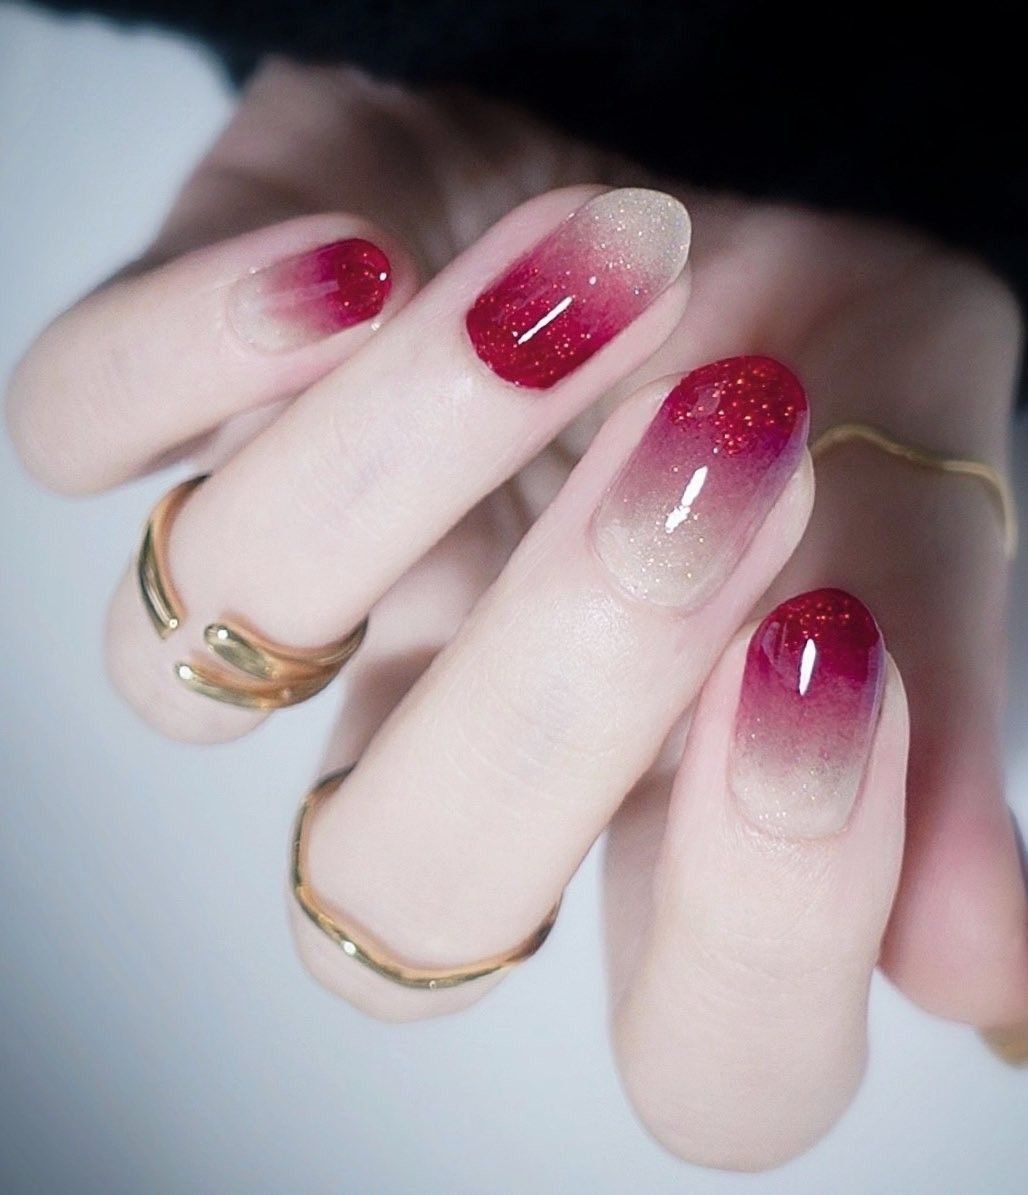
Red glitter starts strong at the tips of these oval nails and melts down into a clear, champagne tinted base near the cuticle. A few nails run the fade the other way, with the deepest red at the base, which keeps the set from looking stamped out. Plain gold rings and a pale background keep the gradient as the single focus.
Ombre is a smart shape for glitter because the fade hides the two problems glitter usually brings: a harsh line at the cuticle and obvious grow out. The soft edge near the base also makes this the easiest full sparkle look to wear for two weeks straight. Sponging is the usual method, dabbing glitter polish over a base and concentrating each extra layer closer to the tip. Work in thin layers and let each one set for a minute, or the sponge will lift the layer under it.
The fade puts the strongest sparkle at the tips, where nails catch the most light, and leaves the base soft enough to grow out gracefully.
6. Glossy Red Nails With Two Glitter Accent Nails
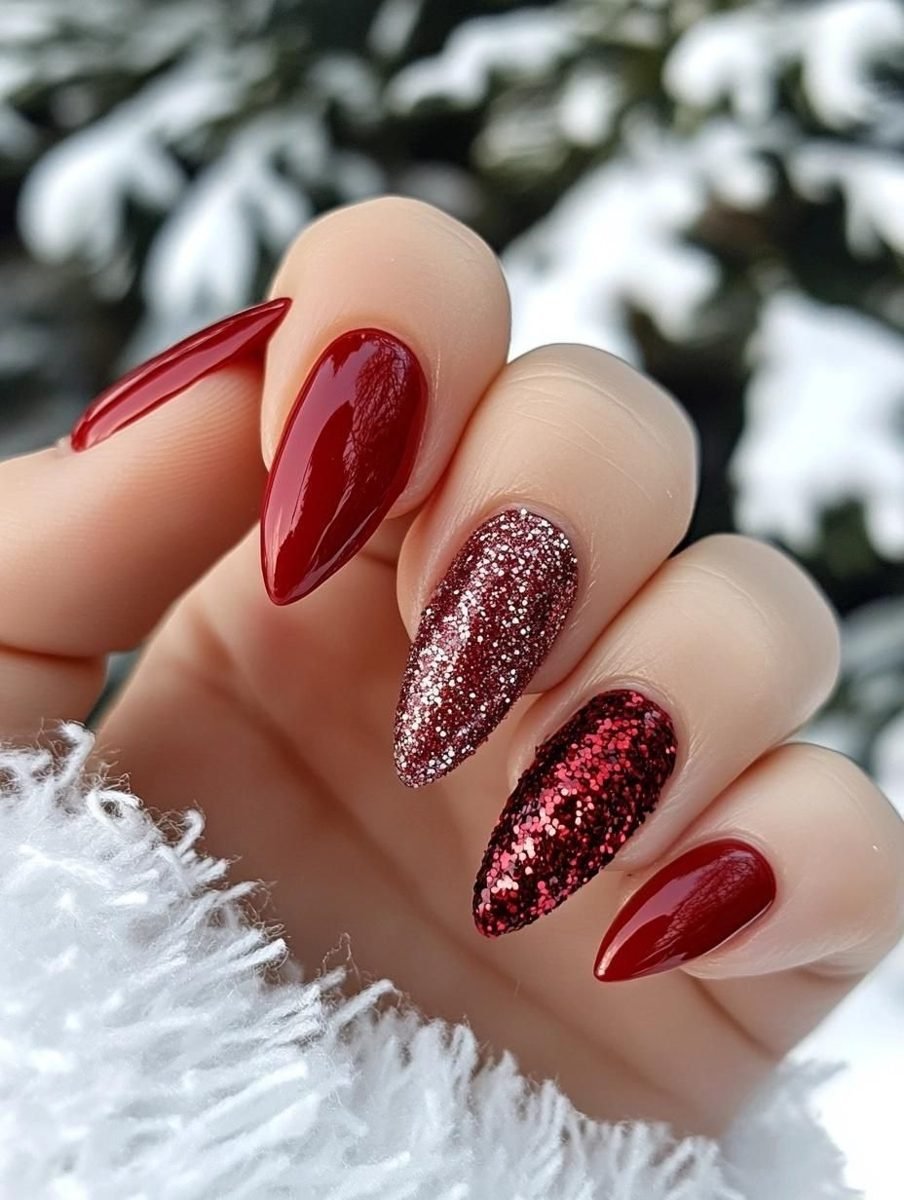
Snowy branches set the scene for this one: long stiletto nails in a glossy, blue toned red, with the sparkle saved for two nails only. The middle nail wears a fine rose glitter, and the ring nail next to it goes chunky, with larger red flecks that catch light in bigger flashes. Placing the two glitter finishes side by side is the detail that makes the set interesting.
Mixing a fine and a chunky glitter in one set sounds busy, yet it works here because the color family stays tight, red on red, and the glossy nails around them stay completely plain. It is a good route for anyone who likes glitter but finds a full set too much for daytime. Keep the plain nails extra glossy, since the contrast between flat shine and sparkle is what the design is built on.
Recreate this look
7. Chunky Gold Glitter Nails
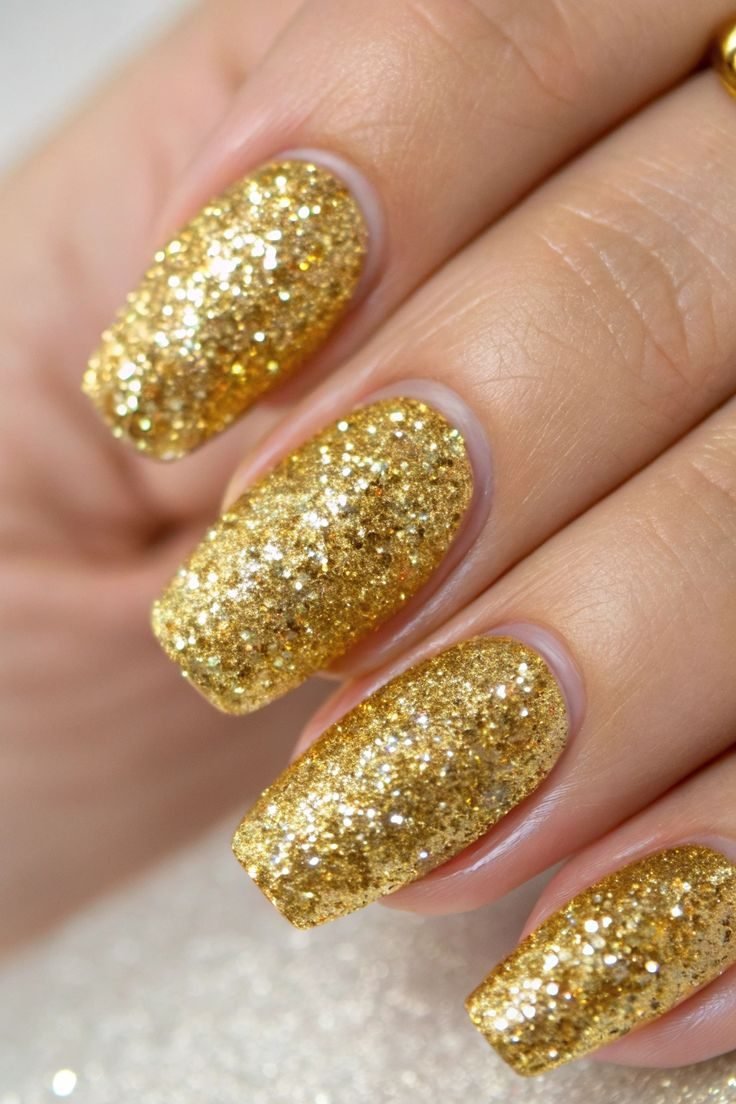
Nothing about this glitter is shy. The flecks are large, mixed in size, and packed so densely on these squoval nails that the surface looks almost hammered, like gold leaf pressed onto the nail. The tight crop shows the texture honestly: bright white gold flashes next to deeper amber pieces, all in one polish.
Chunky glitter is the fastest route to a party manicure because one or two coats already look finished, and small chips barely show against the broken surface. The trade off is texture. A single thin top coat will leave it gritty, so plan on two coats, or one coat of a thick gel style top coat, to get a smooth dome. Removal takes patience too. Soak off with acetone pads rather than scrubbing, or the large flecks will scratch the nail plate on the way off.
Dab and press the glitter on with the brush instead of stroking, so the big flecks lie flat.
Build a smooth dome with two top coats, checking the surface by touch once dry.
One thick coat. It pools at the sides and peels off in a sheet.
Filing the free edge after the glitter is on. It tears the flecks loose.
8. Red And Green Plaid Nails With Gold Glitter Lines
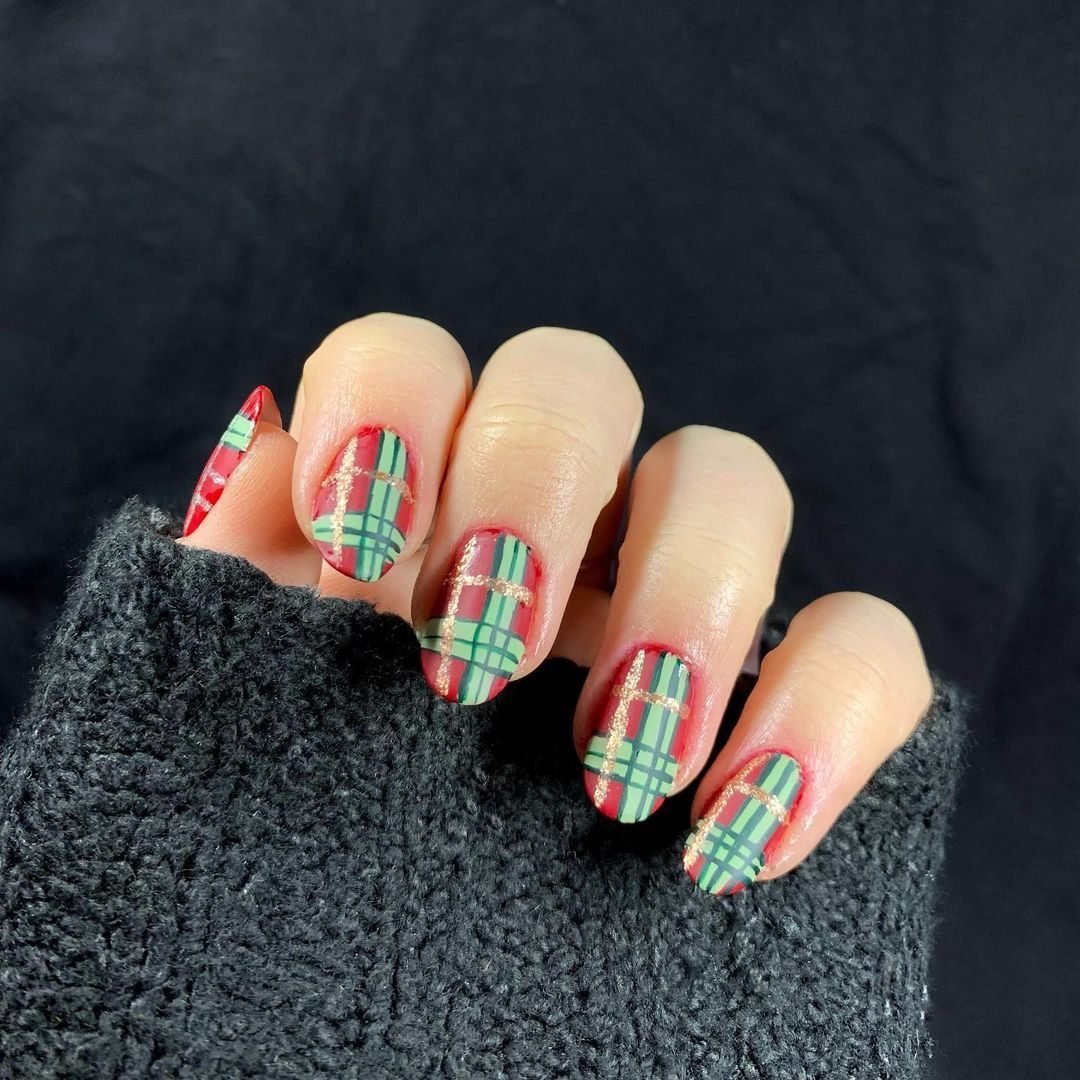
Plaid is the most vintage pattern on this list, and this version weaves the glitter right into it. Every nail carries a red and green tartan, and one line of the check is drawn in gold glitter instead of plain paint, so the grid sparkles as the hand turns. The dark grey fuzzy sleeve and black background push the colors forward.
What works here:
- ▸The glitter stays in one direction of the grid, so the pattern stays readable.
- ▸Green lines run wider than the red, which keeps the tartan from looking like a checkerboard.
- ▸A glossy top coat melts the painted lines and the glitter into one flat surface.
Plaid takes a steady hand and a striping brush, and it is worth practicing the lines on a tip or a piece of paper first. Paint the base, add the wide bands, then the thin lines, and save the glitter line for last so nothing drags through it.
9. Emerald Glitter Almond Nails
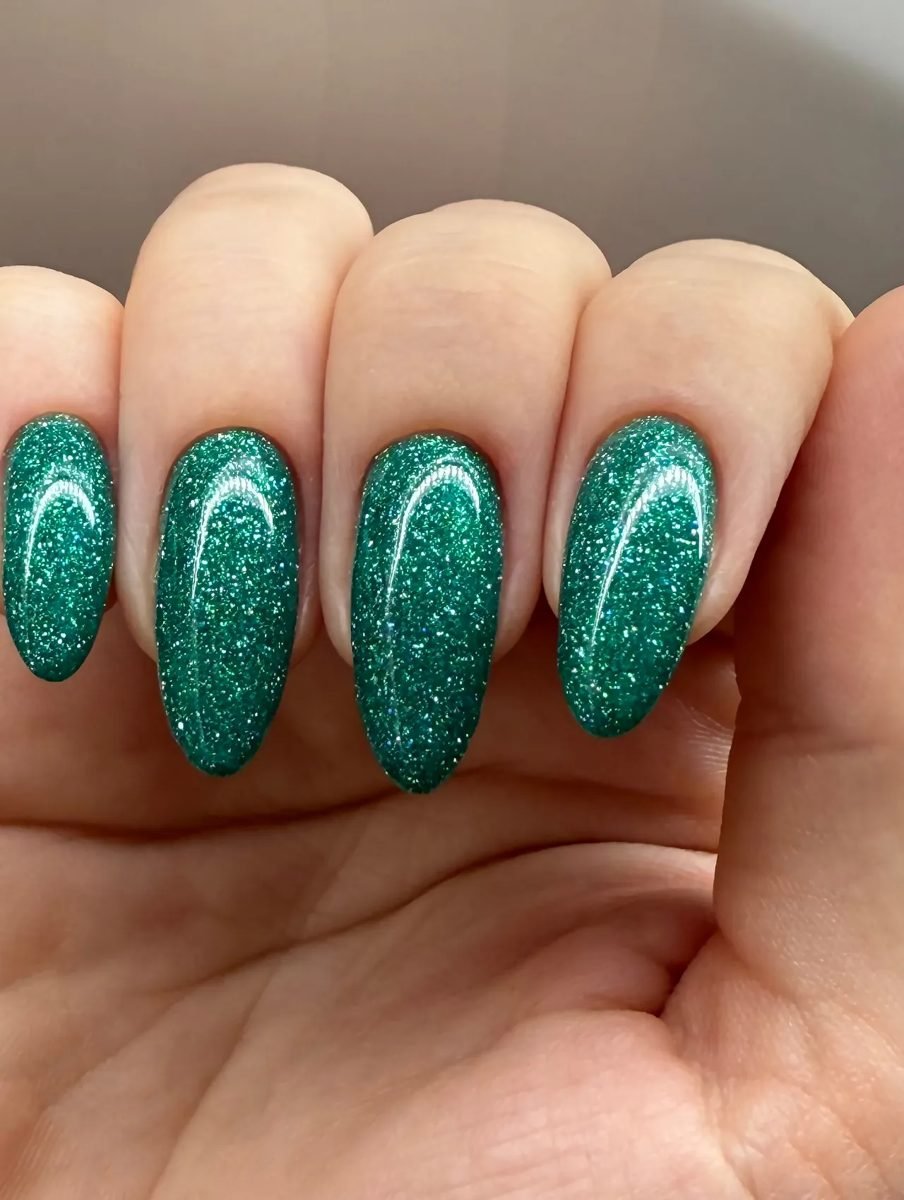
Where the earlier green set leaned dark and moody, this emerald goes bright and jewel toned. The glitter is fine, evenly spread, and sealed under a very glossy top coat, so each almond nail looks lit from inside. The close crop, with fingers curled over a palm, shows how clean the cuticle line stays even with a fully packed glitter.
Emerald sits between green and blue, which makes it the easiest of the jewel shades to wear with both gold and silver jewelry. It also flatters a wide range of skin tones because the color is saturated rather than pale. For the smoothest result, float the top coat on instead of pressing with the brush, since glitter drags easily and leaves bald streaks near the tip. Two thin coats of color under the glitter will deepen the emerald without adding bulk.
A flat emerald cream polish. Pretty, but it sits quiet and reads more spring than Christmas.
Fine glitter through the same emerald, sealed glossy. The color gains depth and catches light like tinsel on a tree.
10. Burgundy Nails With Chunky Gold Glitter Accent Nails
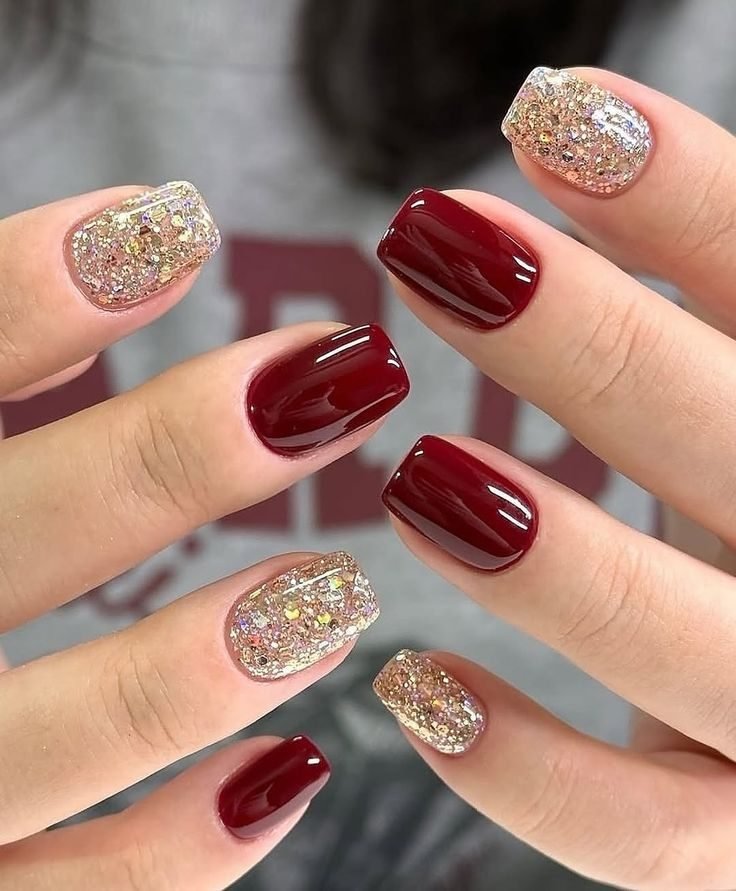
Two finishes share this set evenly. Half the short square nails wear a glossy burgundy so deep it is nearly wine black in shade, and the other half are packed with chunky gold glitter full of tiny holographic flecks. The alternation is regular, solid then glitter, which gives the set a planned rhythm instead of a random mix.
Burgundy and gold is the most grown up pairing in this roundup, and keeping the burgundy glossy rather than glittered is what holds that mood. The chunky gold brings the celebration, the dark wine brings the polish. On short nails the contrast reads clearly because each nail is a clean block of one finish. If you copy it, match the glitter density on every glitter nail, since one sparse nail will stand out against the packed ones.
| Glossy burgundy nails | Chunky gold glitter nails |
|---|---|
| Smooth mirror shine, no texture. | Textured surface with multi size flecks. |
| Shows tip wear sooner, so cap the edges. | Hides chips and grow out for longer. |
| Removes in minutes with regular remover. | Needs a soak off to shift the large flecks. |
11. Gold Glitter French Tips On A Nude Base
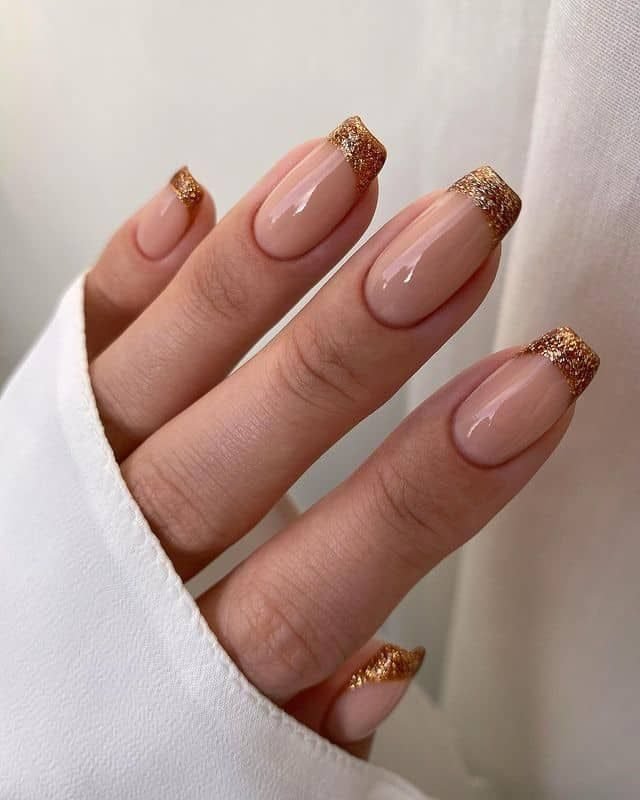
French tips get the glitter treatment in this set, with a coppery gold sparkle standing in for the usual white. The base is a clean glossy nude on square nails, and the glitter sits only in the tip zone, dense enough to read as a solid band of metal from across a room. A plain white sleeve keeps the whole frame soft and bright.
Swapping white tips for glitter ones keeps the tidy shape of a French manicure while making it clearly a December look. It is also one of the kindest designs for shorter nails, since the band of color at the tip draws the eye outward and makes the nail bed look longer. Use tip guides or a cleaned up smile line with a flat brush, and press the glitter on with a sponge for the last layer so the band ends up fully packed with no nude gaps.
12. Silver Glitter And Gold Chrome Split Nails
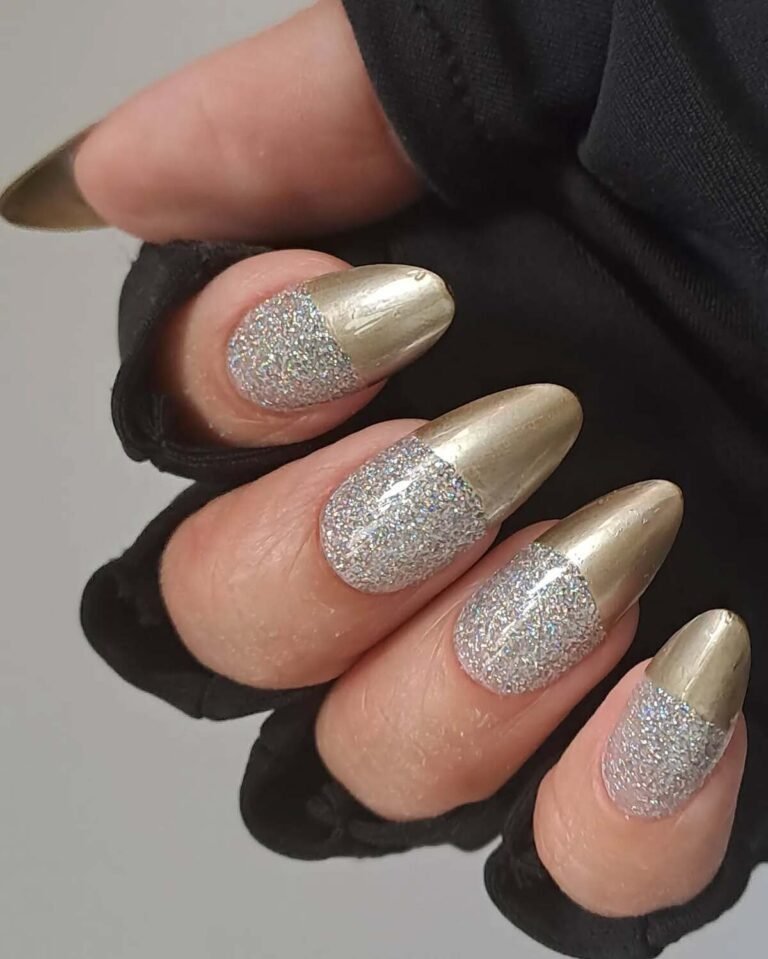
Each almond nail in this set is split cleanly in two: silver holographic glitter toward the base, and a smooth metallic gold chrome toward the tip. The dividing line runs in a shallow curve, and the black fingerless glove behind the hand makes both metals look brighter. It is the most modern design in this list, and it still fits, because silver and gold together are pure vintage Christmas.
The trick is the order of work. Chrome powder needs a smooth, cured surface and it will not grip over rough glitter, so the split has to be planned rather than blended. Paint and seal the glitter half first, protect it with a strip of tape or a nail guide, then rub the chrome over the tip half. Peel the guide while the top coat is still fresh and the line stays crisp. One metal alone would be simpler, but the pairing is what makes people look twice.
Apply silver glitter over the base half of the nail and seal it with top coat.
Cover the glitter half with a guide, then rub gold chrome powder over the exposed tip half.
Remove the guide and seal the whole nail, keeping the dividing line sharp.
13. Red Glitter Nails With Holly Berry Accent Nails
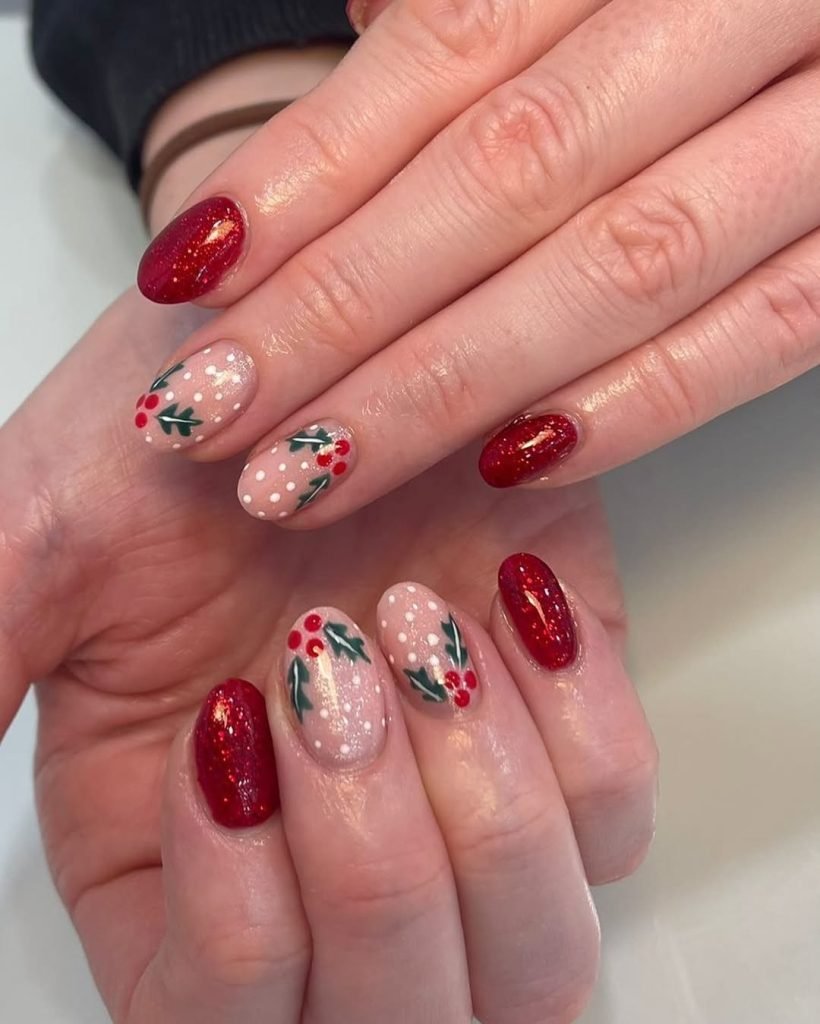
Holly gets its turn here, painted on sheer pink accent nails that sit between full red glitter ones. Each accent nail carries dark green holly leaves, clusters of red berries, and tiny white dots falling like snow. The red glitter nails are a bright, warm red with a jelly depth to them, and the short oval shape keeps the whole set sweet rather than dramatic.
Splitting the art and the glitter onto different nails is what makes this wearable. Full art on every nail plus full glitter would fight for attention; here the eye rests on the plain sparkle, then lands on the painted detail. The holly itself is beginner friendly: leaves are two pointed strokes, berries are dots from a dotting tool, and the snow is the smallest brush dot you can make. Seal the art nails with an extra top coat layer, since painted detail wears at the edges first.
Keep the holly on two nails per hand at most, so the art stays a highlight.
Match the berry red to the glitter red so the set reads as one design.
Painting holly over a glitter base. The leaves lose their clean edges in the sparkle.
Skipping the extra top coat on art nails. Fine lines chip first at the tips.
14. Matte Green And Burgundy Nails With A Gold Glitter Accent Nail
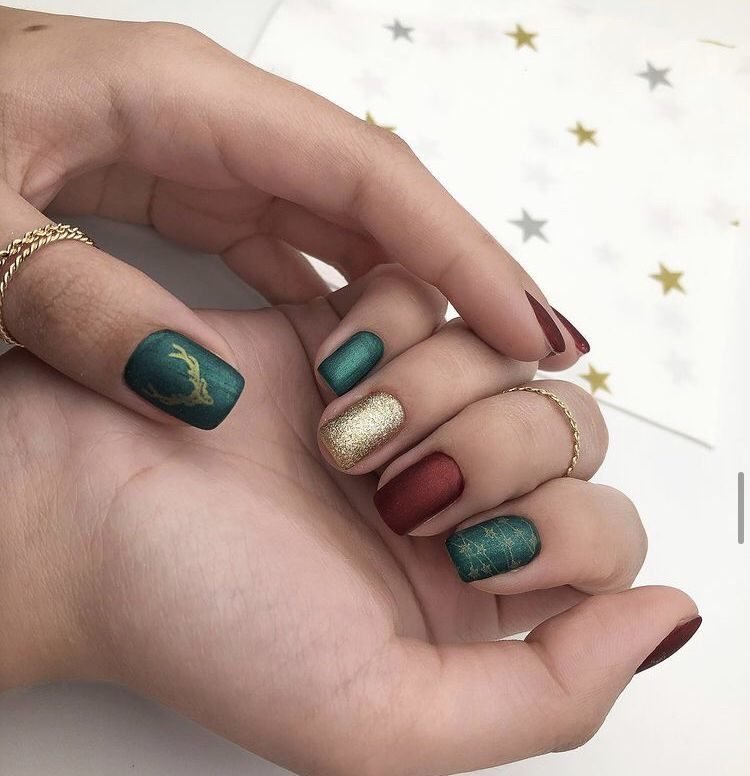
Matte polish changes the mood of everything around it, and this set leans into that. Short square nails in matte forest green and matte burgundy share the hand with a single full gold glitter nail, plus a small gold reindeer painted on the green thumb. Star confetti scattered in the background echoes the one shiny nail.
The single glitter accent works harder in a matte set than it would among glossy nails, because the contrast comes from the finish as much as from the color. Every other nail absorbs light; the gold one throws it back. That makes this a strong pick for someone who wants one clear focal point. Keep matte top coat away from the glitter nail when you seal the set, and expect the matte nails to pick up shine from hand cream over the week. A fresh layer of matte top coat brings the flat finish back in minutes.
Recreate this look
15. White Snowflake Nails With Silver Glitter Accent Nails
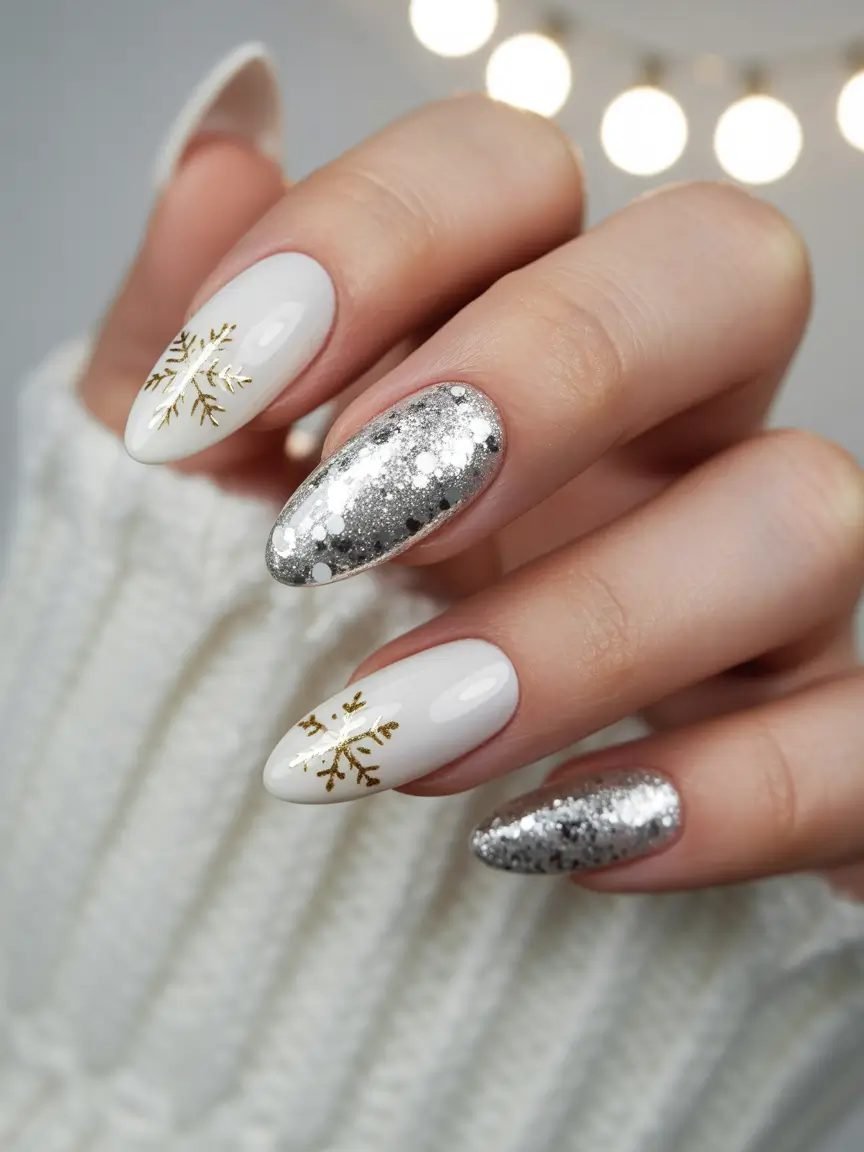
Crisp white almond nails carry a single gold snowflake each, and the nails between them are packed with silver glitter full of larger round flecks. Fairy lights blur behind the hand, and the white knit cuff keeps the palette wintry. The gold snowflake is drawn fine and simple, more like a star with branches than a detailed flake, which suits the clean base.
White polish is unforgiving, so the glitter nails earn their place here too: they break up the set and give the eye somewhere forgiving to land. Two coats of white over a ridge filling base is the usual route to a smooth result, and the snowflake should go on only after the white is fully dry, or the gold will bleed into it. A striping brush with very little polish gives the thinnest lines. If a line goes wobbly, the design still reads, since no two snowflakes are alike anyway.
White, silver, and one touch of gold is the coldest palette in this list, and the mix of plain, glitter, and painted nails keeps it from feeling flat.
16. Cranberry Glitter Gradient On Short Nails
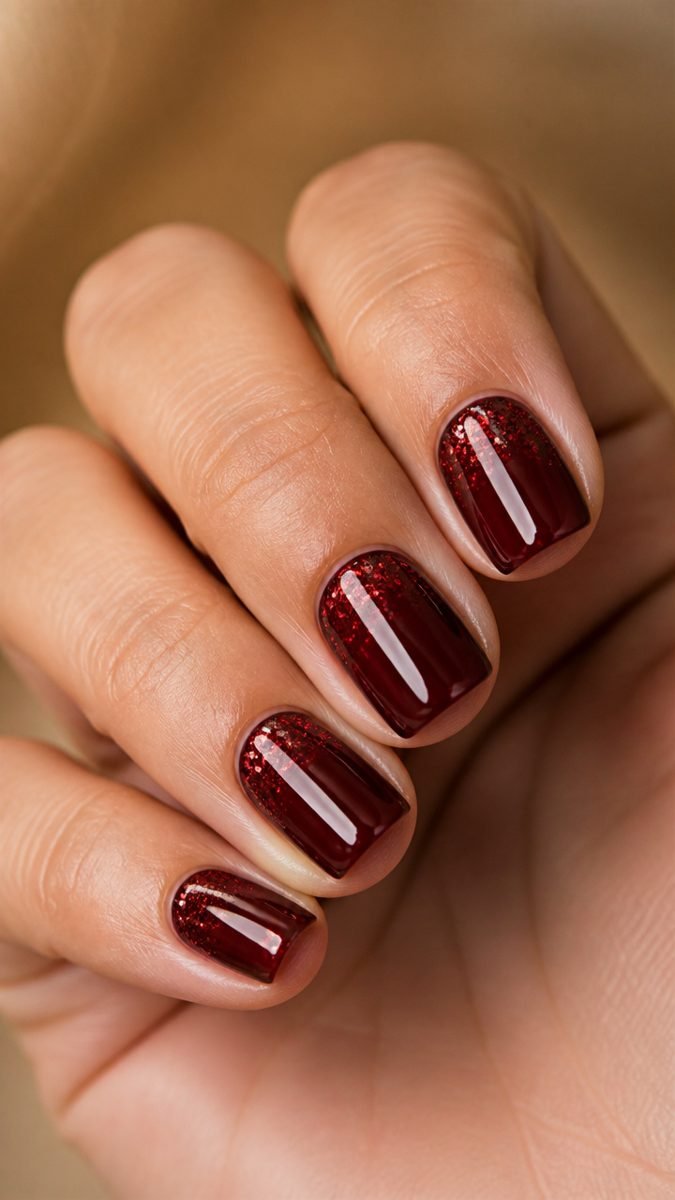
Cranberry red gets a gradient treatment on these short square nails: fine red glitter clusters thickly near the cuticle and thins out toward the tips, over a glossy cranberry base. The warm tan background and the soft light make the red look rich rather than bright, and the short length keeps the whole thing tidy.
Running the glitter from the base instead of the tip flips the usual ombre, and it has a practical side: dense glitter at the cuticle hides new growth better than any other placement, so this set looks fresh the longest of any in the list. It also suits short nails, where a tip fade can look cramped. Press the glitter on with a sponge near the base, then pull a nearly dry brush toward the tip to scatter the fade. One glossy top coat smooths the two textures into a single finish.
📌 Good To Know
A base heavy gradient is the longest wearing glitter placement. As the nail grows, the dense sparkle at the cuticle hides the gap, so the set still looks neat in week two.
17. Matte Burgundy Nails With Gold Glitter Half Moons
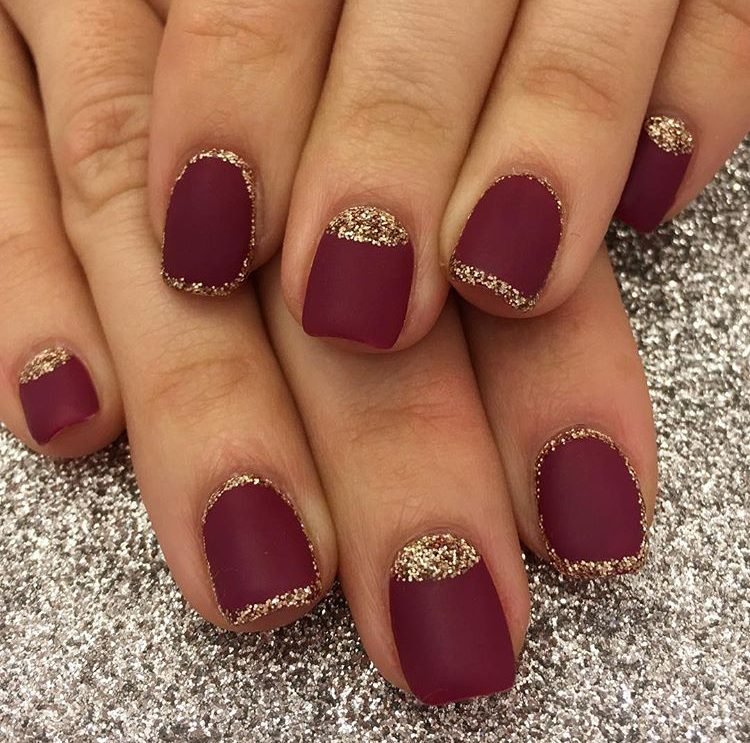
The half moon is the oldest detail in this whole roundup, a staple of manicures from the middle of the last century, and here it is drawn in gold glitter. Short square nails in matte burgundy carry a glitter half moon at the base of two nails, while the rest get a hair thin glitter outline instead. The hands rest on a silver glitter surface that doubles the sparkle.
Matte burgundy can look flat on its own, and the small hits of glitter fix exactly that without turning the set shiny. The half moon placement also flatters short nails, since it draws a neat frame at the base and leaves the rest of the nail clean. Nail guides or a round sticker make the curve easy: place it, paint the glitter into the exposed base, and peel while wet for a sharp edge. A fine brush works too, with the glitter dabbed rather than stroked.
18. Candy Cane Mix And Match Nails With Red Glitter Stripes
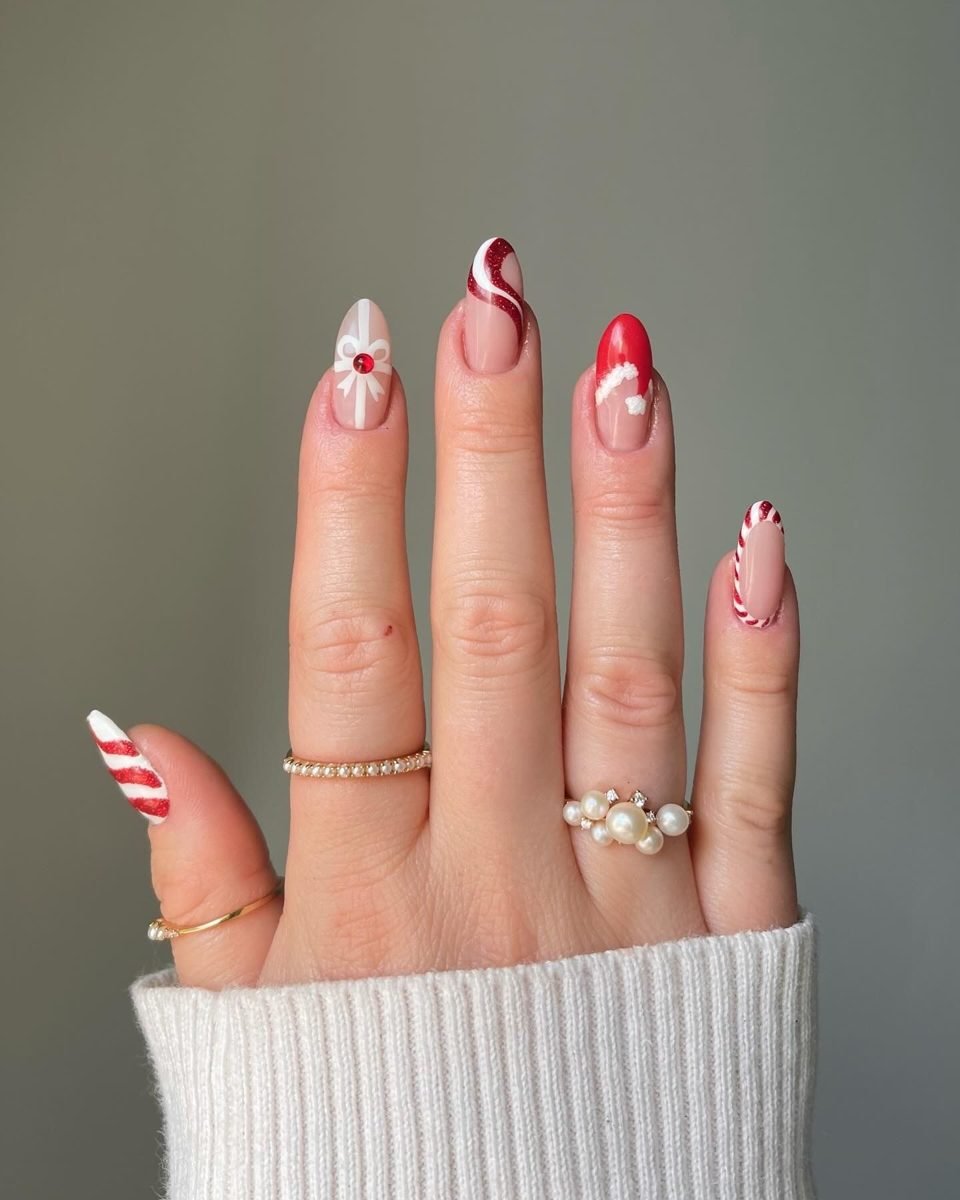
Every nail does something different in this set, and candy cane red ties them together. The thumb wears full diagonal candy cane stripes with a glittery red, the middle nail swirls red glitter over nude, the pinky frames a bare nail with a striped edge, and the remaining nails carry a tiny gift bow and a Santa hat tip. Pearl rings and a white ribbed cuff keep the styling soft.
Mix and match sets live or die on their palette, and this one stays strict: red, white, and nude, with the sparkle always in the same red glitter. That discipline is what lets five designs share one hand. If you copy the idea, pick three motifs rather than five and repeat each one twice, which is easier to paint and calmer to look at. Stripes are the anchor motif, so start there and build the simpler nails around them.
- ▸Anchor motif: diagonal candy cane stripes in red glitter on white.
- ▸Supporting motifs: a swirl tip, a striped frame, a small bow, a Santa hat tip.
- ▸Palette rule: red, white, and nude only, with every sparkle in the same red glitter.
19. Fine Champagne Glitter Almond Nails
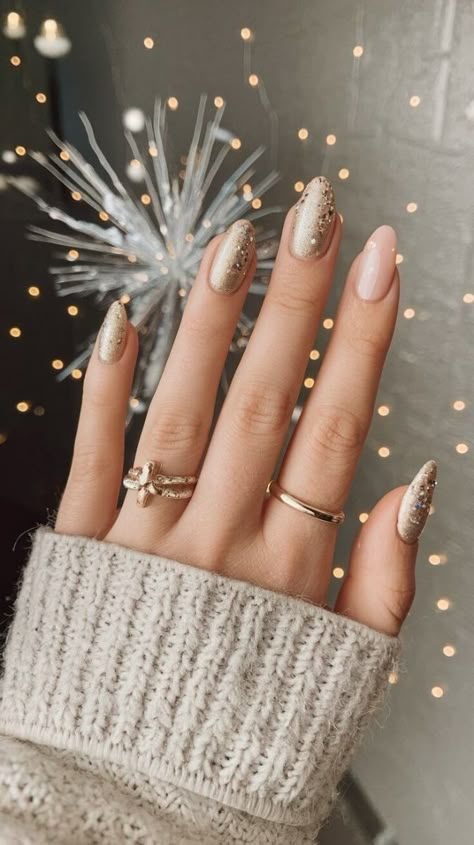
The last set is the quietest. Almond nails wear a fine champagne glitter, pale gold with a silvery cast, and one nail on the hand stays plain nude for contrast. Behind them, fairy lights and a silver starburst decoration blur into warm dots, and a thick beige knit cuff frames the hand. The glitter here is small and dense, closer to a shimmer than a sparkle.
Champagne is the shade to pick when gold feels too yellow and silver feels too cold. It sits between the two and goes with nearly everything in a December wardrobe, from black dresses to cream knits like the one in this photo. Because the flecks are fine, one coat over a nude base gives a soft wash, and two coats reach the full coverage shown here. It is also the easiest glitter in the list to remove, since the small particles lift without a long soak.
A plain nude almond manicure. Clean and neat, but it disappears next to party outfits and evening light.
Fine champagne glitter over the same nude base. The shape stays soft, and the nails catch light like the fairy lights behind them.
That is the full sparkle range, from full gold coverage to a single glitter half moon. The vintage christmas nails glitter looks that last longest are usually the simplest ones: one good glitter, a shape you can maintain, and a top coat refreshed every few days. Most of these sets can be done at home with two or three bottles, and none of them needs a special kit or a salon visit. Pick the set that matches your nail length, save your favorites to a board, and take the photo to your next appointment so your nail tech sees the exact finish you want.