18 Vintage Christmas Nails Matte That Actually Work
Glossy nails get most of the attention in December, but a matte top coat changes the whole mood of a Christmas manicure. It softens bright reds, deepens greens and burgundies, and makes simple art look like it came from a vintage holiday card. If shine feels like too much for everyday wear, these vintage christmas nails matte ideas keep the colour and the artwork, just with a calm, velvety finish. The list runs from plain single colours you can paint in ten minutes to small painted details like candy canes, holly berries, snowflakes and gold foil. Every design here leans on the same trick: a flat base that lets the colour do the work. A few entries add one glossy or glitter accent on purpose, because that contrast is what makes the matte finish stand out. Shapes range from short squares to long coffins, so there is something here for natural nails and extensions alike. Pick the one that matches your December plans, and save the rest for the weeks after.
1. Matte Red Almond Nails With A Single Snowflake Accent
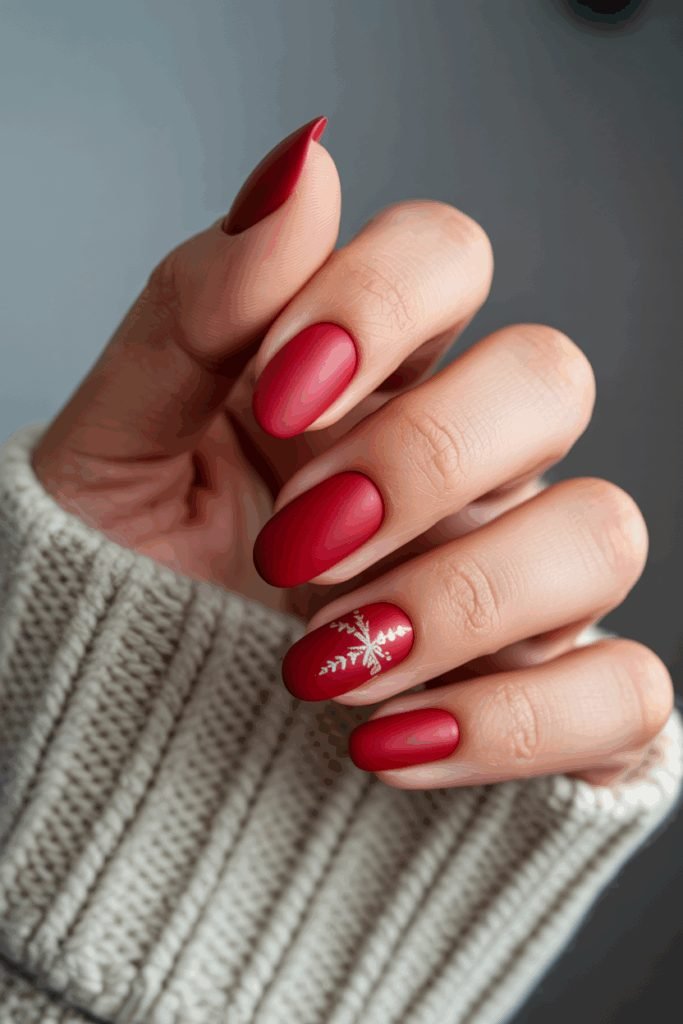
Bright red goes quiet and classy under a matte top coat. The almond shape keeps the colour looking soft rather than sharp, and the single white snowflake on the ring finger does all the talking. Everything else stays plain, which is why the little flake stands out so well against the flat red.
What makes it work:
- One accent nail only, so the art never fights the base colour
- A mid tone red that sits happily next to most skin tones
- Almond tips that lengthen the fingers without extra length
Paint two coats of red and let them dry fully, then add the snowflake with a fine brush or a nail art pen. Seal the set with the matte top coat last so the finish stays even from nail to nail. This is the safest first step into matte Christmas nails.
2. Plain Matte Burgundy Almond Nails
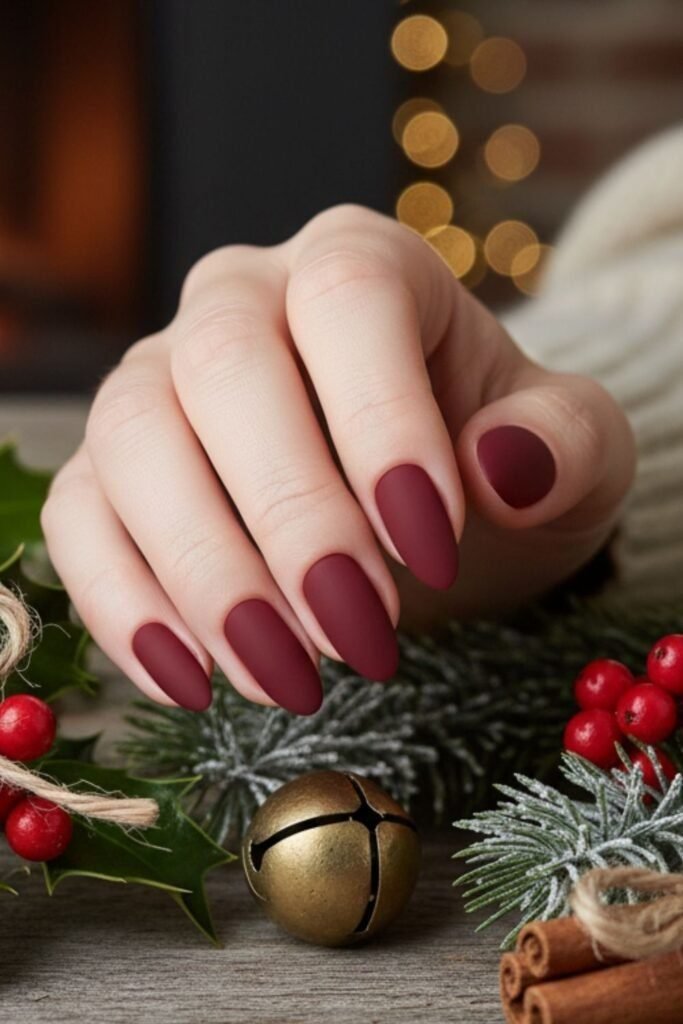
Some manicures need no art at all. A deep burgundy in a flat finish looks rich on its own, the way dark lipstick does. The almond shape and the clean cuticle line carry the whole look, and the colour sits somewhere between wine and dried berries.
Burgundy is a smart pick if bright red feels too loud for work or family events. It still reads festive next to greenery and gold, but it behaves like a neutral for the rest of the day.
Keep the coats thin. Matte polish shows every ridge, so a smoothing base coat matters more here than it does under gloss. Two thin coats, a matte top coat and tidy edges give that smooth, almost fabric like surface in the photo.
💡 Quick Tip
Buff the nail surface very gently before the base coat. Matte burgundy shows bumps and ridges that a glossy finish would hide.
3. Matte Green Coffin Nails With Candy Cane Art
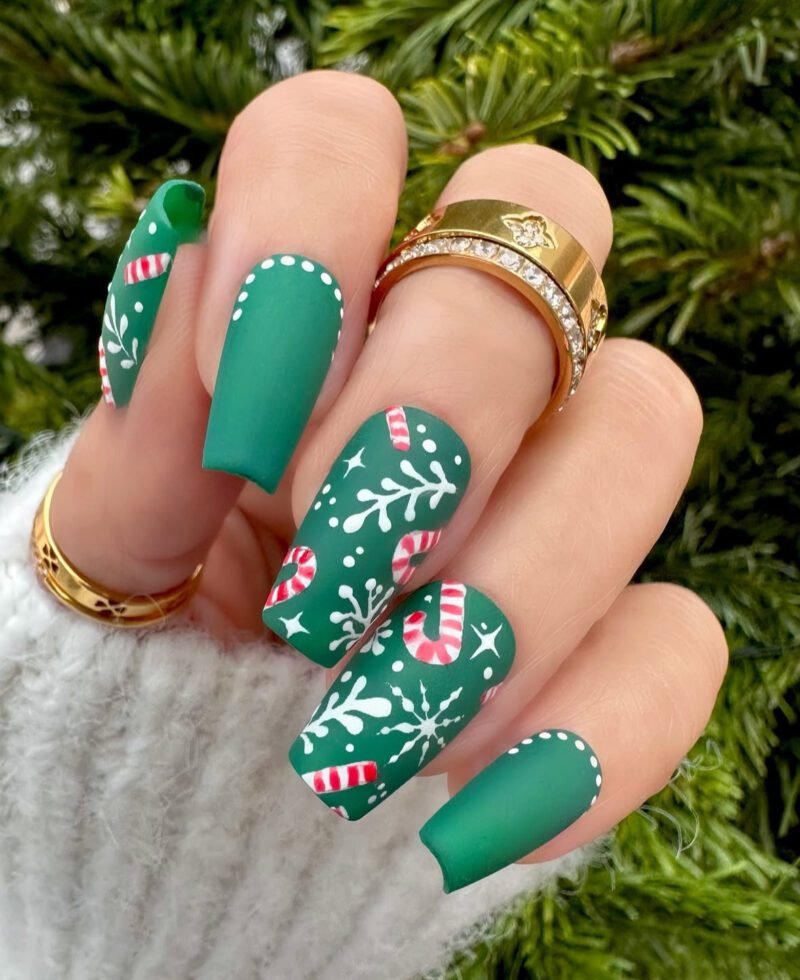
Green this deep can look heavy on its own, so the art does the lifting here. White snowflakes, tiny candy canes and dotted edges scatter across the coffin nails like a sheet of wrapping paper. Two nails stay plainer, with a dotted border, and that pause gives the busy nails room to breathe.
How the balance works: the patterned nails sit in the middle of the hand, the calmer nails frame them, and the white art pops because the green underneath has no shine competing with it.
Long coffin shapes give you the canvas for art like this. On shorter nails, shrink the pattern to one candy cane per nail and keep the same deep green base.
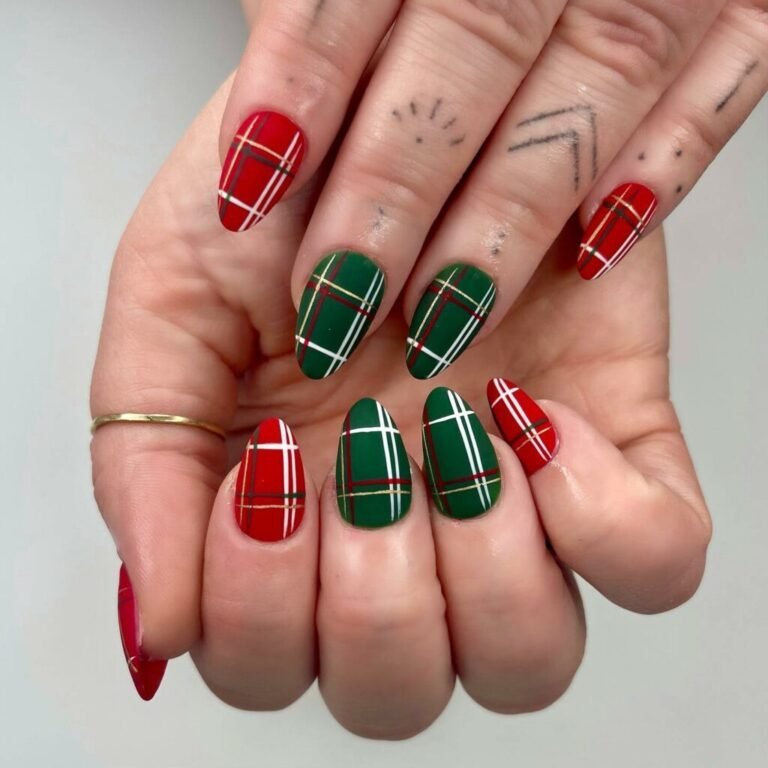
4. Matte Tartan Plaid In Red And Green
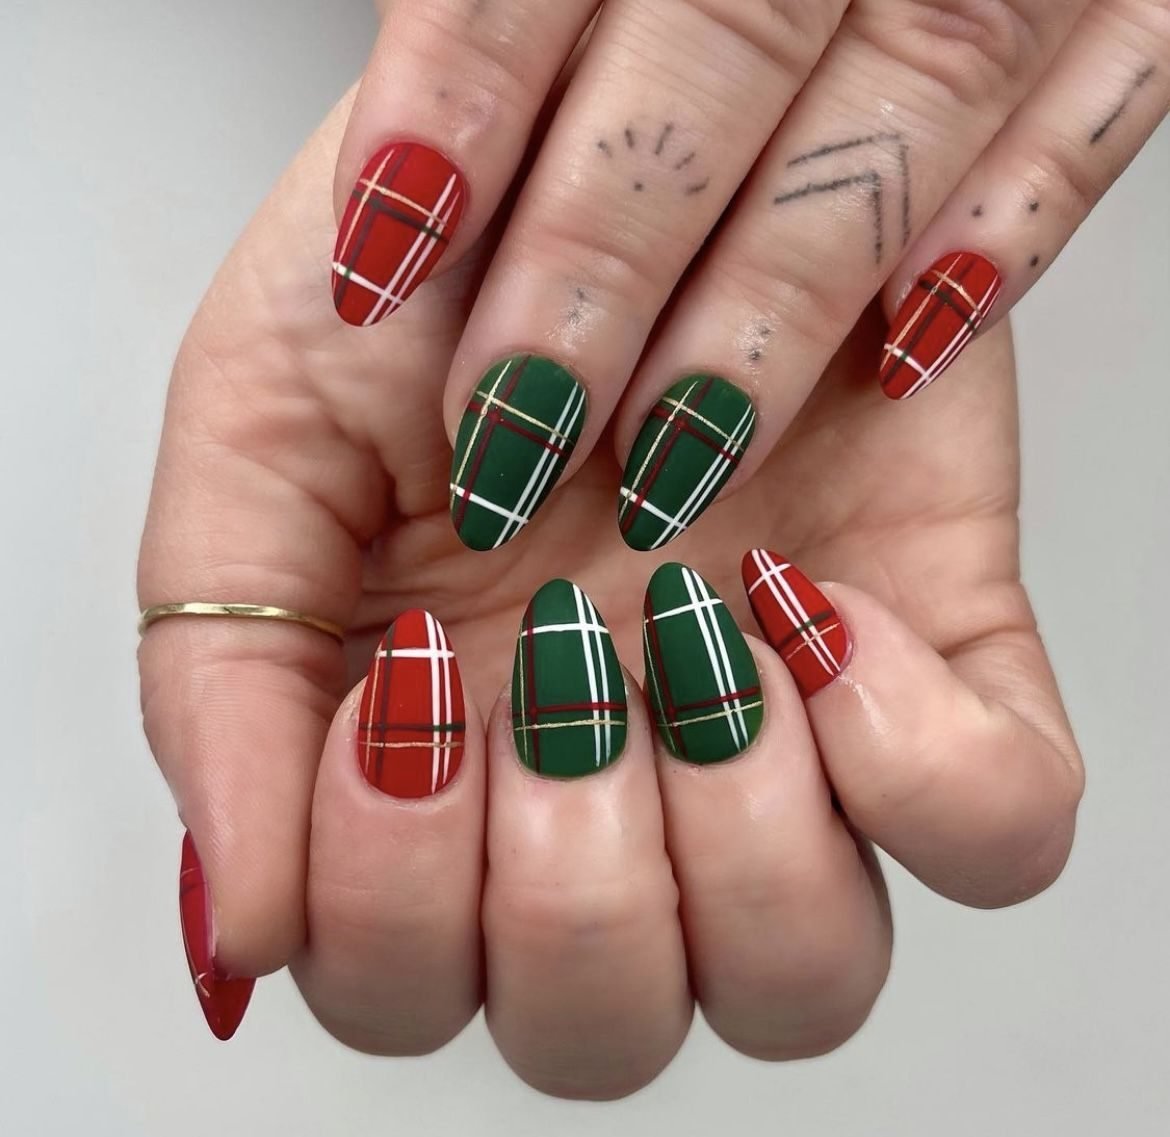
Plaid is the print of the season, and matte polish makes it look like real fabric. Fine white lines cross over red and green almond nails, with a few thin gold lines worked in so the pattern catches the light in a quiet way.
A steady hand helps, but the pattern is forgiving. The lines are meant to look hand painted, not printed, and small wobbles read as part of the weave. Work the wide bands first and the thin lines second, and keep the colours a little muted so the tartan feels vintage rather than bright.
Tartan suits medium and long nails best, where the full check pattern has room to show across the nail.
Paint the base colour, red on some nails and green on the others, and let it dry fully.
Add the wide white bands across and down each nail to build the check.
Finish with the thin lines and the matte top coat to lock in the woven look.
5. Matte Red Nails With Glossy French Tips
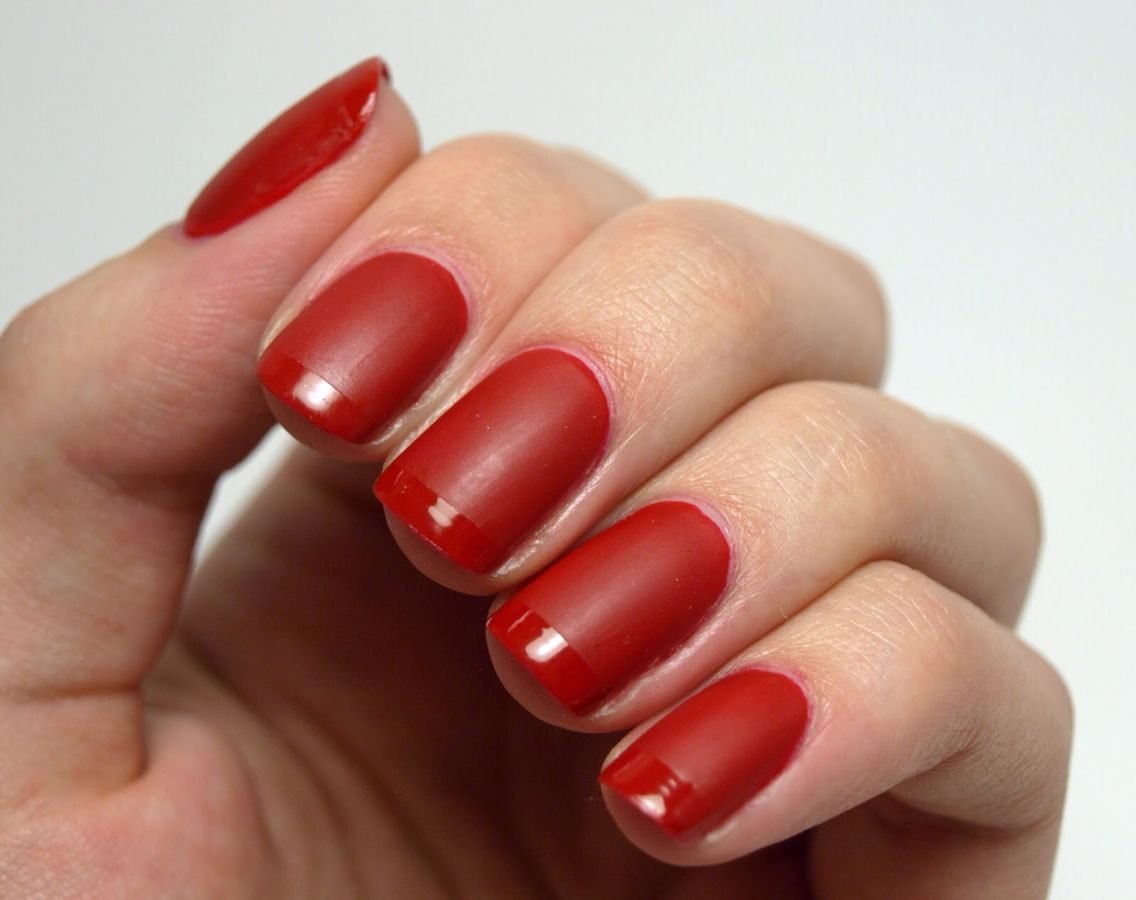
Two finishes, one colour. The nail bed stays matte while the tips shine as if they were dipped in gloss. It is the same red from cuticle to edge, so the contrast comes from texture alone.
This trick updates the French manicure without changing its shape. It also grows out kindly, since the tip is where wear shows first, and gloss hides small chips better than a flat finish does. The look suits anyone who finds a full glossy set too bright for December days.
Ask for a full matte manicure first, then a glossy top coat painted only on the tips. At home, a strip of tape helps keep the smile line clean. Short square nails wear this especially well.
Paint the whole nail matte first, then add gloss to the tips only.
Keep the red the same shade in both finishes for a clean contrast.
Gloss over the whole nail, which loses the two texture effect.
A shaky tip line, so use tape guides until your hand is steady.
6. Matte Red Nails With Gold Chrome Swirls
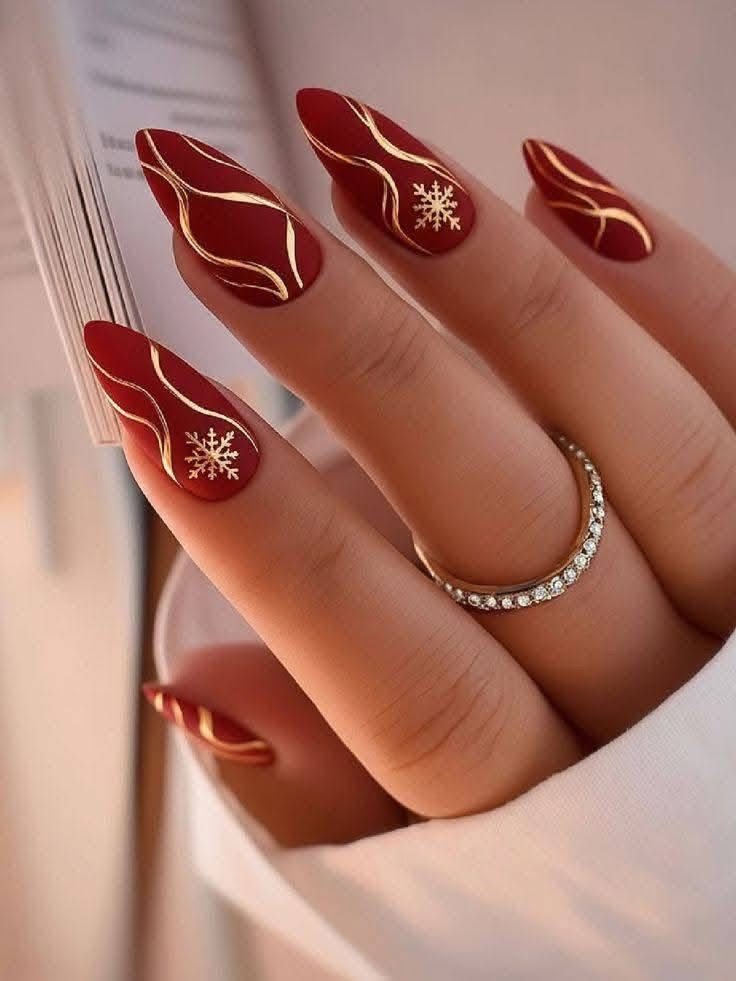
Gold chrome swirls wind across a matte red base like ribbon on a parcel. The metallic lines stay bright because the polish under them does not reflect light back, so every curve reads clearly. Two nails add a small gold snowflake near the cuticle, a second point of interest that keeps the set from feeling plain.
Chrome powder or metallic gel paint both give this effect. Paint the swirls last, after the matte top coat, so the metal keeps its shine instead of sinking into the flat finish.
The hand in the photo rests against the pages of an open book, and the design reads grown up rather than playful. It is a good pick for office parties and dinners, where candy cane art might feel too young but plain red feels unfinished.
Recreate this look
7. Matte Green Nails Covered In Tiny Candy Canes
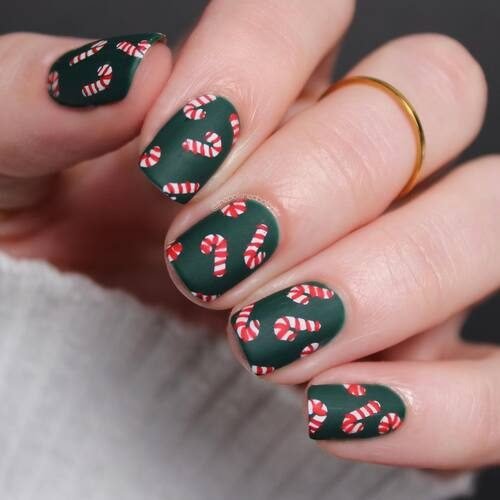
Short nails, big pattern. A deep green matte base is covered in small red and white candy canes, each one no bigger than a grain of rice. The all over print reads playful from a distance and detailed up close.
Short square nails suit busy prints because the pattern stays in proportion. If your nails are longer, space the canes further apart so the design does not crowd the nail.
A dotting tool or a fine striping brush makes the cane shape: one curved white stroke, then thin red stripes across it. Seal with a matte top coat and the print looks almost printed on, in the best way. The thin gold band on the ring finger is the only jewellery a set this busy needs.
A tiny repeated print on a dark matte base gives short nails the same festive detail that long nails get, with no extra length needed.
8. Matte Cranberry Nails With White Snowflakes

Cranberry red sits between classic red and burgundy, and it loves a white snowflake. Here the flakes land on different nails at different sizes, with small white dots scattered around them like falling snow. The flat finish keeps the white art crisp instead of sparkly.
Snowflakes are easier than they look. Draw six short lines out from one centre point, then add tiny branches to each line. A toothpick works if you lack a fine brush. Vary the size from nail to nail so the set looks hand done rather than stamped.
The pale marble styling in the photo shows how well this colour works with thin gold rings and cream knitwear.
| One big flake | Small edge flakes |
|---|---|
| Fills the nail and becomes the clear focal point | Sits at a corner and leaves most of the nail plain |
| Best on ring fingers and thumbs | Easy to repeat across every nail |
| Needs a steady hand and a fine brush | Forgiving for a first try at nail art |
9. Matte White Nails With Holly Berry Sprigs
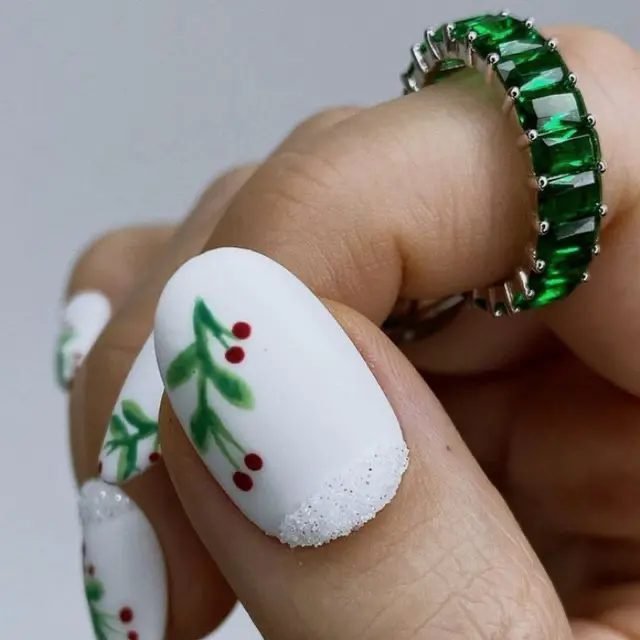
A matte white base is the quietest canvas on this list, and the little berry sprigs make the most of it. Green leaves and red berries trail across each oval nail, painted small and loose, like the corner of a Christmas card. One nail catches the light with a sugared, frosted tip.
White matte polish needs care. It shows dust and marks faster than any other colour here, and it wants three thin coats to stay streak free rather than two thick ones.
Keep the art near the middle of the nail, the way it sits in the photo. That placement keeps the design clear of the tip, where everyday wear would rub it away first.
Plain matte white nails that can look a little stark and chalky on their own.
The same white base warmed up with green leaves, red berries and one frosted sugar tip.
10. Matte Nude Nails With Gold Stripe Bands
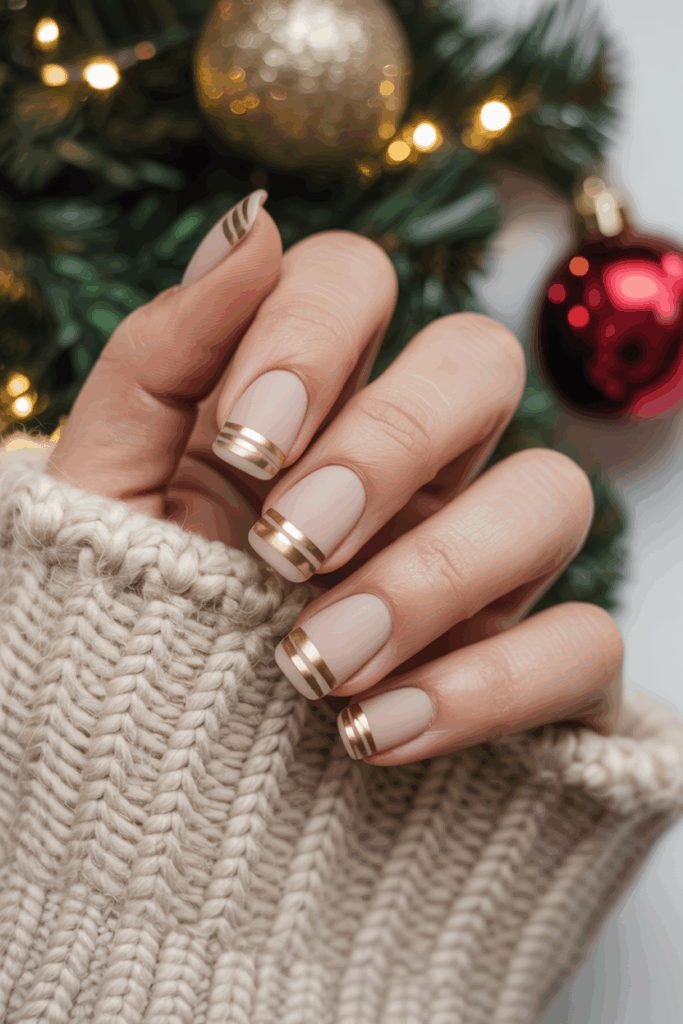
Nude nails get a party upgrade from two slim gold bands near each tip. The matte beige base stays calm and office friendly, while the metallic stripes do the festive part. It is the kind of manicure that works from a desk to a dinner without a change.
Why it works on short nails:
- The bands sit close to the tip, so the nails look longer
- Gold flatters a warm nude better than silver would
- The design takes minutes once the base is dry
Use striping tape or metallic nail tape for the bands, press the edges down well, and seal with the matte top coat everywhere except over the gold if you want it to keep glowing.
- ▸Matte nude base, two coats for an even skin tone match
- ▸Twin gold bands placed just below each tip
- ▸Baubles and tree lights in the photo echo the gold
11. Matte Black To Red Ombre Coffin Nails
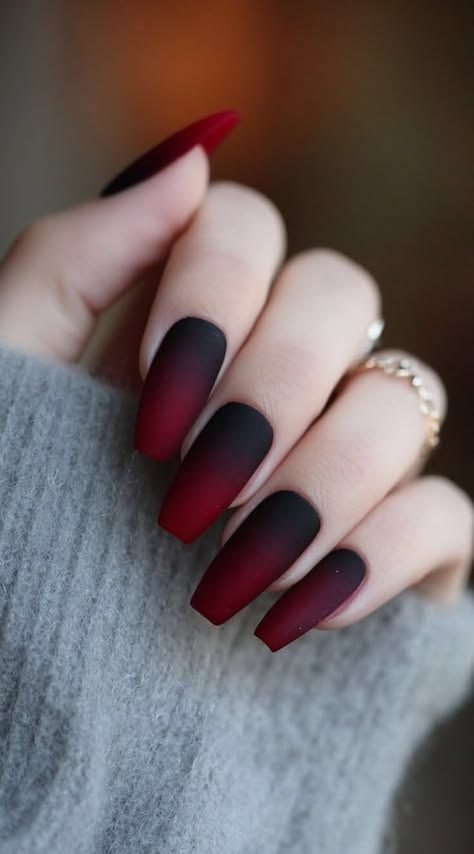
Black melts into deep red along these coffin nails, darkest at the base and glowing red at the tips. Matte polish makes the blend look smoky, like embers under ash. There is no art and no glitter, and the set does not miss either.
Ombre in a matte finish needs a light hand. Sponge the two colours together while both are still wet, then soften the join with a clean brush. Two passes usually give a smooth fade with no hard line where the colours meet.
This is the boldest look on the list. It pairs well with plain black or cream outfits, where the red tips can do the talking.
12. Matte Cranberry Nails With A Rose Gold Glitter Accent
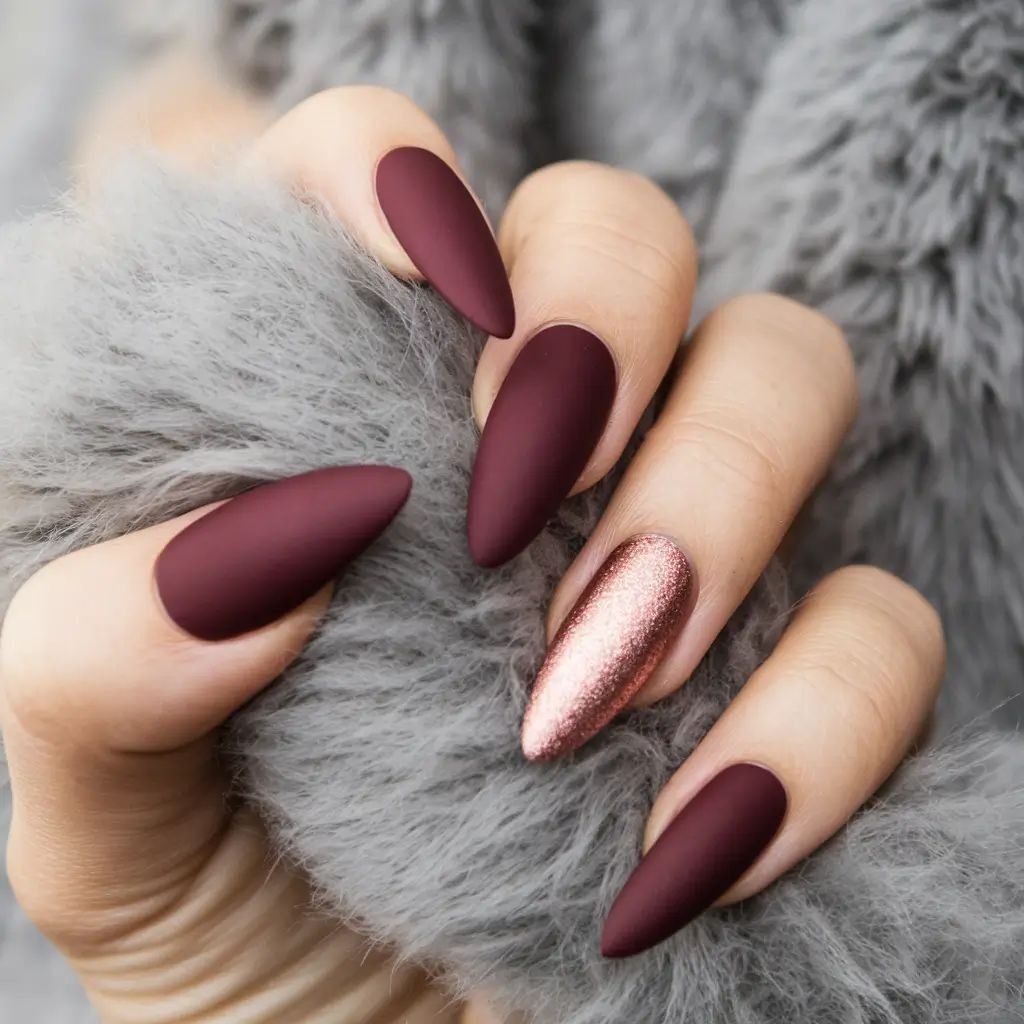
One glitter nail changes a plain set completely. The base here is a deep cranberry shade worn matte on long almond nails, and the ring finger swaps to rose gold glitter that catches every bit of light in the room.
Rose gold is the kind choice next to cranberry. Yellow gold can fight the red tones in the polish, while rose gold blends with them and still sparkles against the flat finish around it.
The soft grey styling in the photo shows the other strength of this colour: it sits happily next to neutrals, so the manicure will not clash with a single outfit all season. Ask for the glitter packed on in two coats so no base colour peeks through.
📌 Good To Know
Glitter accent nails wear well because the rough texture hides small chips. If one nail in your set always breaks first, make that one the glitter nail.
13. Matte Emerald Nails With A Gold Bow And Snowflake
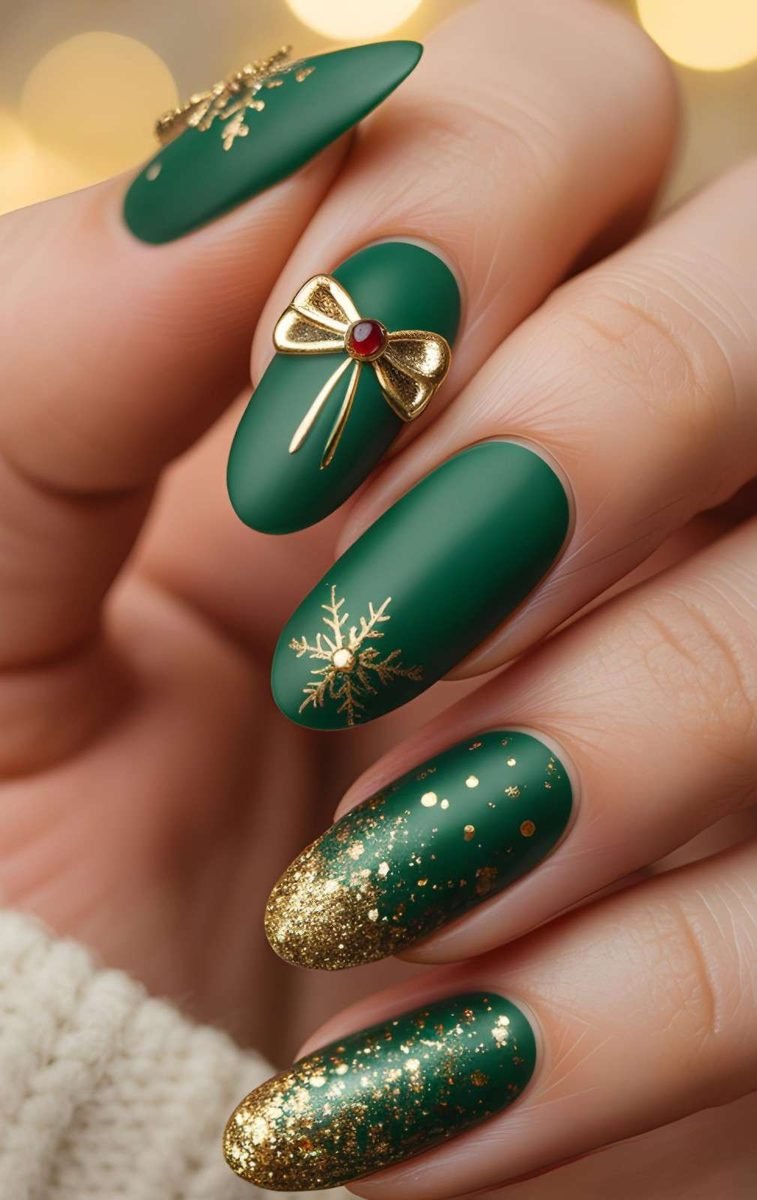
Emerald green in a matte finish looks like velvet ribbon, and this set dresses it up with gold. One nail wears a gold bow with a small red centre stone, another carries a fine gold snowflake, and the last two fade into gold glitter at the tips.
Three kinds of gold on one hand could feel like a lot, yet the flat green base calms it down. Each accent sits on its own nail, so the eye moves from detail to detail instead of taking everything in at once.
The bow is a charm, so treat it as jewellery. It suits a party week better than a week of typing and washing up, and it is worth saving for the days when you want the full effect.
Fix the bow charm with gel or strong nail glue, never plain polish.
Keep the glitter fade to two nails so the green stays the star.
Charms on every nail, which catch on knitwear and feel heavy.
Long lengths under a charm if you type or cook a lot.
14. Matte Ivory Nails With Gold Tree Accents
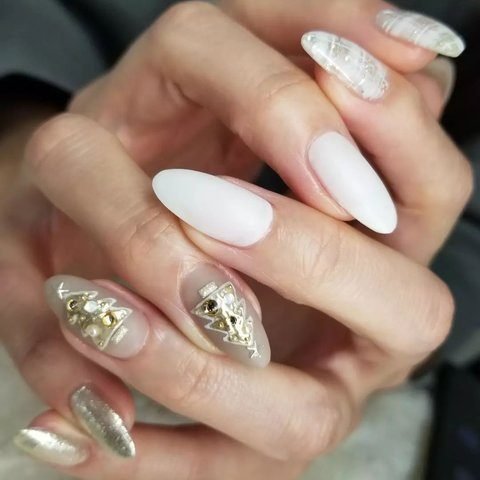
Ivory nails with a vintage soul. The matte cream base stays plain on most nails, while the ring fingers carry little gold Christmas trees dressed with tiny pearls. A silver glitter nail and one soft plaid nail finish the set without stealing the scene.
Trees are the easiest festive shape to paint: a small triangle of three strokes, a short trunk, and dots for baubles. Gold paint on a matte ivory base looks like the gilt edge of an old book, which is where the vintage feel comes from.
This set suits December weddings and formal dinners, where bright red might feel out of place. The pale base also shows regrowth slowly, a quiet bonus in a busy month.
Paint the matte ivory base and let it dry completely.
Draw the tree with three gold strokes that widen toward the bottom, then add a short trunk.
Dot on tiny pearl baubles and finish the plain nails with the matte top coat.
15. Matte Wine Nails With Gold Foil Accent Nails
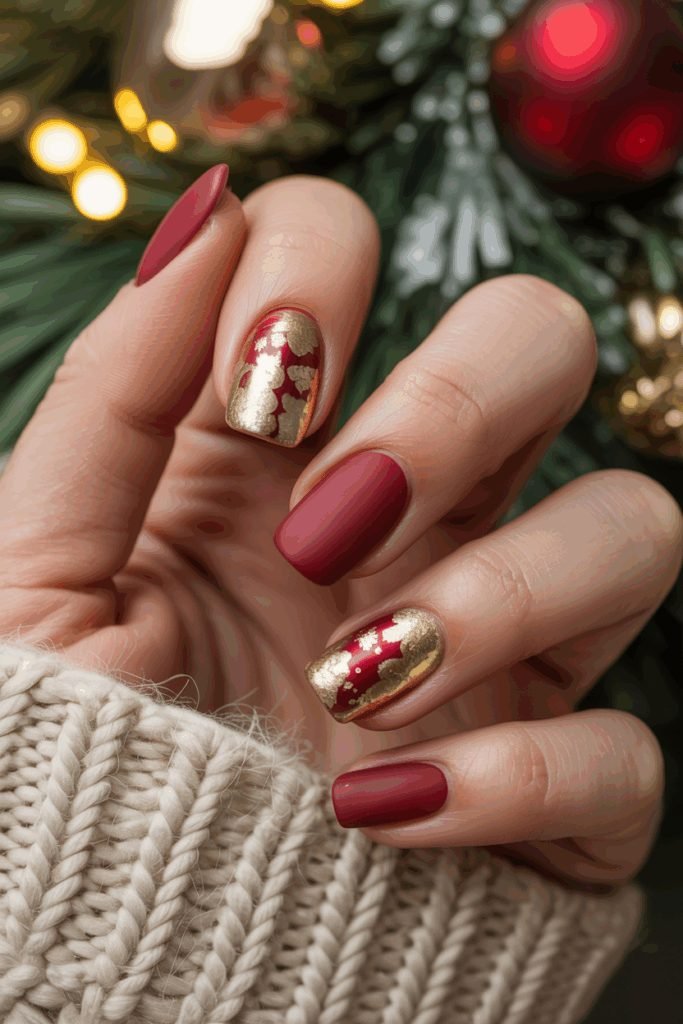
Gold foil turns a plain wine manicure into something that looks gilded by hand. Two nails carry torn pieces of gold leaf over the deep red, and the rest stay flat and simple. The broken edges are the point: foil is meant to look uneven.
Apply the foil over tacky polish or foil glue, press it down with a fingertip, then brush away the loose pieces. Seal it under the matte top coat so the edges stay put and the gold keeps its broken, antique look.
Wine shades like this one sit between red and burgundy, which makes them easy to wear with both gold and silver jewellery. Short, tidy nails keep the look neat and grown up.
16. Matte Red Velvet Almond Nails
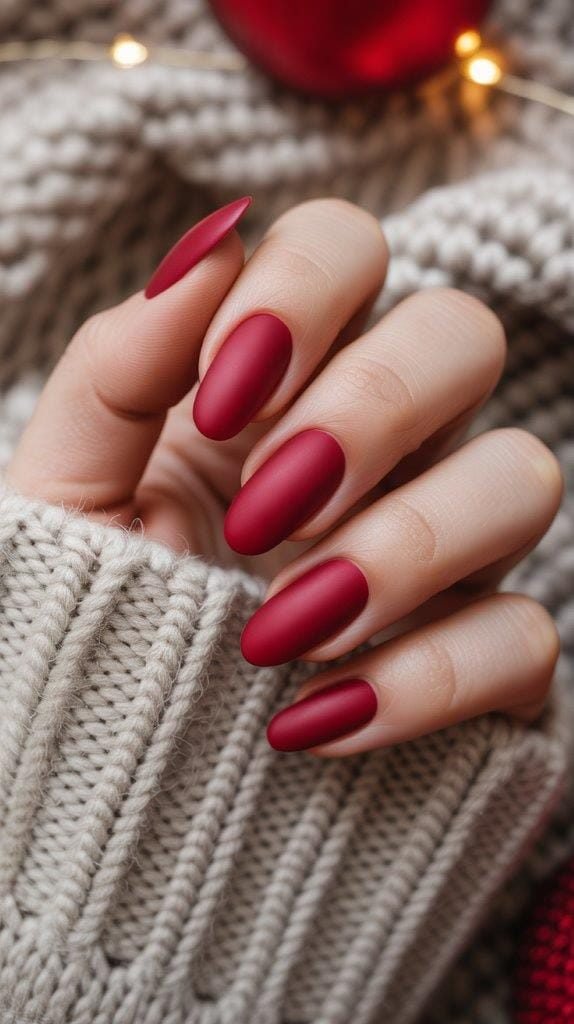
Velvet is a texture as much as a colour, and this deep crimson wears it well. No art, no accents, just smooth matte red on almond nails, photographed against chunky knitwear that makes the finish look even softer.
Red velvet shades differ from the brighter red at the top of this list. This one is darker and moodier, closer to cranberry sauce than to wrapping paper, and it reads almost brown in low evening light.
The secret is surface prep. Push the colour right up to the cuticle in thin coats, because a matte finish shows gaps that gloss would hide. A clean up brush dipped in remover gives that sharp edge you can see in the photo.
Recreate this look
17. Matte Two Tone Green And Burgundy With Gold
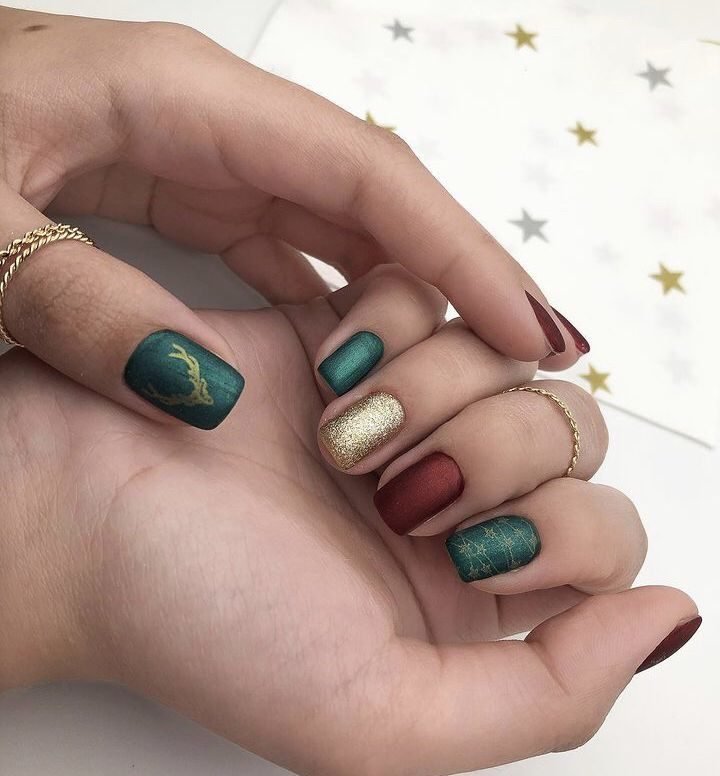
Two matte colours share one hand here: deep green and burgundy, mixed nail by nail on short square shapes. A single gold glitter nail joins them, and the green thumb carries a tiny gold antler design.
Mixing colours nail by nail is the easiest form of nail art there is. No tools and no drying races, just a plan before you start. Decide the order first: in the photo the green takes the thumb, index and pinky, burgundy takes the middle nails, and the glitter breaks the pattern once.
Short lengths keep the mix looking tidy rather than busy. This is a kind set for anyone whose nails will not grow far past the fingertip.
Alternating two matte colours nail by nail gives you a designed set with zero art skills, and one glitter nail is all the sparkle it needs.
18. Matte Red Nails With Glossy White Dots
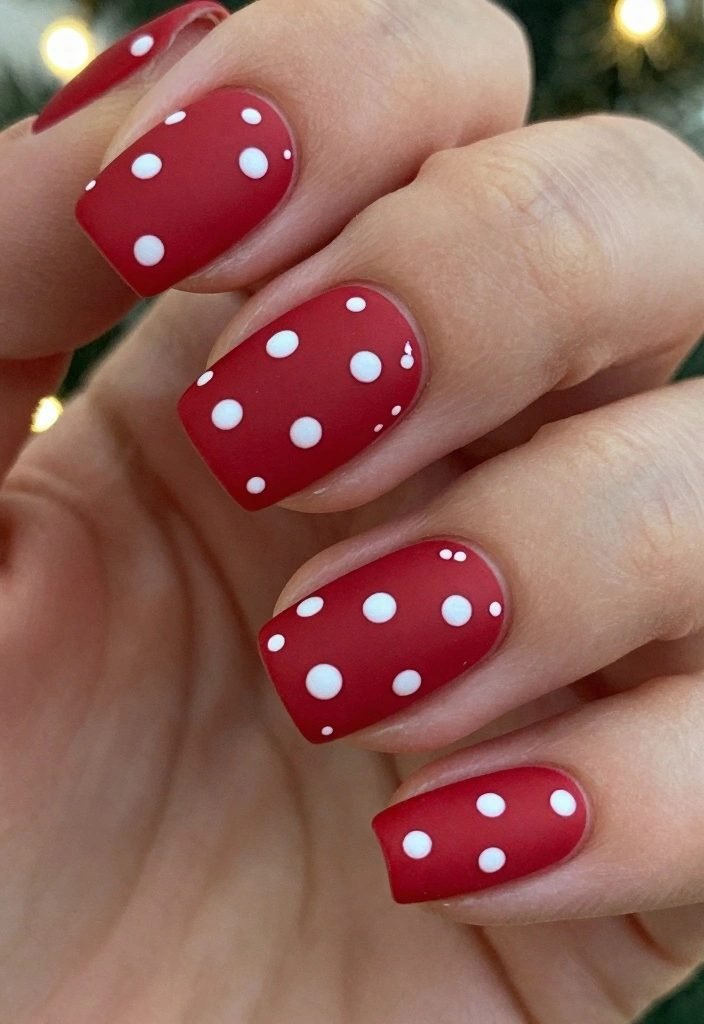
Polka dots are the oldest trick in the vintage book, and they still work. White dots scatter over a matte red base on short square nails, each dot finished with a dab of glossy top coat so it shines like a tiny bauble.
That small shine is the whole design. The dots catch the light as your hands move, while the base stays flat and calm. It is the reverse of the glossy tip idea earlier in this list, and the two looks bookend the season nicely.
A dotting tool makes even dots, but the end of a hair grip works too. Dot after the matte coat has dried, then add the gloss only on the dots themselves.
| All matte dots | Glossy dots |
|---|---|
| Soft and flat, matching the base exactly | Shiny dots that catch the light like baubles |
| Calmer and more understated | More playful and clearly festive |
| One top coat for the whole nail | A second, careful pass over the dots only |
Matte polish is forgiving, quick to wear, and it suits the season better than most people expect. A flat finish hides small brush marks, reads well in photos, and pairs with knitwear and candlelight in a way that high shine never quite manages. Start with a plain red or burgundy if you want the safest bet, then try one art design once you trust your matte top coat. Whichever of these vintage christmas nails matte designs you pick, seal the edges well and keep a small bottle of top coat nearby for touch ups. Save this list for your next salon visit or your next home manicure night.