15 Vintage Christmas Nails For Beginners DIY Step By Step That Actually Works
Your first Christmas manicure does not need salon skills or a drawer of special tools. Most of the looks in this list come down to three things: a steady base colour, a dotting tool or the round end of a hairpin, and a little patience between coats. Every design here was picked for shaky hands and short evenings. The art is built from dots, straight stripes and simple shapes, the kind of marks anyone can make on the first try. You will find plain red gloss next to dotted snowflakes, candy cane stripes, plaid made from straight lines, and a snowman that is really just dots in the right places. Work through them in order if you like, because the early ones teach the base steps the later ones use. These vintage christmas nails for beginners lean on the classic colours, deep red, burgundy, cream and gold, so one small polish collection covers the whole list. Pick the design that matches the time you have tonight, and keep a cotton bud dipped in remover nearby for quick clean ups.
1. Solid Red Gloss, The First Manicure To Master
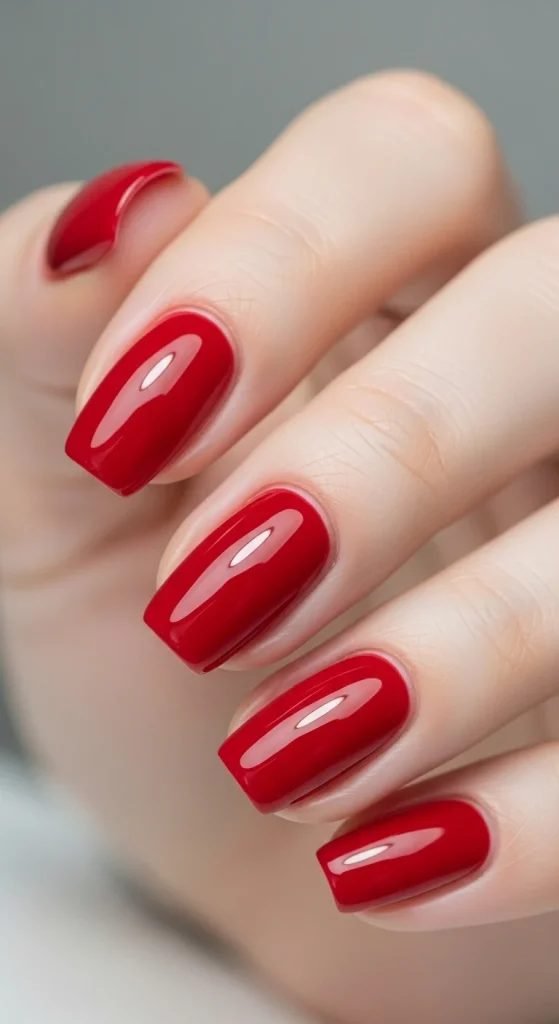
Every design in this list sits on the same foundation, so this plain red manicure is worth learning first. The photo shows a glossy cherry red on medium square nails, no art at all, and it still looks finished. That shine comes from thin coats and a glossy top coat, not from any special product. Start with clean, dry nails and push the cuticles back gently. A base coat matters here because red pigment can stain the nail plate. Paint in three strokes, one down the middle and one on each side, and let the first coat go tacky before adding the second. Two thin coats beat one thick coat every time, since thick coats bubble and dent while they dry. Finish with top coat, and wrap the tip by running the brush along the free edge.
Base coat first. It stops red pigment from staining the nail plate.
Two thin coats of red, three strokes per nail, middle then sides.
Glossy top coat, wrapped over the tip edge to slow down chips.
2. Deep Red With Gold Glitter Accent Nails

Glitter is the friendliest art supply a beginner can own, because it hides every wobble. In this set, one nail on each hand is fully coated in chunky gold glitter while the rest stay a deep glossy red. There is no line to keep straight and no shape to copy. Paint the red nails first and let them dry properly. Then load the glitter polish onto its own brush and pat it onto the accent nail instead of stroking, which packs the flakes closer together. Two patted coats usually give full cover. If your glitter polish looks thin, sponge it on with the corner of a makeup sponge for a denser finish. Seal everything with a thick glossy top coat so the glitter feels smooth rather than gritty under your fingertips.
3. Snowflakes Drawn With Lines And Dots On Burgundy
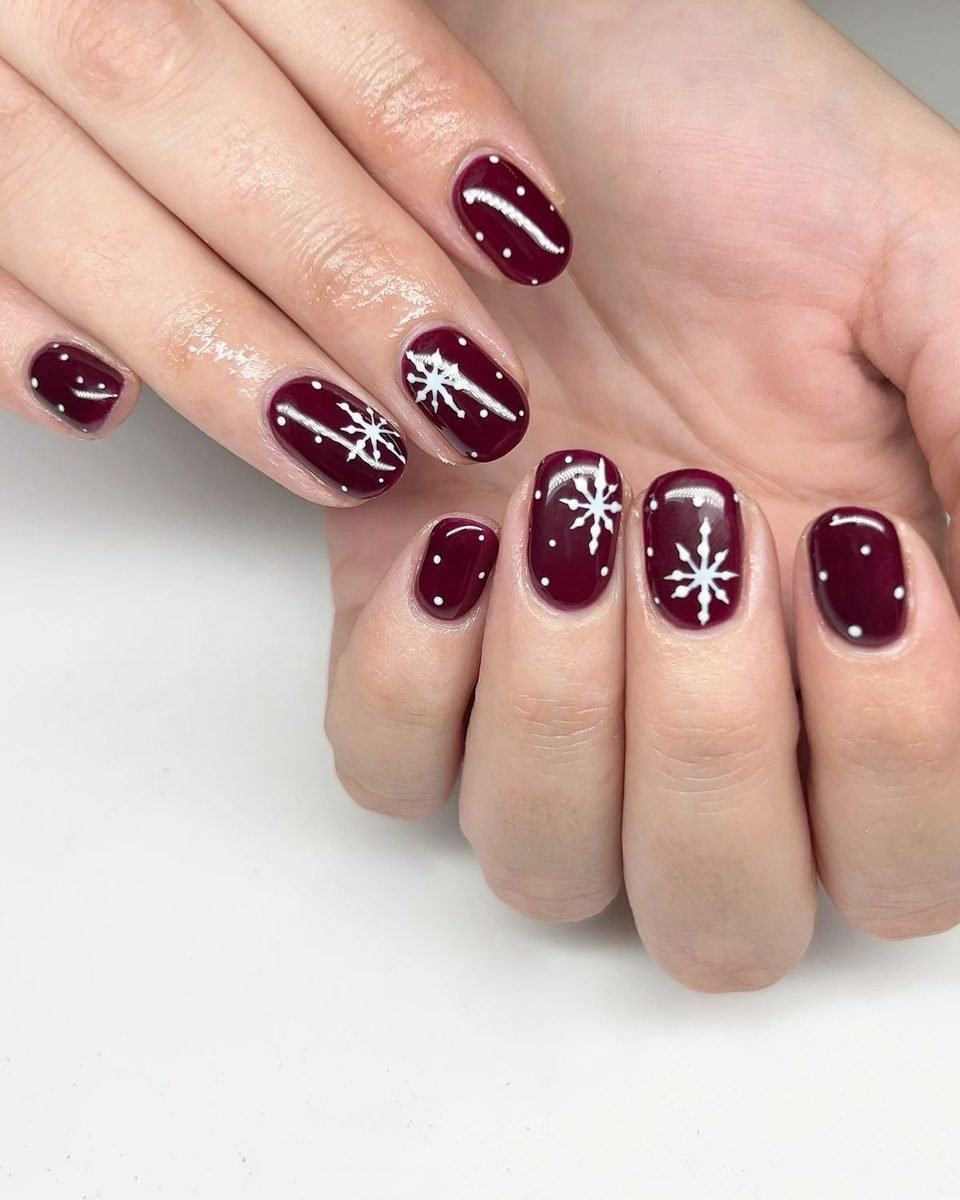
A snowflake sounds hard until you break it into parts: one straight cross, one X laid over the top, and small dots at the ends of the lines. These short burgundy nails carry exactly that, white flakes built from lines and dots, with a few spare dots scattered around them like falling snow. Use the thinnest brush you have, or drag a toothpick through a drop of white polish. Work on one nail at a time and keep the flakes different sizes, like the photo, so small mistakes read as variety instead of errors. Paint the cross first and let it set for a minute, then add the X. Tiny dots at each line end finish the shape and neatly cover any shaky tips.
💡 Quick Tip
Rest your painting hand flat on the table and move the hand being painted instead. Lines come out steadier with far fewer wobbles.
4. Candy Cane Stripes With A Striping Brush

Bold diagonal stripes in red and white give the full candy cane effect with one repeated move. The nails here are short, which helps, because each stripe has less distance to travel while staying straight. Start with two coats of white and let them dry longer than feels necessary, since red dragged over a soft base will streak and bleed. Load a striping brush, wipe most of the polish off, and pull each stripe from one side of the nail to the other in a single go. Turning the finger slightly as you work keeps the angle even across the hand. Leave uneven gaps between stripes on purpose; real candy canes are not measured either. A glossy top coat at the end melts the edges together and hides small overlaps.
Let the white base dry fully before striping.
Wipe the brush almost clean before each stripe.
Going back over a wet stripe to fix it.
Thick coats that bleed under the stripe edges.
5. Deep Red French Tips Using Guide Stickers

French tips scare beginners because the smile line has to curve evenly on every nail. Guide stickers take that job away. This sheer pink set has deep red tips with a clean, even curve, and one nail carries a tiny white squiggle near the edge for fun. Stick a French guide onto each nail just below where you want the colour to start, press the edges down firmly with a fingertip, then paint the tip red in two thin coats. Peel the guides away while the second coat is still slightly wet and the line stays crisp. Any small bleed can be tidied with a flat brush dipped in remover, swept along the curve. A sheer pink base hides regrowth and makes the red look richer.
What you need
6. A Thin Gold Line Along The French Tip
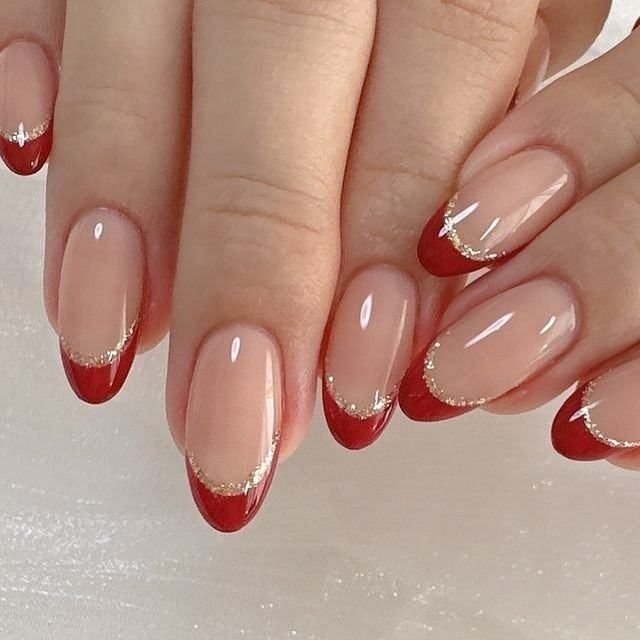
Once plain French tips feel easy, this is the upgrade that costs about one extra minute. The red tips on these nude oval nails are traced with a thin line of gold glitter right along the smile line, where the red meets the nude base. That little line does two jobs at once: it glints like jewellery, and it covers the exact spot where a hand painted tip tends to look uneven. Use a gold glitter striper polish if you have one. Without one, dip the very tip of a toothpick into gold polish and dot a row of tiny dots close together until they merge into a line. Keep it thin and close to the edge of the red; the line should catch the light, not take over the nail.
A glitter line along the smile line hides an uneven edge and makes a simple French tip look salon finished.
7. Holly Built From Three Red Dots
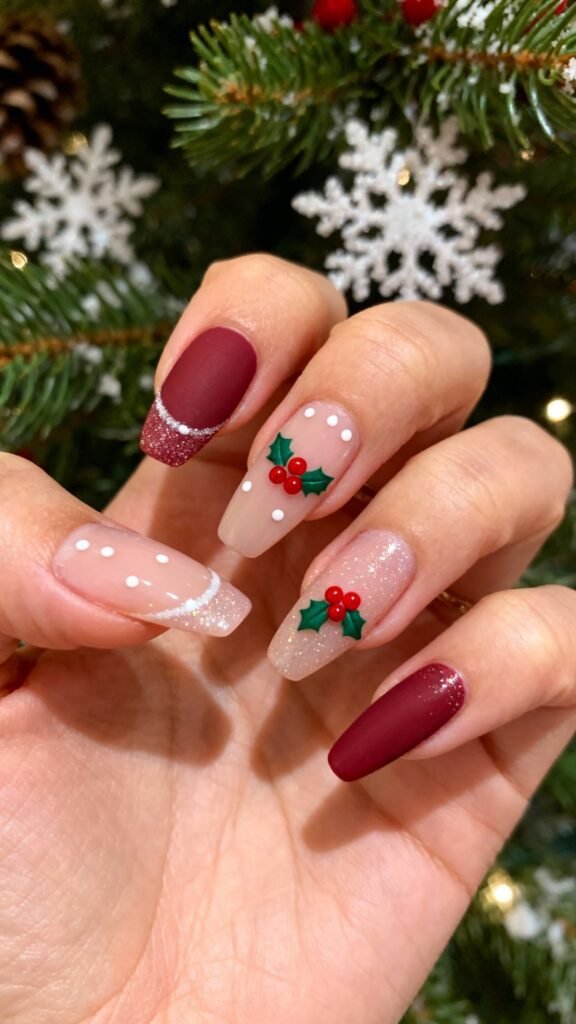
Holly looks like careful painting, but the berries are just three red dots in a tight triangle. Two nails in this mix and match set carry the design: three red dots clustered together with two small green leaves tucked behind them, sitting on a soft nude and glitter base. The other nails stay simple, matte burgundy on some and sheer with white dots on another, so the holly gets all the attention. Dot the berries first with the large end of a dotting tool, pressing straight down for round, even circles. For each leaf, place a green dot and drag it outward with a pin point to pull it into a teardrop. Two leaves per cluster is plenty. Let the red dry before adding top coat, or the berries will smear into pink streaks.
Dot three red berries in a tight triangle.
Drag two green dots outward into pointed leaves.
Rest the design for five minutes, then seal with top coat.
8. Red Plaid From Straight Stripes
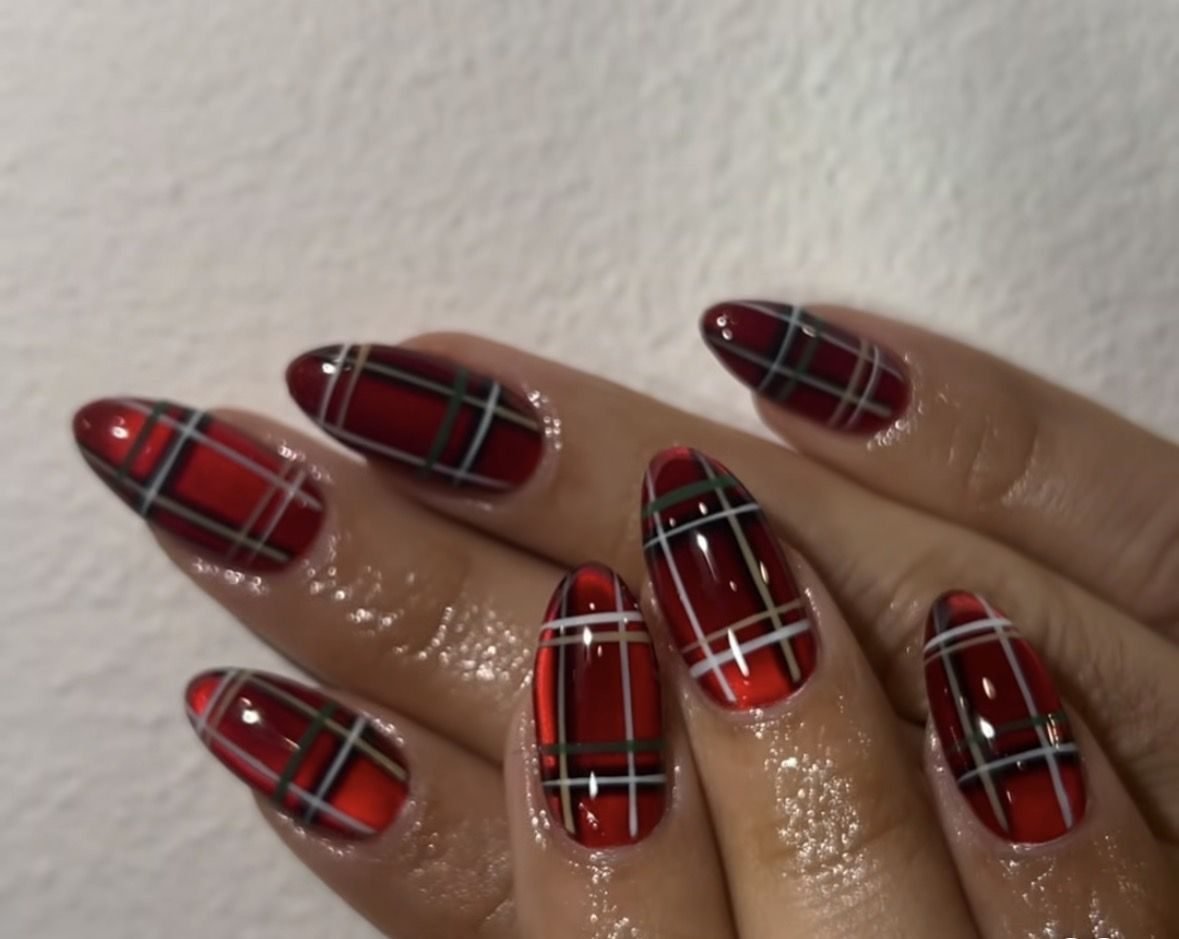
Plaid is only stripes that cross. This glossy set layers thin white, green, black and gold lines over a deep red base, and the overlap is what makes it read as checked fabric. You do not need every colour on a first try. White stripes alone over red already look like a simple plaid, and you can add a second colour once the pattern feels familiar. Paint the red base and let it dry well. Add the widest stripes first, two running across and two running down, using a striping brush and a light hand. Thinner lines go on after, slightly offset from the first set. Work on one or two accent nails if a full set feels like a lot for one evening. Short nails can carry plaid too; just use fewer and thinner stripes.
9. Silver Glitter Gradient With A Makeup Sponge
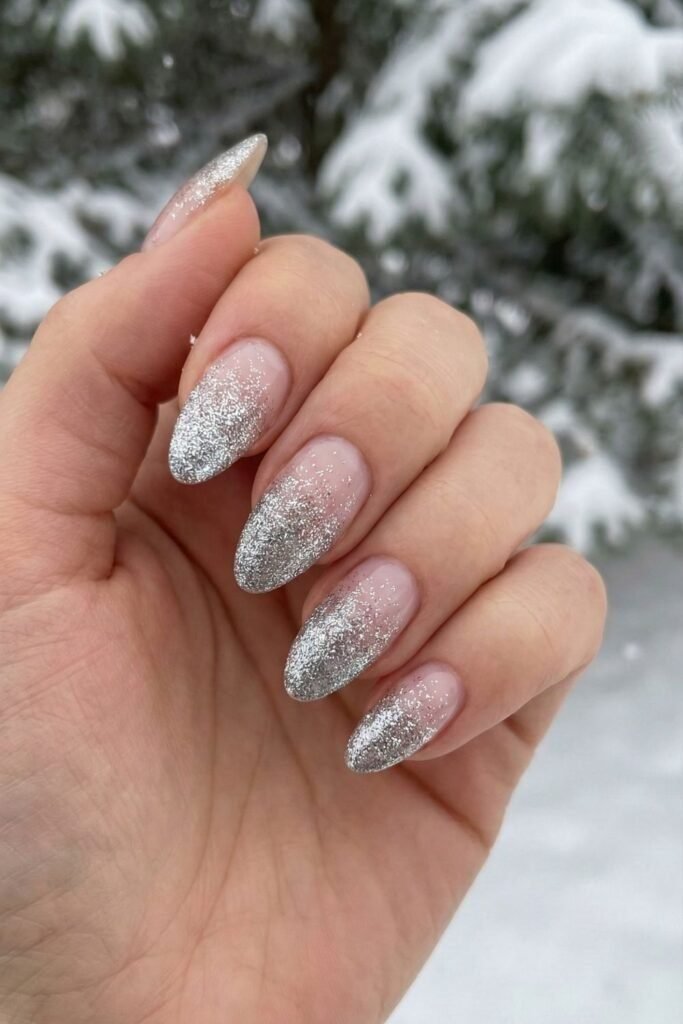
A gradient sounds technical, but the sponge does the blending for you. These almond nails fade from nearly bare at the cuticle to packed silver glitter at the tips, like frost creeping up the nail. Paint a strip of glitter polish and a strip of clear polish side by side on a makeup sponge, then press and roll the sponge over the tip half of the nail. Lift, reload, and repeat twice more, pressing a little higher each round so the fade stays soft. The glitter lands densest at the free edge, which is also where nails chip first, so this design hides tip wear better than most. Clean the skin around each nail with a small brush and remover once the glitter is on.
📌 Good To Know
Pick off any sponge crumbs with tweezers before the top coat goes on, while the glitter layer is still tacky and easy to clean.
10. Matte Top Coat Over Burgundy Red

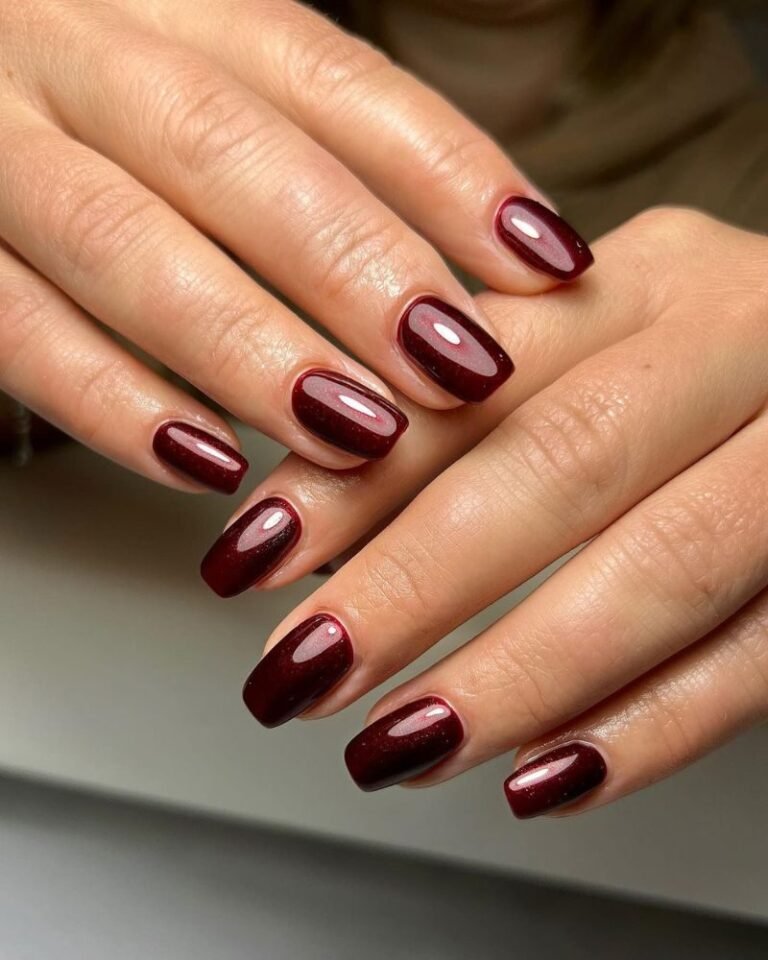
Matte top coat is the cheapest trick in this whole list: one bottle turns a red you already own into a different manicure. The long nails in this photo wear a deep burgundy red with a flat, velvety finish, and the Christmas jumper and firelight behind them show how soft the colour looks without any shine. Paint your red exactly as usual, two thin coats, and let it dry. Then swap the glossy top coat for a matte one and apply it in the same three strokes. The surface goes cloudy for a few seconds, then settles flat and even. Matte finishes show nail ridges more than gloss does, so a ridge filling base coat underneath helps. Keep hand cream off the nails afterwards, since oils bring back shiny patches.
Glossy burgundy red, painted with the same base steps as the first design in this list.
A flat, velvet looking finish from one coat of matte top coat. No new colour needed.
11. Tiny Triangle Trees With Red Dot Baubles
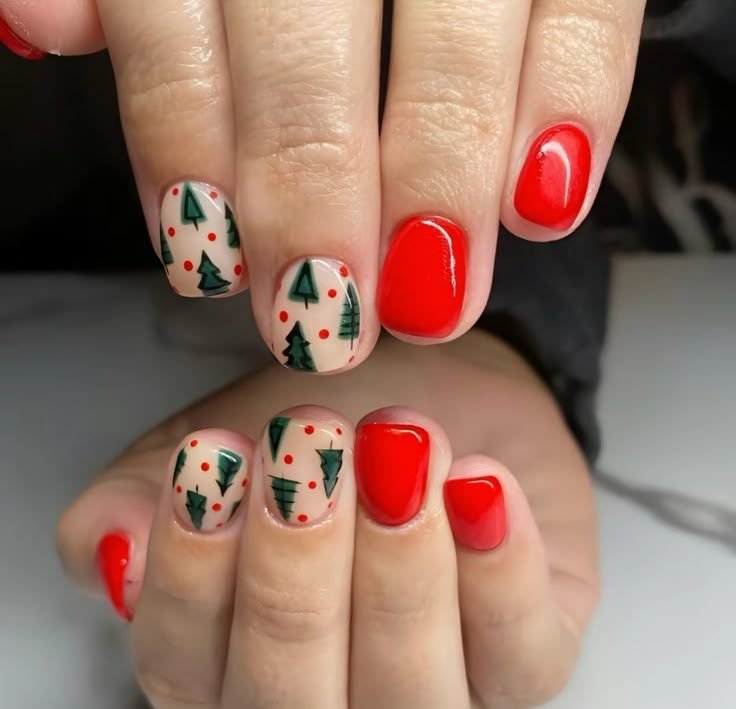
Keeping the art on a few accent nails, like this short set does, is a layout worth copying when time is tight. The remaining nails stay a bright solid red. On the milky accent nails, each tree is a simple green triangle with a short trunk line, and the red dots scattered around them work as baubles and falling snow at the same time. A triangle is only three short strokes, or one filled zigzag if your hand feels brave. Keep the trees at different heights so the pattern feels playful rather than stamped. Dot the red baubles last, using the small end of a dotting tool, and leave some space between them. Because the art sits on short nails here, it suits anyone who types, cooks or wraps gifts a lot during the holidays.
- ▸Accent nails only. Two per hand is enough.
- ▸Triangles first, red dots second.
- ▸Solid red everywhere else keeps the set quick.
12. Two Tone Red And Green, One Colour Per Nail

Two tone does not have to mean a single nail split down the middle. This short glossy set simply alternates: one nail deep red, the next deep green, all the way across both hands. It is the fastest design in the list after plain red, because there is no art at all, just two bottles and the same base routine you learned at the start. The only trick is keeping the colours balanced, so count as you go and begin each hand with the same colour. Short squoval nails keep the look neat and practical for busy days. If full green feels too bold, swap it for burgundy and keep the red, which gives the same two tone effect in a softer way. Finish with glossy top coat so both colours look rich.
13. White Polka Dots On Burgundy
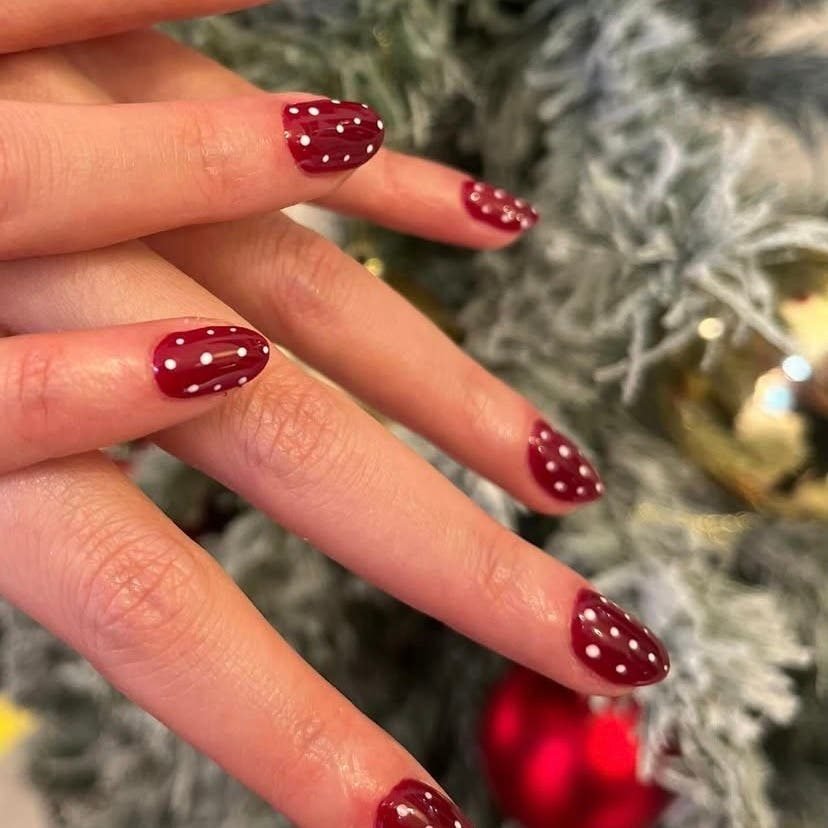
Polka dots were the first nail art most of us ever tried, and they still hold up. Small white dots scattered over short burgundy nails read as falling snow, and the spacing here is happily uneven, which takes all the pressure off. Use a dotting tool if you own one. If not, the round end of a hairpin, the tip of a toothpick, or the head of a dressmaking pin all leave a clean round dot. Dip lightly, because a loaded tool makes blobs instead of dots. Place the biggest dots first, then fill the gaps with smaller ones. Vary the pattern on each nail instead of copying it across, which hides the fact that no two nails match. Let the dots dry a full five minutes before top coat so they keep their round shape.
Dot tools from around the house
14. Gold Foil Pieces Pressed On Deep Red
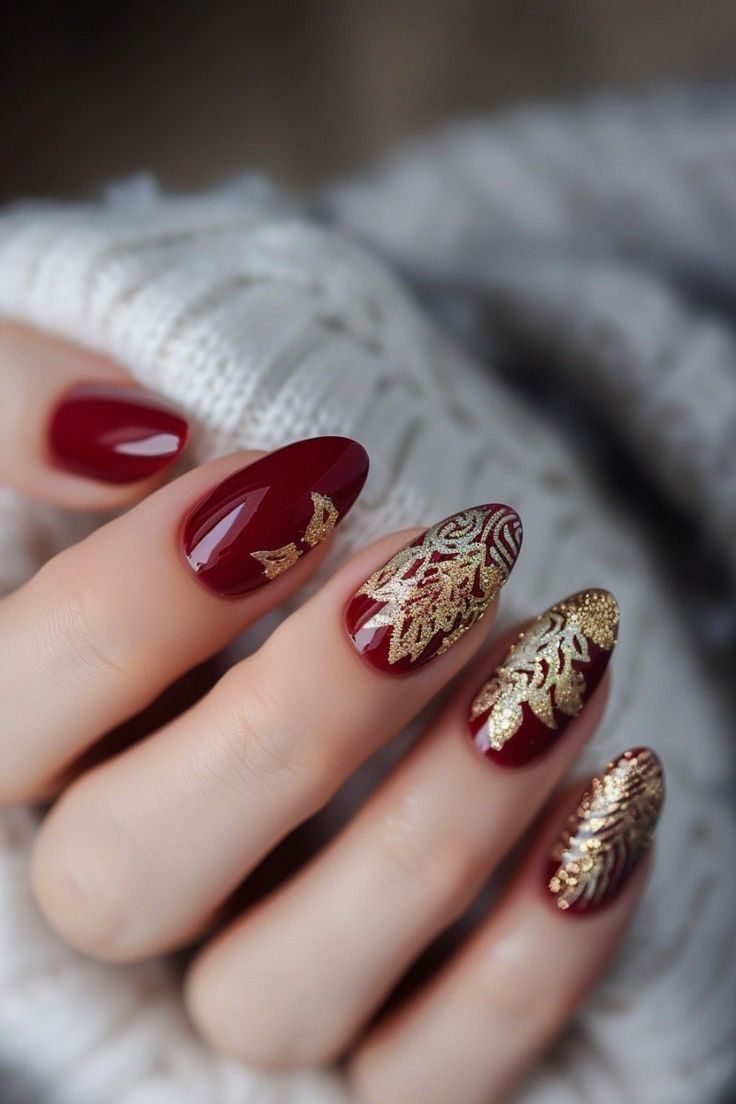
Foil gives a broken, gilded effect that no brush can copy, and it asks for almost no skill. On these deep red almond nails, irregular gold pieces sit across the outer nails in leaf like patches, while the thumb and first nail stay plain. You need foil flakes or a small foil sheet, and a nail that is still slightly tacky. Paint the red as usual, then wait until the second coat is dry to the touch but not fully hard. Lay small torn pieces of foil shiny side up and press gently with a fingertip. Peel the backing away and the gold stays where it touched the polish. Rough, uneven edges are the whole point, so resist tidying them. Seal with top coat, because unsealed foil dulls and lifts within a day.
Press the foil on while the polish is tacky.
Seal the finished nail well with top coat.
Waiting until the polish is bone dry. Foil will not stick.
Rubbing the foil hard. It tears into dust instead of flakes.
15. A Snowman Made From Dots On One Nail
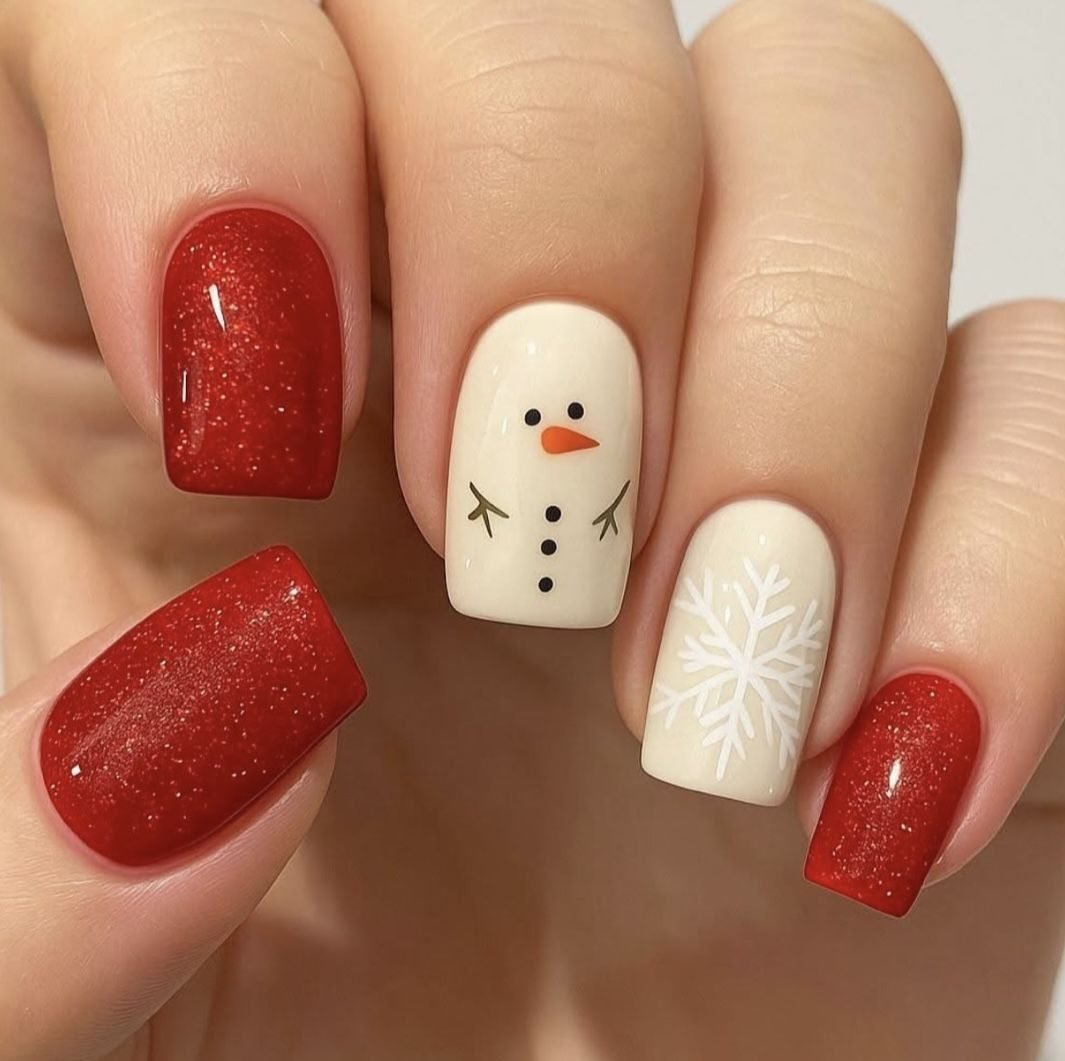
The snowman on this cream nail is built the same way as the holly berries and the polka dots earlier in the list: with dots. Two black dots make the eyes, three more run down the middle as buttons, and a small orange triangle forms the nose. The twig arms are two short brown strokes, thin enough to paint with a toothpick. The nails around him stay simple, red glitter on most and one cream nail carrying a white snowflake, so the snowman nail is the clear star of the set. Paint the cream base first and let it dry fully, because black dots bleed into wet cream and turn grey. Place the button dots in a straight line down the centre, then add the eyes above them. If a dot lands slightly off centre, call it personality. Snowmen are not symmetrical either.
Cream base coat colour, dried fully before any dots.
Black dots for the two eyes and the three buttons.
One small orange triangle nose, then two twig arm strokes.
Start where your confidence is. Plain red, the two tone set and the polka dots ask for nothing but polish and a hairpin, and they still look like Christmas. When those feel easy, the dotted snowflake, the holly and the snowman are waiting, all built from the same simple dots. Save this list of vintage christmas nails for beginners for the next quiet evening, and work through it one design at a time. A cotton bud, a little patience and thin coats will carry you further than any expensive kit.