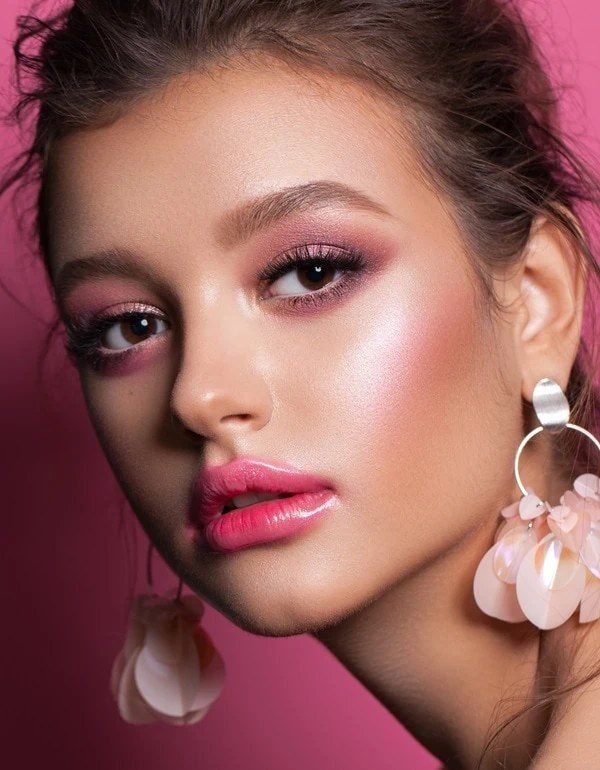
22 Pink Eye Makeup With Glitter That Look Stunning On Anyone
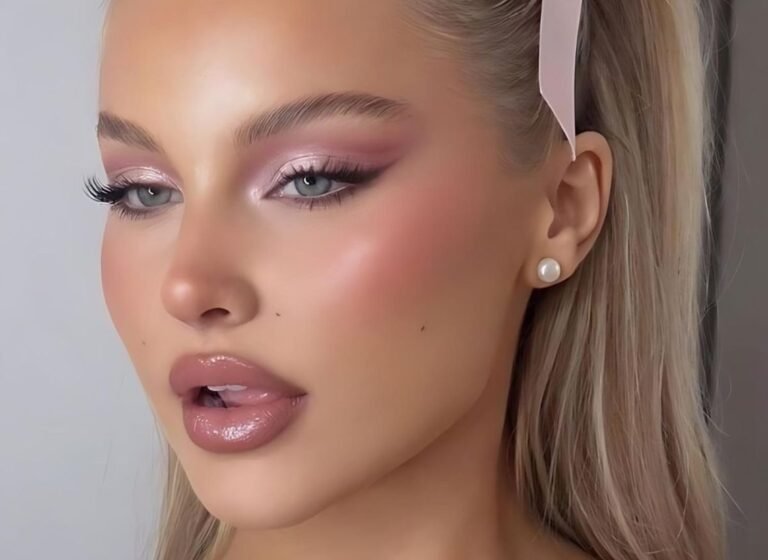
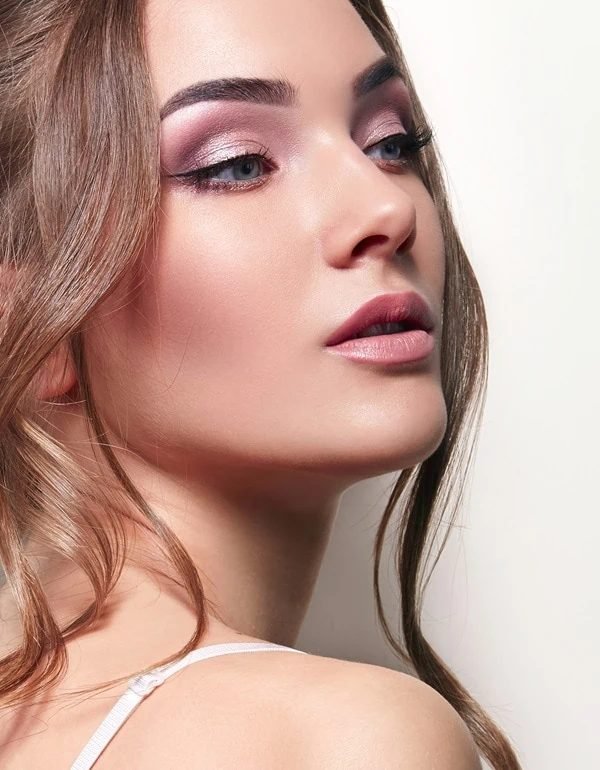
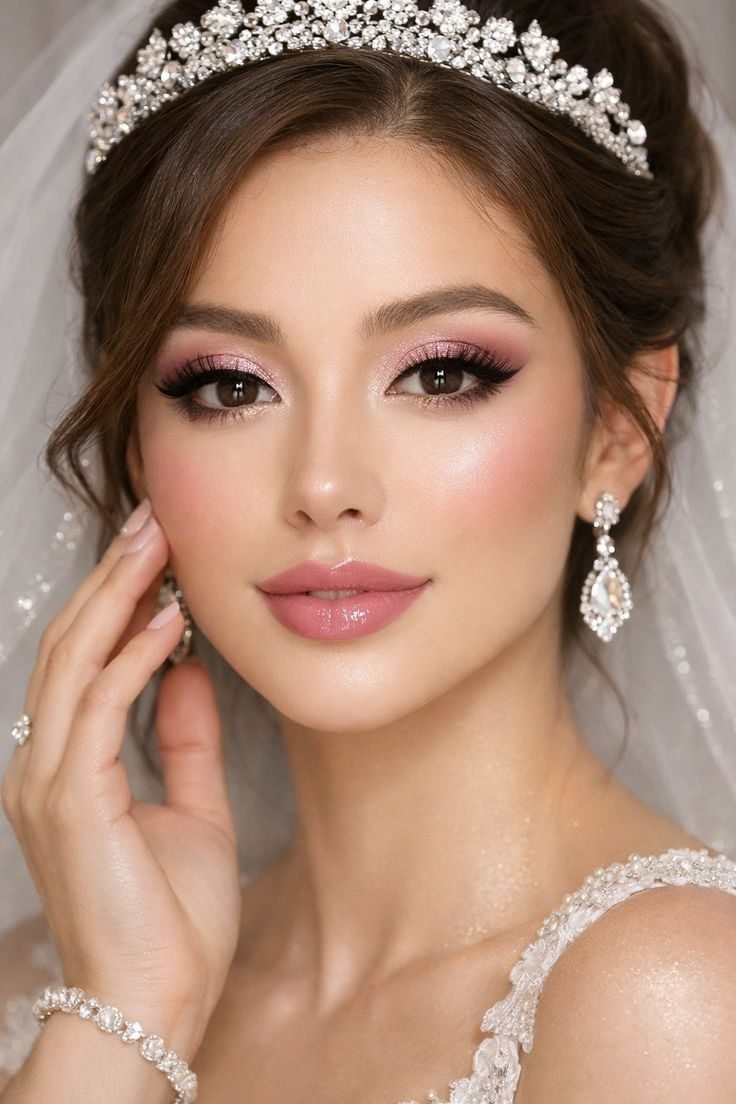
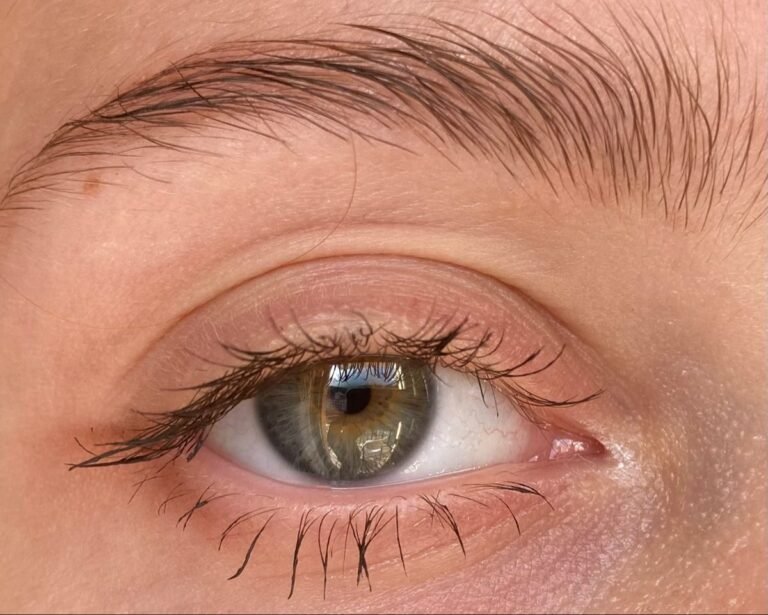
Glitter has a way of splitting people. Some reach for it every Friday night, others tried it once, got sparkle on their cheeks for two days, and swore off it for good. The difference is rarely the glitter itself. It is where the glitter sits, how much of it you use, and what the rest of the eye is doing underneath. This list pulls together twenty two pink eye makeup with glitter looks that hold up on real faces, from a pale wash with a lit inner corner to a full magenta halo that wraps the whole eye. Each entry breaks down where the sparkle sits, how deep the pink goes, and what to keep quiet around it, so you can copy the placement instead of guessing. Start with the soft ones if glitter is new to you. Save the chunky cut crease for when your hand feels steady. By the end you will know which version suits your eyes, your plans, and your patience level on a given night.
1. Rose Gold Glitter Lid, Full Coverage
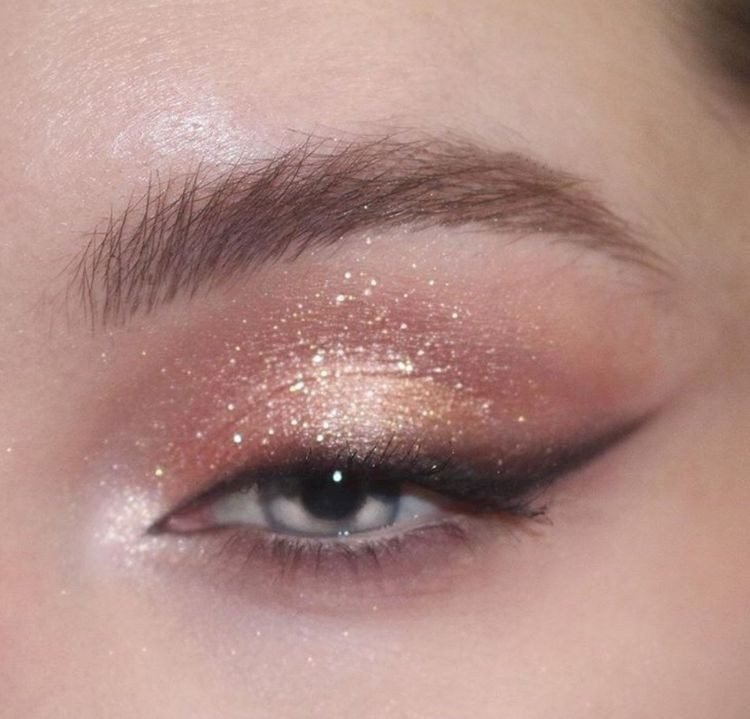
Full coverage is the honest place to start. Rose gold glitter covers the whole lid from lash line to crease, packed densest at the centre where the light lands, and the fine gold particles keep it warm rather than icy. A matte rose brown does the quiet work in the crease and at the outer corner, giving the sparkle a soft edge to sit against. Black liner draws a clean wing along the top lashes, and a bright pinch of sparkle at the inner corner opens the eye up.
- Glitter packed over the full lid, heaviest at the centre
- Matte rose brown blended through the crease
- Black winged liner to give the sparkle a frame
- Lower lash line left almost bare, just a soft pink smudge
Press the glitter on with a fingertip instead of sweeping it. Sweeping moves the particles onto your cheeks, pressing keeps them on the lid where they belong.
2. Pink Chunky Glitter Cut Crease
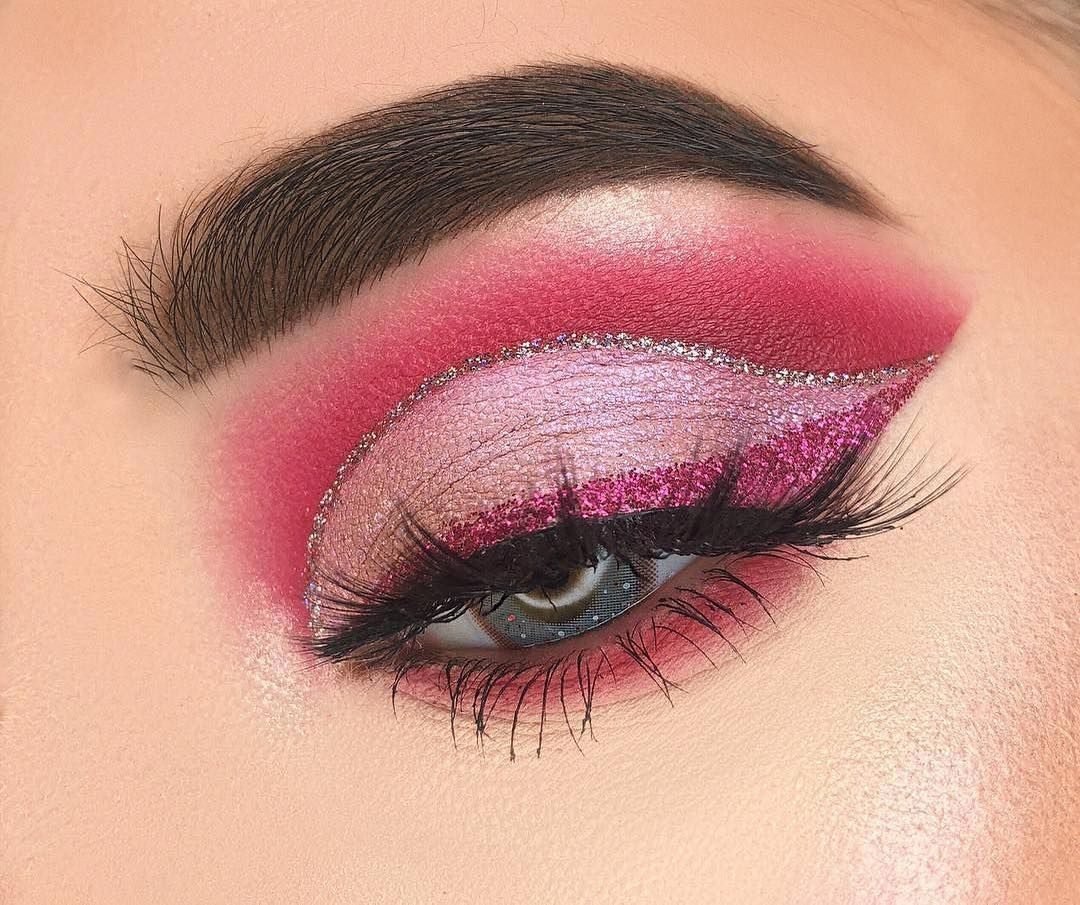
Nothing about this one whispers. A deep matte pink is blended high above the crease, then the lid is cut clean and filled with pale pink glitter, and a band of chunky magenta glitter runs along the outer lash line into the wing. A thin silver glitter line traces the cut itself, so the edge between matte and sparkle stays razor sharp. Heavy lashes finish the job, and the same pink is smudged under the lower lashes to balance all that weight on top. The order matters here. Matte first, cut second, glitter last, because chunky particles are much harder to clean up than powder once they land. Work with the eye looking down into a hand mirror so loose flakes fall forward, away from the finished crease, instead of dropping straight onto your cheek.
Blend the deep pink matte above the crease and let it set the shape.
Cut the crease with concealer and pack pale glitter onto the lid while it is still tacky.
Lay the chunky magenta band along the outer lash line and trace the cut with silver glitter.
3. Silver And Pink Glitter Gradient

Two metals, one lid, and the blend between them does all the talking. The inner half of the lid is silver white and bright, and it melts into rose pink as it travels outward, with the pink taking over the outer corner and the crease. Fine sparkle runs through the pink half, so the colour change is also a texture change, smooth and icy at the front, warmer and grainier at the back. Long lashes and a simple black line keep the gradient from looking busy. Gradients fail when both halves are applied at full strength and then attacked with a brush. Lay the silver down first, then feather the pink into it with a light hand, and stop blending the moment the middle turns muddy.
| Silver Half | Pink Half |
|---|---|
| Sits at the inner lid and inner corner | Takes the outer lid, corner and crease |
| Smooth, bright, almost metallic finish | Fine glitter sparkle through the colour |
| Opens the eye and catches light first | Adds the depth and the warmth |
4. Glitter Inner Corner Only On A Soft Pink Lid
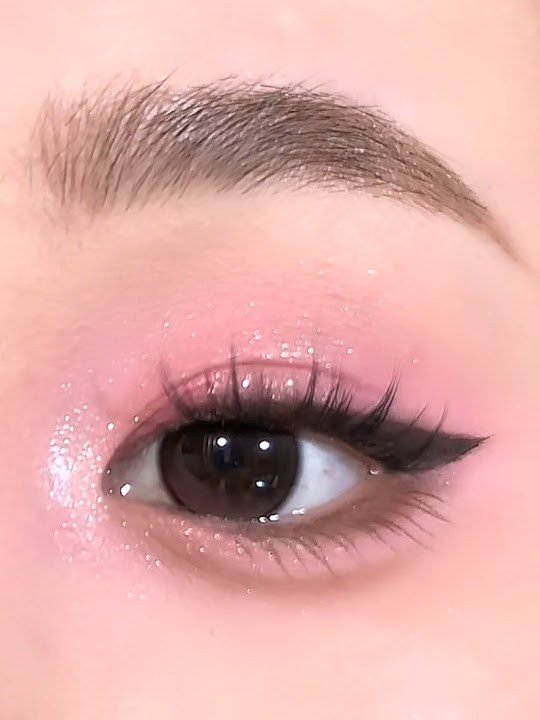
One small patch of glitter, placed exactly where it earns its keep.
The lid itself is a soft pink wash, sheer enough that the skin shows through, with a black wing and wispy lashes doing the shaping. All the dense sparkle is packed into the inner corner, where it catches light every time the eye moves. A lighter dusting of fine sparkle sits across the lid, but it reads as a glow rather than glitter. Because the placement is so small, this is the version that works at brunch, at the office, anywhere a full glitter lid would feel like too much costume. Keep the patch tight. The moment it creeps halfway across the lid, the whole point of the restraint is gone.
💡 Quick Tip
Dab the inner corner glitter on with the tip of a cotton bud over a dot of glitter glue. A brush spreads it too wide and the clean edge is the whole look.
5. Hot Pink Glitter Smokey
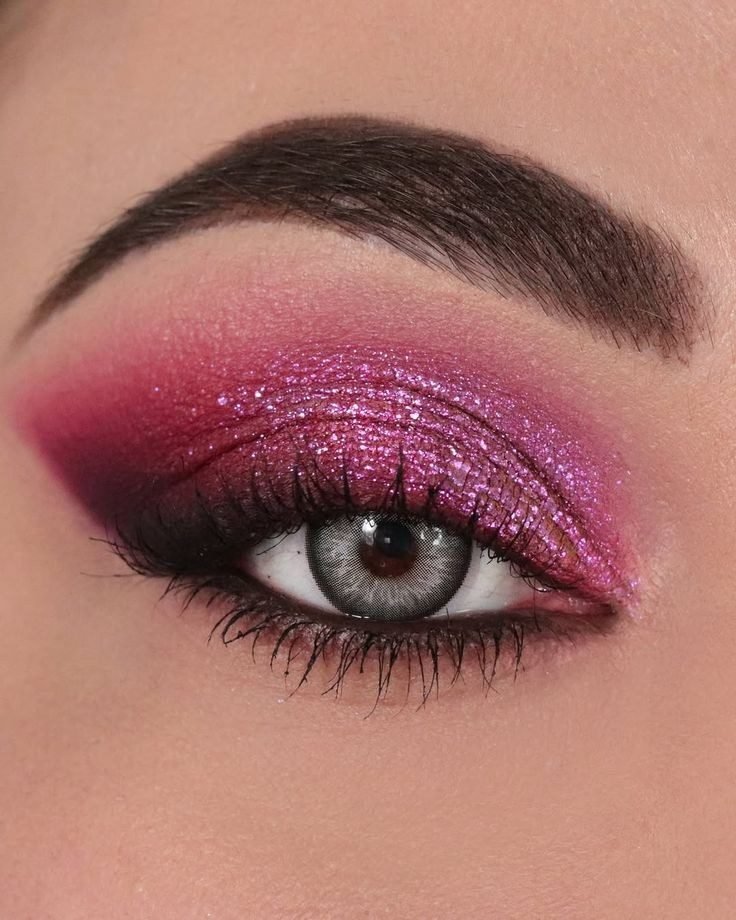
Smoke and sparkle are not natural partners, which is exactly why this works. Magenta pink glitter is packed across the lid, then a deep hot pink matte is smoked around it, through the crease, at the outer corner, and under the lower lash line, so the glitter sits inside a frame of blurred colour. The blend is what separates this from a flat glitter lid. Every edge is soft except the sparkle itself. What works here is the contrast in texture: matte smoke absorbs light, glitter throws it back, and the eye keeps moving between the two. Build the smoke first and press the glitter on last, in the centre of the lid, so the deepest colour stays at the edges where it shapes the eye.
Smoke the deep pink out first, then press glitter into the centre of the lid.
Run the same smoky pink under the lower lashes to close the frame.
Glitter first and smoke over it. Blending buries the sparkle and turns it grey.
A hard black edge around hot pink. It fights the softness that makes the look work.
6. Pale Pink Fine Glitter Wash
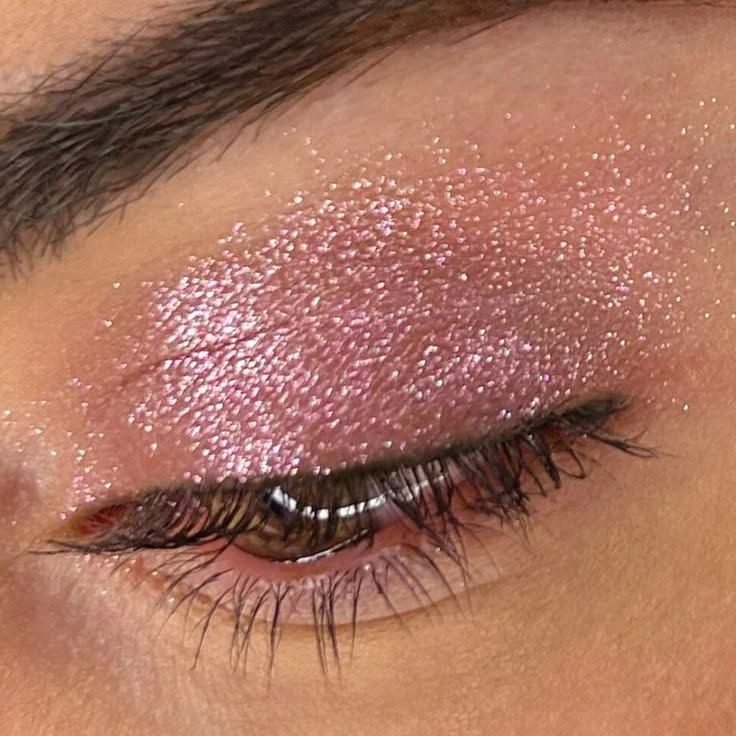
Closed, this eye looks like pale pink dusted with sugar. Fine glitter covers the whole lid in one even wash, no patches, no lines, no darker corner doing drama in the background. The colour underneath is a soft mauve pink, and the particles are small enough that the lid reads as texture first and sparkle second. Lashes stay natural, liner stays home, and the brow is left soft. A wash like this is the easiest glitter to wear in daylight because there is no single spot for the eye to land on. It is also forgiving to apply. One finger, one sweep, blend the edge with a clean brush, and the look is done before a cut crease wearer has finished taping her edges.
Recreate this look
7. Gold And Pink Glitter Duo
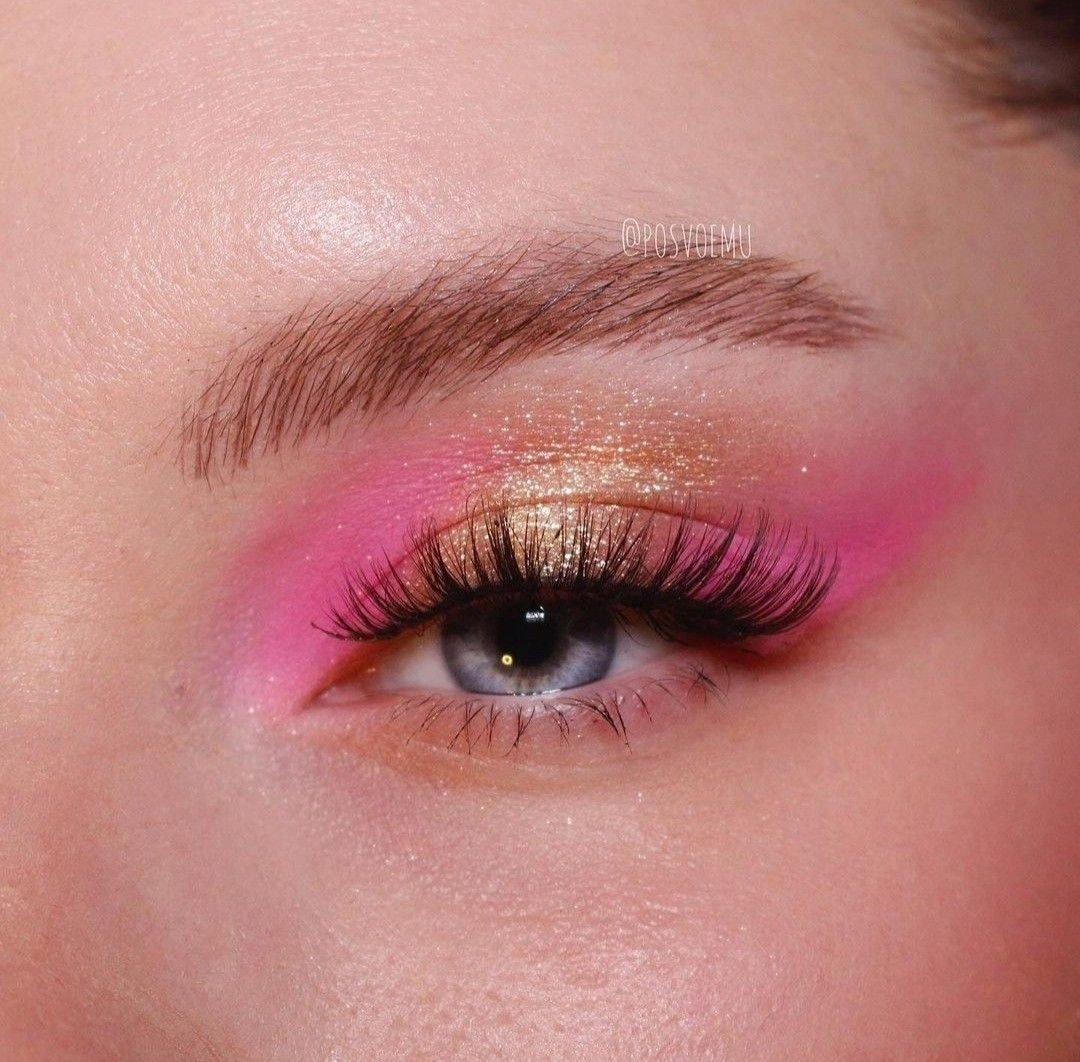
Gold takes the centre of the lid and pink does the framing, and neither one apologises. The gold glitter is packed onto the middle of the lid where it catches the most light, while hot pink matte fills the inner corner area and sweeps around the outer corner and crease, boxing the gold in on both sides. Side by side, the two colours sharpen each other. The pink looks pinker against the metal, and the gold looks richer against the matte. Full lashes and a clean lower line keep the duo from tipping into fancy dress. If your gold and pink are fighting, the fix is usually value, not colour: deepen the pink at the outer corner and the gold will step forward on its own.
8. Glitter Winged Liner In Pink
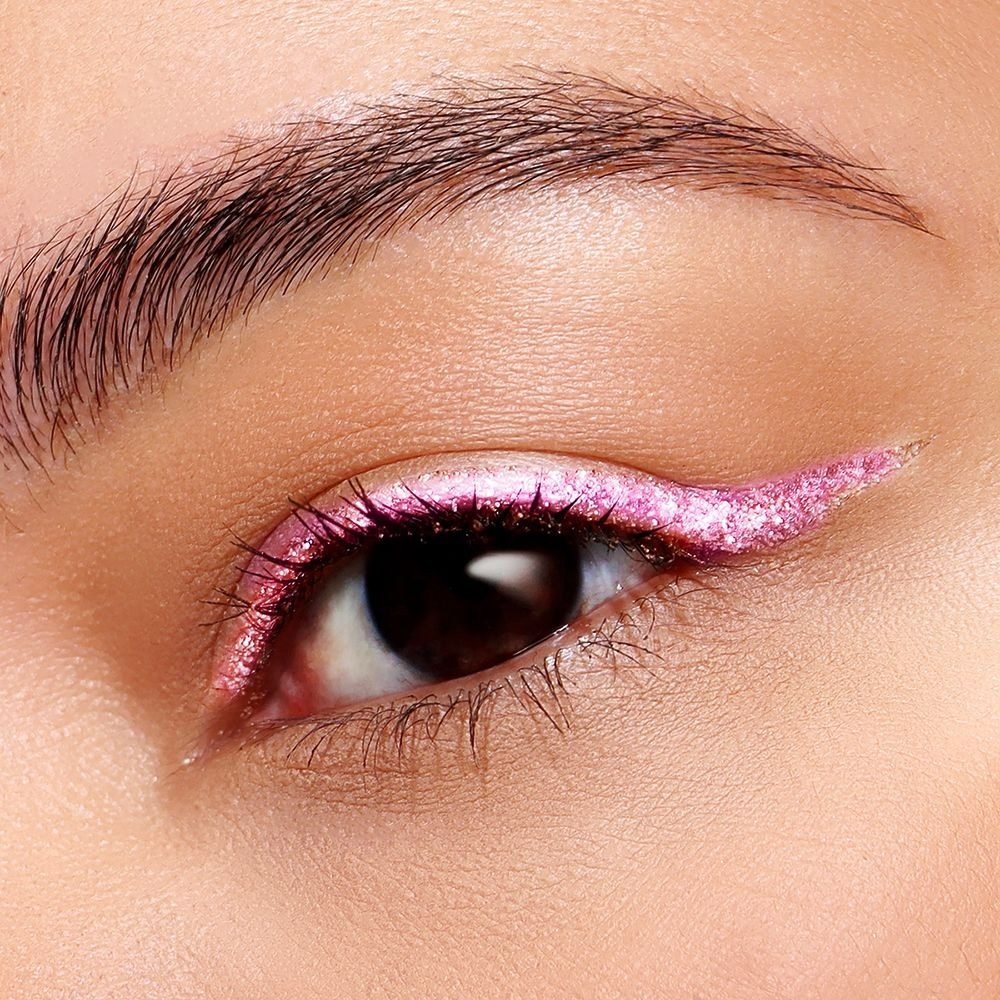
Bare skin, one line, nothing else to hide behind. The wing here is drawn entirely in pink glitter, a clean band along the upper lash line that flicks out at the corner, and the rest of the eye is left completely alone. No shadow, no smoke, no second colour. That emptiness is the point. Against bare skin the glitter reads graphic and deliberate, the way a red lip does against a plain face. Getting it right is mostly about the base: draw the wing shape first in a pale pink pencil, check both sides match, then pack the glitter over the line with a small flat brush. Mascara goes on after, never before, or the wet lashes will drag through the wet glitter and smear the edge you just built.
- ▸Sketch the wing in pencil first and fix the angles before any glitter comes out.
- ▸Pack glitter over the line in two thin layers instead of one thick one.
- ▸Leave the lid and lower line bare so the wing stays the only event.
9. Magenta Glitter Halo Eye
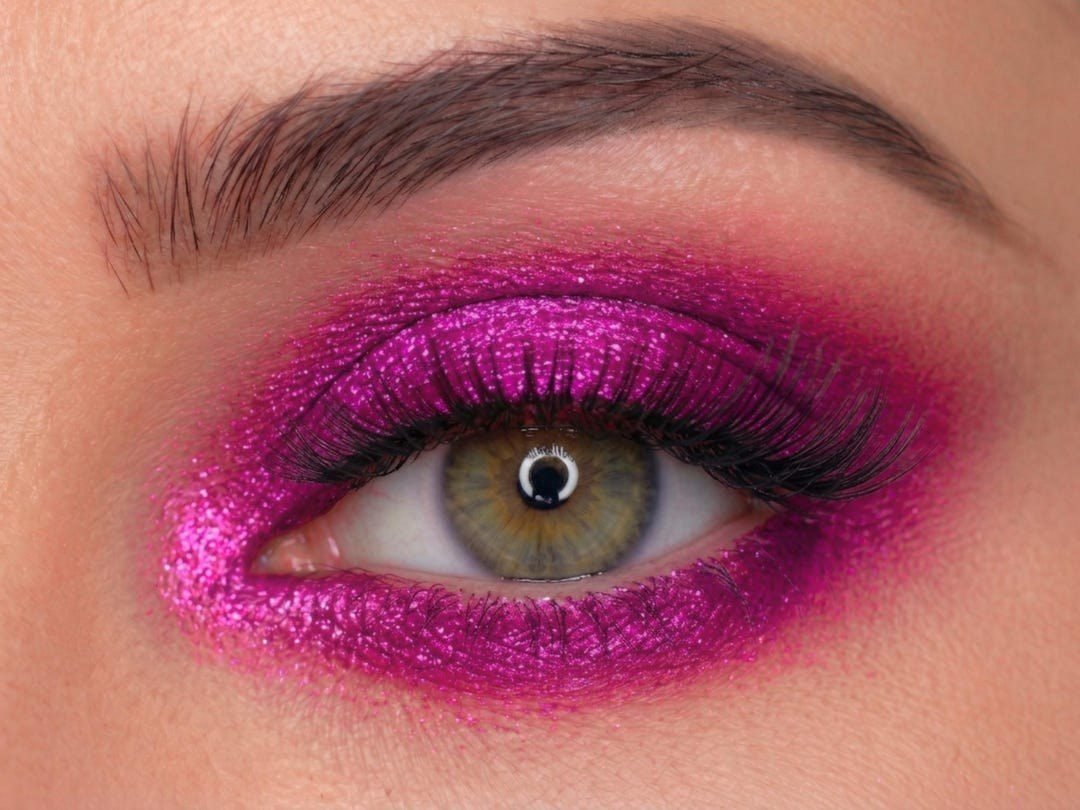
Some looks decorate the eye. This one surrounds it. Magenta glitter wraps the full circle, across the lid, above the crease, into the inner corner, and under the lower lashes, with the brightest packing at the centre of the lid so the eye sits inside a ring of sparkle. The edges melt into a softer pink, which keeps the ring from looking stamped on. A halo only works when the centre stays lighter than the frame around it, so resist adding depth to the middle of the lid. Keep your darkest magenta at the outer edges and under the eye, and let the centre glitter do the glowing. On green and hazel eyes the effect is doubled, since magenta sits opposite them on the colour wheel and makes the iris look greener.
A halo is just contrast arranged in a circle: bright centre, deep frame, and the eye itself becomes the focal point.
10. Pink Glitter Under Eye Accent

Flip the usual plan and put the glitter where nobody expects it.
The top lid here stays pale and glossy, a fine shimmer with long lashes, while a thick band of hot pink glitter is packed under the lower lash line and left to be the whole event. It sounds like a small change, but it moves the colour to the part of the eye that catches light when you look down, laugh, or blink, so the sparkle shows up in motion rather than in a posed stare. Lower glitter has one honest enemy, and that is fallout onto the cheek by midnight. A strip of tissue or a shadow shield under the eye during application, plus a setting spray at the end, keeps the band where you drew it.
⚠️ Watch Out
Do the under eye glitter before your base makeup. Fallout wipes off bare skin in one sweep, but it drags through finished foundation and leaves pink streaks.
11. Champagne Pink Glitter For A Soft Sparkle

Soft is a skill, and this is what it looks like done well. A gentle pink covers the lid, fine champagne sparkle is scattered across it like light through a window, and a clean black wing gives the softness a spine. Nothing is packed, nothing is chunky, and the lower lashes are left separated and natural. The champagne tone in the glitter is doing quiet diplomacy here: it warms the pink up, so the look flatters skin that finds blue based pinks chalky. Wear this one when the dress is doing the shouting. It is also the most forgiving glitter in the list for textured lids, because fine particles settle into lines far less visibly than chunky ones do.
Plain pink shadow and mascara. Pretty, flat, and easy to forget by lunchtime.
Fine champagne sparkle over the pink and one black wing. The eye catches light every time it moves.
12. Berry Glitter Smoked Out
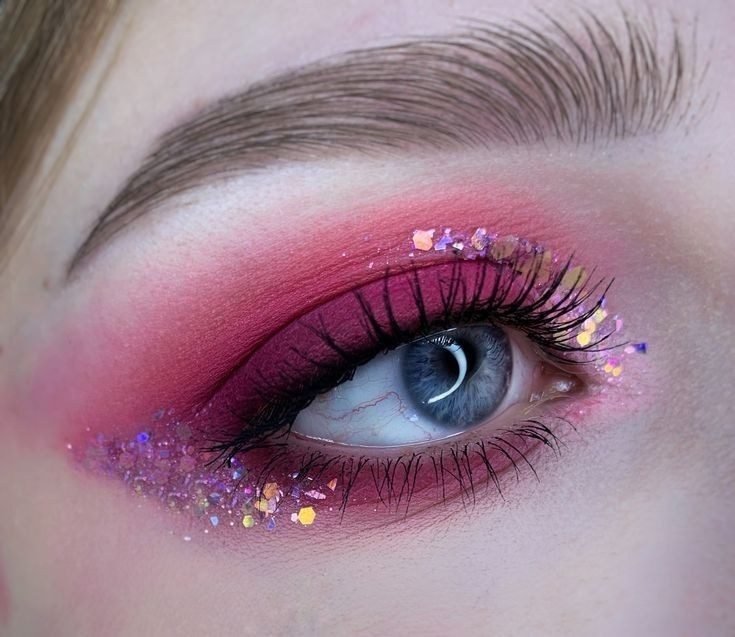
Berry tones forgive a lot, and smoked out like this they forgive almost everything. Deep berry pink is blended wide around the eye, soft at every edge, with chunkier iridescent glitter flakes pressed at the outer corner and scattered under the eye where they catch light against the dark base. The inner lid stays a cleaner pink, which stops the smoke from swallowing the eye whole. Berry is the grown up end of the pink family, closer to wine than to candy, and it suits evening light better than brights do. Smoke it out with a clean fluffy brush in small circles and stop while the edges still look like mist. One pass too many and mist turns into mud, especially with red based shades.
Pack berry pink over the lid and through the crease as your base.
Blend every edge outward with a clean brush until the colour fades like mist.
Press the chunky flakes at the outer corner and under the eye, last, over the finished smoke.
13. Iridescent Pink Glitter Over A Matte Base
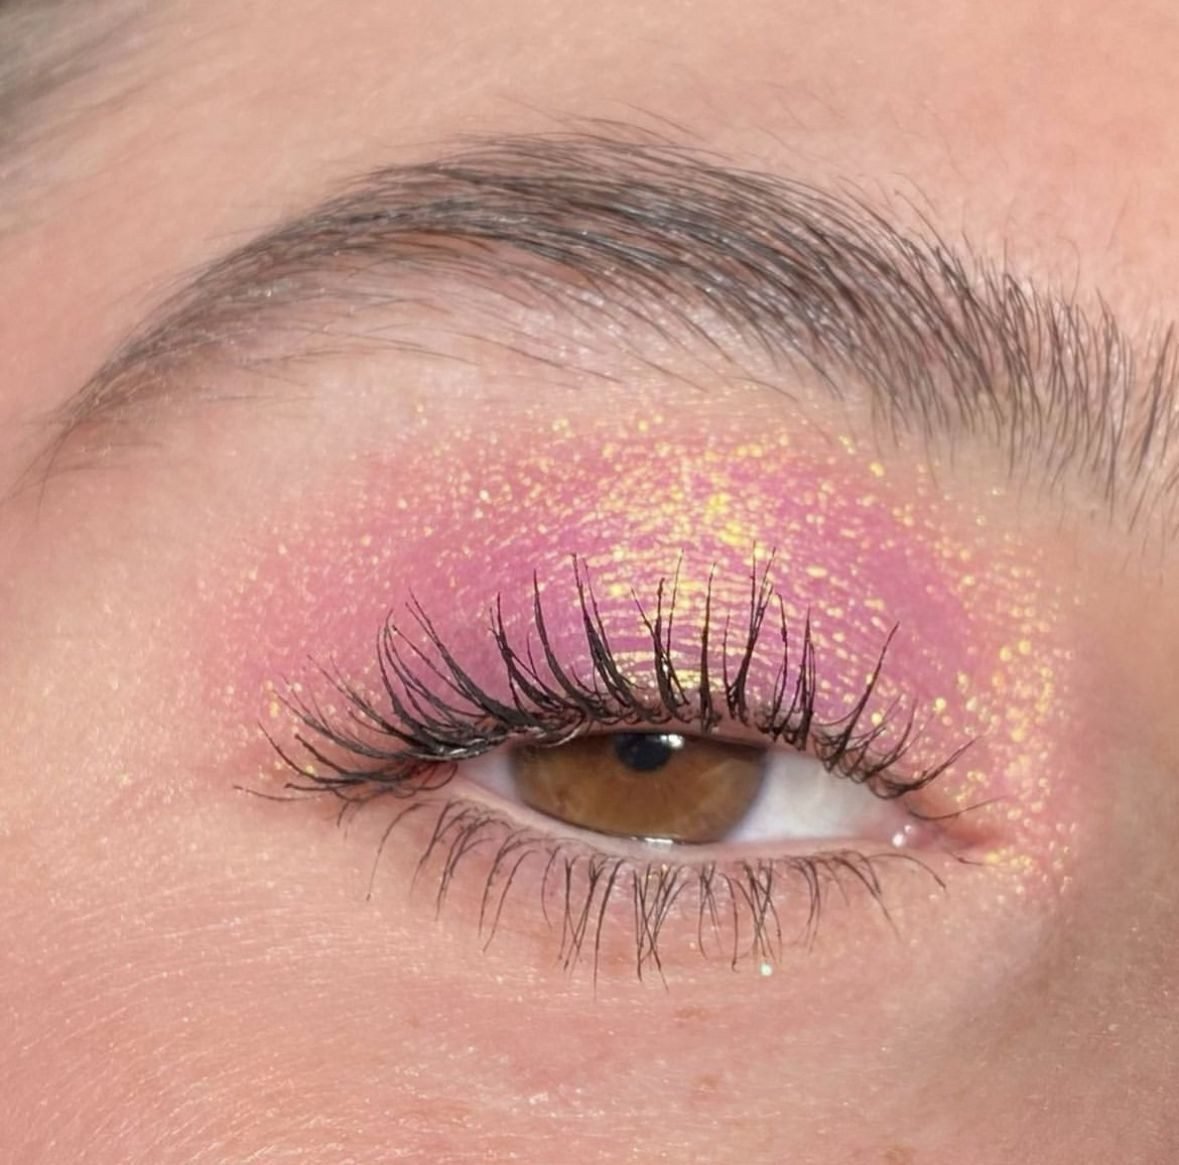
The base is plain on purpose. A soft matte pink wash covers the lid and melts around the eye, and over it sits a layer of iridescent sparkle that cannot decide what colour it is, flashing gold one second and green the next as the head turns. Against a flat matte base the shift is easy to read, the way light plays on water over sand. Wear this when you want people to notice your eyes without being able to say exactly why. Two thin layers of the iridescent topper beat one thick one. Thick layers go cloudy and grey at the edges, while thin layers keep the pink underneath visible and the colour play clean.
14. Glitter Crease Line On A Satin Pink Lid
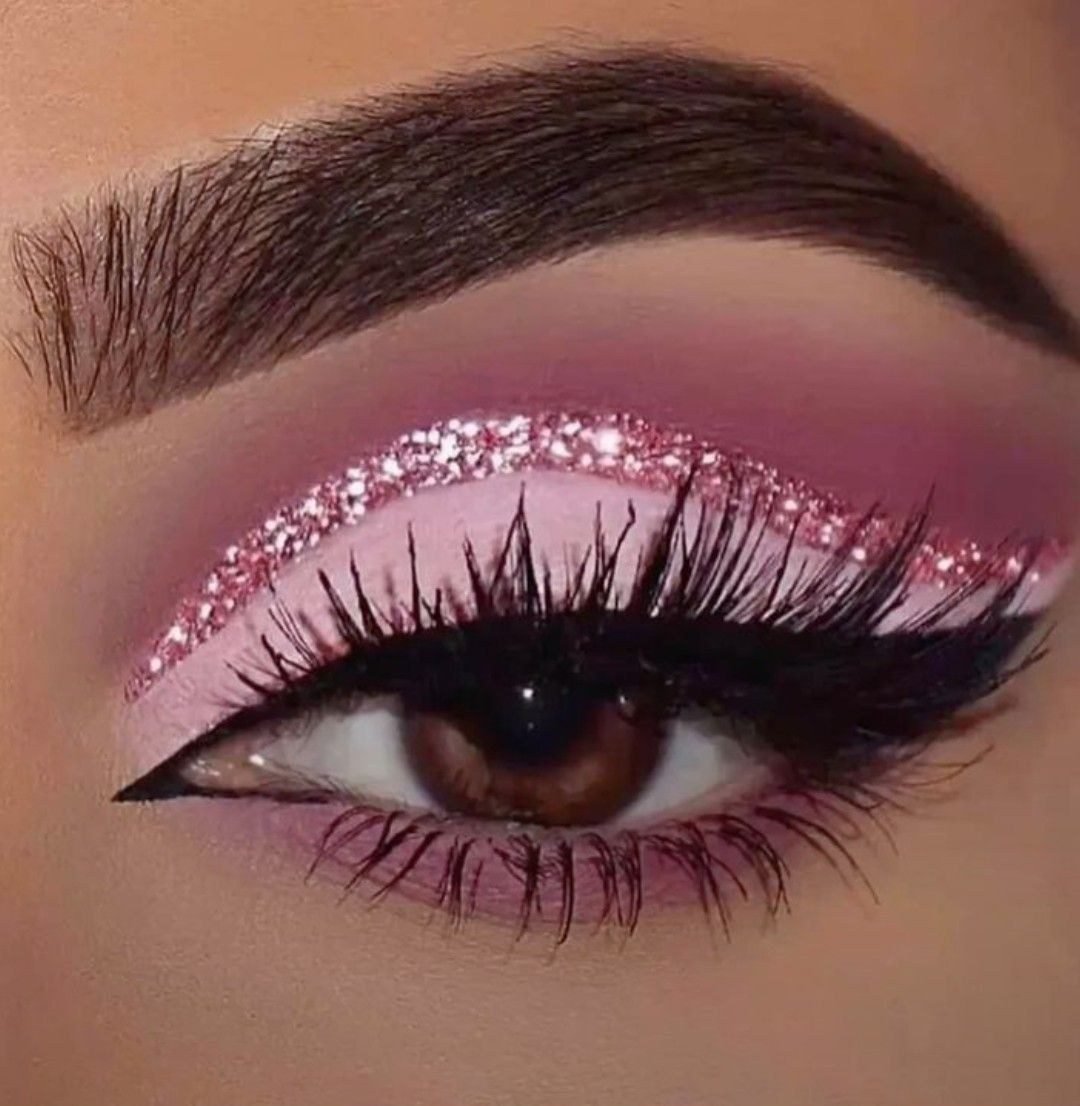
A single arc of chunky pink glitter, drawn through the crease like a headline. The lid below it is pale satin pink, smooth and quiet, and above the arc a mauve matte fades toward the brow, so the glitter line sits between two calm zones and reads twice as bright. Black liner and a pink smudge under the lower lashes finish the frame. The trick is commitment. A crease line that wobbles or fades halfway looks like an accident, while one drawn in a single confident sweep looks like jewellery. Rest your elbow on the table, look down into a mirror, and draw the arc in one go. Fix small wobbles with a pointed cotton bud rather than redrawing the whole line thicker.
| Thin Glitter Line | Chunky Glitter Band |
|---|---|
| Delicate, reads like eyeliner from a distance | Bold, reads as part of the shadow design |
| Easier to keep neat on hooded eyes | Needs a steady hand and a tacky base |
| Suits daytime and smaller lids | Suits evenings and photographs |
15. Full Glitter Lid With A Matte Pink Crease
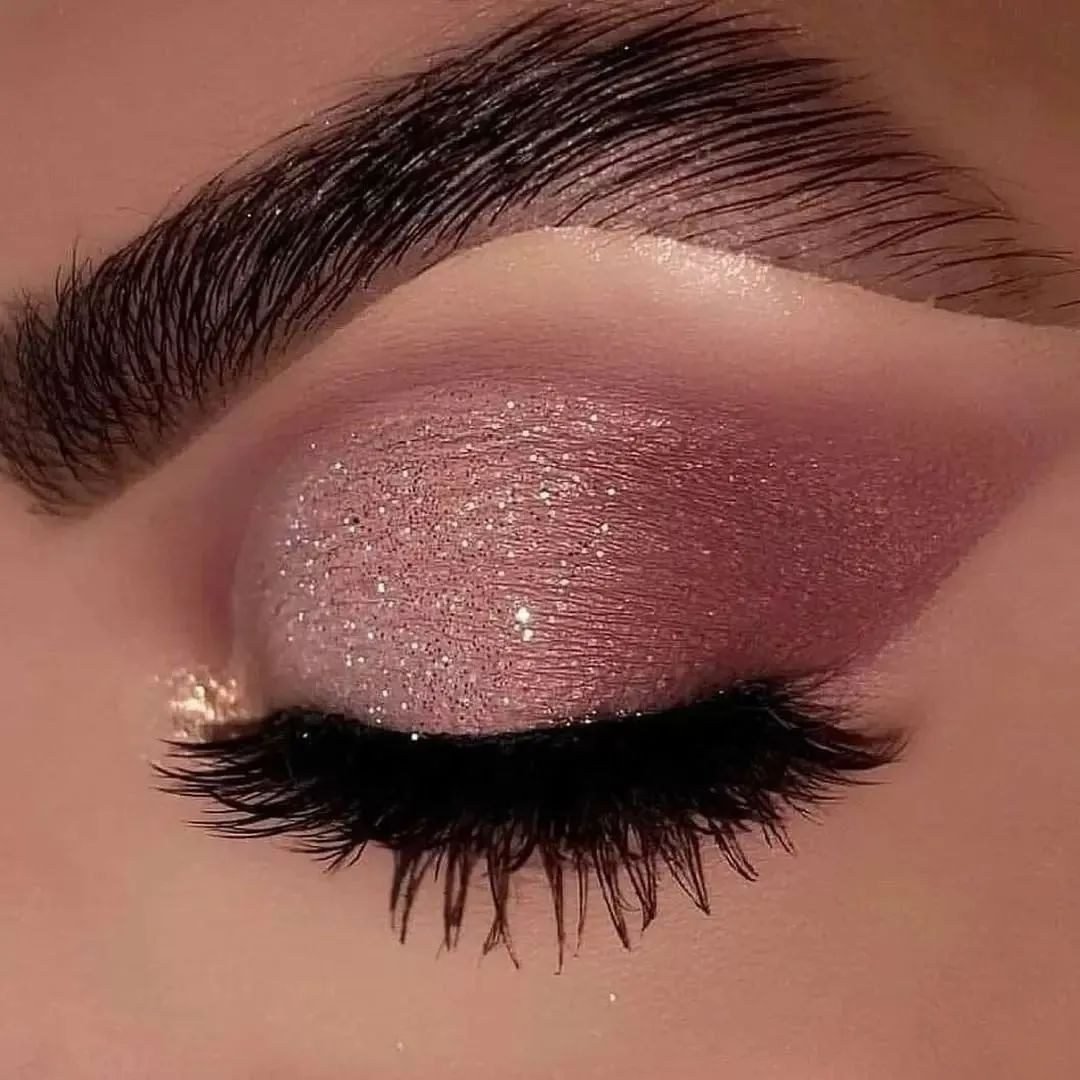
Swap the usual arrangement and the whole look changes character. Here the lid is wall to wall mauve pink glitter, fine and dense, while the crease above it is a soft matte pink brown with no sparkle at all. That matte band is doing more work than it gets credit for. It gives the glitter a border, stops the sparkle from creeping toward the brow, and makes the lid look deeper set than it is. A tiny gold sparkle dot at the inner corner is the only extra. Matte in the crease also means one less thing to fix at midnight, because crease glitter is always the first to crack and wander. If your lids are oily, this is the glitter layout that will still look tidy at the end of the night.
Set the matte crease first so the glitter has a clean border to stop at.
Pack the lid glitter up to the crease line and no further.
Glitter in the crease as well. It cracks, travels, and dulls the contrast.
A shimmery crease shade. The crease must stay flat for the swap to read.
16. Glitter Dots Along The Lower Lash Line
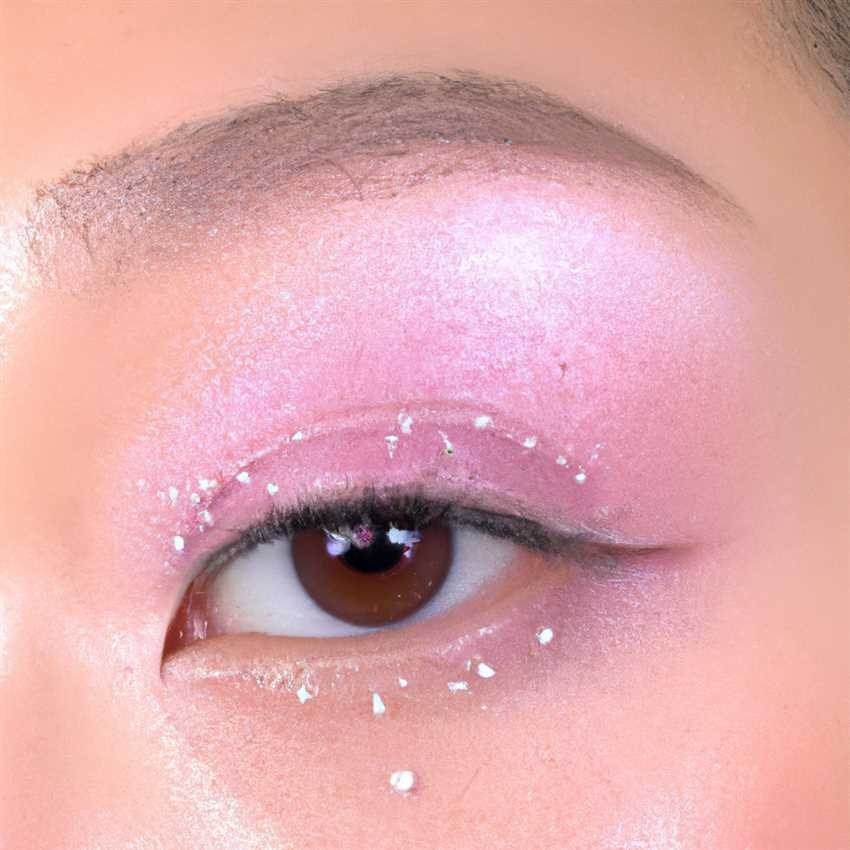
Playful, precise, and much easier than it photographs.
A pale pearly pink wash covers the lid, black liner keeps the top tidy, and under the lower lashes sits a row of small glitter dots, spaced out like tiny lights along a path. Each dot is just a pinhead of glitter placed on a dot of glue, and the spacing is what makes it look deliberate instead of like fallout that got lucky. Keep the dots small and even, and stop the row at the outer corner rather than carrying it up toward the temple. This is a kind look for anyone who finds a full glitter band under the eye too heavy. The sparkle is there, but the skin between the dots keeps it light.
Recreate this look
17. Coral Pink Glitter Sunset
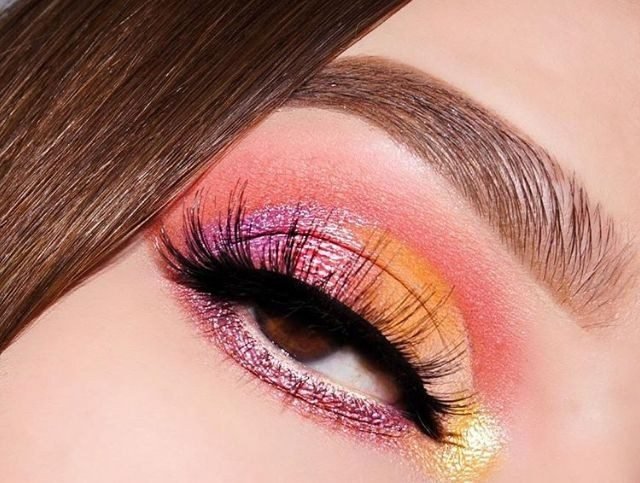
Sunset shades only work when the order is right, and here it runs like the real thing. Gold glows at the inner corner, orange warms the centre of the lid, coral pink takes the crease, and a purple pink glitter is smudged along the lower lash line and the outer lid like the last light catching water. Each colour touches the next with no hard borders, so the eye reads as one gradient rather than four stripes. Sunset blends punish hesitation. Work while each layer is fresh, blend at the borders only, and keep the glitter for the lower line, where it reads as reflection rather than decoration. Brown eyes look almost amber inside this much warmth.
18. Lavender Pink Glitter Blend
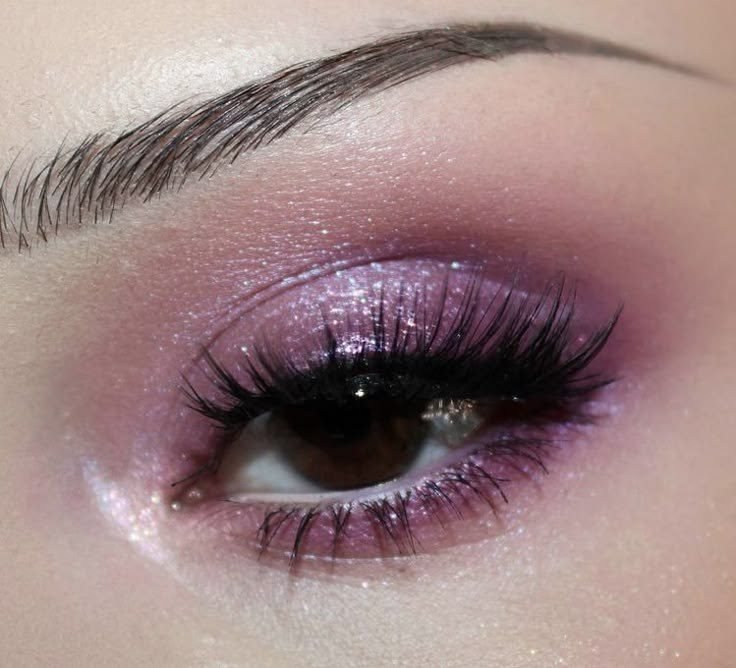
Lavender and pink meet halfway and neither one wins, which is the charm of it. The lid carries a lavender glitter, cool and silvery, while pink warms the crease, the inner area, and the blend at the edges, so the eye keeps shifting between cool and warm as it moves. Edges are smoked out softly all around, with no liner line to harden the mix. Cool blends like this flatter green eyes and fair skin especially, but the pink in the crease is the insurance policy for everyone else, stopping the lavender from reading grey. If your lavender pulls too blue on your skin, add one more layer of pink in the crease rather than more lavender on the lid.
- ▸Lavender glitter owns the lid, pink owns the crease and edges.
- ▸Blend the border between them until no line survives.
- ▸Skip hard liner. A smoky edge keeps the cool tones gentle.
19. Dark Plum Pink Glitter For Night

Daylight would flatten this one, and that is fine. It was built for low light. Dark plum fills the outer corner and crease, a softer pink transition shade sits above it, and the lid itself is packed with pink glitter that stays bright even when everything around it goes deep. In dim rooms and flash photos, that contrast is what keeps the eye visible instead of sinking into shadow. Plum is also kinder than black for a night smokey base. It gives the same depth, but the pink glitter on top stays in the same colour family, so the look reads rich rather than harsh. Keep the under eye clean here. One smudge of plum along the lower lashes is enough, and it stops the look from sliding into costume.
Night makeup needs one bright surface to catch what little light there is. Deep plum builds the shadow, pink glitter holds the light.
20. Glitter Centre Spotlight On A Deep Pink Smokey
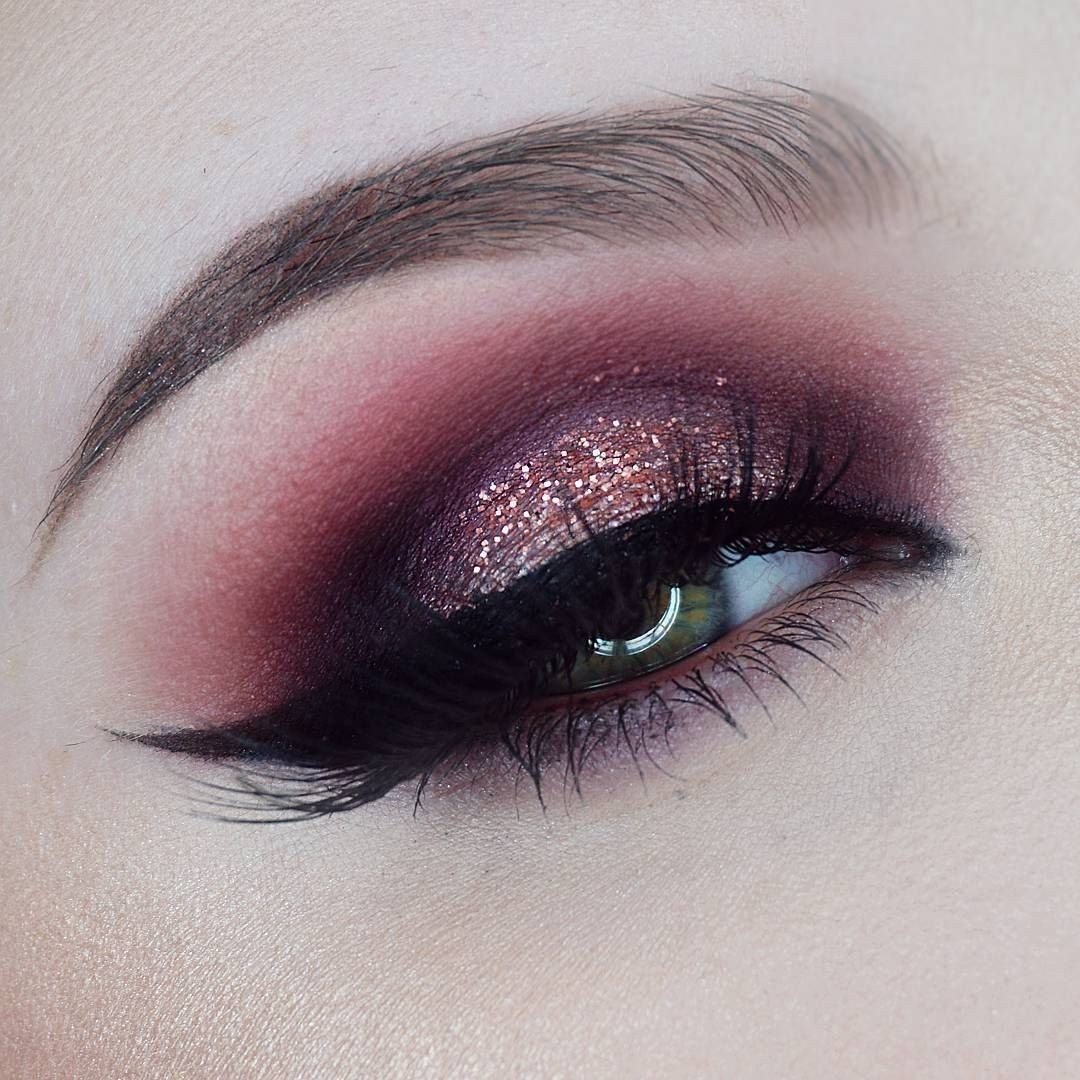
All the depth lives at the edges and all the light lives in the middle. A deep pink smokey is built around the eye, dark at the inner and outer corners and through the crease, and then a bronze pink glitter is pressed onto the centre of the lid only, like a small lamp switched on inside the smoke. The trick makes the eye look rounder and more awake, because the brightest point sits right over the iris. Keep the spotlight small. If it spreads to the corners it stops being a spotlight and becomes a glitter lid with commitment issues. A fingertip is the right tool here, one press, no swiping, and the edges of the patch stay soft on their own.
💡 Quick Tip
Look straight ahead and mark the spot directly above your iris before you start. That is your spotlight centre, and it is rarely where people guess it is.
21. Fine Pink Sparkle Over A Rose Matte Lid
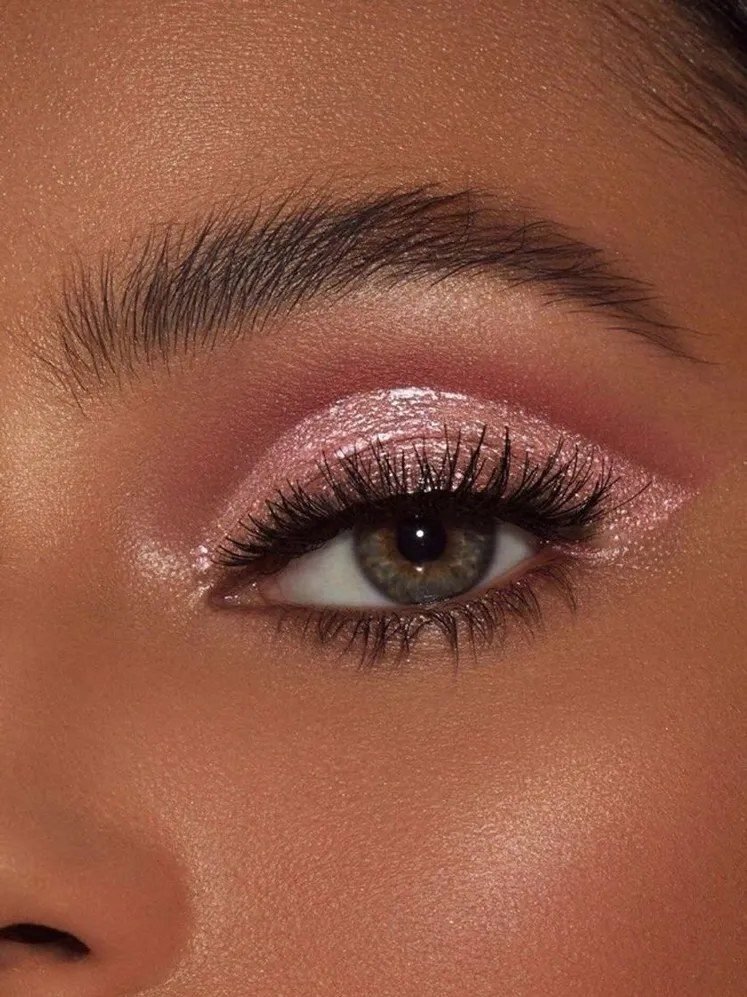
Proof that glitter does not have to change the shape of a look to change its mood. The base here is a plain rose matte, blended the way you would wear it on any ordinary day, and a dusting of fine pink sparkle sits over the top like frost on a petal. In still photos it reads as a glow. In person, every blink throws tiny flashes of light. On deeper skin the rose base holds its own beautifully, and the sparkle adds dimension without lightening the lid or turning it ashy. This is the version to hand a friend who claims she cannot wear glitter. There is no line to draw, no patch to place, just her usual shadow with a sparkle pressed over it.
Rose matte shadow on its own. Soft, tidy, and completely flat in photos.
The same rose matte with fine pink sparkle pressed over it. Same shape, far more life.
22. The Full Sparkle Finish, Glitter Sealed And Set

End where the confidence is highest. Both lids are packed with pink glitter over deep pink shading, the edges are smoked out clean, and a row of tiny gems traces one crease for anyone who gets close enough to notice. Skin is finished and glowing, lashes are full, and every part of the look looks deliberate, sealed, and ready to be photographed from any angle. A finish like this is built in layers and locked at the end: glitter glue under the sparkle, a fine mist of setting spray over the top, and a clean brush kept aside for sweeping away any fallout before it sets into the base. Do the eyes first and the skin second, always, when the glitter is this generous. Your future self, wiping sparkle off finished foundation, will thank you.
A full sparkle finish is not more glitter. It is glitter with a plan: glue under it, spray over it, and clean edges around it.
Twenty two looks later, one pattern should be clear. Glitter works when it has a job: a line in the crease, a patch at the inner corner, a spotlight at the centre of the lid. Pink does the heavy lifting underneath, and the sparkle just catches the light on top. Pick one placement, keep the rest of the eye calm, and press the glitter on with a fingertip so it stays where you put it. Every pink eye makeup with glitter look here can be copied with a small palette and a pot of loose glitter. Save this list for the next night you want your eyes to do the talking.