16 Pink Eye Makeup Tutorial Step By Step That Actually Works
Pink shadow has a reputation for going wrong fast, sliding into bruised or sore looking territory by the second brush. Almost every failed attempt breaks down in the same place: the order. Colour dumped on in one go, liner before blending, lashes before the lower line is even touched. This pink eye makeup tutorial slows the whole thing down into sixteen small steps, and each step gets its own photo so you can see exactly what that stage should look like on a real eye. You will prime first, float on a pale base, build the crease in thin layers, and only reach for liner, lashes, and blush once the colour is behaving. The tools stay simple. One pink family in three depths, a fluffy brush, a flat brush, and a few cotton buds will carry the full build. Work through the steps in order the first time you try it. After that, the sequence lives in your hands, and you can start skipping the stages your own eyes do not need.
1. Step 1: Prime And Set The Lid
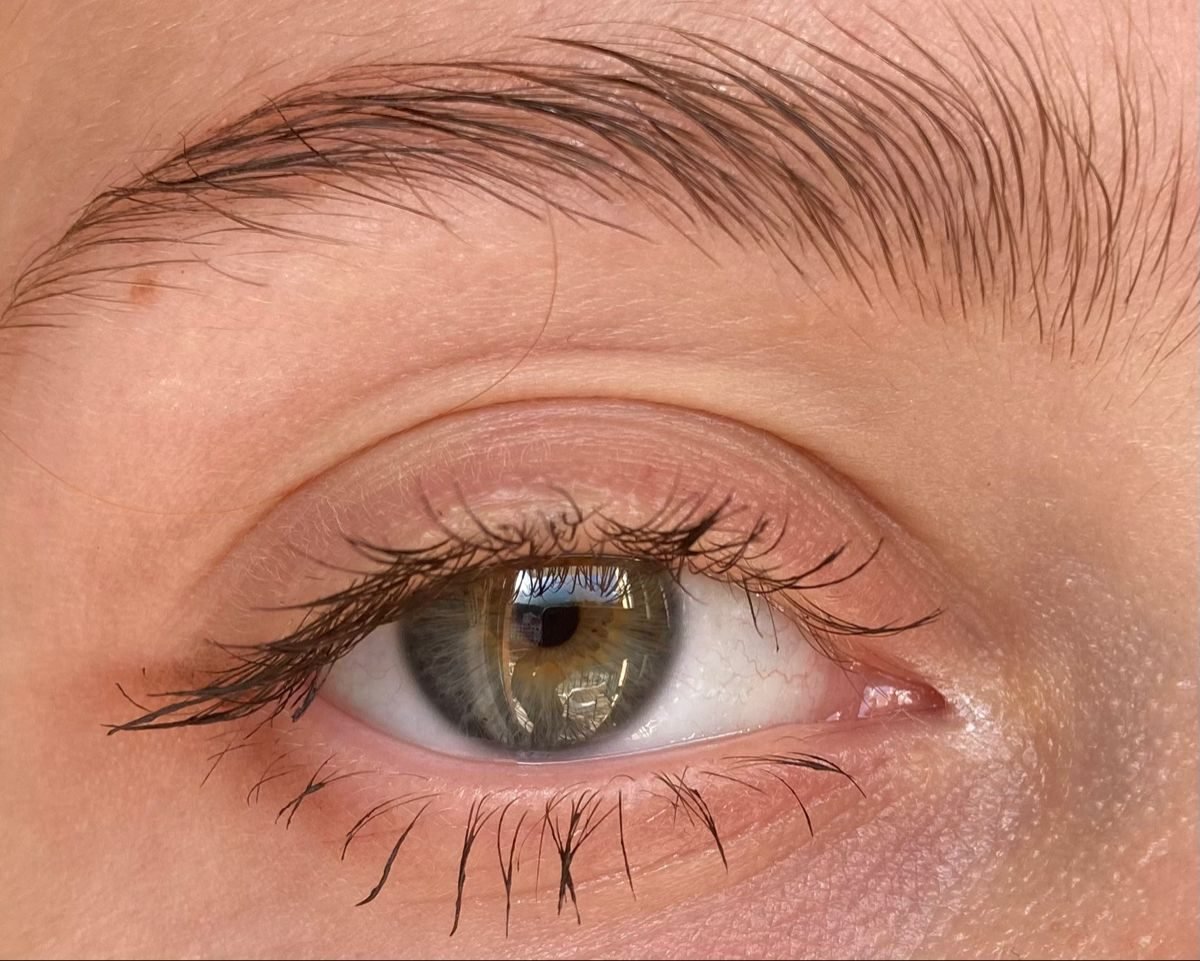
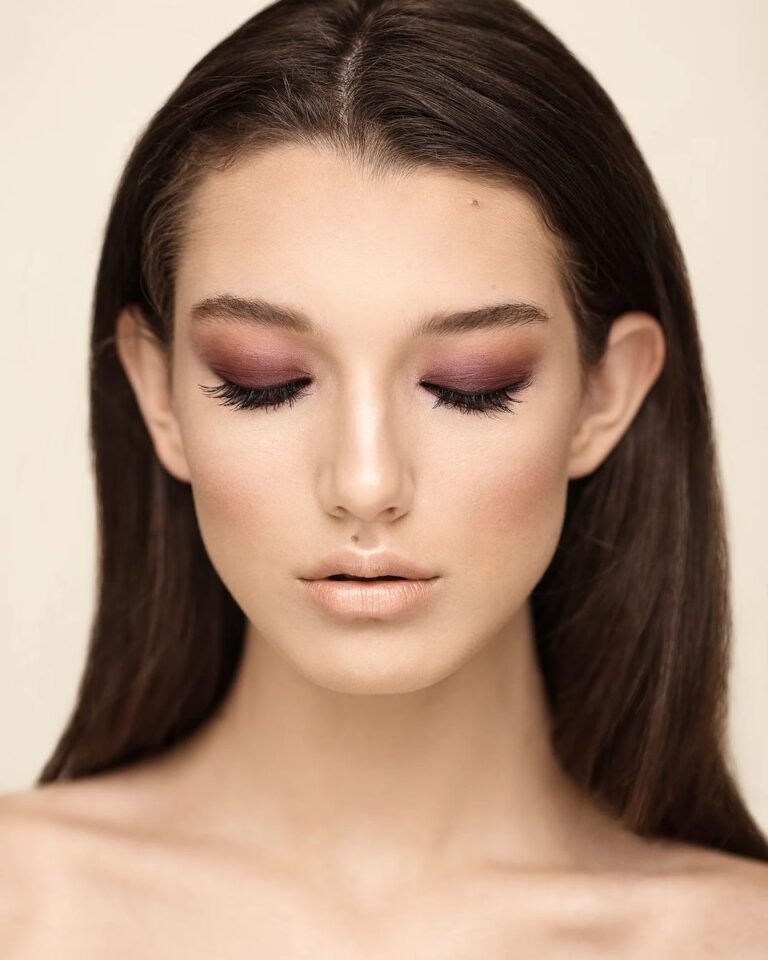
Everything after this leans on the surface you build here. Look at the eye in this photo: the lid is bare, smooth, and even in tone, with no shadow, no liner, and no shine pooling in the crease. The lashes carry only a whisper of mascara. That flat, calm finish is what a primed lid should look like before colour ever touches it. Pat a pea sized amount of eye primer, or a thin layer of concealer, from the lash line up to the brow, then set it with a dusting of translucent powder. Give it a full minute to settle. Skin oil is the main reason pink turns patchy or slides into the crease by midday, and this thin barrier keeps oil and pigment apart. It also cancels the redness and fine veins most lids have, so the pink you lay down next reads true instead of muddy. Keep the layer thin and dry to the touch. A wet, thick base grabs shadow in dark patches that blending cannot rescue later.
💡 Quick Tip
Do your eyes before foundation. Pink fallout wipes off bare skin in seconds, and your base stays clean for the steps that follow.
2. Step 2: Lay The Pale Pink Base
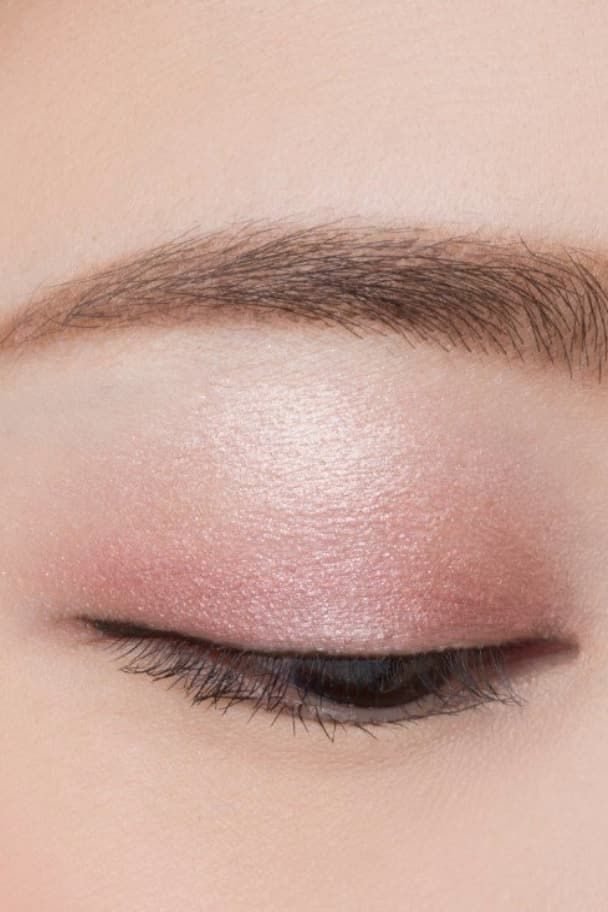
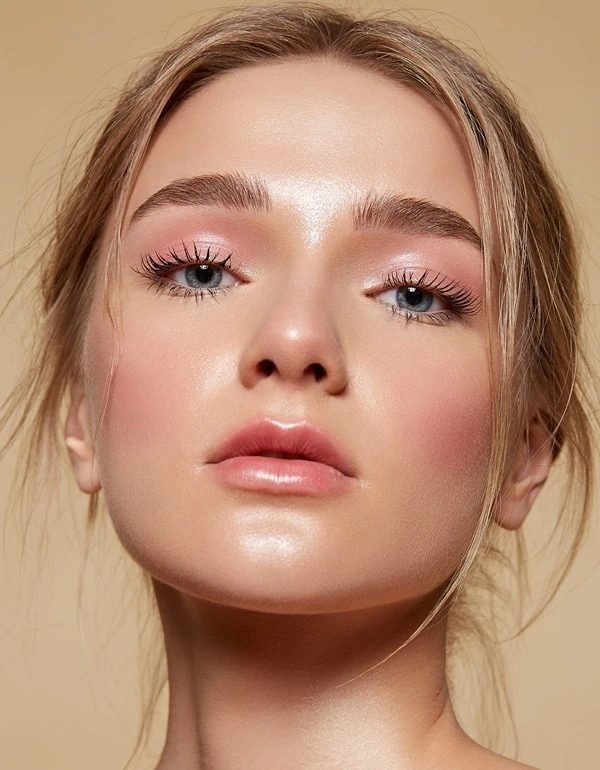
Colour starts here, gently. The closed eye in this photo wears one sheer wash of pale satin pink across the whole lid, deepening only slightly where it meets the lash line. Skin still shows through at the edges, and that softness is exactly right for a base. Sweep the palest pink in your set over the entire lid with a large fluffy brush, from the lashes up toward the brow, using slow side to side strokes. This wash does three quiet jobs. It tints the lid so later shades have something to melt into, it warms the whole eye area, and it shows you the true shape of your lid before any depth goes on. One pass is enough. Where the colour looks uneven, blend the edge out rather than packing on more, because a base that gets heavy stops behaving like a base and starts fighting every layer above it. Hold the brush near the end of the handle. A lighter grip lays down less pigment, and this step is about a veil of colour, nothing stronger.
3. Step 3: Build The Rose Crease

Photo: @favoriteplace_ via Instagram
Depth arrives in this step, and the crease is where it lives. In the photo, a matte rose has been worked through the socket line and washed over the lid, growing deeper toward the lashes while the brow bone stays clean. That band of mid pink is what gives the finished eye its shape. Load a smaller, denser blending brush with your mid rose shade, tap off the excess, and place the colour right into the crease with the eye open, looking straight ahead. Work in short windshield wiper strokes, then tiny circles at the outer third where most people need the most depth. Build in two or three thin passes instead of one heavy one. Thin passes blend into each other and leave no hard top edge. One heavy pass stamps a stripe you will chase for ten minutes. Keep the colour below the brow bone and inside the outer corner. The base wash from step two should still peek through near the inner lid, and that pale window is what keeps pink looking fresh rather than flat.
Find the crease with your eyes open, fingertip resting in the socket line.
Lay the rose in the outer half of the crease first, where depth matters most.
Drag what is left on the brush through the inner crease, then soften the top edge.
4. Step 4: Deepen The Outer Corner
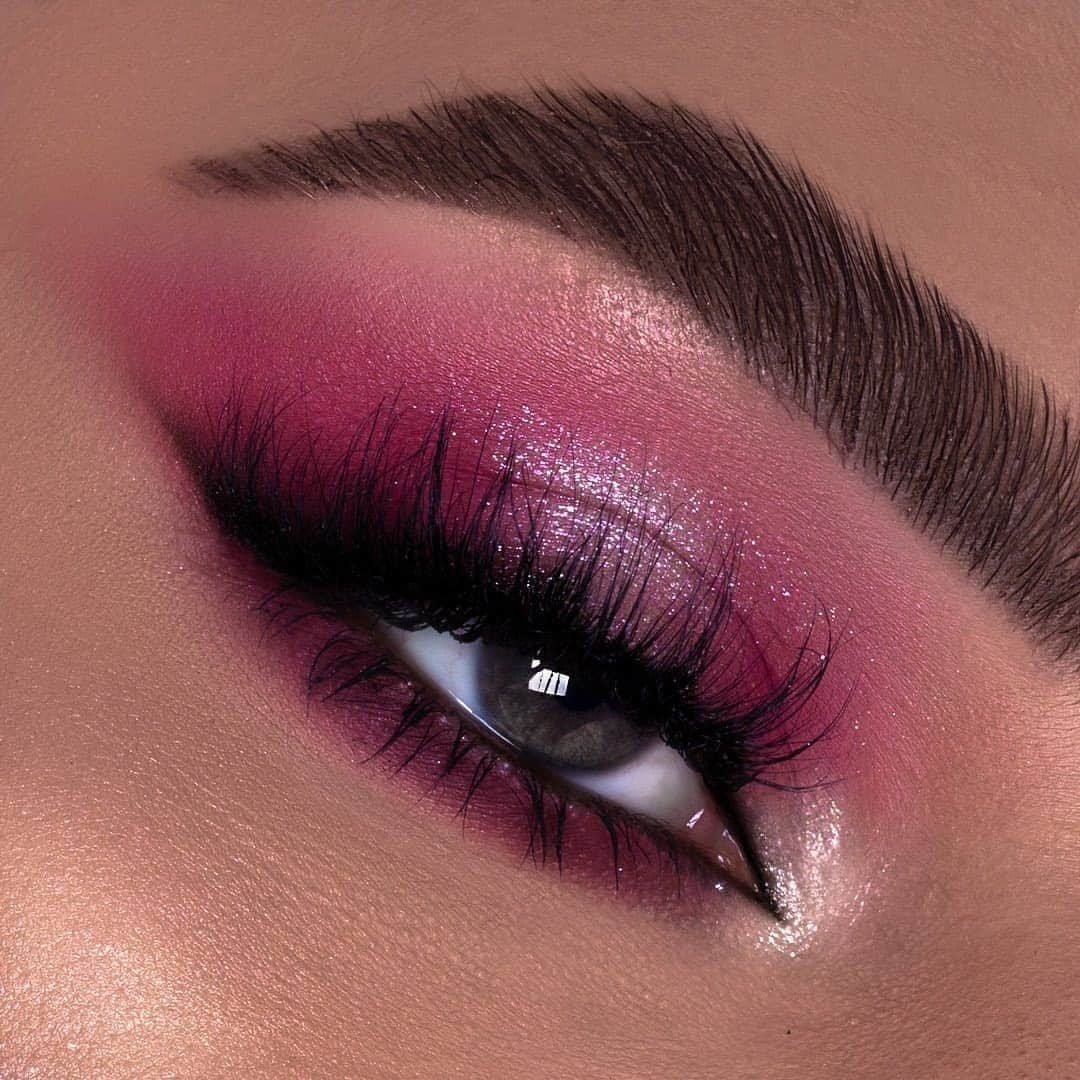
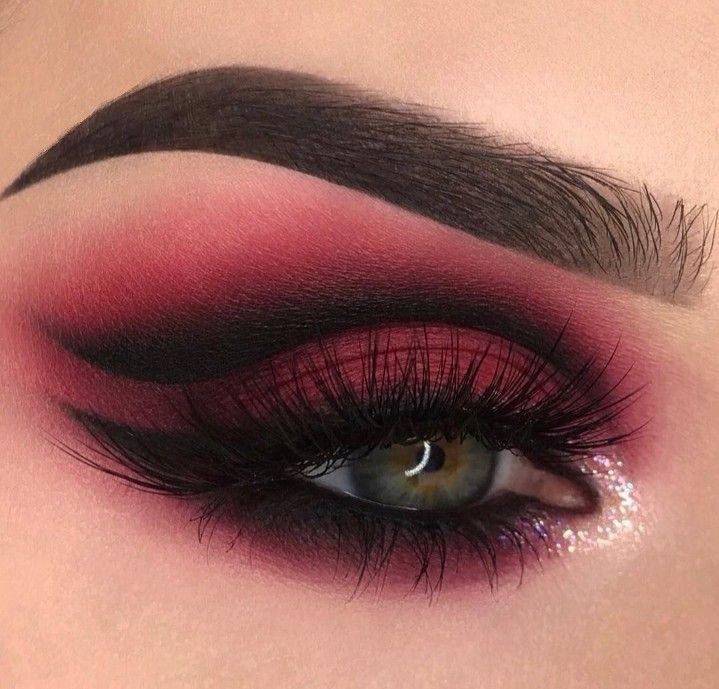
Now the eye gets its anchor. The photo shows the deepest magenta of the set packed into the outer corner and along the lash line, fading as it travels inward, with a fine glitter sheen catching the light on top. Notice how the inner half of the lid stays comparatively light. That contrast is the whole trick. Take your deepest pink or magenta on a small flat brush and press it into the outer third of the lid, right against the lashes, in a rough V shape. Press, do not swipe. Pressing keeps the pigment where you put it, while swiping drags colour across the pale work you protected. Then take a clean blending brush and soften only the inner edge of the dark patch, so it melts into the rose crease from step three. Two rules guard this step. Keep the dark shade off the inner half entirely, and keep it low, hugging the lash line rather than climbing toward the brow. Depth that sits low and outward lifts the eye. Depth that spreads everywhere just looks heavy.
Press the deep shade on with a flat brush, in small stamps.
Blend only the inner edge of the dark patch, in tiny circles.
Dragging deep magenta across the whole lid in long strokes.
Letting the dark shade climb above the crease toward the brow.
5. Step 5: Pack The Pink Shimmer Centre
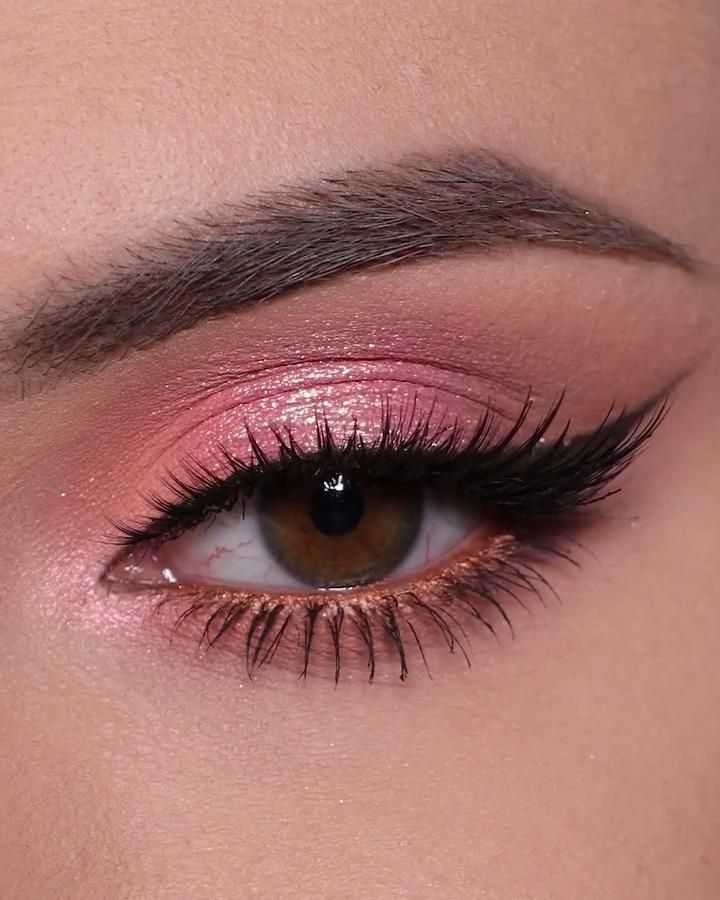
Here is where the look wakes up. The centre of this lid carries a bright, light catching pink shimmer, packed on densely, while the matte rose from the earlier steps frames it at the crease and corners. A coppery line under the lower lashes warms the whole thing up. Shimmer placed dead centre does something matte colour cannot: it pushes the middle of the lid forward, so the eye looks rounder and more awake. Use a flat brush or a clean fingertip, pick up your brightest pink shimmer, and press it onto the middle third of the lid in firm pats. Fingertips usually win here, because skin warmth melts the shimmer into a smooth sheet instead of a dusty sprinkle. Keep the shimmer inside the centre panel. If it creeps into the crease, the depth you built disappears and the eye goes flat again. One more pat in the exact centre, right above the iris, gives the strongest flash when you blink. Build it in two thin layers, and the finish stays smooth instead of crumbly.
Pack the centre like this
6. Step 6: Brighten The Inner Corner
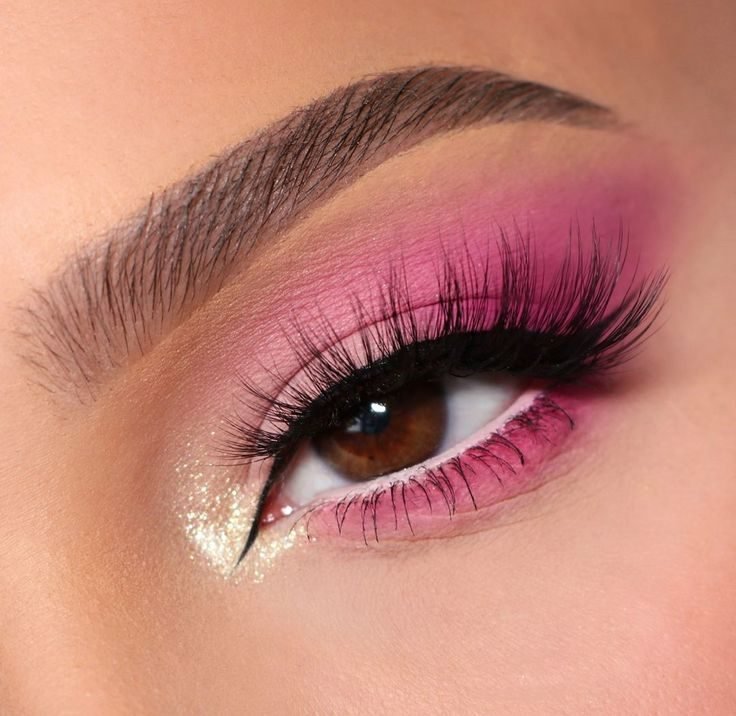
A tiny point of light at the inner corner changes the whole balance of a pink eye. In this photo, a gold glitter highlight sits right at the tear duct, blazing against the hot pink around it, and the eye instantly looks wider and more awake. Pink worn alone can pull the inner corner into shadow, which is part of why it sometimes reads as tired. The bright dot fixes that in five seconds. Take your lightest shimmer, a pale champagne or soft gold, on the tip of a small pencil brush or a cotton bud, and dot it precisely at the inner corner, wrapping it a fraction onto the inner third of the lower lash line. Small is the operative word. You are placing a highlight, not another eyeshadow. If the dot spreads up the side of the nose or across the lid, wipe the edge back with a clean bud. On deeper pink looks like this one, a warm gold keeps the brightness friendly. On pale, cool pinks, a silvery white does the same job.
7. Step 7: Blend The Edges Seamless
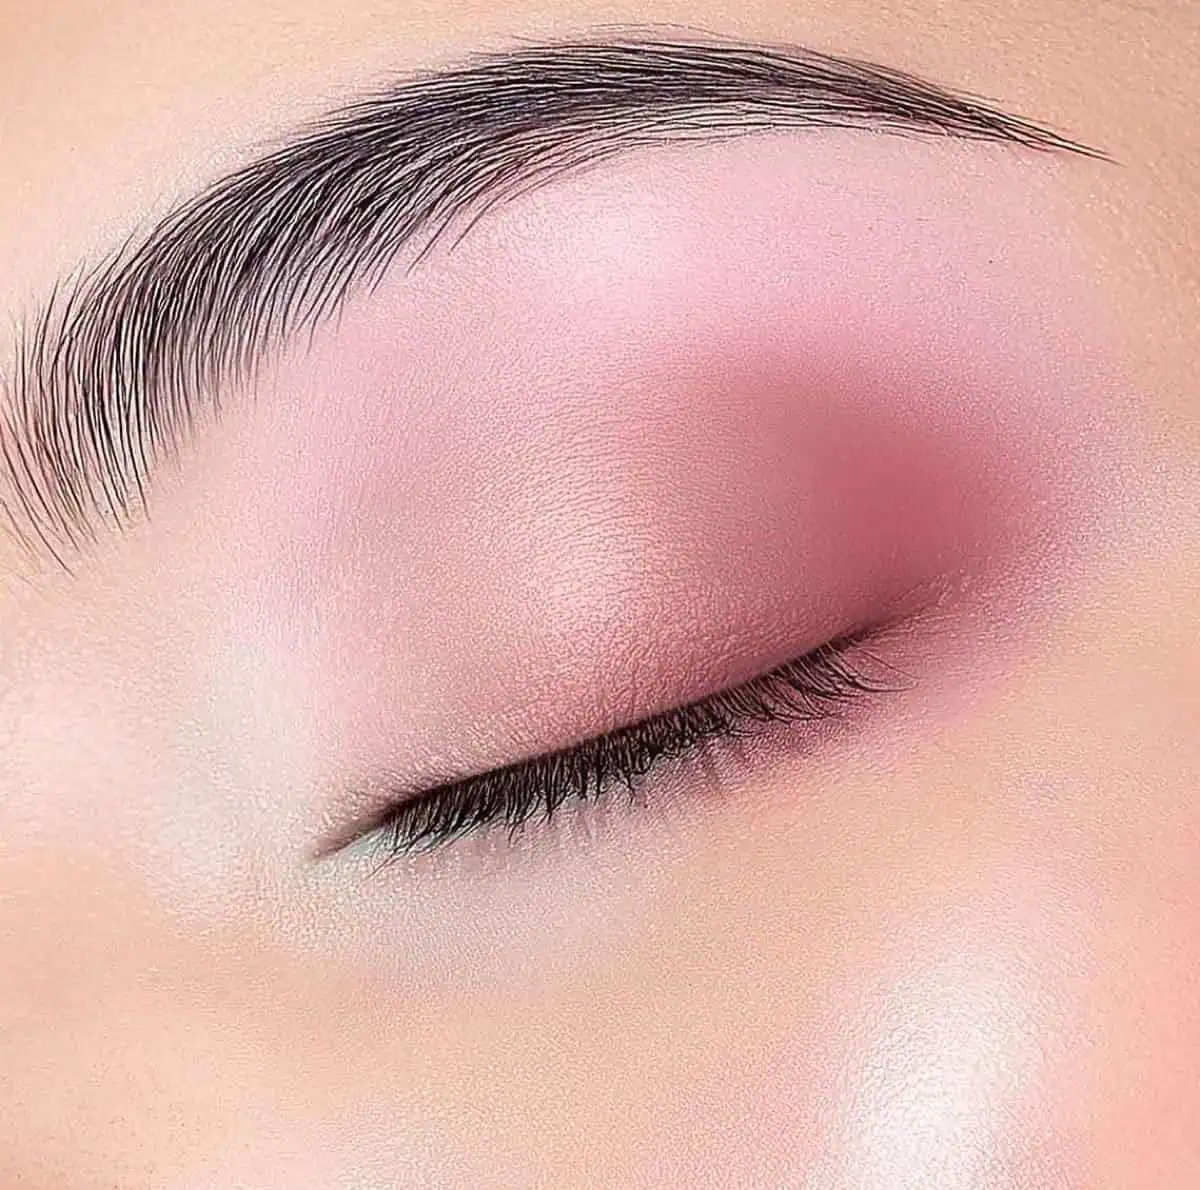
Before any liner goes on, the shadow has to lose its edges. Study the closed eye in this photo: the satin pink deepens near the lash line and then dissolves into skin so gradually that you cannot point to where the colour stops. No stripe at the crease, no hard line at the outer corner, nothing sitting on the surface. That melt is a separate step, not something that happens by accident while you apply. Take a completely clean, fluffy blending brush, no product on it at all, and work in small circles along every border of the shadow: the top of the crease, the outer corner, the inner fade. Use the lightest pressure you can manage, letting the tips of the bristles do the work. Where two shades meet, blend along the seam rather than across it, so the shimmer centre and the deep corner stay in their own zones. Stop the moment the borders go soft. Over blending is real, and it drags all your careful placement into one flat pink smear.
⚠️ Watch Out
A dirty brush re deposits colour while you blend, so the edges never soften. Keep one brush in your kit that only ever does this job.
8. Step 8: Draw The Liner And Flick The Wing
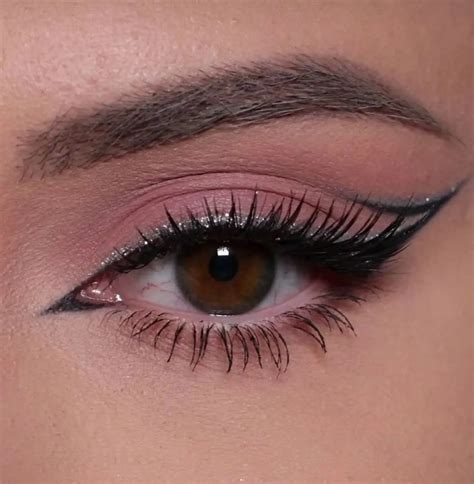
With the shadow fully blended, a line of black gives the softness something to lean against. This photo shows the classic placement: a neat black line running the full length of the upper lashes, an extended point at the inner corner, and a clean flick lifting off the outer corner. Against the mauve pink, the line reads crisp without eating the colour. Start with the thinnest line you can draw, resting the pen or brush tip right in the roots of the lashes, and work in short connected strokes from the inner corner outward. Thin at the roots is what matters, because a line that floats above the lashes leaves a pale gap that shows every time you blink. At the outer corner, follow the angle of your lower lash line upward and flick out in one confident stroke, then join it back to the main line and fill the small triangle. Build thickness only if your eye shape asks for it. On hooded or smaller lids, keep the line whisper thin and the flick short.
Blended pink with a soft, undefined lash line. Pretty, but the eye has no frame and the lashes look sparse.
One black line in the roots plus a short flick. The lash line looks twice as dense and the pink reads deliberate.
9. Step 9: Smoke The Lower Lash Line Pink
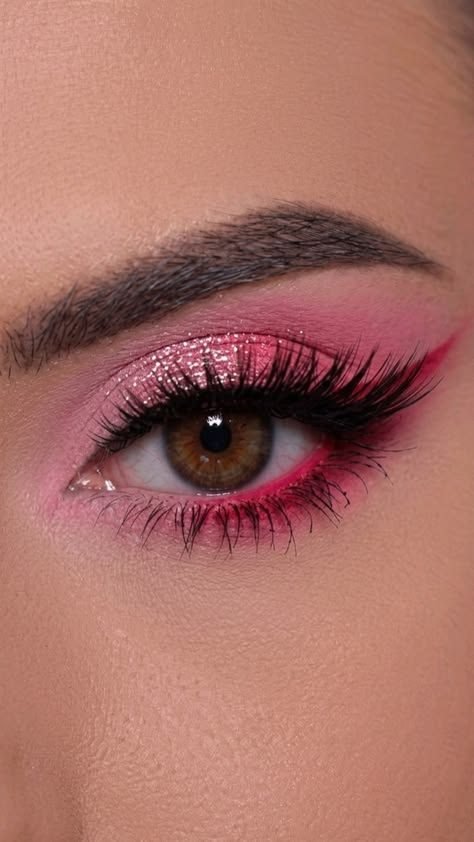
An eye with colour only on top looks unfinished, like a sentence that stops halfway. The fix takes twenty seconds: run pink under the lower lashes, the way this photo does with a bold hot pink smoked along the lower line and into the waterline. The top and bottom of the eye suddenly belong to the same look. Use the mid rose from your crease step, or the deep shade if the look is dramatic, on a small flat brush or a pencil brush. Run it directly under the lower lashes from the outer corner inward, stopping around the inner third where your bright corner highlight lives. Keep the line hugged close to the lashes and then blur the lower edge with a clean brush so it smokes out instead of sitting like a stripe. Depth should mirror the top: darkest at the outer corner, fading as it travels in. A few honest notes on placement:
- ▸Keep the band narrow, about the width of the brush, so the eye stays lifted.
- ▸Connect the lower colour to the outer corner so there is no bare gap at the edge.
- ▸Leave the inner third bare or bright, or the eye starts to look sore.
10. Step 10: Curl And Coat The Lashes

Lashes do more for a pink eye than most people expect, because pink on its own can make lashes look washed out and sparse. This photo shows the mascara result to aim for: upper and lower lashes separated, dark, and fanned, with a soft brown wing behind them and the pink still clearly in charge. Start with the curler, because curling after mascara snaps lashes. Squeeze gently at the roots for ten seconds, then once more halfway up the lash for a rounded lift rather than a sharp bend. Then take mascara right into the roots and wiggle the wand side to side as you pull up, which coats each lash fully instead of just painting the tips. Two thin coats beat one thick one, and a coat on the lower lashes ties the smoked lower line from step nine into the look. If a clump forms, comb through with a clean spoolie while the coat is still wet. Skip the extra coat on the outer corners only. Even coverage keeps the eye balanced.
Dark, lifted lashes give pale pink a frame. Without them the colour floats. With them, the whole eye reads finished.
11. Step 11: Add Wispy Lashes For Lift
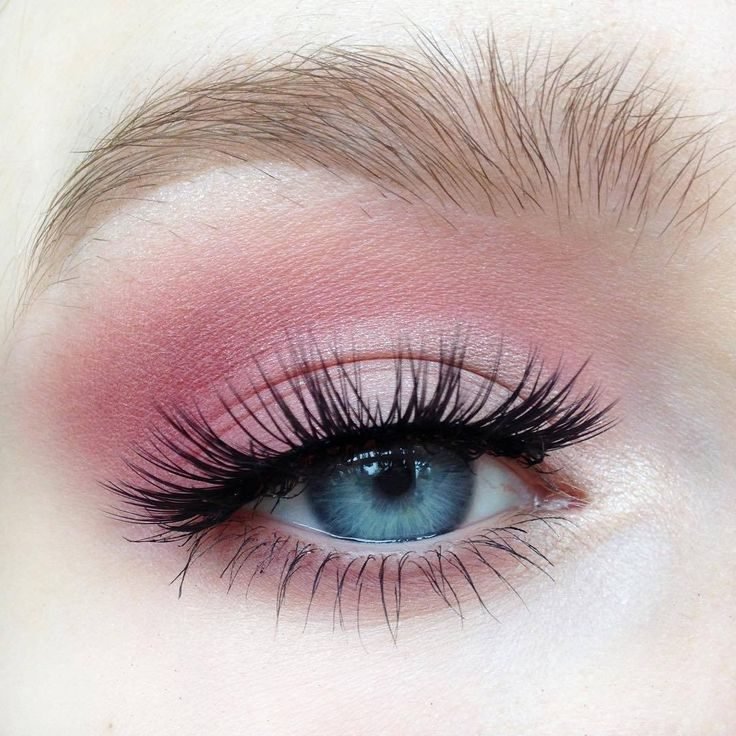
For days when mascara is not enough, a wispy strip lash does the heavy lifting. Look at the lashes in this photo: long, feathery, and separated, with the fibres longest toward the outer half, laid over a matte pink gradient and a bright blue eye. The style matters more than the drama. Wispy, uneven fibres read as an upgrade of your own lashes, while a solid black wall of lash reads as costume from across the room. Measure the strip against your eye and trim from the outer end, never the inner, so the delicate short fibres stay where your own lashes are shortest. Run a thin line of glue along the band, wait until it turns tacky, then set the strip as close to your natural lash line as you can, centre first, then corners. Pinch the false and natural lashes together with your fingertips or the back of tweezers so there is no visible gap. A final whisper of mascara over the join, and only the join, blends the two sets into one.
| Mascara only | Wispy strip lash |
|---|---|
| Best on days when your own lashes are long and just need darkening. | Best when lashes are short, straight, or sparse at the outer corner. |
| Takes two minutes and removes with your normal cleanser. | Takes five minutes and needs glue, trimming, and a steady hand. |
12. Step 12: Clean The Edges And Sharpen The Shape
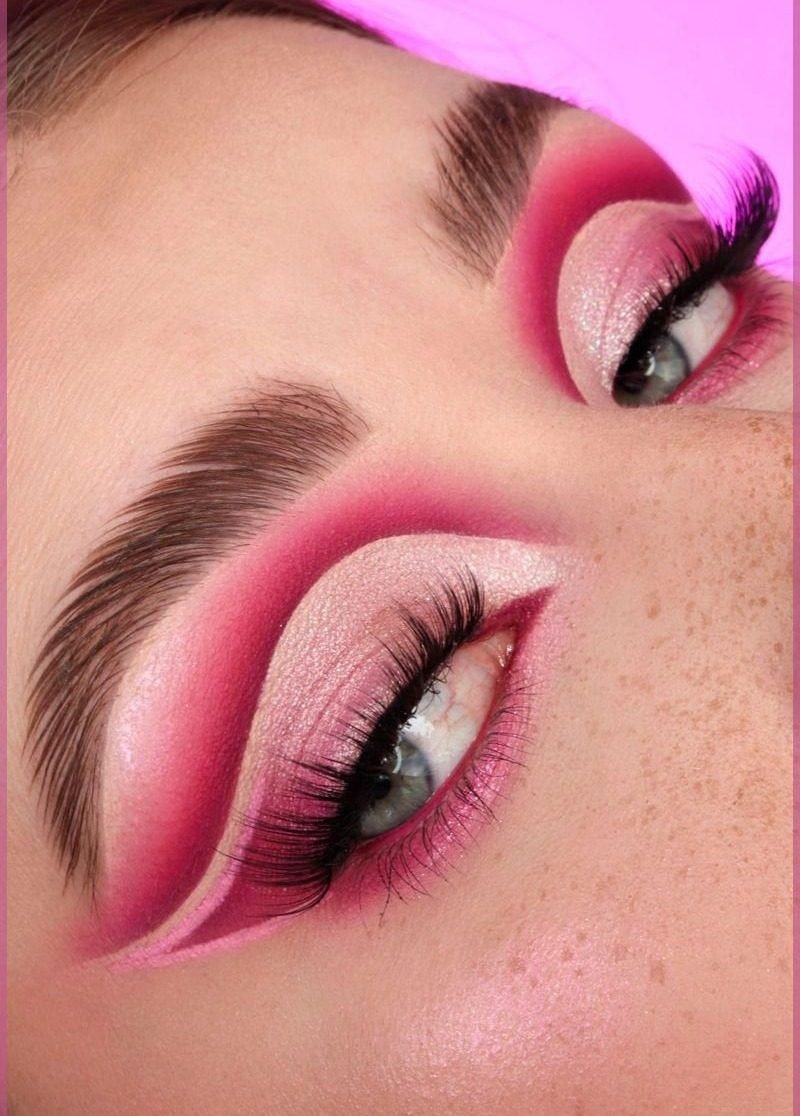
Soft blending was the rule for the everyday version of this build. This step is the opposite move, used when you want the pink to look deliberate and graphic. The photo shows why it works: a carved cut crease with a razor clean line, a pale shimmer lid below it, and the outer shape wiped into one sharp point. Every border was cleaned on purpose, after the colour went on. The tool is humble. Fold a makeup wipe or a cotton bud dipped in micellar water and run it along the outer edge of the shadow, from the outer corner of the eye toward the end of the brow, in one straight sweep. That single line is the frame of the whole look, and sharpening it makes even simple pink read as skilled. For a cut crease edge like the one pictured, trace the crease with concealer on a flat brush and set it with the pale shimmer. Work slowly, in small strokes. You can always take more away, but colour wiped off has to be rebuilt.
13. Step 13: Balance With Blush In The Same Family
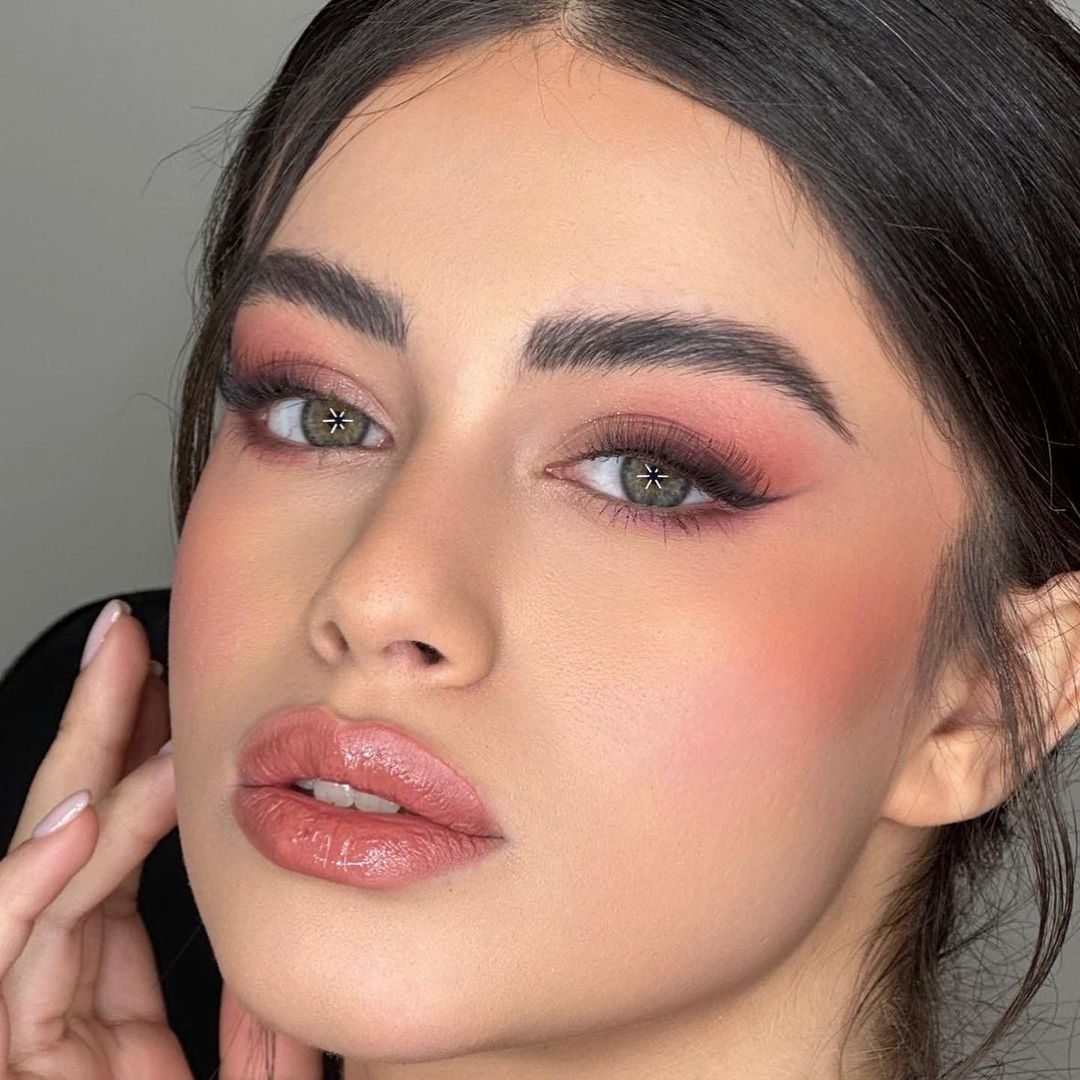
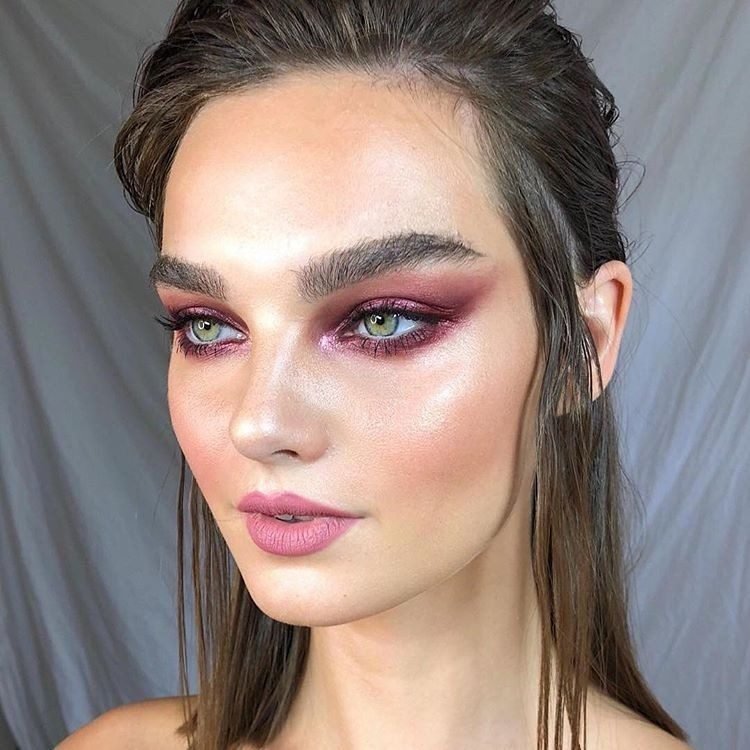
An eye look does not end at the eye. In this full face photo, the rose pink on the lids is answered by a strong wash of pink blush high on the cheeks and a rose lip in the same family, and the whole face reads as one planned look instead of eyes pasted onto bare skin. Pink shadow with no colour on the cheeks can look unfinished, because the eye colour has nothing to echo it. Take the same pink family as your crease shade, in blush form, and sweep it over the apples of the cheeks, blending upward toward the temples. Placing blush a touch higher than feels natural connects it to the eye area and lifts the face. Match the depth to the eyes: a soft everyday pink eye needs only a wash, while a deep dramatic eye can carry the stronger draped blush in the photo. If you go too far, buff the edges with your foundation brush, using whatever product is left on it, and the blush settles back into the skin.
Tie the face together
14. Step 14: Check The Look In Daylight

Bathroom light lies, kindly but constantly. This selfie, taken in hard direct sunlight, shows what daylight does to a pink look: every blend line is visible, the shimmer reads brighter, the blush shows its true depth, and nothing can hide. Before you set anything, take your finished face to a window or step outside for thirty seconds and look properly. Daylight answers three questions that indoor light cannot. Is the pink balanced on both eyes, or did one side get more depth? Does the blush still match the eyes at full strength, or does it need one more sweep? And does the shimmer centre look smooth, or has it turned patchy where the light hits it? Fix what you find while the makeup is still fresh and movable: a clean brush softens a hard edge, a fingertip pat rebuilds a faded centre, a tissue pressed over blush lifts the excess. Thirty seconds in real light saves the embarrassment of catching your reflection in a shop window at noon and finding a different face than the one you left home with.
Check both eyes side by side in the brightest light you can find.
Fix edges and centres now, while the colour still moves.
Judging the look only under warm bathroom bulbs.
Adding more colour before checking. Daylight usually shows you already have enough.
15. Step 15: Set And Finish
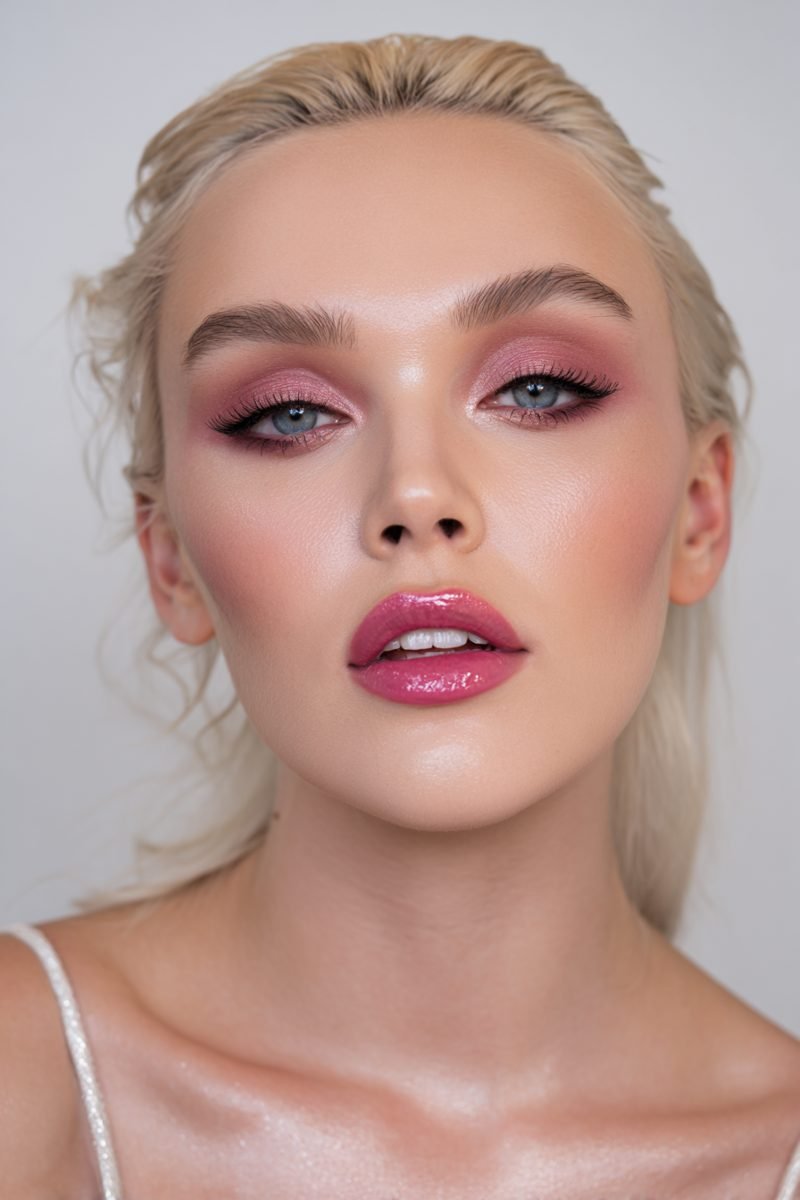
Only now, with the look checked in honest light, do you lock it down. The portrait here shows a properly finished face: rose pink smokey eyes with clean lashes, skin set to a soft glow rather than a flat matte, blush in place, and a glossy pink lip tying the colour story shut. Nothing looks powdery or overworked, and that restraint is the finish line. If your skin runs oily, press a light dusting of translucent powder through the T-zone and under the eyes, and leave the cheeks alone so the blush keeps its life. A fine mist of setting spray, held at arm’s length, melts the powder into the skin and takes away the freshly dusted look. Keep the spray away from the eyes themselves if your shimmer is loose or glitter based, since a direct hit can dull the sparkle you packed on in step five. Finish with the lip last, after any spray has dried, so the gloss stays glossy. Then stop. The most common way to ruin a finished pink look is one more adjustment.
📌 Good To Know
Carry a cotton bud and a mini of your crease shade. A thirty second edge cleanup at midday makes a morning look read freshly done.
16. Step 16: The Finished Pink Eye

This is the payoff the fifteen earlier steps were building toward. One eye, finished: a bright pink shimmer lid that catches the light, warm brown depth smoked through the crease and outer corner, a black line tight to the lashes, and full dark lashes above and below. Every layer from the build is in there, and none of them is shouting over the others. Stand back and read your own finished eye the same way. The base keeps the colour even, the rose crease gives the shape, the deep corner anchors it, the shimmer centre brings the light, the liner and lashes frame it, and the lower line balances the whole thing. If one element looks off, you now know exactly which step owns it, and a fix takes a minute instead of a full restart. Wear it a few times and the sequence will compress itself. What took sixteen steps on paper becomes five relaxed minutes in front of the mirror, and pink stops being the colour you avoid and becomes the one you reach for.
Pink behaves when it is built in order: base, depth, light, frame. Skip the order and the colour fights you. Follow it and the colour works for you.
Sixteen steps sounds like a lot written out, but on the eye it is just a steady build: base, depth, shine, definition, then the checks that keep pink looking fresh instead of sore. Keep the layers thin, keep the deepest colour low and outward, and let daylight have the last word before you set anything in place. Save this pink eye makeup tutorial for the next morning you want colour that behaves, and run the steps in order until your hands know them by heart.