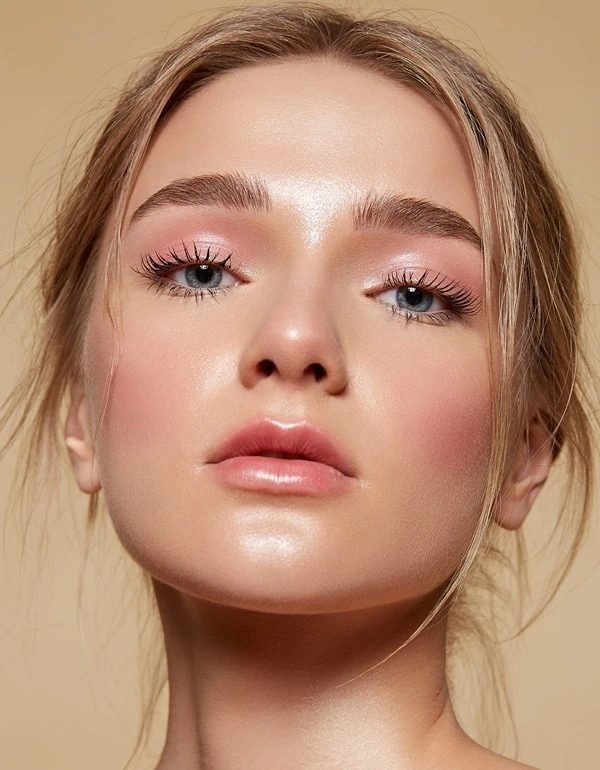
17 Pink Eye Makeup For Hooded Eyes That Actually Work
Hooded eyes swallow eyeshadow. You blend a pretty pink across the lid, open your eyes, and most of it vanishes behind the fold. The colour is not the problem. Placement is. On a hooded lid, pink has to live higher than feels natural, sit above the crease instead of inside it, and keep its brightest point where the eye can still show it off. This list gathers seventeen pink looks built on that one rule, from a soft wash floated above the crease to a carved cut crease, a lifted smokey wing and glitter packed only on the strip of lid that stays visible. Every entry names the exact spot the pink sits, the finish that suits it, and the small liner and lash choices that stop the look closing the eye down. If pink eye makeup for hooded eyes has ever left you frustrated, start at the top and work down. Each look here was chosen because the colour still reads with the eyes wide open.
1. Pink Placed Above The Natural Crease
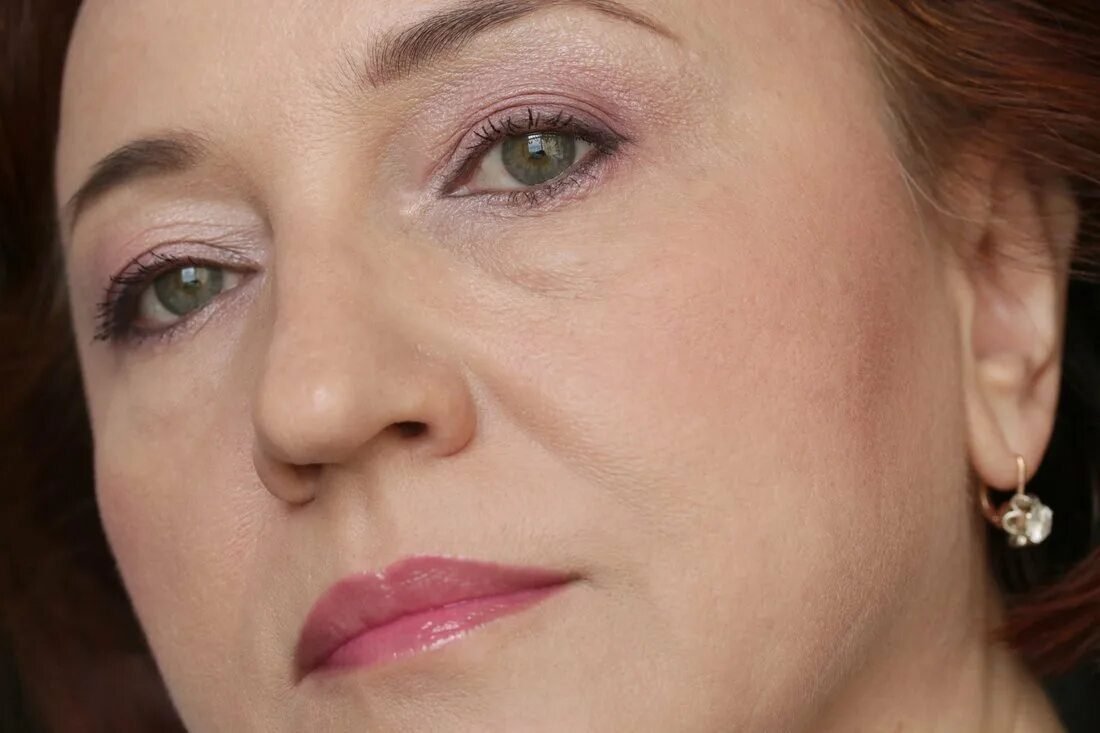
Look at where the colour actually sits on this mature eye. The soft mauve pink wash starts above the natural crease and fades out toward the brow, because that strip of skin is the part a hooded lid never hides. Only a whisper of deeper rose touches the outer corner, and the lid itself stays almost bare, which keeps the eye looking open instead of heavy. Her brows are soft and straight rather than carved, so the pink does the shaping on its own.
Recreate the placement with a fluffy brush and a matte rose two shades deeper than your skin. Sweep it in a slow arc above the fold, check with your eyes open and your face relaxed, then add a second layer only where the colour still shows. Lips in the same pink family finish the balance without stealing focus.
2. Matte Pink With A Faux Crease Drawn Higher
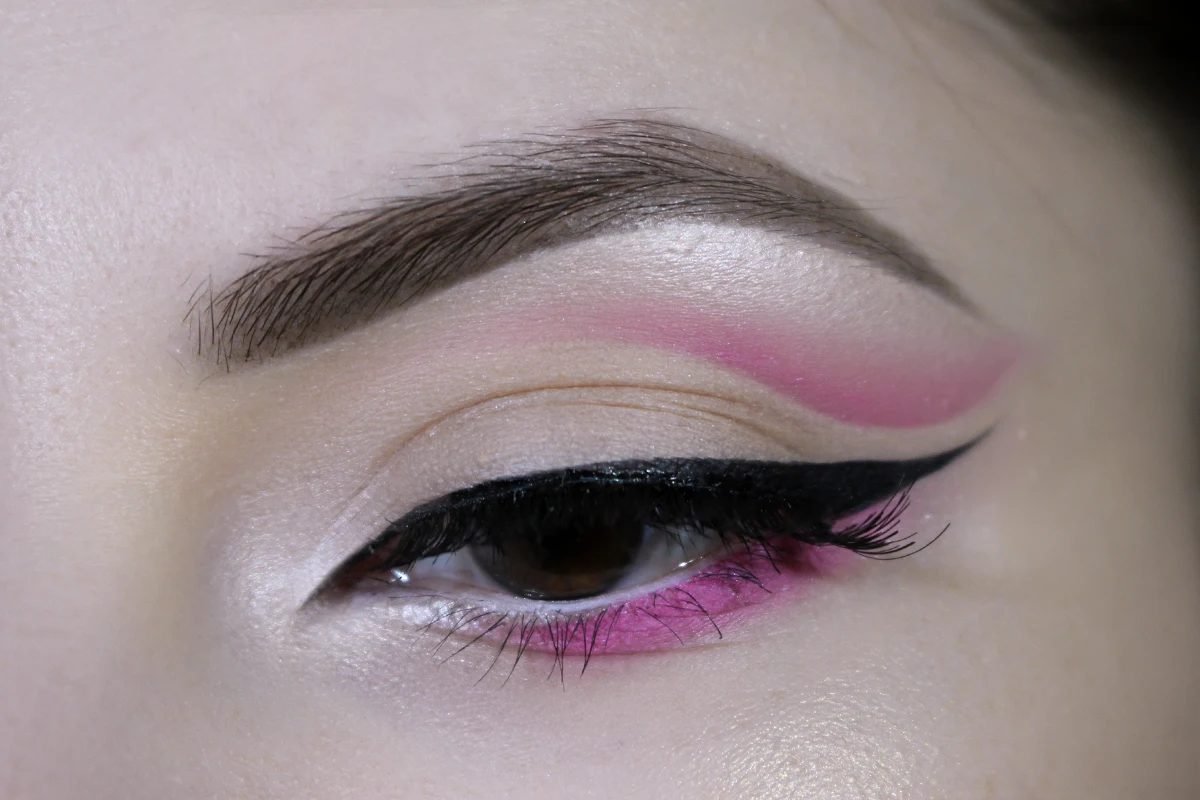
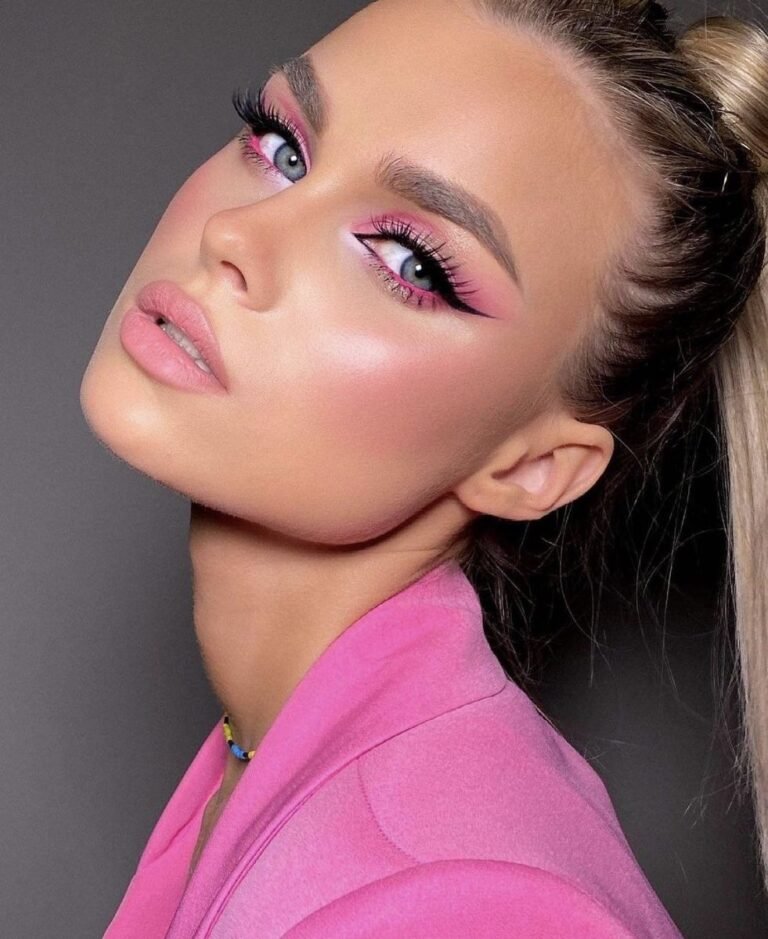
The pink band floating above this lid is not sitting in the crease at all. It is drawn a few millimetres higher, on the flat skin a hooded eye shows even when it is wide open, so the colour survives every blink. Below it the lid stays pale and shimmery, the black wing hugs the lash line, and a line of magenta under the lower lashes ties the whole thing together. That gap between the real crease and the drawn one is the entire trick.
To copy it, look straight into the mirror with your eyes open and dot the pink where you want the new crease to read. Close the eye, join the dots with a matte shadow, and blend the top edge only. Blend downward and the band drops back into the fold, which is exactly what you are trying to avoid.
💡 Quick Tip
Place the band with your eyes open and relaxed. A crease drawn with the eye closed lands lower than you think once the lid opens.
3. Bright Pink Centre That Stays Visible With Eyes Open
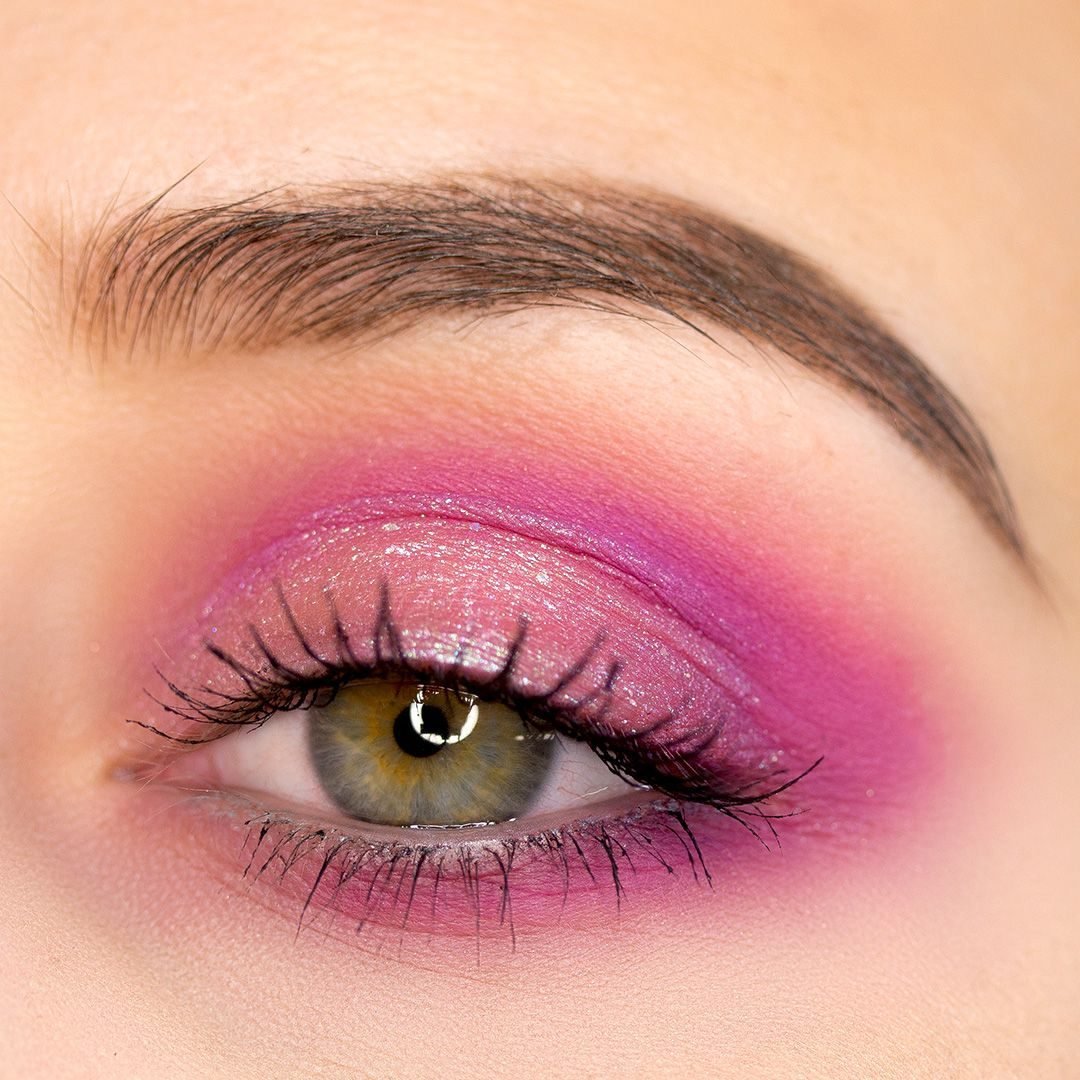
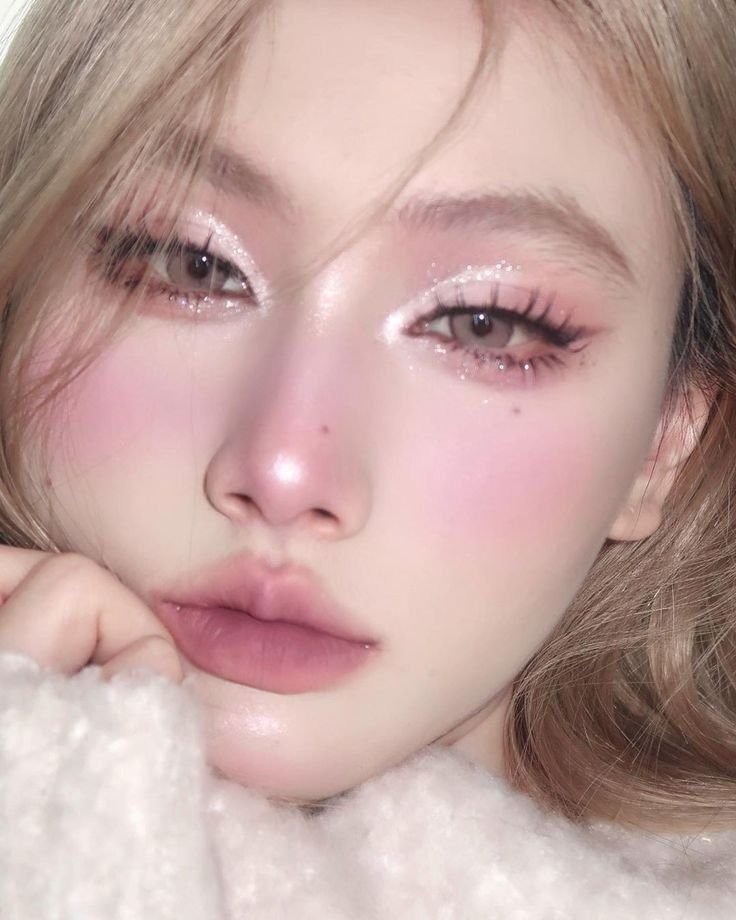
Bright pink usually disappears first on a hooded eye, swallowed by the fold before lunch. Here it survives because the brightest, sparkliest part sits low on the centre of the lid, pressed over a deeper magenta frame that does the travelling upward. With the eye open, that lit centre is still on show, framed by colour that climbs above the crease and wraps the outer corner. The lashes are long but separated, so they frame the pink instead of covering it.
Build yours in the same order. Pack the deep shade above the crease first and blend it wide, then press the bright shimmer onto the centre of the lid with a fingertip, keeping it below the fold line. Finish with mascara on the top lashes only, and the centre stays lit every time you blink.
The deep frame does the travelling above the crease, while the bright centre stays low on the lid where a blink cannot hide it.
4. Smoked Pink Wing Lifted At The Outer Corner
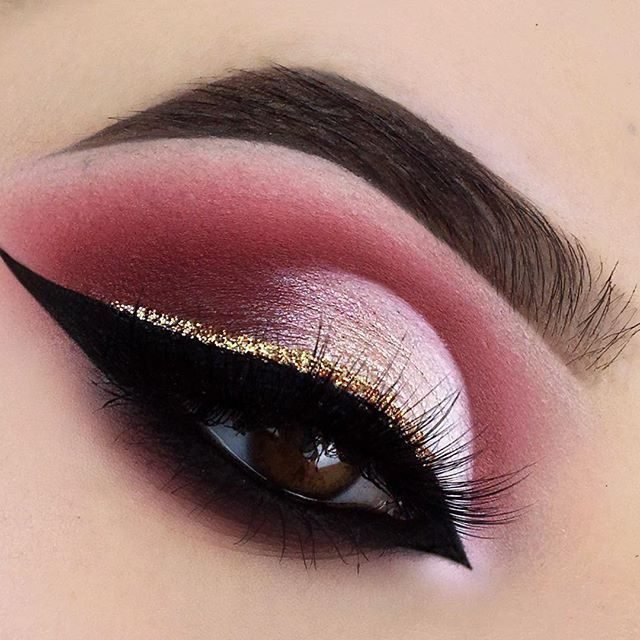
Smoke does the lifting here. The deep rose shadow is blended into a long point at the outer corner, angled up toward the tail of the brow, so the eye reads longer and higher instead of rounder. Against that dark sweep, the inner half of the lid stays pale and clean, and a thin line of gold glitter runs along the lash line like a seam. On a hooded eye that contrast matters, because the pale inner lid is the part that stays visible.
Keep the darkest colour outside the outer third and resist blending it across the whole lid. The shape should look like a wing drawn with shadow first and liner second. Two coats of mascara on the outer lashes underline the lift.
Pack the deep rose at the outer corner only.
Drag the edge up toward the tail of the brow.
Leave the inner lid pale so the contrast stays sharp.
5. Pale Pink Lid With A Deep Shade Above The Crease
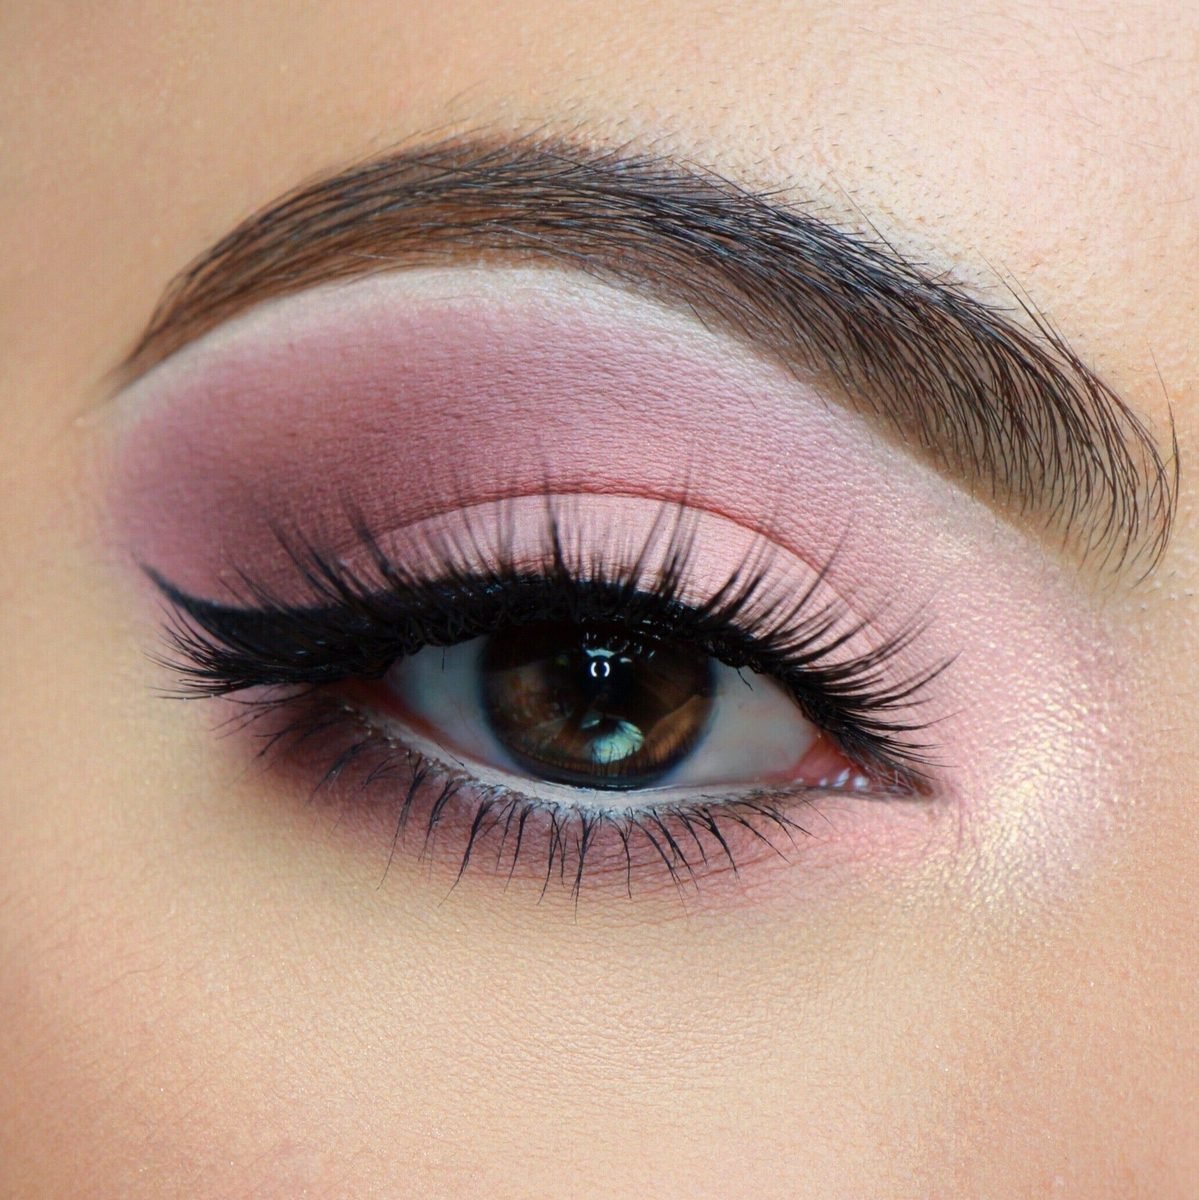
Pale lid, deep frame. That split is what makes this one so useful for hooded eyes, because each shade has a separate job. The soft pink on the lid keeps the visible strip bright, while the deeper mauve sits above the crease where it can shape the eye without ever being swallowed. A clean black wing finishes the edge and stops the pale lid looking washed out.
The trick is keeping the border between the two shades soft but high. Blend the deep shade with your eyes open, checking that a band of it still shows above the fold, and leave the lid colour almost untouched by the blending brush. If the two tones merge into one mid pink, the eye loses its frame and the whole look goes flat.
6. Pink Shimmer On The Visible Lid Only
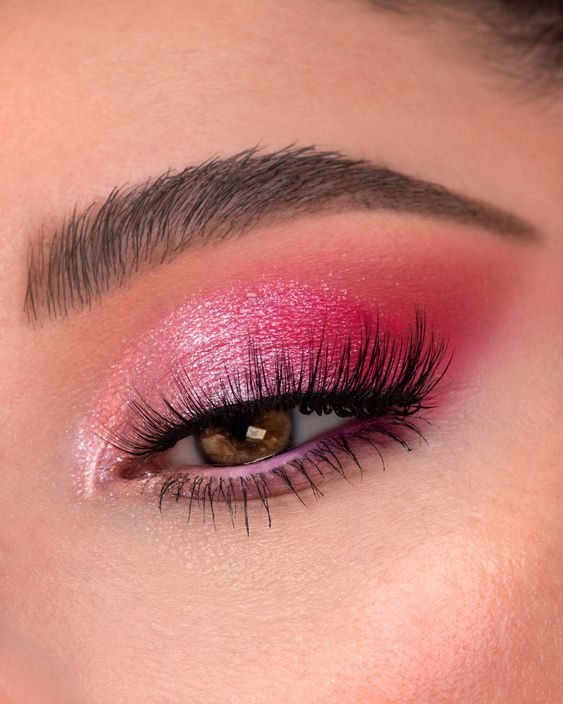
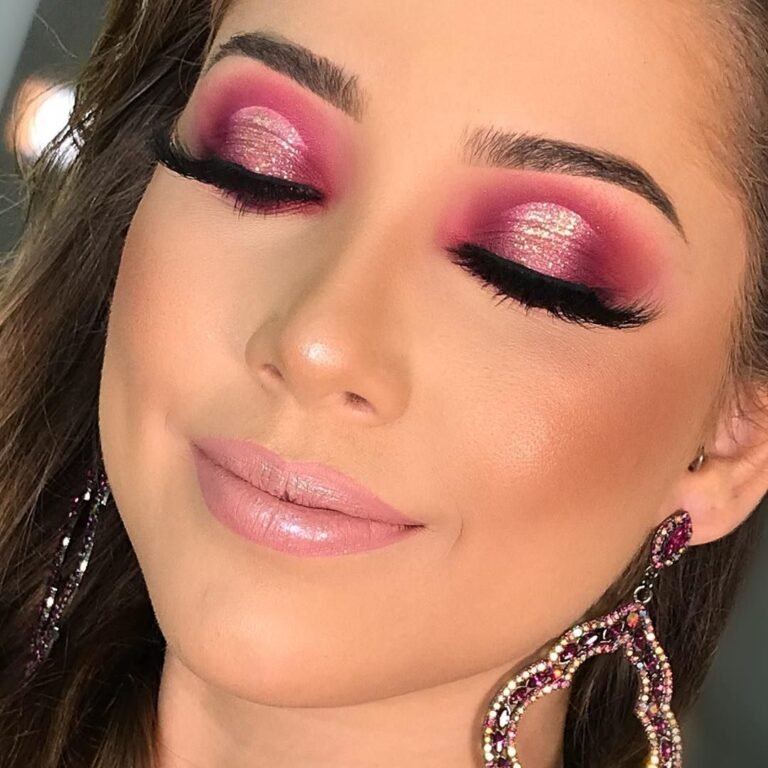
Shimmer has one safe home on a hooded eye, and this look uses it well. The metallic pink is packed only on the strip of mobile lid that stays visible when the eye is open, while the deep red above the crease stays matte and does the shaping. Because the shine sits low and the matte sits high, the fold cannot rub the two together into a muddy blur. Notice how the shimmer stops before the outer corner, where the deeper shade takes over and pulls the eye outward.
Copy the split with two brushes. Pat the metallic shade on with a flat brush or a fingertip and do not blend its top edge. Then blend the matte shade above it, letting the boundary stay visible. That crisp border is the detail that reads as deliberate.
Recreate this look
7. Pink Cut Crease Carved Above The Hood

This crease is not hiding anywhere. The deep pink arc is carved in a clean curve well above the natural fold, on skin that stays on show all day, with a softer matte pink filling the lid beneath it. It is the boldest answer to a hooded eye in this whole list, because it ignores the real crease completely and draws a new one where the eye can keep it. The matching blush swept high on the cheek is part of the design, pulling the whole face into the same pink story.
Precision matters more than product here. Sketch the arc with a small brush and your eyes open, following the shape of your brow bone rather than your socket. Fill below it with the lighter pink, keep the bottom edge of the arc unblended, and let mascara stay simple so the line does the talking.
Sketch the arc with eyes open, following the brow bone.
Keep the lower edge of the arc sharp and clean.
Tracing your real crease and hoping it shows.
Blending the arc until it turns into a soft wash.
8. Soft Pink With Tightlined Liner, Never Thick

Thick liner is where hooded eyes go to disappear.
This look proves the opposite approach: a soft pink wash deepening at the outer corner, and liner kept so thin and tight against the lashes that it reads as lash density, not a stripe. A small flick lifts the corner, pink smudged under the lower lashes balances the top, and a dusting of gold sparkle under the brow adds light without weight. The whole eye stays open and calm. Tightlining means pushing liner or dark shadow into the roots of the lashes, filling the gaps rather than drawing above them. On a hooded lid that gives definition the fold cannot eat. Keep the flick short and angled up, and stop the lower pink at the outer two thirds so the eye keeps its length.
- ▸Liner lives in the lash roots, not on the lid.
- ▸The flick stays short and points up.
- ▸Lower pink stops at the outer two thirds.
9. Gradient Pink, Darkest At The Lash Line
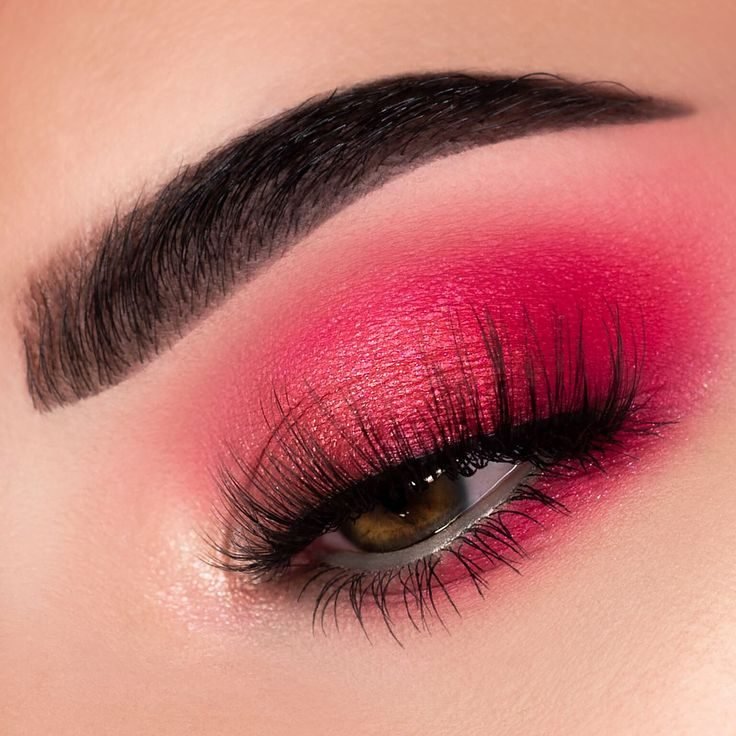
Look at where the strongest colour sits. The saturated pink is packed low, right across the lid above the lash line, and it softens step by step as it climbs, ending in a pale wash that disappears under the brow. That flipped order is the whole trick for hooded eyes. A fold can swallow crease colour, but it cannot cover the band along the lashes, so the boldest part of the gradient stays on show whether the eye is open or lowered like this one.
Copy the build in the same direction. Press the deepest pink along the lash line first and keep it low, then blend a mid pink over the rest of the lid so the two melt together, and sweep the palest shade at the top edge with a clean brush. The dense dark lashes in the photo are part of the effect, so finish with mascara worked into the roots, plus a soft pink echo under the lower lashes to balance the weight on top.
The deep shade sits in the crease, and the fold hides it by midday.
The deep shade hugs the lash line and stays on show all day.
10. Pink And Brown Blend That Opens The Eye
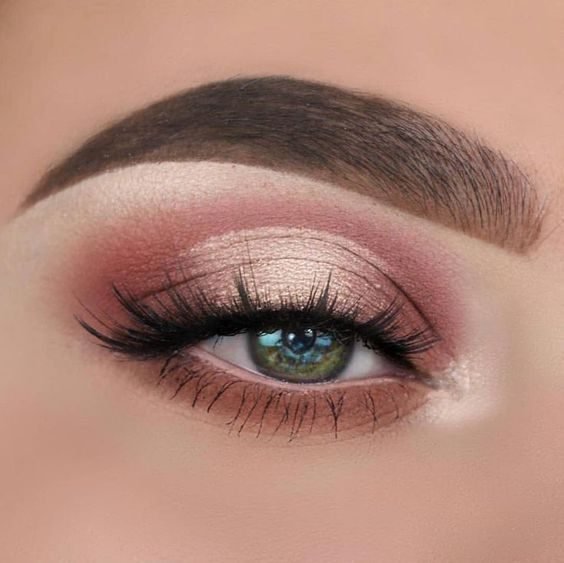
Pink on its own can look sweet but flat on a hooded eye. Brown is what gives it architecture. Here a champagne lid keeps the visible strip bright, rose pink warms the crease, and warm brown deepens the outer corner and runs under the lower lashes, so the eye gets depth without a single harsh line. The green iris helps, but the structure works on any eye colour, because the brown does the framing and the pink does the brightening.
Keep the brown above the crease and at the corners, never across the whole lid, or the eye closes down. Blend the pink into the brown until there is no visible border, then add the bright lid shade last so nothing dulls it. It is the most wearable look in this list for workdays.
| Pink does this | Brown does this |
|---|---|
| Warms the crease and keeps the look soft. | Deepens the outer corner for real depth. |
| Brightens the eye when paired with a pale lid. | Runs under the lower lashes as a soft frame. |
11. Glitter Pink On The Mobile Lid
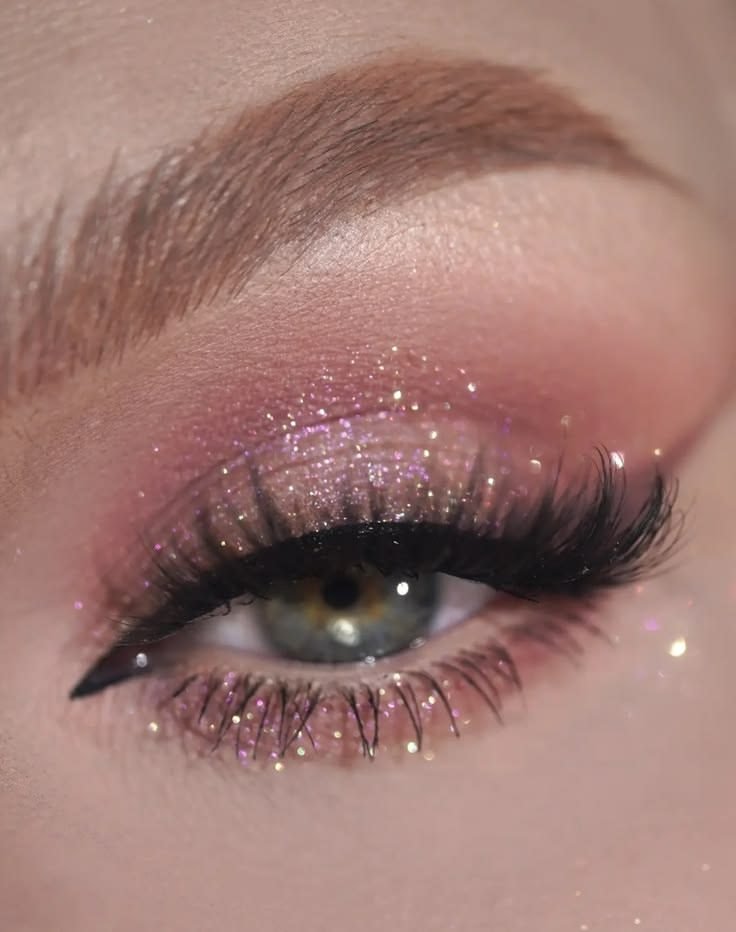
Glitter earns its place on a hooded eye when it sits on the mobile lid, the one strip that moves with the blink and catches light all day. Here fine pink glitter is scattered across that strip over a dusty pink base, with a little more dusted along the lower lashes, and the area above the crease stays soft and matte so the sparkle has contrast. With the eye open, the glitter is still right there, flashing when the light changes.
Size is the detail to copy. Fine glitter reads as glow from a normal distance, while chunky pieces can feel gritty on a lid that folds over itself. Press it on with a fingertip over a tacky base, keep it off the fold line itself, and let the lashes stay fluffy rather than spiky so nothing competes with the sparkle.
12. Berry Pink Pushed Up Toward The Brow Bone
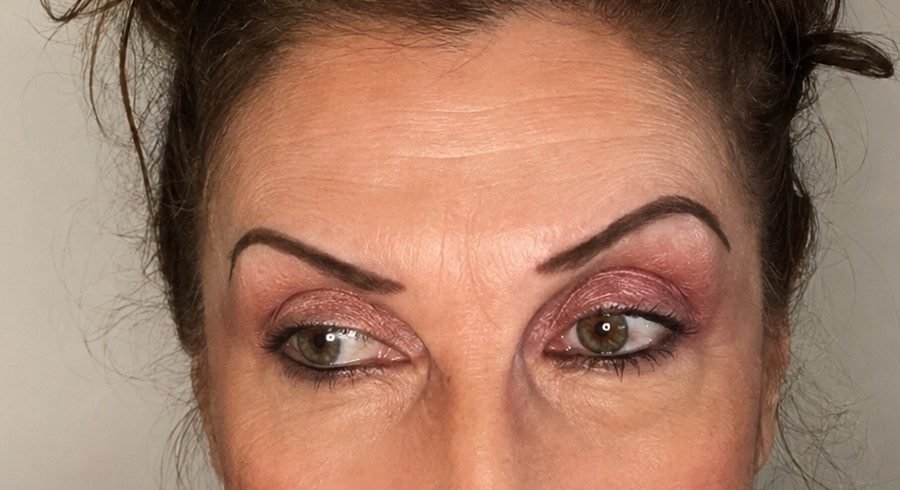
Nothing about this placement is shy, and that is why it works. On a mature hooded eye, the berry pink is blended high, almost to the brow bone, because colour placed at natural crease height would vanish the moment she looks up. A shimmery rose on the lid keeps the centre bright, the brows are strong and simple, and the whole eye reads lifted rather than decorated. This is the version to copy when softer washes keep disappearing on you.
Work with your eyes open and blend upward in small circles, stopping a few millimetres below the brow. Depth belongs at the outer corner, blended into a soft point. Keep blush in the same berry family and the face stays coherent, and skip heavy liner, since the high colour is already doing the framing work.
💡 Quick Tip
Blend with your eyes open and your head level. Colour that looks high enough with the eye closed usually sits too low once you look up.
13. Half Cut Crease In Rose Pink
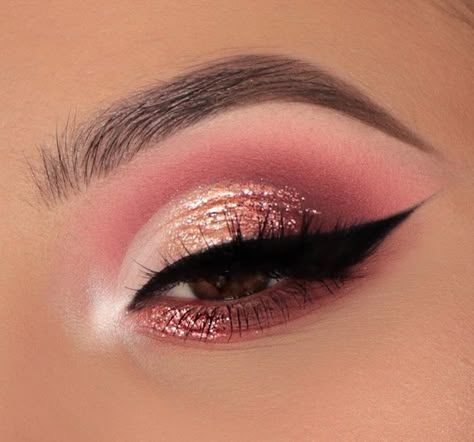
A full cut crease asks for more lid than a hooded eye can offer. The half version asks for half, which is why it fits. The rose gold glitter lid is carved with a clean edge across the inner and centre lid, then allowed to soften into the matte rose at the outer corner, where a black wing takes over the shaping. That carved edge sits above the fold line, so it stays visible with the eye open, and the bright inner corner opens the whole look up.
Carve with a flat brush and a creamy pale base, working from the inner corner to the centre only. Pack the glitter inside the line, blend the outer corner as normal, and keep the crease shade matte so the carved edge stays the sharpest thing in the look.
14. Pink Lower Lash Colour To Balance The Hood
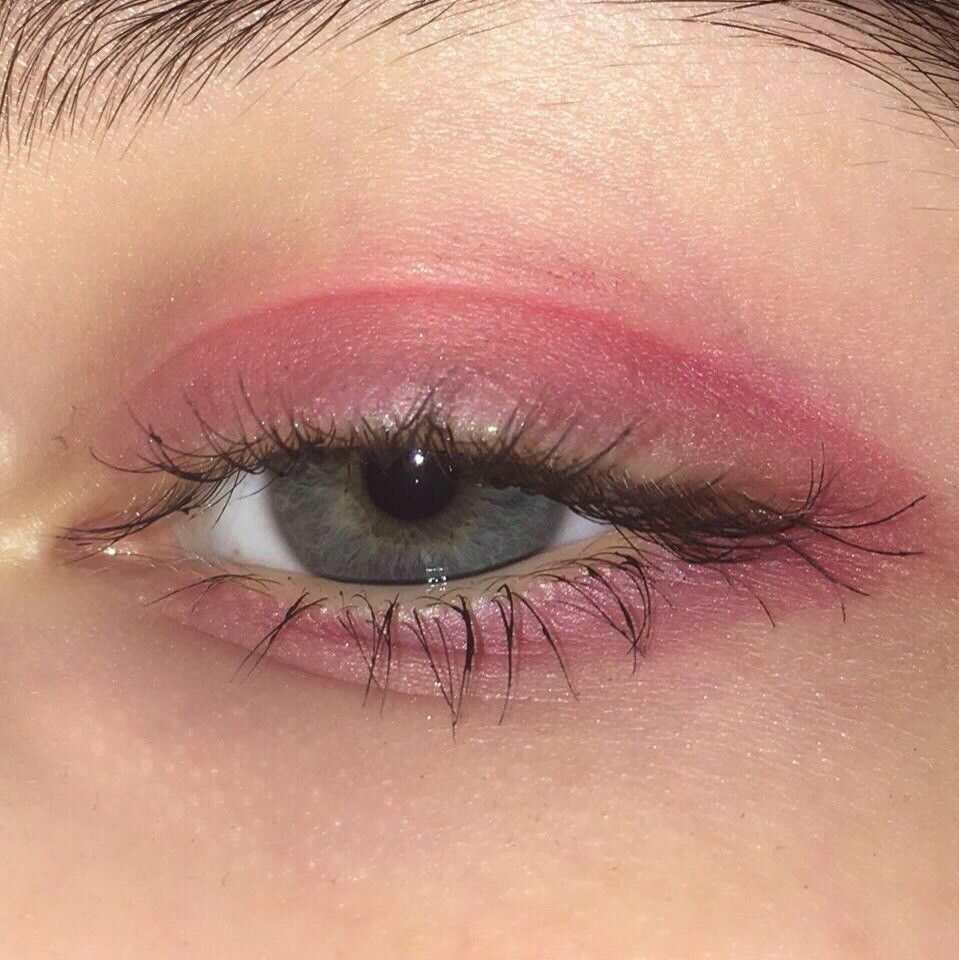
When the top of the eye has limited space, the lower lash line becomes prime real estate. This look keeps the upper lid simple, a soft pink wash blended above the crease, then repeats the same pink in a clean smudge under the lower lashes. That band of colour under the eye balances the hood, pulls the whole eye forward, and makes the shape look longer. The lashes top and bottom stay natural, so the pink frame does all the work.
Smudge the lower colour with a small pencil brush and keep it close to the lash roots, thicker at the outer corner and thinner toward the inner corner. Too low and too wide can drag the eye down, so check the mirror at arm’s length. A touch of mascara on the lower lashes finishes the frame.
Wash soft pink above the crease and keep it simple.
Smudge the same pink under the lower lashes, close to the roots.
Thin the colour toward the inner corner and check at arm’s length.
15. Metallic Pink That Catches Light On The Visible Lid
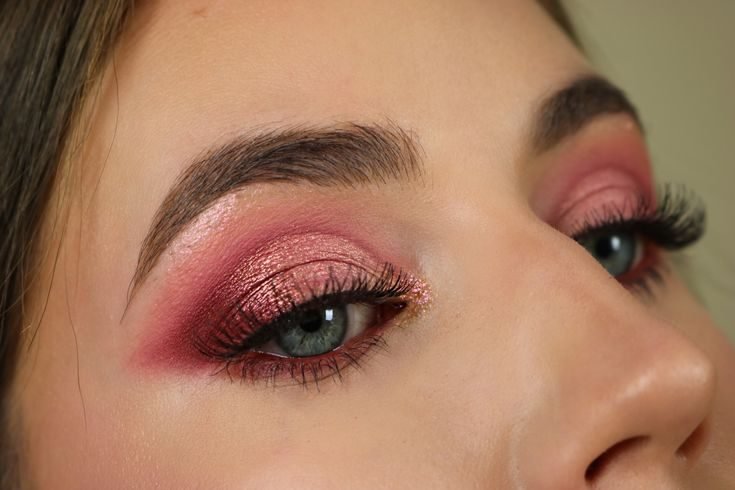
Metallic shadow behaves like a mirror, and on a hooded eye that is a gift, because the small strip of visible lid can still throw light back. Here a rose gold foil is pressed over the mobile lid while deep burgundy pink is smoked around it, above the crease and under the lower lash line. The foil centre stays bright every time she blinks, and the dark frame stops the shine looking accidental.
Foil finishes need pressing, not sweeping. Pat the metallic shade on with a fingertip or a dense flat brush and leave its edges where they land. Blend only the burgundy around it. If you buff the foil like a normal shadow it turns to dust and the mirror effect is gone, so treat the two finishes as separate jobs that happen to share an eye.
Pressed foil on the visible lid throws light back with every blink, and the dark burgundy frame keeps the shine looking deliberate.
16. Smokey Pink With The Wing Angled Up
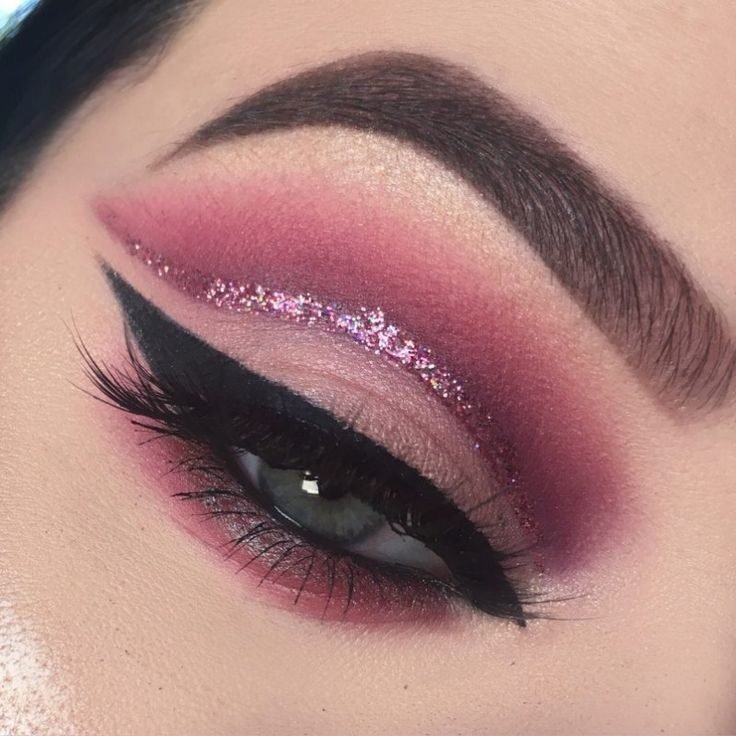
Follow the wing. It leaves the outer corner at a steep upward angle, aiming at the end of the brow instead of straight out toward the ear, and that angle is what lifts the whole smokey eye. The burgundy pink is smoked above the crease, a line of pink glitter traces the fold, and the lower lash line keeps a softer version of the same colour. On a hooded eye, a straight wing gets cut by the fold and can even snap in the middle.
Angling it up from the lower lash line keeps it in one clean piece. Draw the angle first with shadow and your eye open, using the lower lash line as the guide, then deepen it with liner. If the fold crosses the wing, raise the starting point slightly and try again.
Recreate this look
17. The Hood Friendly Finish, Colour Placed Where It Shows
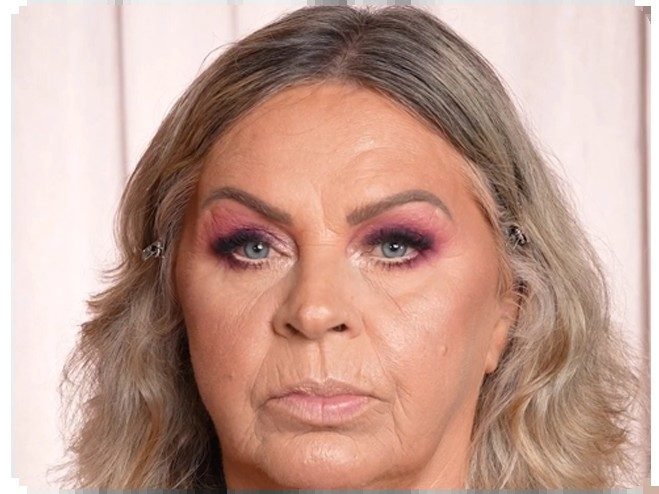
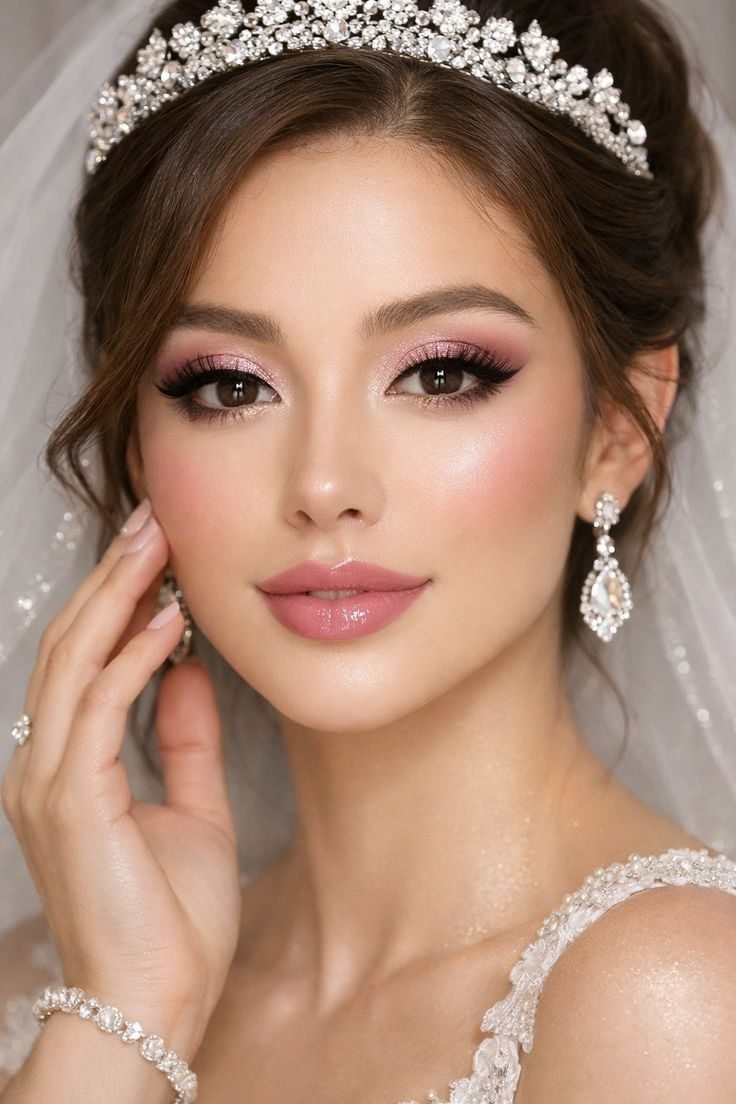
Everything in this list comes together on this one face. The magenta and plum pink sit above the crease where the camera can see them, deepen at the outer corners, and return under the lower lashes, so with her eyes open and facing forward, none of the colour is wasted. The brows are groomed but not heavy, the skin keeps its glow, and the pink is strong because the placement, not the product, is doing the work.
That is the real lesson for hooded eyes. You do not need more shadow, you need shadow in the places your eye shape actually shows. Choose one placement from this list, above the crease, at the lash line, under the eye or carved higher, and build your pink around it. The colour was never the problem.
Place colour where your eye shape shows it.
Check every blend with your eyes open.
Copying placements built for deep set eyes.
Adding more product when placement is the issue.
Pink was never the enemy of a hooded eye. It just refuses to sit where other eye shapes wear it. Keep the colour above the fold, aim wings up instead of out, and save shimmer and glitter for the strip of lid that survives a blink, and pink eye makeup for hooded eyes turns into one of the most flattering things you can wear. Pick two or three looks from this list that match your mornings, practise the placement once without liner, and save this page for the next time you want fresh ideas.