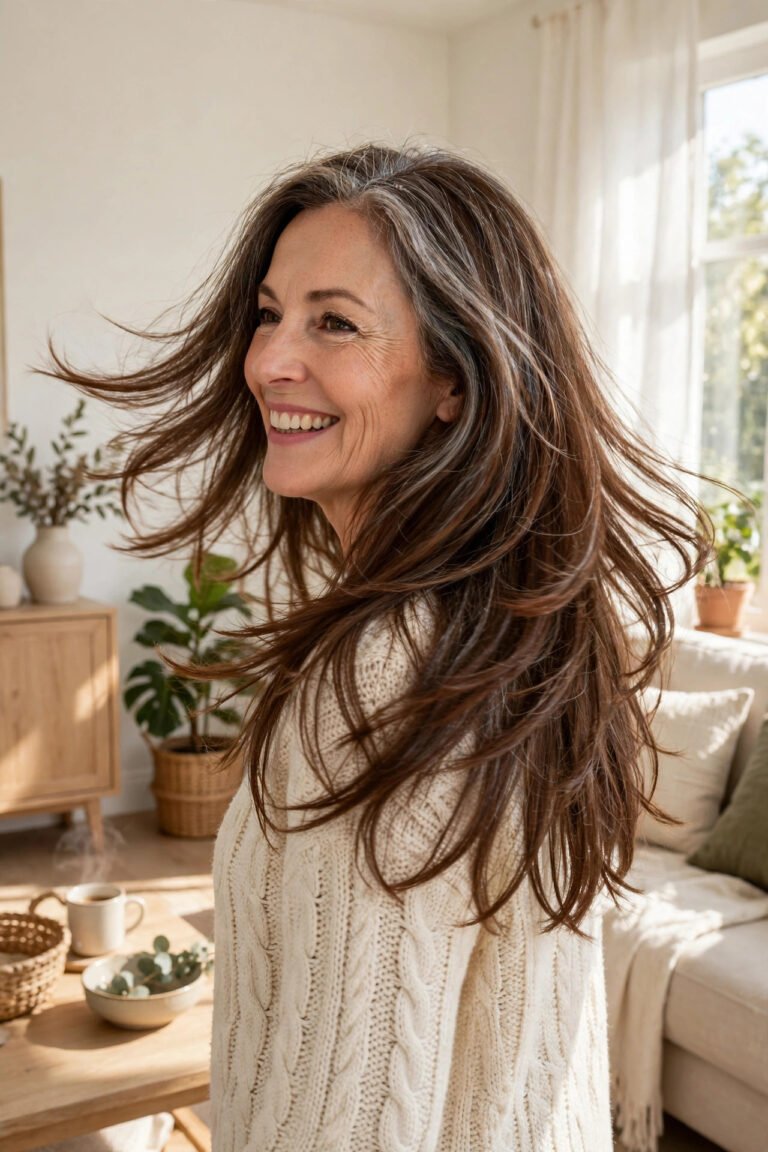
23 Modern Shag Haircuts Over 50
The haircut you keep saving photos of probably has a name, and it is probably a shag.
After 50, hair often turns finer, drier, and slower to hold a style, and a blunt one length cut shows every bit of that. The shag answers with layers. Short pieces around the crown lift flat roots, feathered ends keep the outline light, and a soft fringe brings the focus back to your eyes. Modern shag haircuts over 50 are not the wild rock star cuts of the seventies. They are cleaner, softer, and cut to suit your own texture.
Below are 23 versions, from a short cropped shag you can style with your fingers to a long layered one that still swings when you walk. Each entry notes who it suits, how much upkeep it asks for, and the exact words to use at the salon.
Save the two or three that match your hair now, not the hair you had at thirty. That honest match is what makes the cut work.
1. The Classic Medium Shag With Curtain Bangs

Start here if the shag is new to you.
This is the version most stylists reach for first. The length sits between chin and collarbone, the layers begin around the cheekbones, and the curtain bangs split softly in the middle so your forehead never looks chopped. It works on straight, wavy, and lightly curly hair because the shape does not depend on one texture. Ask for the shortest layer to land at the cheekbone and the ends to be point cut, not thinned to wisps. Grown out, it settles into a soft layered cut instead of falling apart, which is why so many women stay with it for years.
2. The Short Cropped Shag

Short does not have to mean severe.
A cropped shag keeps the choppy layers and the soft fringe, then takes the length up so the sides skim the ears and the back sits off the neck. The top stays piecey rather than puffy, which keeps it feminine. It suits strong cheekbones and anyone whose hair grows fast, since the shape is meant to look a little undone. On fine hair, keep the layers concentrated on top so the ends do not go stringy. Style it with damp fingers and a pea size amount of styling cream, then leave it alone while it dries.
💡 Quick Tip
Ask your stylist to leave the fringe a touch longer than you think you want. Short layers shrink as they dry, and a fringe cut wet can land higher than planned.
3. The Long Layered Shag
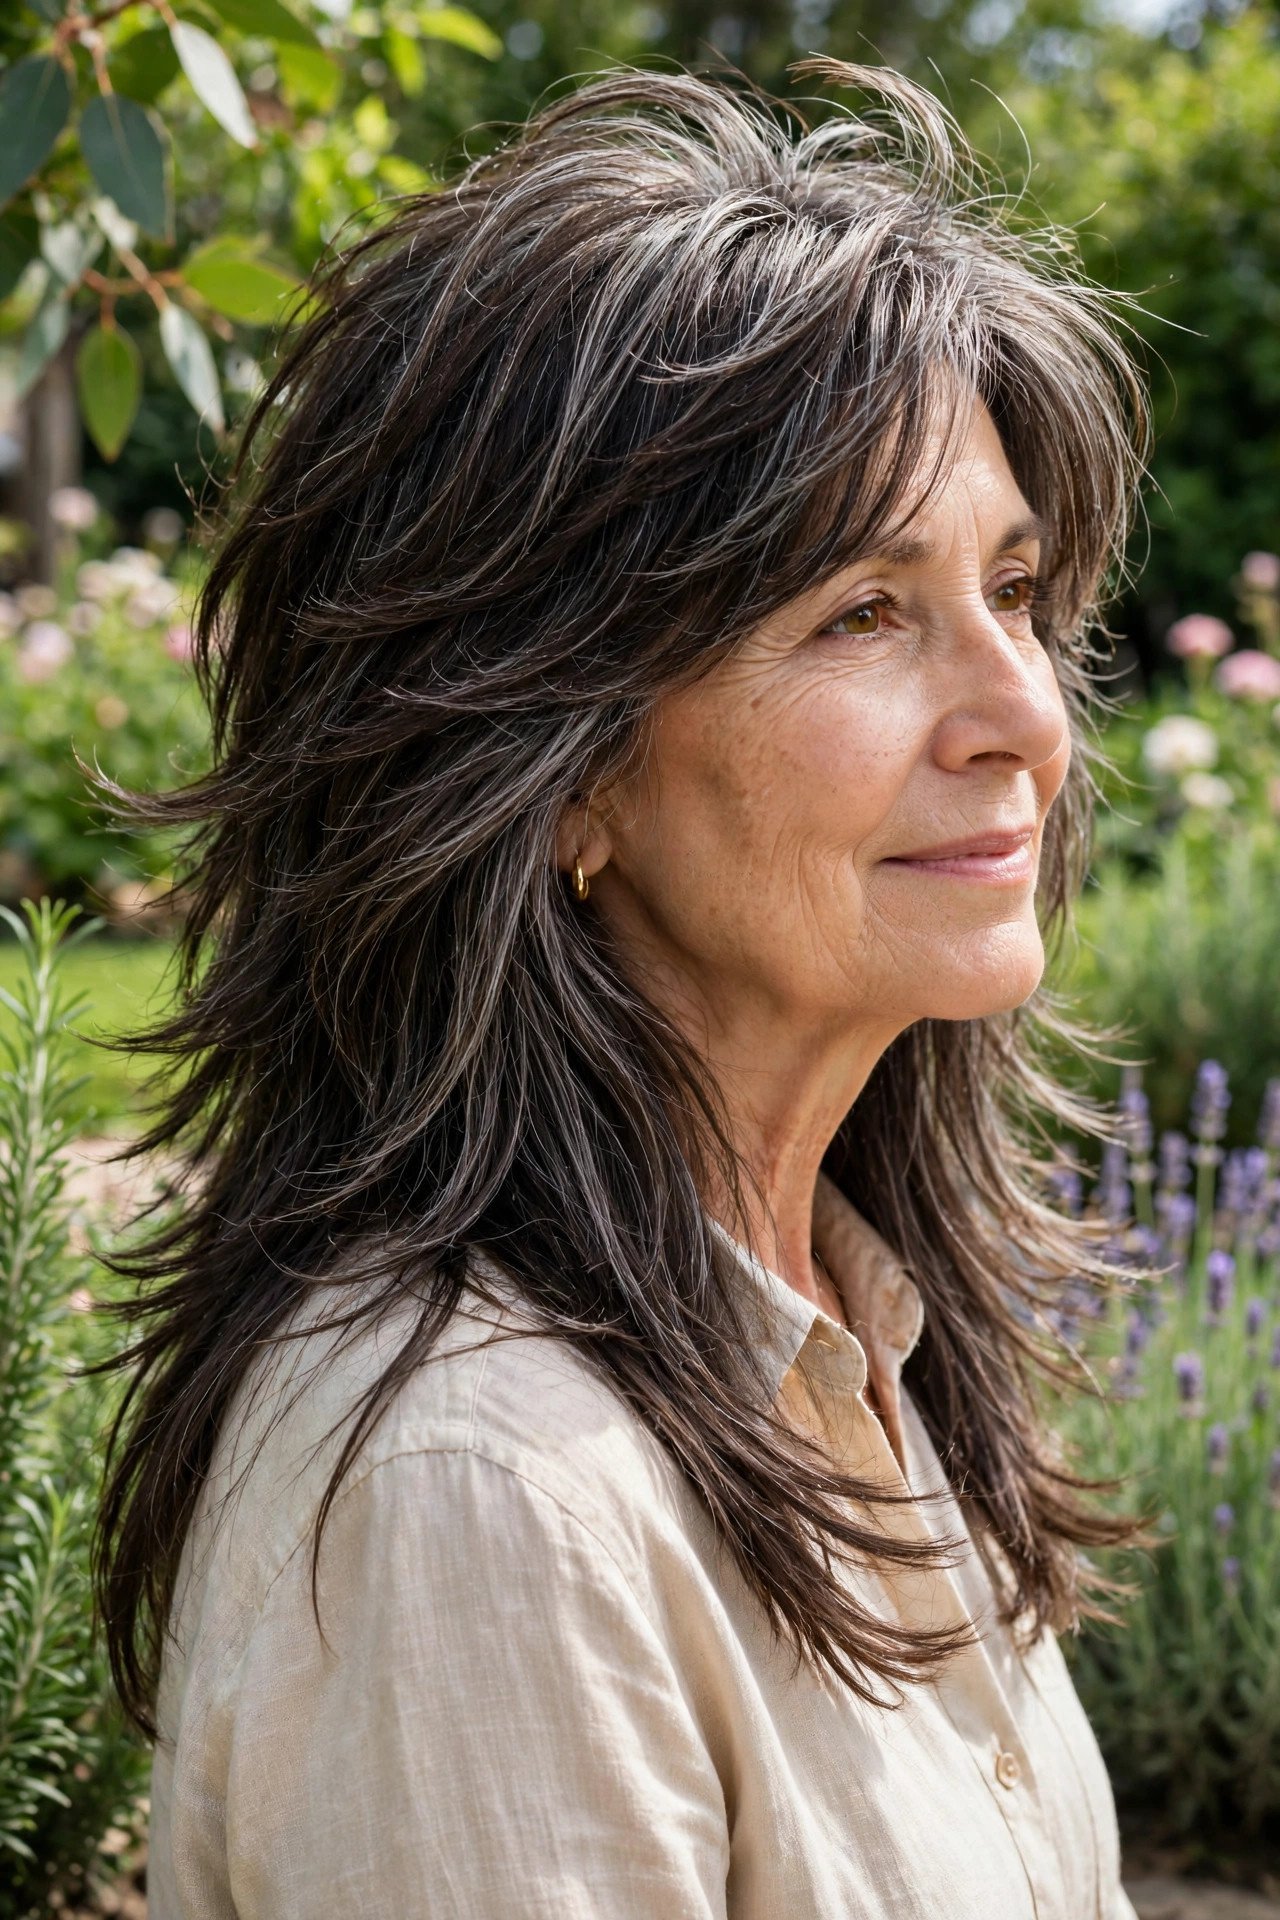
The length stays. The heaviness goes.
Long shags keep hair past the shoulders and earn their shape from layers that start higher than most long cuts dare. Shorter pieces around the crown lift the top, and the ends are feathered so the outline never widens into a triangle. Thick hair gains the most, since the layering removes real weight. If your hair is fine, ask for longer layers through the back and keep the shortest pieces around the face only. Worn wavy, the layers separate on their own. Worn straight, they read as soft steps down the back.
4. The Curly Shag That Follows Your Natural Curls

Curly hair and heavy layering have a rough history.
Cut wet and stretched, curls spring up shorter than planned and the layers land in the wrong places. A modern curly shag avoids that by shaping the hair dry, or curl by curl, so each layer sits where the curl actually lives. The outline is rounded rather than square, with shorter pieces around the crown to stop the sides from ballooning. Keep the fringe long and piecey, never blunt. Most women find their curls dry faster and frizz less once the weight sitting on top of them is gone.
Ask at the salon
5. The Shag With Full Blunt Bangs
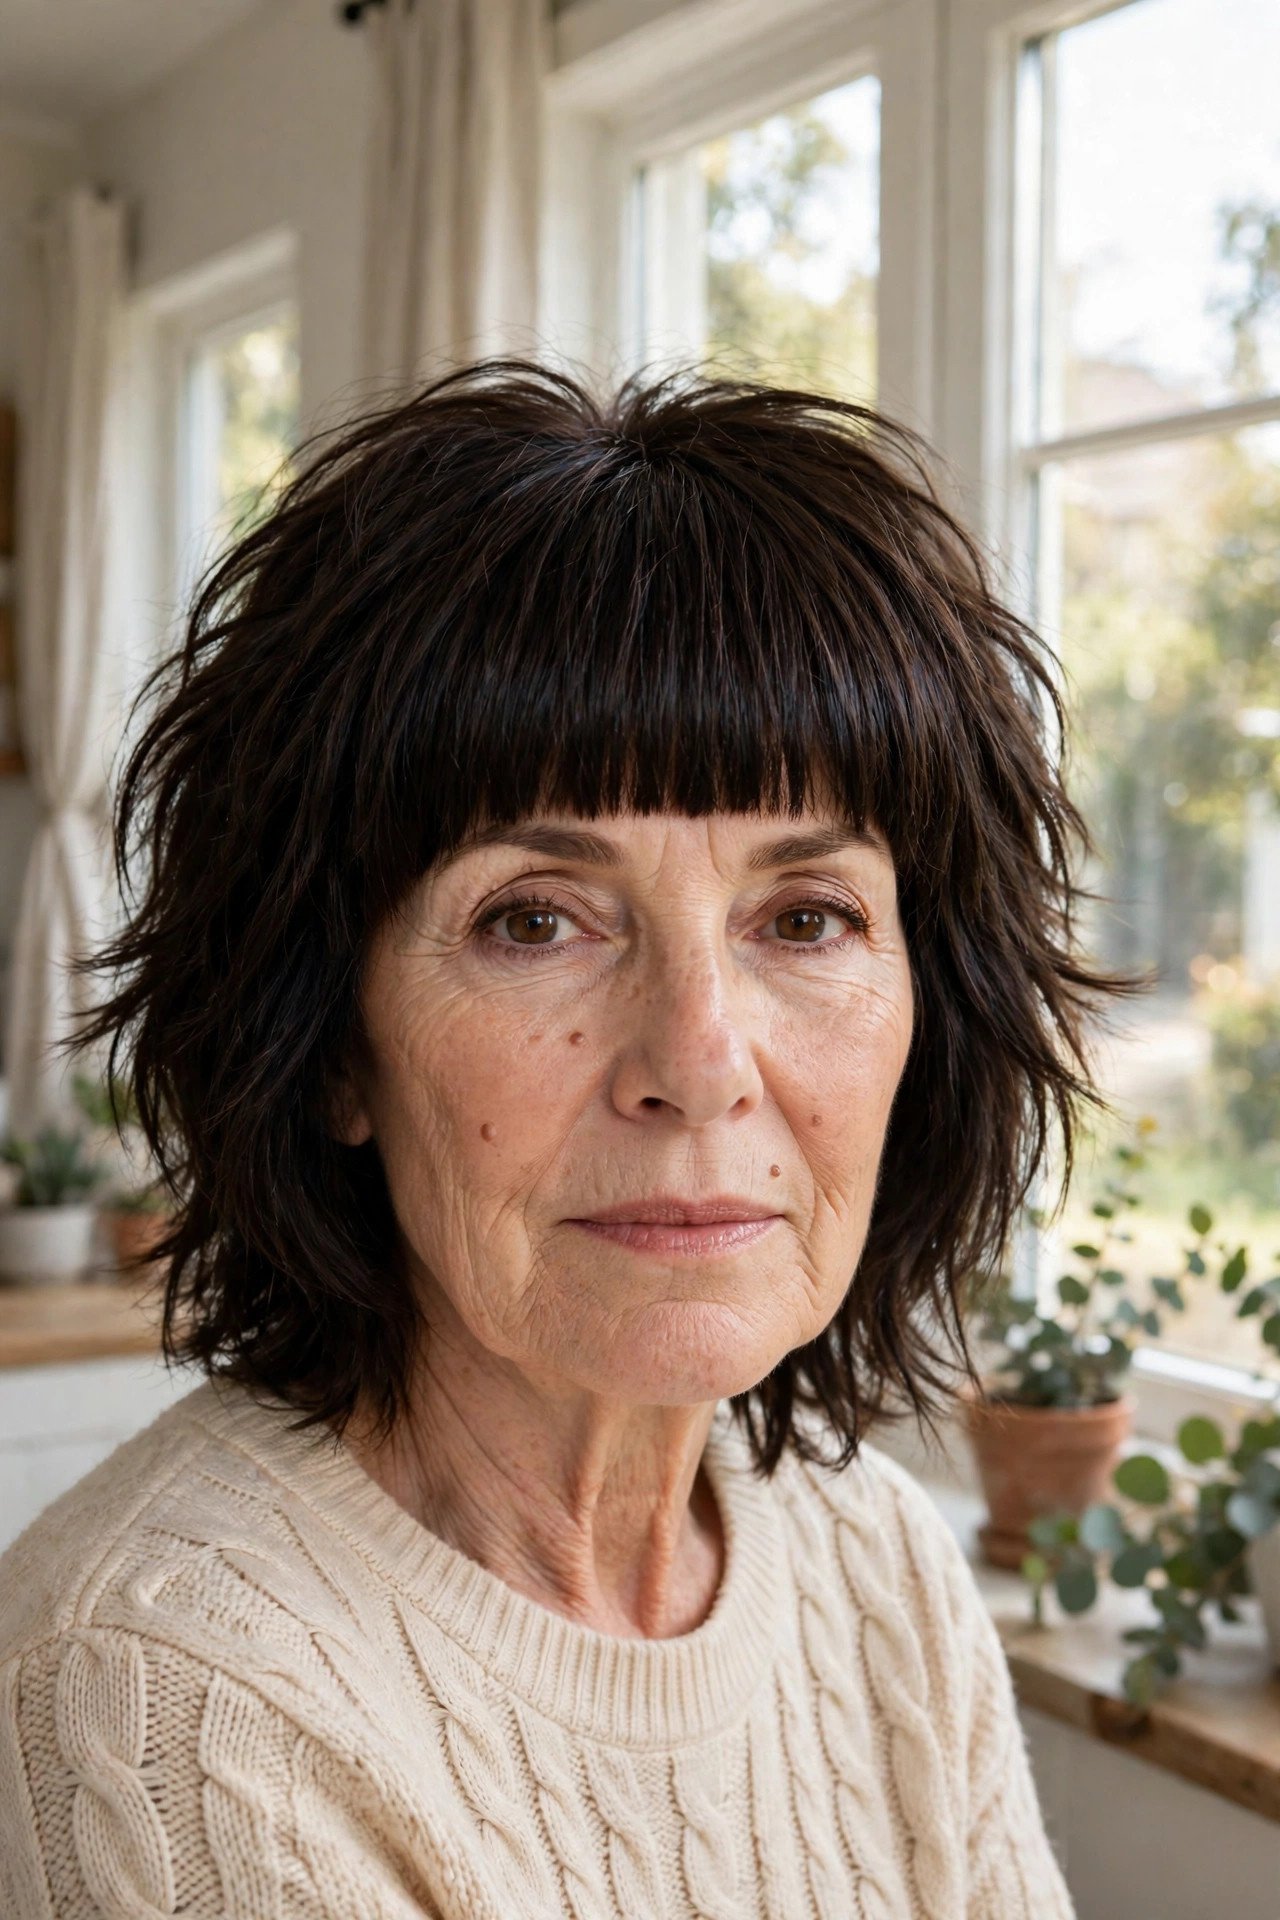
A full fringe changes the whole balance of a shag.
The bangs sit straight across at brow level, blunt and a little heavy, while the layers behind them stay choppy and light. That contrast is the point. The eye lands on the fringe and the eyes first, which is why this version flatters a longer face and softens a high forehead. It does ask for commitment. Fringe trims every few weeks keep it at the right line, and on very curly hair the bangs will need a quick pass with a dryer each morning. Women with glasses should bring them to the appointment so the fringe is cut to sit above the frames.
The fringe is wispy and apologetic, layers start down at the chin, and the face looks longer than it is.
Bangs sit full at the brow, layers start higher, and the whole face reads shorter and softer.
6. The Soft Shag Bob

It sits at the jaw, neat like a bob, but it moves like a shag.
The outline stays bob length while the inside is layered and point cut, so the ends flick and separate instead of hanging in one solid sheet. It is the easiest first step for a woman leaving a classic bob, because nothing about the length feels risky. Fine and medium hair both hold it well. Thick hair needs the under layers lightened or the sides will push out. Worn tucked behind one ear, it looks polished. Worn loose and a little messy, it looks like you tried less than you did.
| Shag bob | Classic bob |
|---|---|
| Outline is layered and broken up | One clean blunt line |
| Ends flick and separate as you move | Hangs as one solid shape |
| Trim every 8 weeks or so | Trim every 6 weeks to keep the line |
7. The Feathered Shag With Flippy Layers
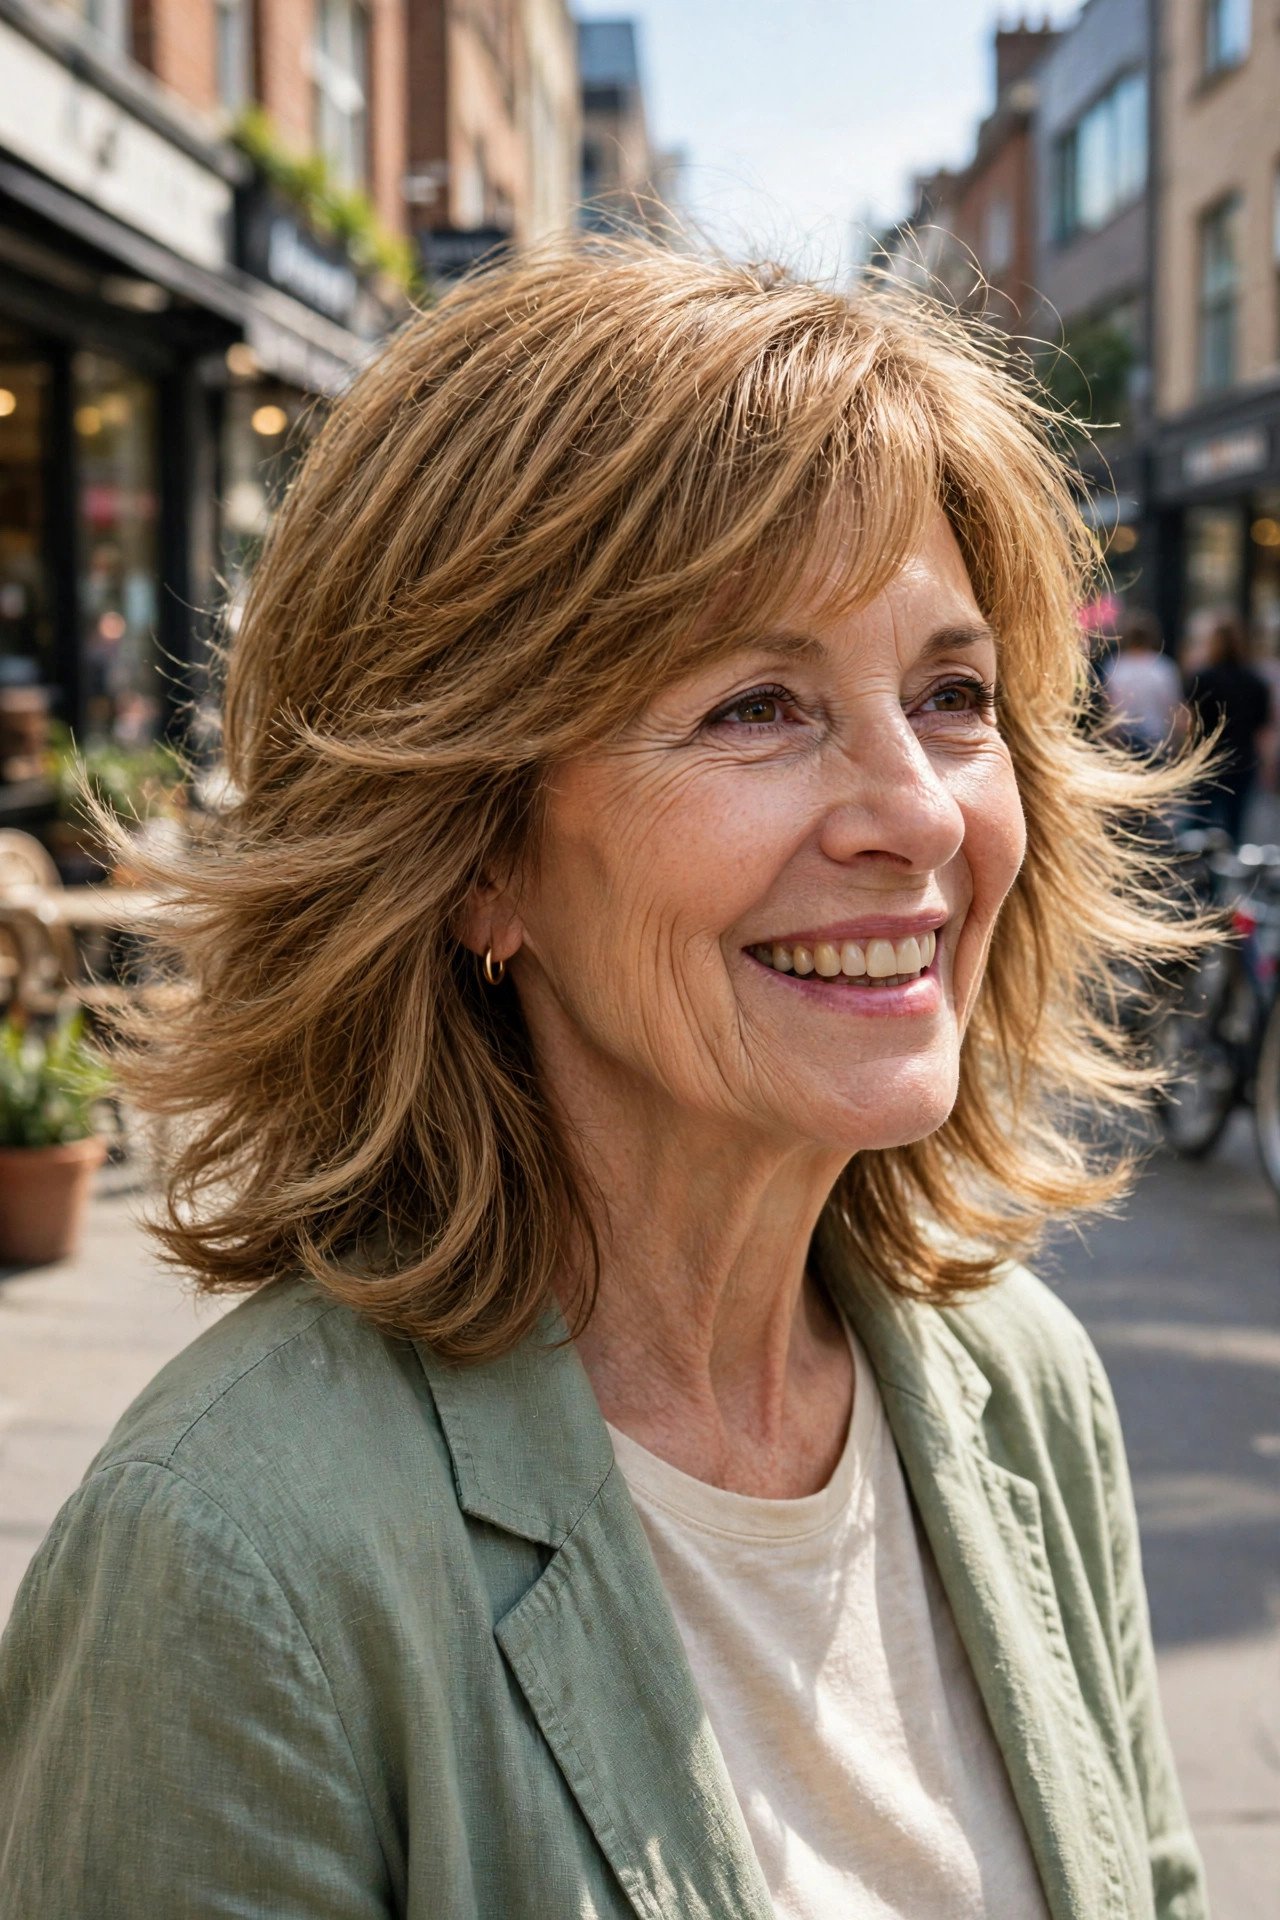
The flip at the ends is cut in first, then coaxed out at home.
Feathered layers are brushed and cut so they sweep away from the face, layer over layer, like the soft wings on a bird. The result has a gentle seventies echo without the costume feel. Straight and wavy hair show it best. The daily routine is short: rough dry, then roll a round brush under the front sections and flick the ends outward as they cool. Women who air dry can still wear it, but the flip softens into a wave by midday. That softer version suits plenty of faces too.
Rough dry until the hair is about 80 percent dry, lifting at the roots with your fingers.
Roll a round brush through the front layers, turning the ends away from your face.
Let each section cool before you touch it, so the flip holds through the day.
8. The Wolf-Leaning Shag With a Tapered Back

No, it is not a mullet, and a good stylist will not let it turn into one.
The wolf-leaning shag takes the classic shag and pushes the contrast further: shorter, chunkier layers on the crown, a slimmer back that keeps more length, and a fringe with real presence. What keeps it on the shag side of the line is blending. The sides melt into the back instead of stopping in a hard step, and the back is tapered, never left as a thin tail. Thick hair wears it best, since the cut needs something to carve. It is the boldest cut on this list, and the most fun to wear.
Blending is the whole cut. If the sides melt into the back, it reads shag. If they stop short, it reads costume.
9. The Silver Shag, Fully Natural

Silver hair has a texture of its own, and the shag happens to suit it well.
Grey strands tend to be coarser and a little wirier than pigmented hair, and in a one length cut they can sit stiff, like a helmet. Layers break that stiffness up. Each cut edge catches light differently, so the silver reads as several shades instead of one flat grey. Keep the ends fuller than you would on fine hair, since wiry hair thinned too far looks frayed. A violet toning wash every few weeks keeps the colour bright rather than yellow. Many women find this is the cut that finally makes going grey feel like a choice.
📌 Good To Know
Silver shows every layer clearly, so small cutting mistakes show too. This is a cut worth booking with a stylist who works with grey hair often.
10. The Wavy Beach Shag

Your natural wave does most of the work in this one.
The layers are cut to sit where your hair already bends, so the wave pattern lines up instead of fighting itself. Length lands around the shoulders, long enough for the waves to form, short enough that they do not get dragged flat by their own weight. A light texturising spray on damp hair, a scrunch with your hands, and you are done. Women who have spent years straightening their hair often find this cut is the truce. On very humid days the wave grows bigger. Most wearers call that a fair trade.
Scrunch product into damp hair, then leave it alone while it dries.
Let the layers follow the bend your hair already has.
Brushing it dry, which pulls the wave apart into frizz.
Layers cut shorter than your wave needs to form a full bend.
11. The Wispy Shag for Fine Hair
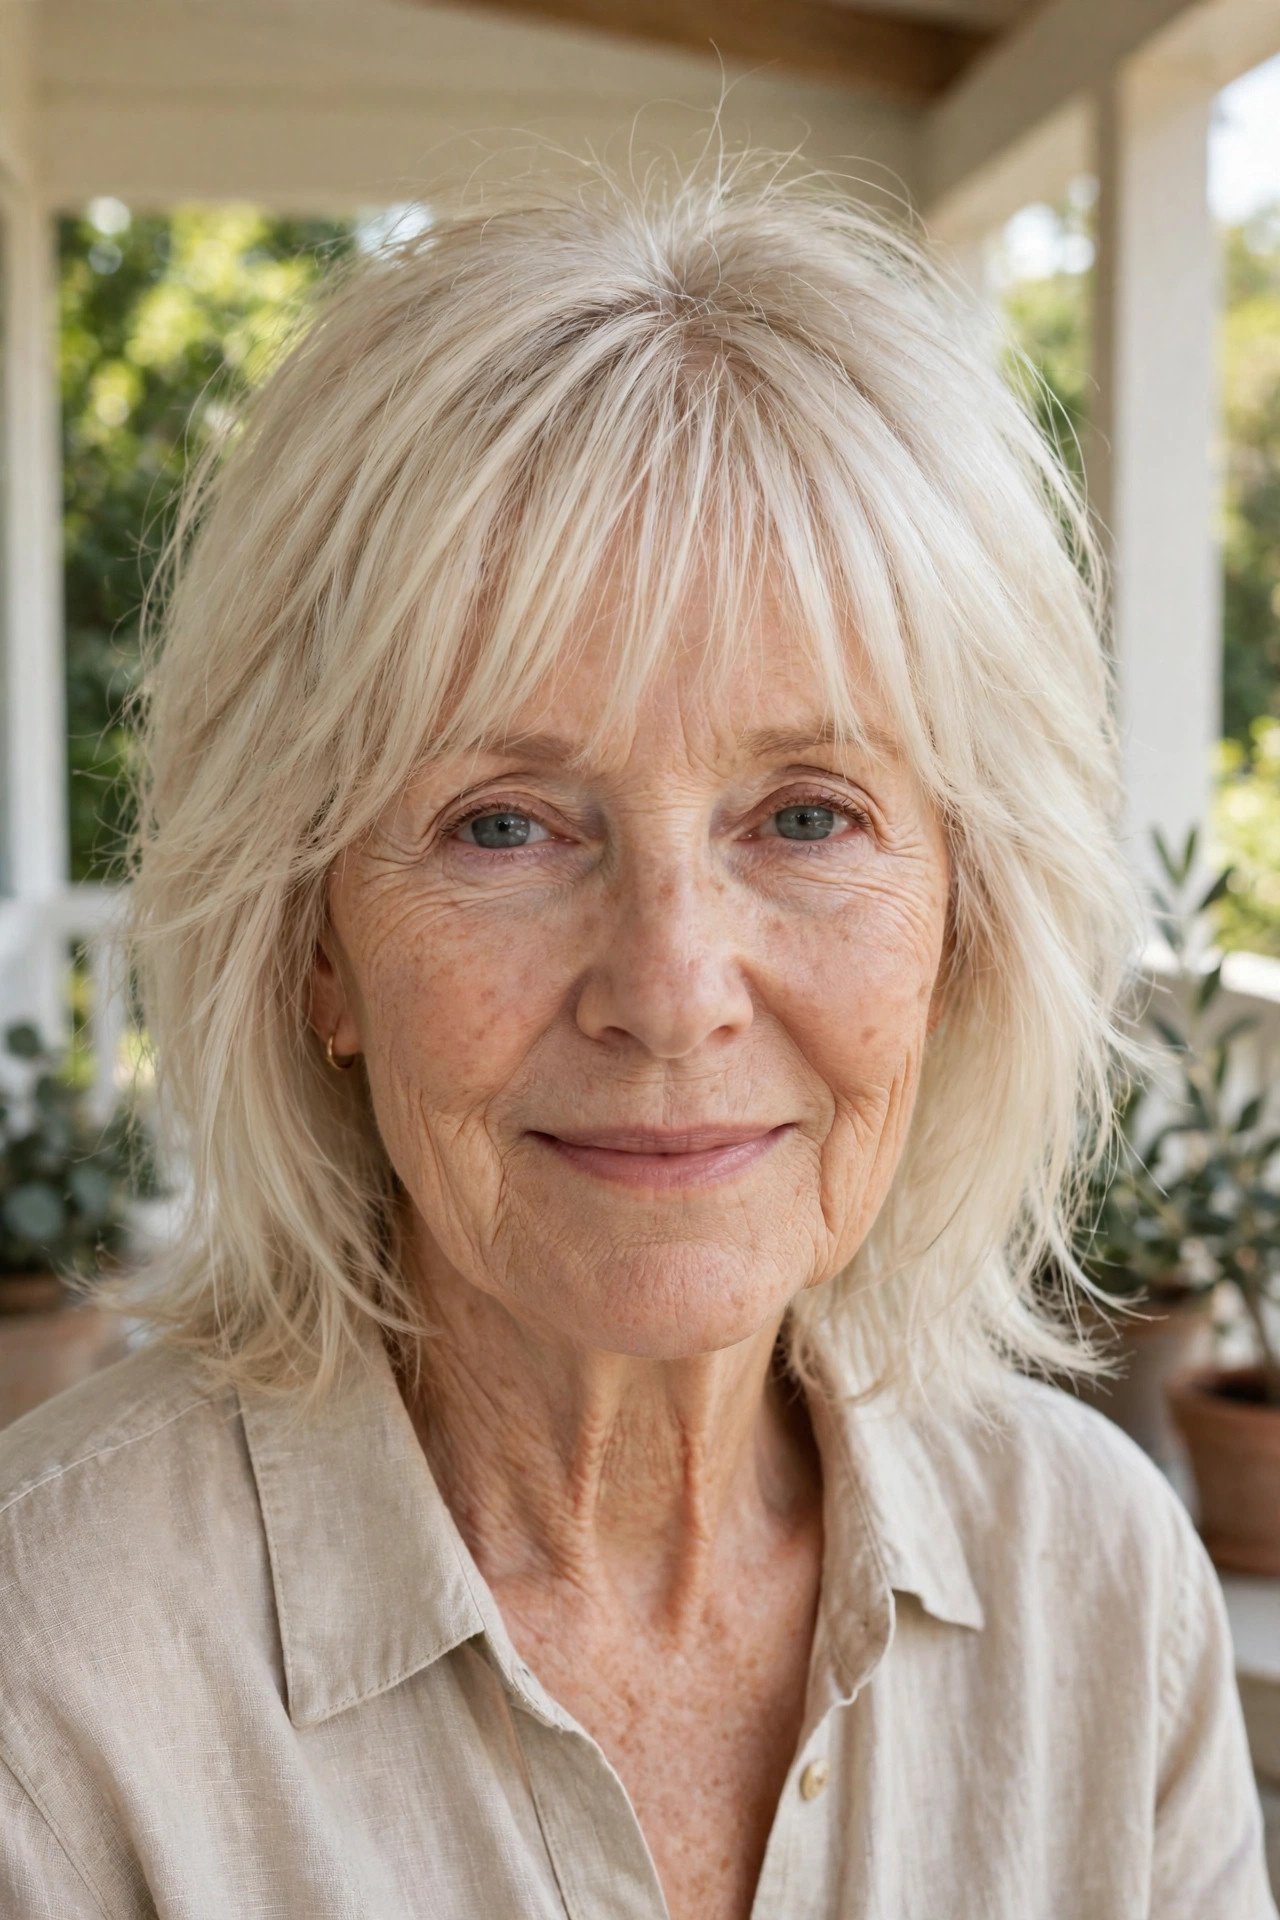
Fine hair is where shags go wrong most often, and it is nearly always the same mistake.
Too many layers get cut in, the ends lose their weight, and the whole cut turns stringy by week two. The wispy shag fixes the maths. Layers are fewer and longer, placed mostly around the face and crown, while the bottom edge stays close to blunt so the ends keep their fullness. The fringe is light and see through rather than heavy. Styling stays simple: a root lift spray at the crown and a rough dry with your head tipped forward. The result looks soft, not sparse.
- ▸Layers around the face and crown only
- ▸Bottom edge kept nearly blunt
- ▸Ends point cut, never razor thinned
- ▸Fringe light enough to see forehead through it
12. The Shag With Bottleneck Bangs
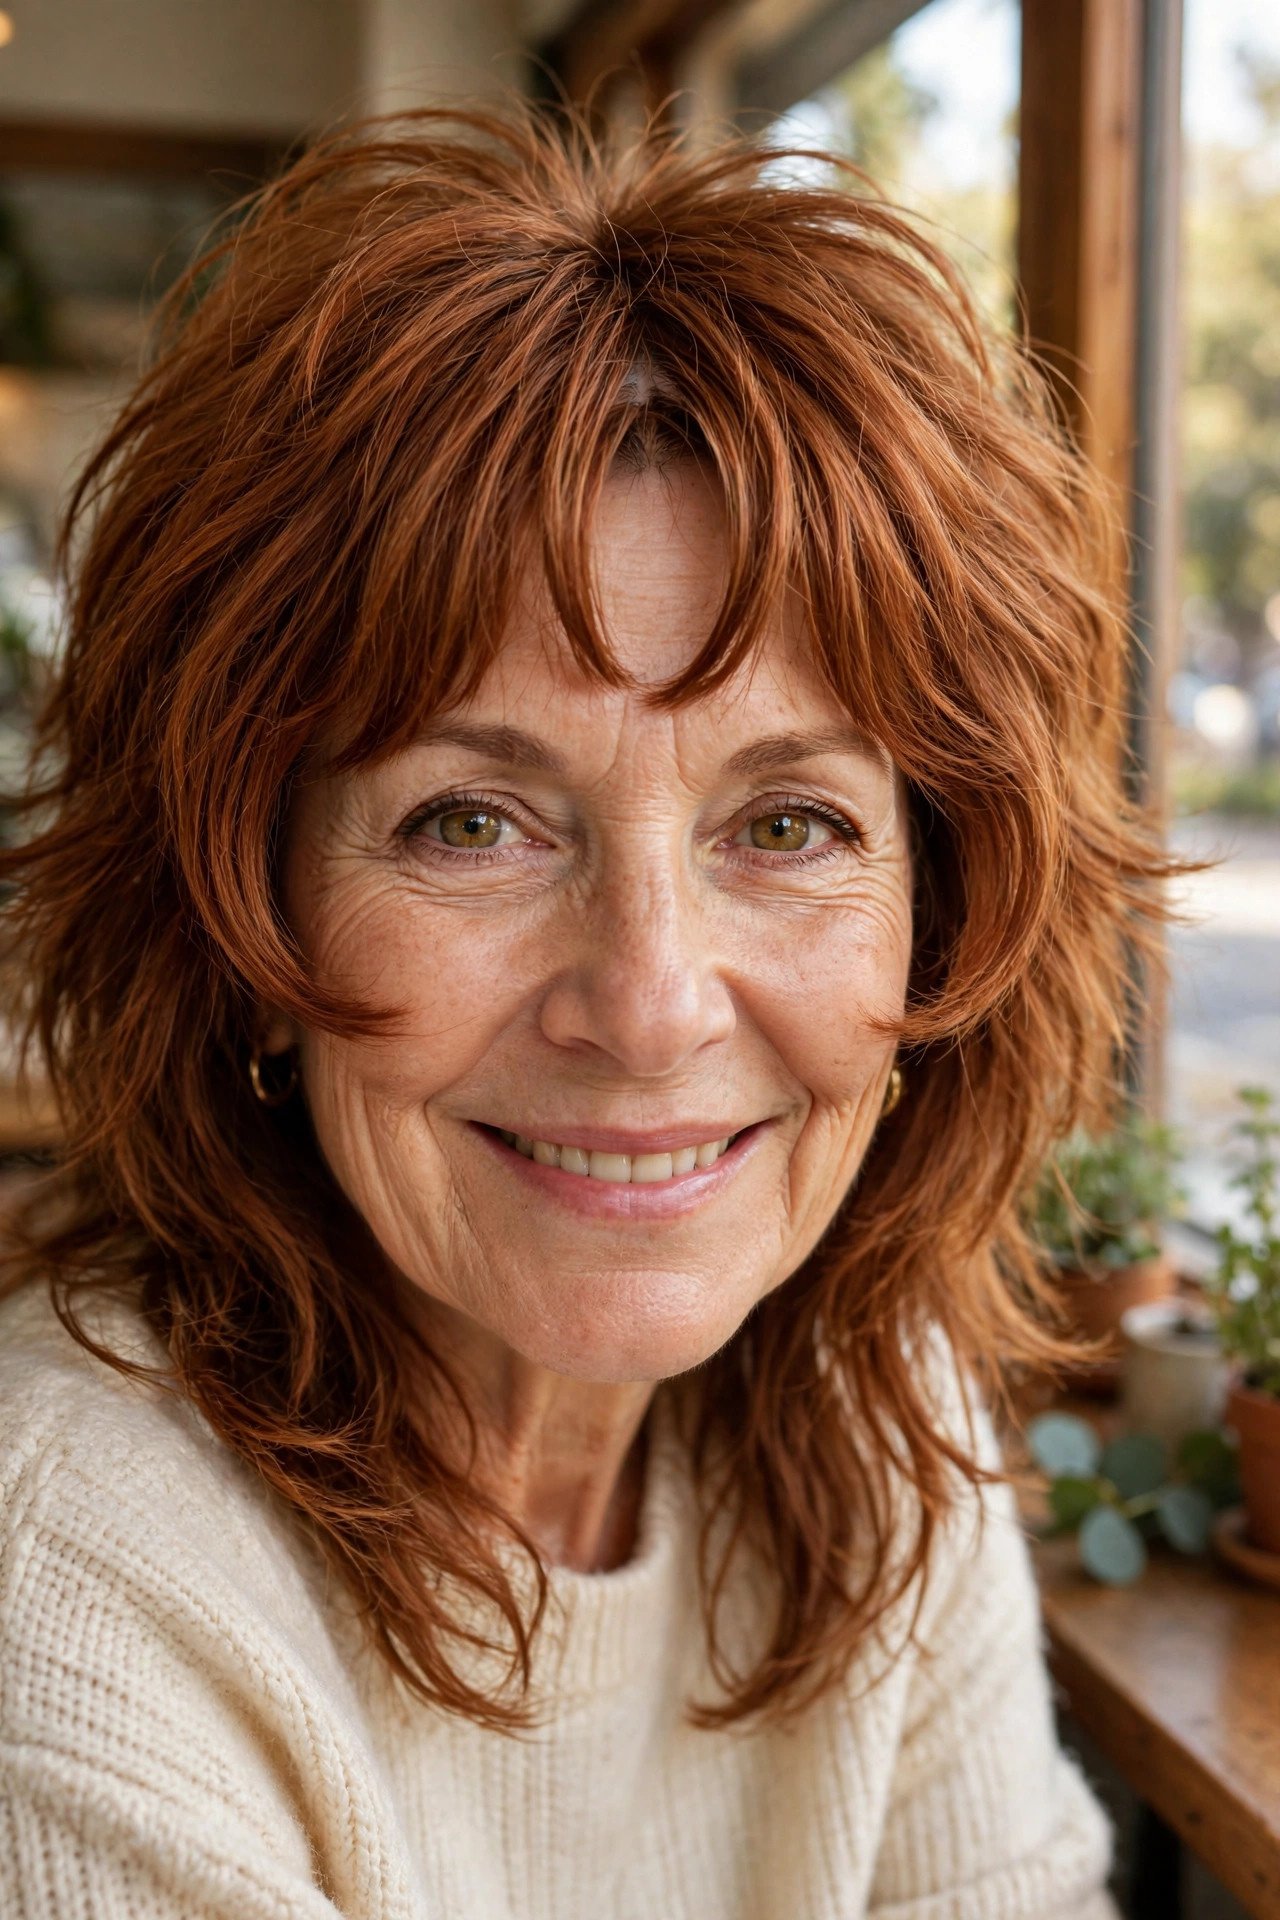
Bottleneck bangs are the fringe for women who are not sure they want a fringe.
The shape is narrow at the centre of the forehead and widens as it reaches the cheekbones, the way a bottle curves out at the shoulders. That curve frames the eyes and cheekbones while leaving the sides of the forehead open, so the face never looks cut in half. Paired with shaggy layers, it reads soft from every angle. The other gift is the grow out. Bottleneck bangs melt into curtain bangs, then into face framing layers, with no awkward stage in between. Round and square faces gain the most from the slimming curve at the centre.
13. The Shoulder-Length Shag With Razor Ends
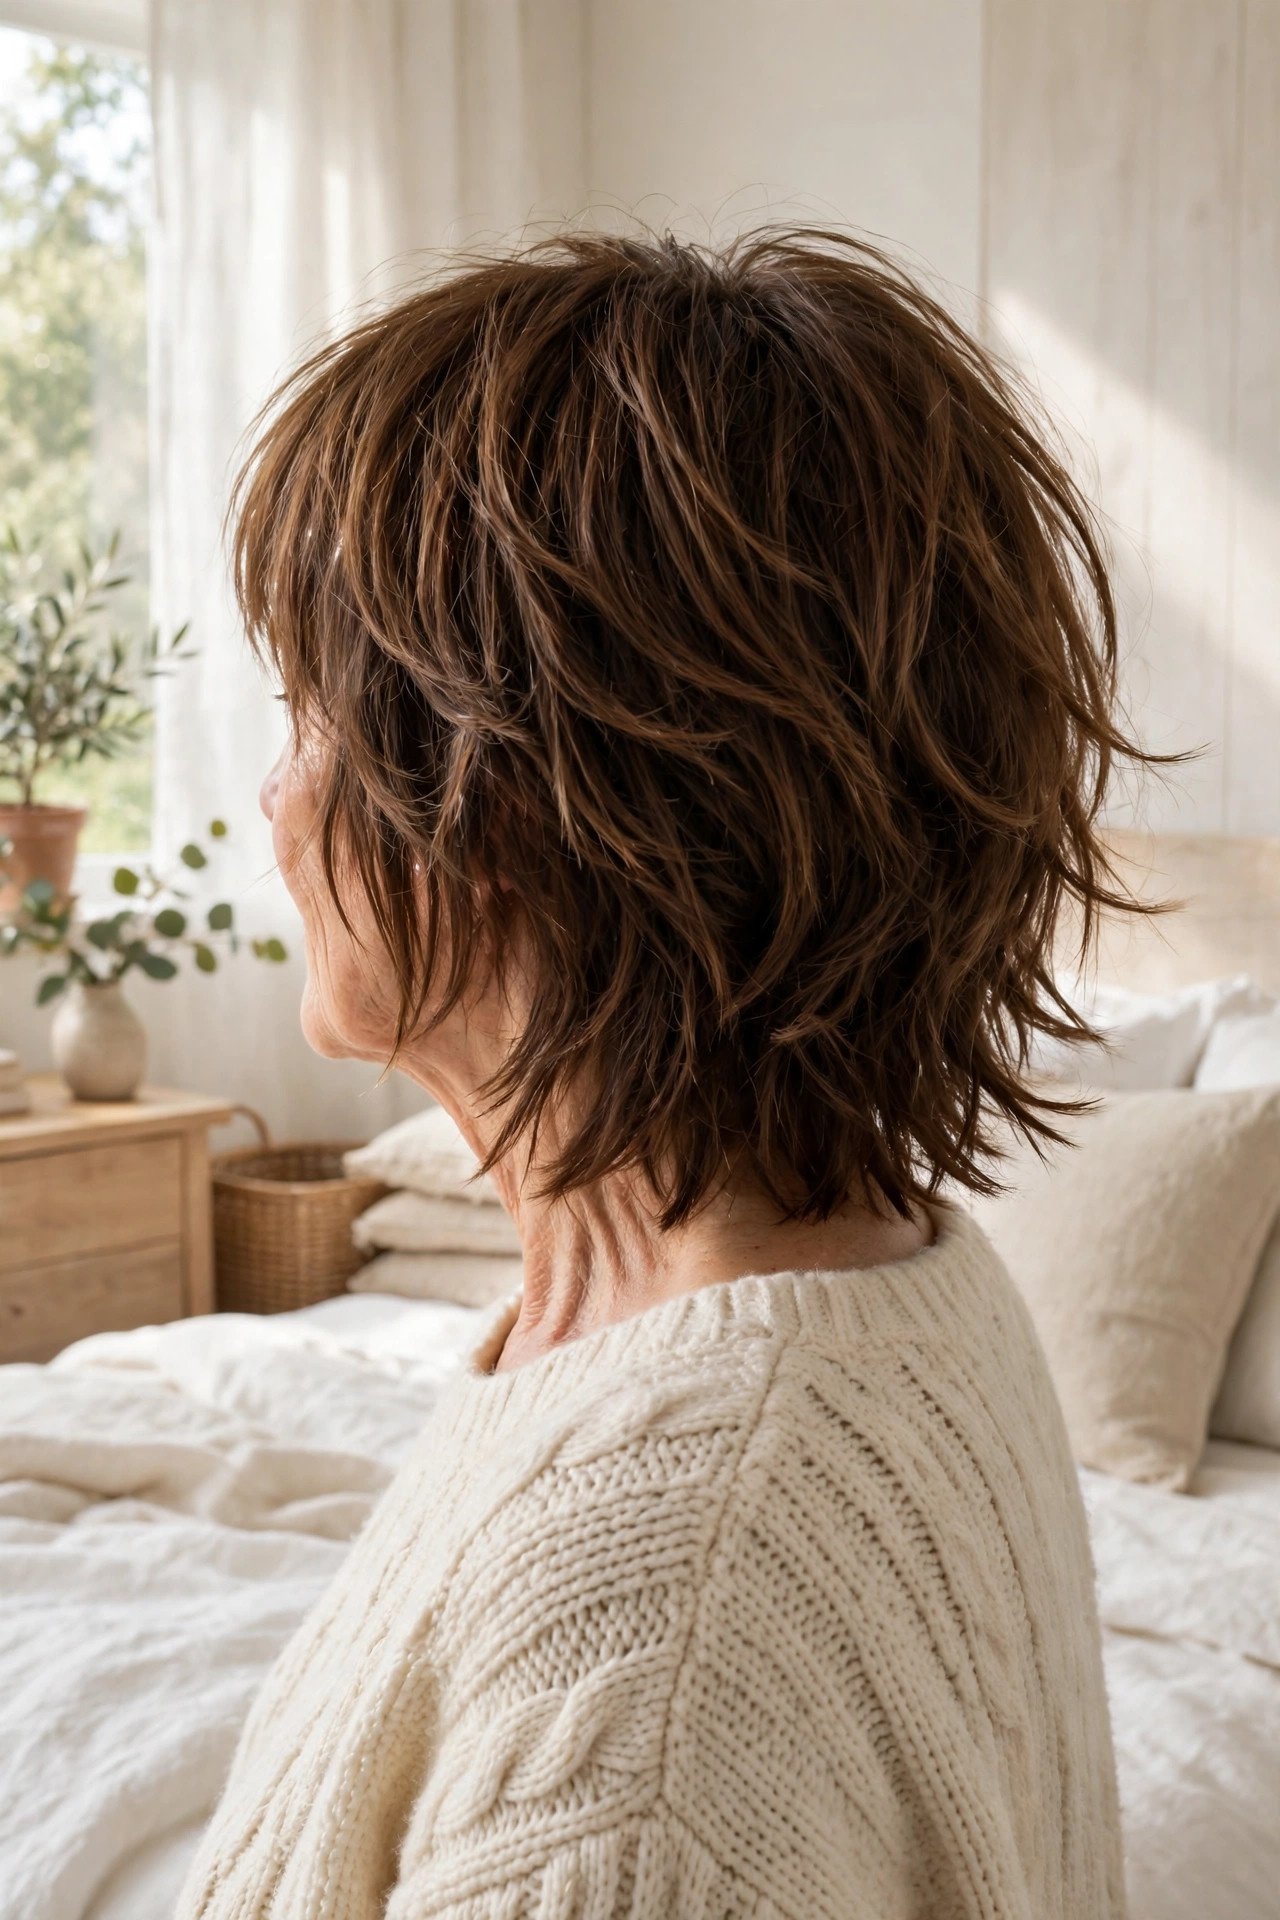
Run your eye down this cut and the ends never sit in one straight line.
That broken edge comes from the razor. Instead of snipping a clean end, the stylist slides a razor down each section so the tips taper and separate. On shoulder length hair with medium or thick strands, the effect is soft and a little undone, and the layers blend with no visible steps. Fine hair should be careful here. Razored ends on fine hair can fray and look thinner within weeks. If your hair is fine, ask for the same shape cut with scissors and point cutting. You get the outline without the wear.
Before you book razor ends
14. The Choppy Shag With Piecey Ends

This is the shag with the texture turned all the way up.
Layers are cut in bigger, chunkier pieces, and the ends are separated into points rather than blended smooth. The crown carries real height, which is why this version suits women whose hair has enough body to hold a shape. A pea size amount of styling paste, warmed between your fingers and pinched through the ends, keeps the pieces defined through the day. Keep the fringe soft and a little long. That softness stops the choppy layers from reading harsh, and it is the detail that keeps the cut friendly at any age.
15. The Side-Swept Shag
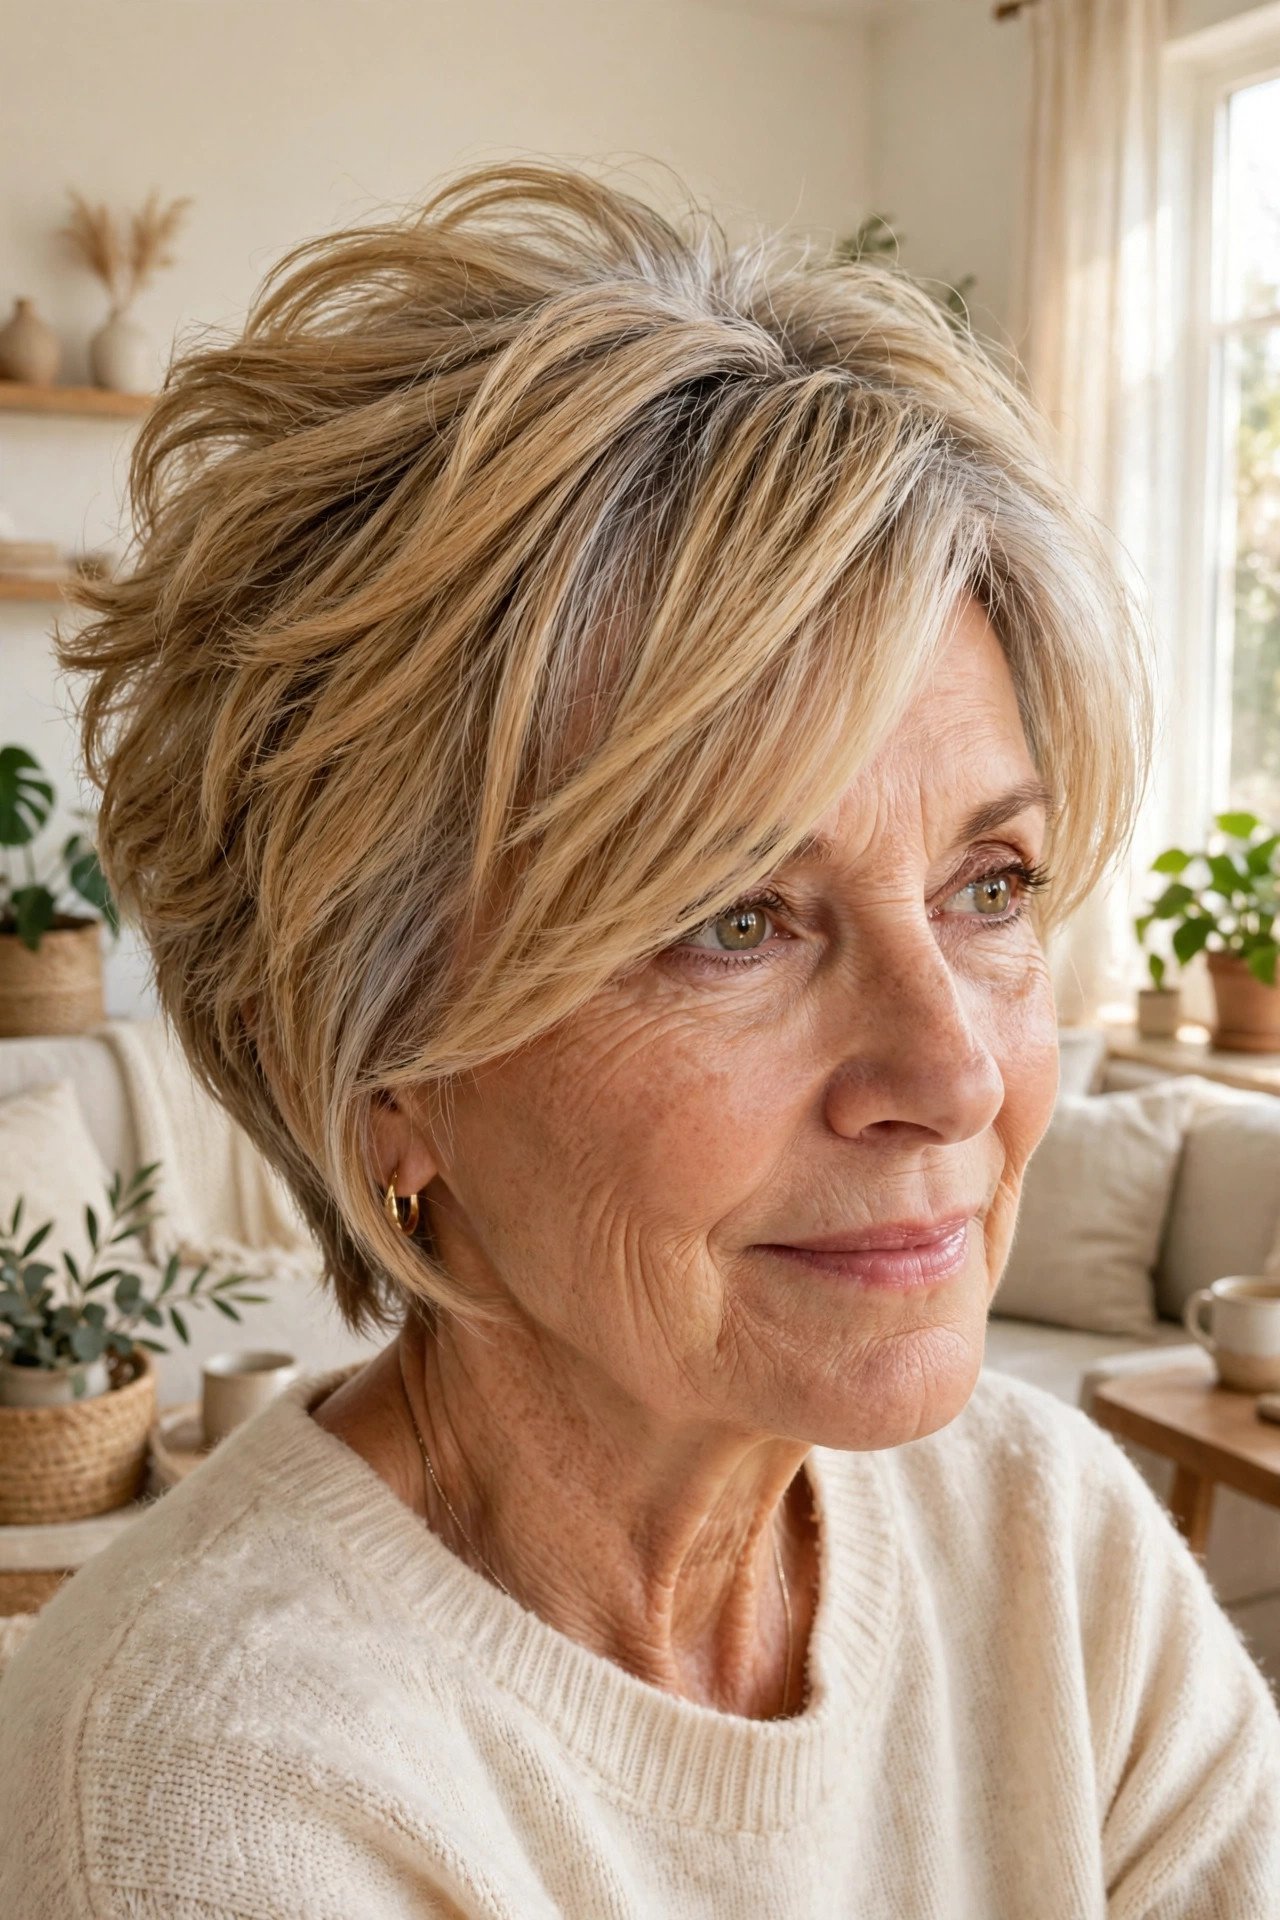
One deep side part, and a familiar shag changes character completely.
Sweeping the front layers across the forehead builds height on one side and gives the cut an asymmetric line that reads polished even on a rushed morning. It is also a kind trick for a parting that has started to look sparse, since moving the part moves where the eye lands. Round faces gain length from the diagonal line across the forehead. The layers themselves stay the same as a standard medium shag. Only the part and the fringe direction change, which makes this the cheapest experiment on the list: try the part at home before you commit to a new cut.
💡 Quick Tip
Part it deeper than feels natural, roughly above the outer edge of your eyebrow. A timid side part slides back to the middle by noon.
16. The Auburn Shag With Face-Framing Layers

Colour and cut pull together in this one, and neither would work as well alone.
The auburn itself can be copper, chestnut red, or a deep rust. What matters is the placement of the layers. The shortest pieces sit right at the cheekbones, where they catch the light every time you turn your head, so the colour looks lit from inside the cut. Warm skin tones wear it easily, and green or hazel eyes stand out against it. Red based colours fade faster than browns, so plan on a colour refreshing gloss between full appointments. The shag shape hides regrowth well, which stretches the time between salon visits.
One flat auburn all over, layers starting down at the chin, colour and cut ignoring each other.
Face framing layers at the cheekbones catch the light, and the colour reads deeper and warmer.
17. The Grown-Out Shag for Low Upkeep

Book the cut that still looks good at week ten, not only on day one.
Some shags are cut to be grown out. The layers start longer, the gaps between them are wider, and the fringe is shaped so it turns into face framing layers instead of a problem. At three months this cut looks like a soft layered style rather than a shag that missed its appointment. The trade is real: you give up some of the crown lift and piecey texture of a fresh shag. Women who live far from a salon, travel often, or simply dislike appointments tend to call that trade worth it every time.
| Fresh shag | Grown-out shag |
|---|---|
| Trim every 6 to 8 weeks | Trim every 3 to 4 months |
| At its best in the first month | At its best in months two and three |
| Fringe needs regular tidy ups | Fringe grows into face framing layers |
18. The Shag Mullet-Lite

The word mullet scares women off a version that is actually gentle.
Mullet-lite keeps the front and sides short and neat, then leaves more length at the back, but the back is tapered and blended into the sides rather than left hanging as a separate layer. There is no hard shelf where the short part stops. From the front it reads as a short shag. The extra length only shows in profile and from behind, where it softens the neckline. It suits oval and longer faces, and women who like a cut with a bit of nerve. Bring a side view photo to the salon, since the profile is where this cut is decided.
Taper the back length into the sides so there is no hard step.
Keep the front fringe soft and a little long.
A hard shelf between the short sides and the long back.
Letting the back grow past the shoulders without shaping.
19. The Blowout Shag With Rounded Volume
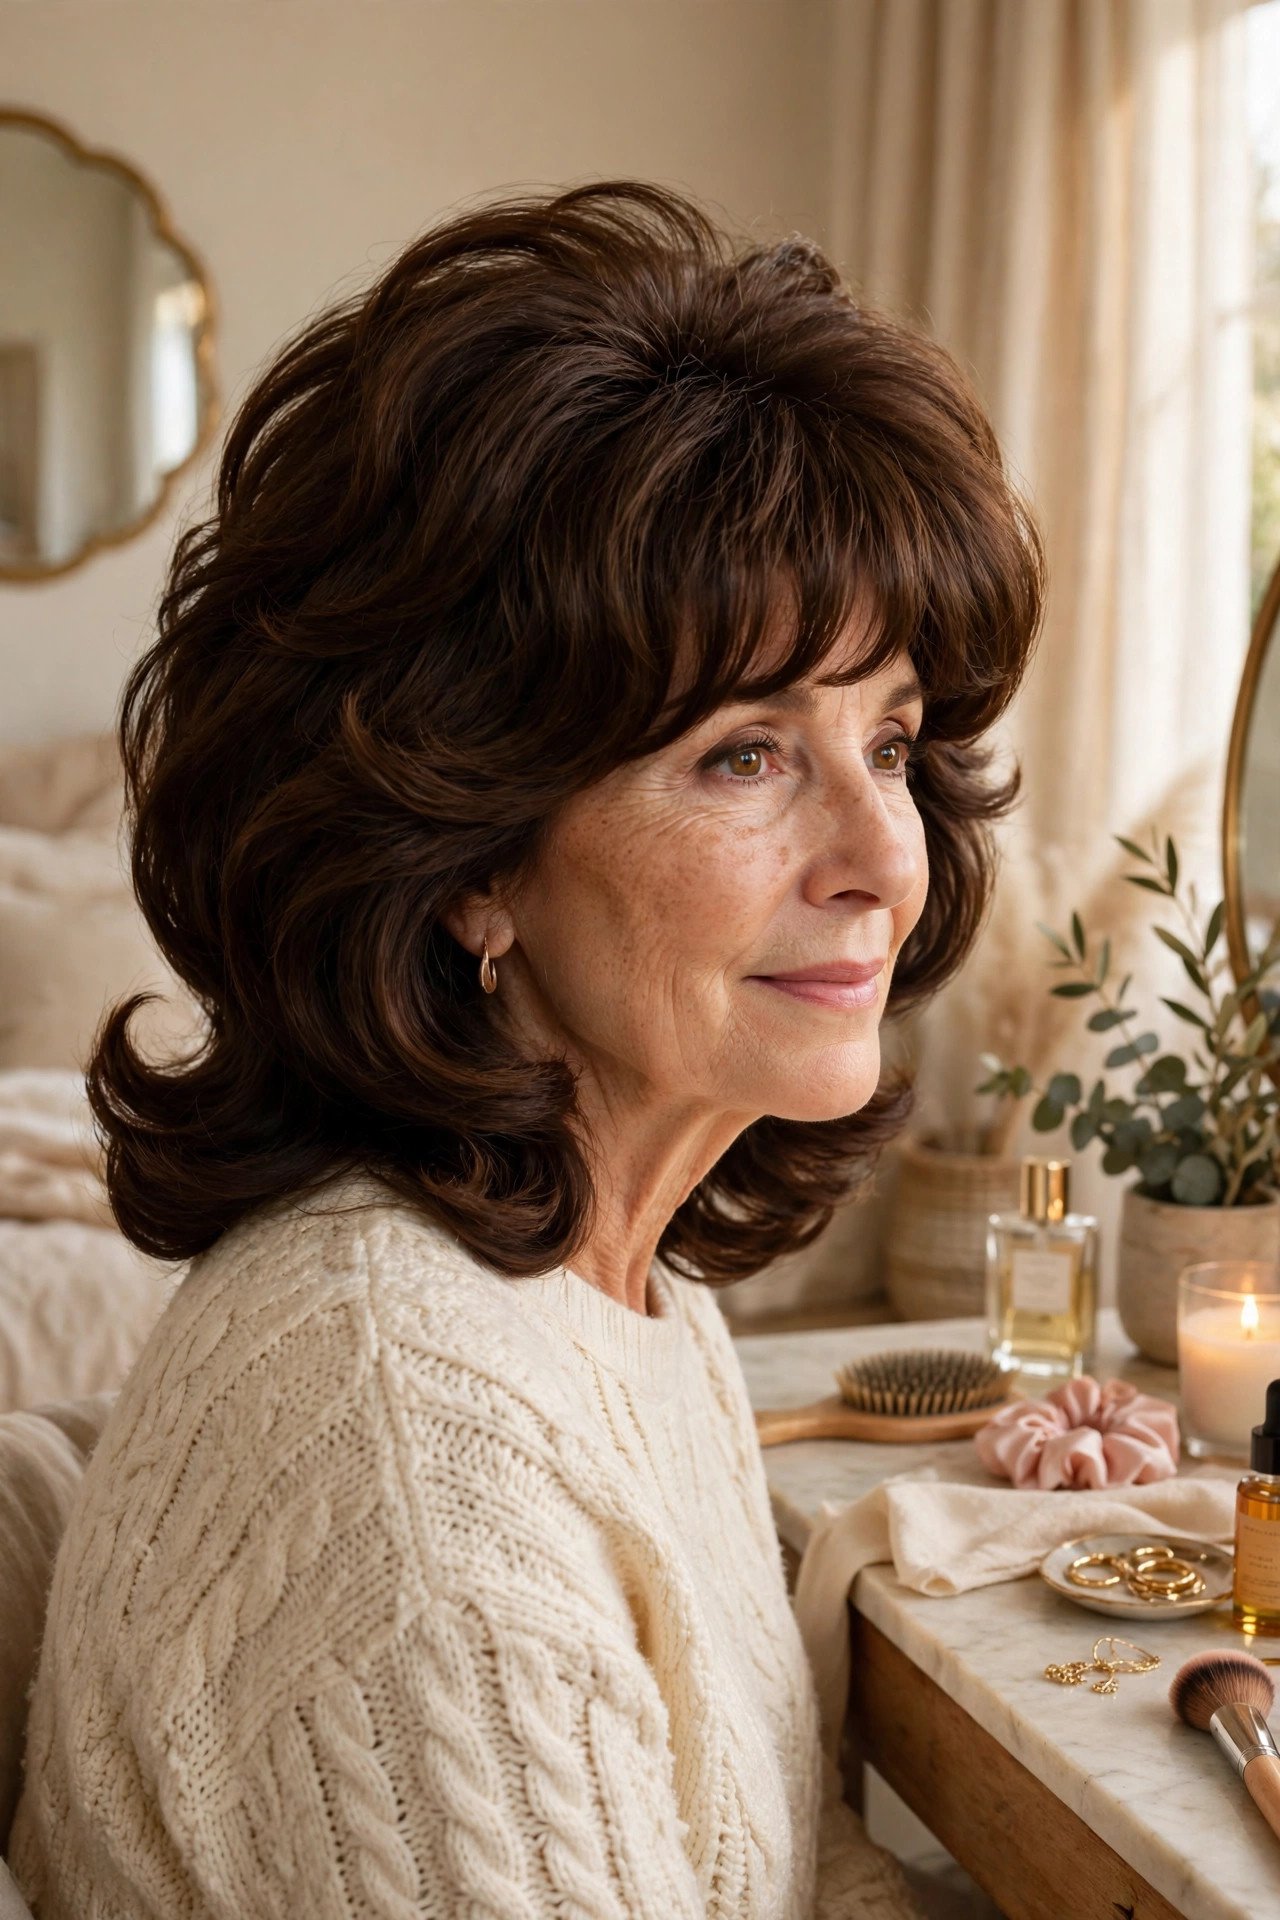
This is the shag dressed for the evening, built on the same layers you wear loose all week.
The blowout version is not a different cut. It is a medium shag dried smooth with a round brush, each layer rolled under or over so the whole shape rounds out like a soft dome. The ends curve instead of flicking, the fringe sits full, and the finish looks deliberate. Straight and wavy hair hold it best. It takes fifteen minutes or so once you know the moves, and a light dry shampoo at the roots on day two brings the lift back. Keep one shag cut and style it two ways, rather than booking a separate formal style.
Dry in sections, lifting each layer at the root with the brush as you go.
Roll the ends under at the back and over at the front, for the rounded shape.
Cool each section on the brush for a few seconds before you let it go.
20. The Air-Dry Shag

Wash it, scrunch it, walk out the door. That is the whole routine, provided the cut is right.
An air dry shag is planned backwards from your natural texture. The stylist watches where your hair bends on its own and places the layers there, so the shape appears as it dries instead of needing a brush to force it. Wavy and lightly curly hair are the natural candidates. Straight hair can wear it too, with a flatter, sleeker result. Say the words air dry at the booking, not in the chair. It changes where a good stylist puts every layer, and it is the difference between a wash and go cut and a daily argument.
An air dry shag is decided at the booking. Say you will not be heat styling, and the layers land where your hair actually bends.
21. The Pixie Shag
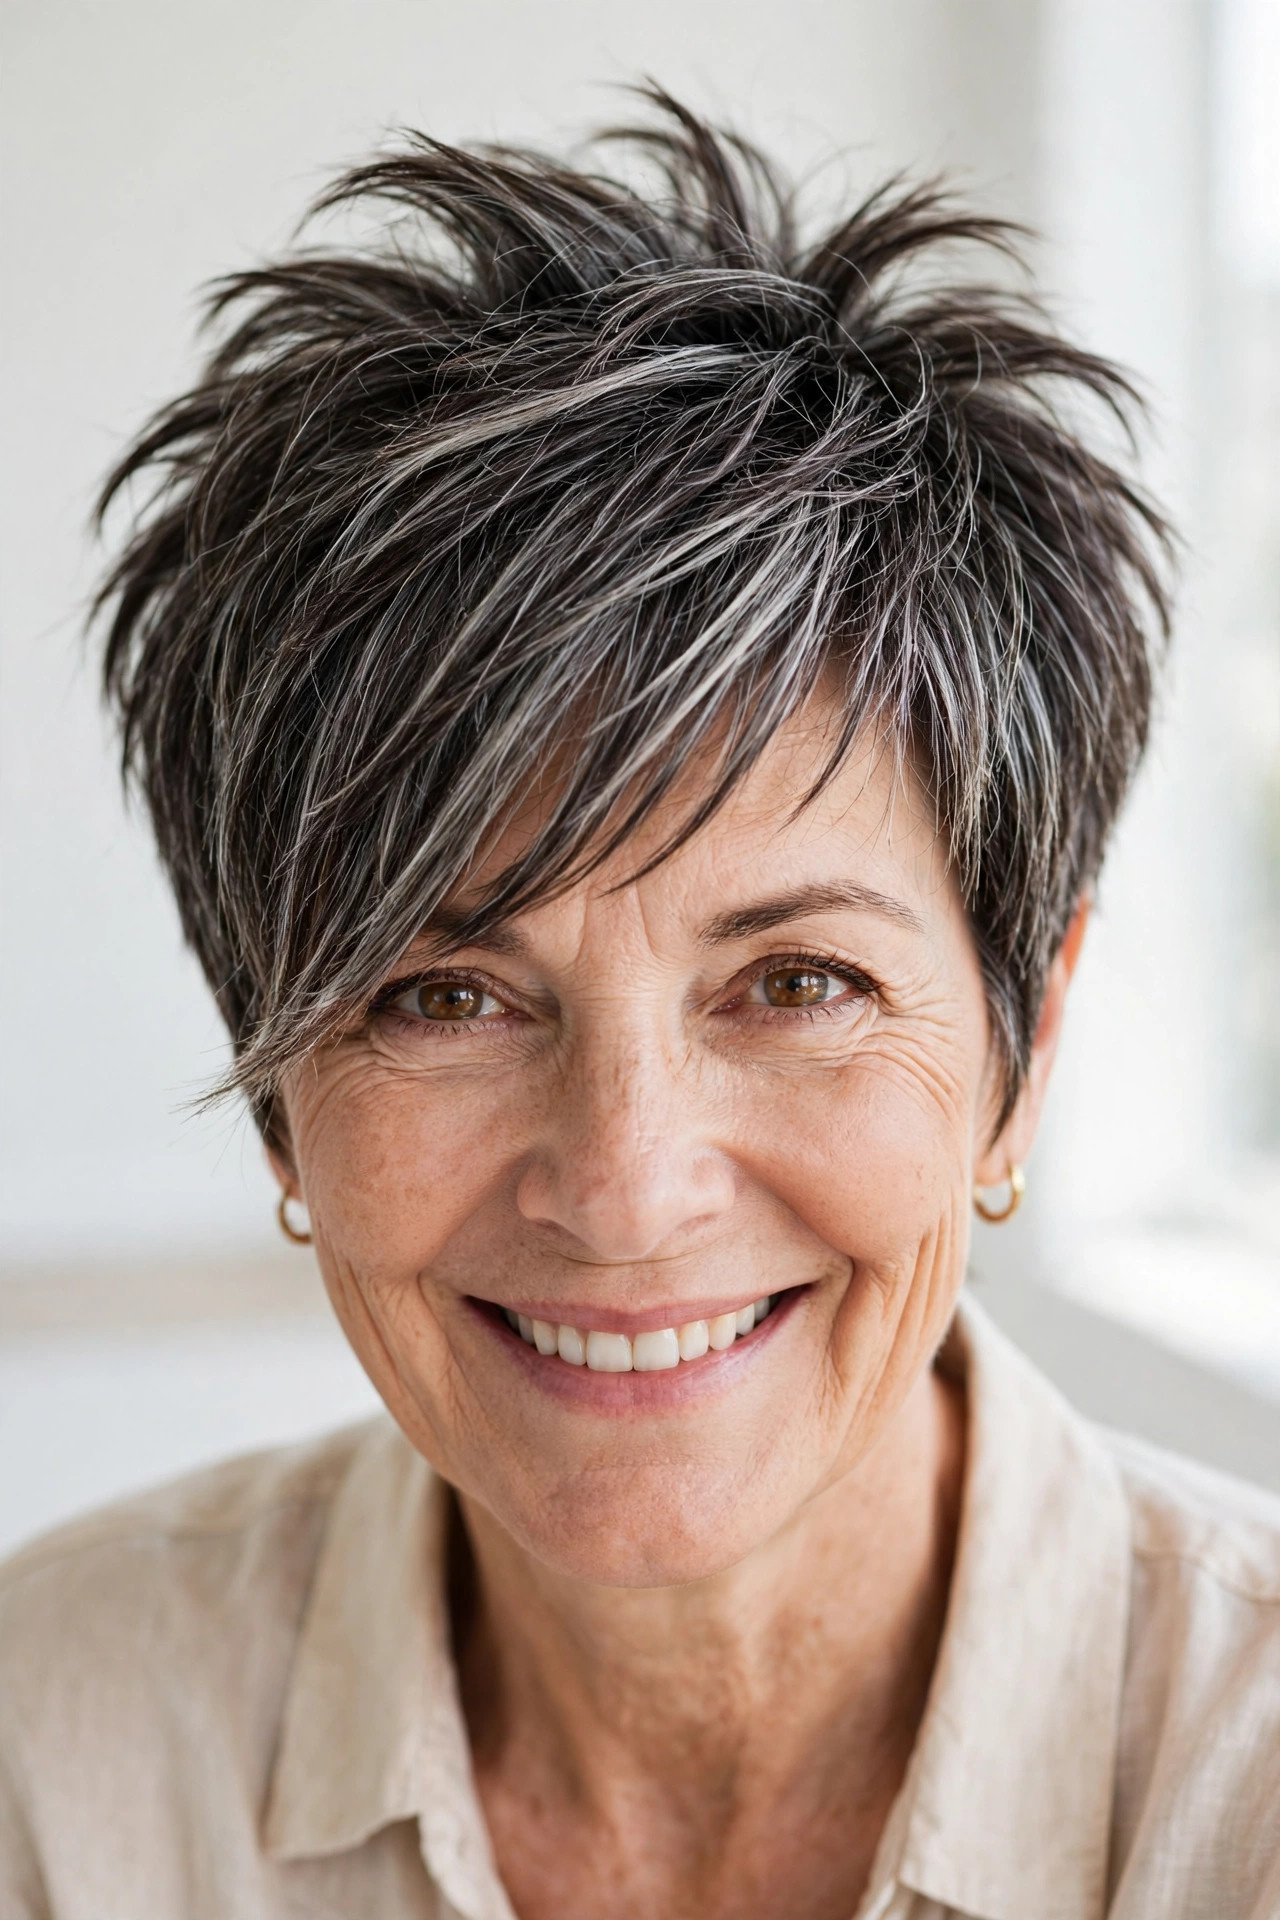
Short at the back, shaggy on top, and a fringe longer than you would expect.
The pixie shag borrows the pixie outline, cropped close at the nape and around the ears, then keeps the crown and fringe long and layered so the top has movement instead of sitting flat. That long top is what separates it from a standard pixie. Fine hair does well here because the short back removes weight the top cannot support. It is also kind to glasses wearers, since the sides sit clear of the frames. The honest cost is upkeep. Short cuts show growth fast, so plan on a tidy up every five to six weeks.
22. The Shag for Thick Hair, Weight Removed
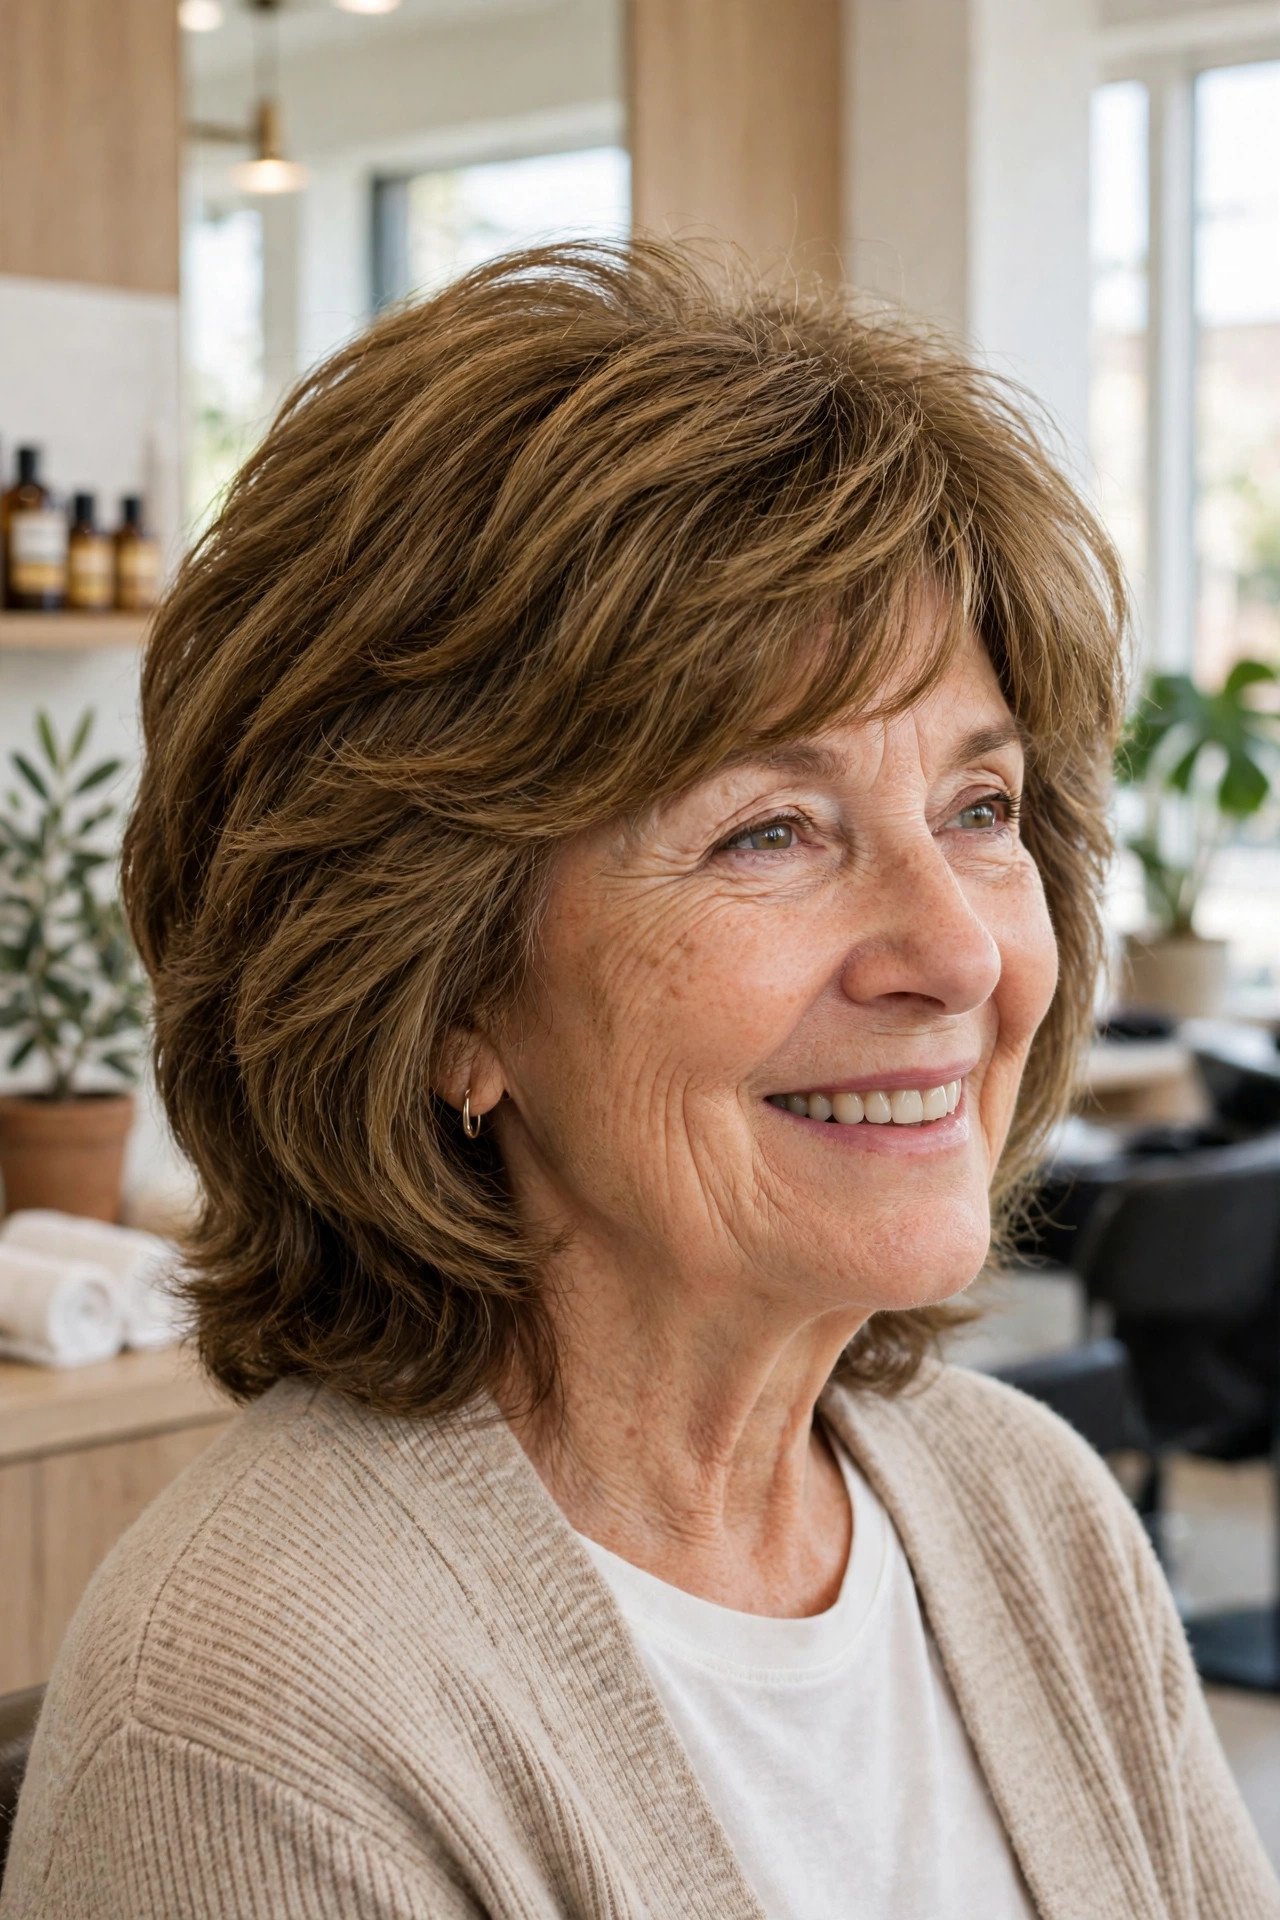
Thick hair carries a shag beautifully, once the hidden weight comes out.
The problem is never the top layer. It is the dense undergrowth underneath, which pushes the whole cut outward and turns layers into a triangle. A stylist who knows thick hair removes weight from the inside, with interior layers and careful slide cutting through the ends, while the surface stays smooth. The outline keeps its shaggy shape and the head feels lighter the same day. Drying time drops as well, which thick haired women notice every single morning. Ask how the stylist plans to remove weight before the scissors come out. The answer tells you a lot.
Signs the weight needs to come out
23. The Glossy Polished Shag
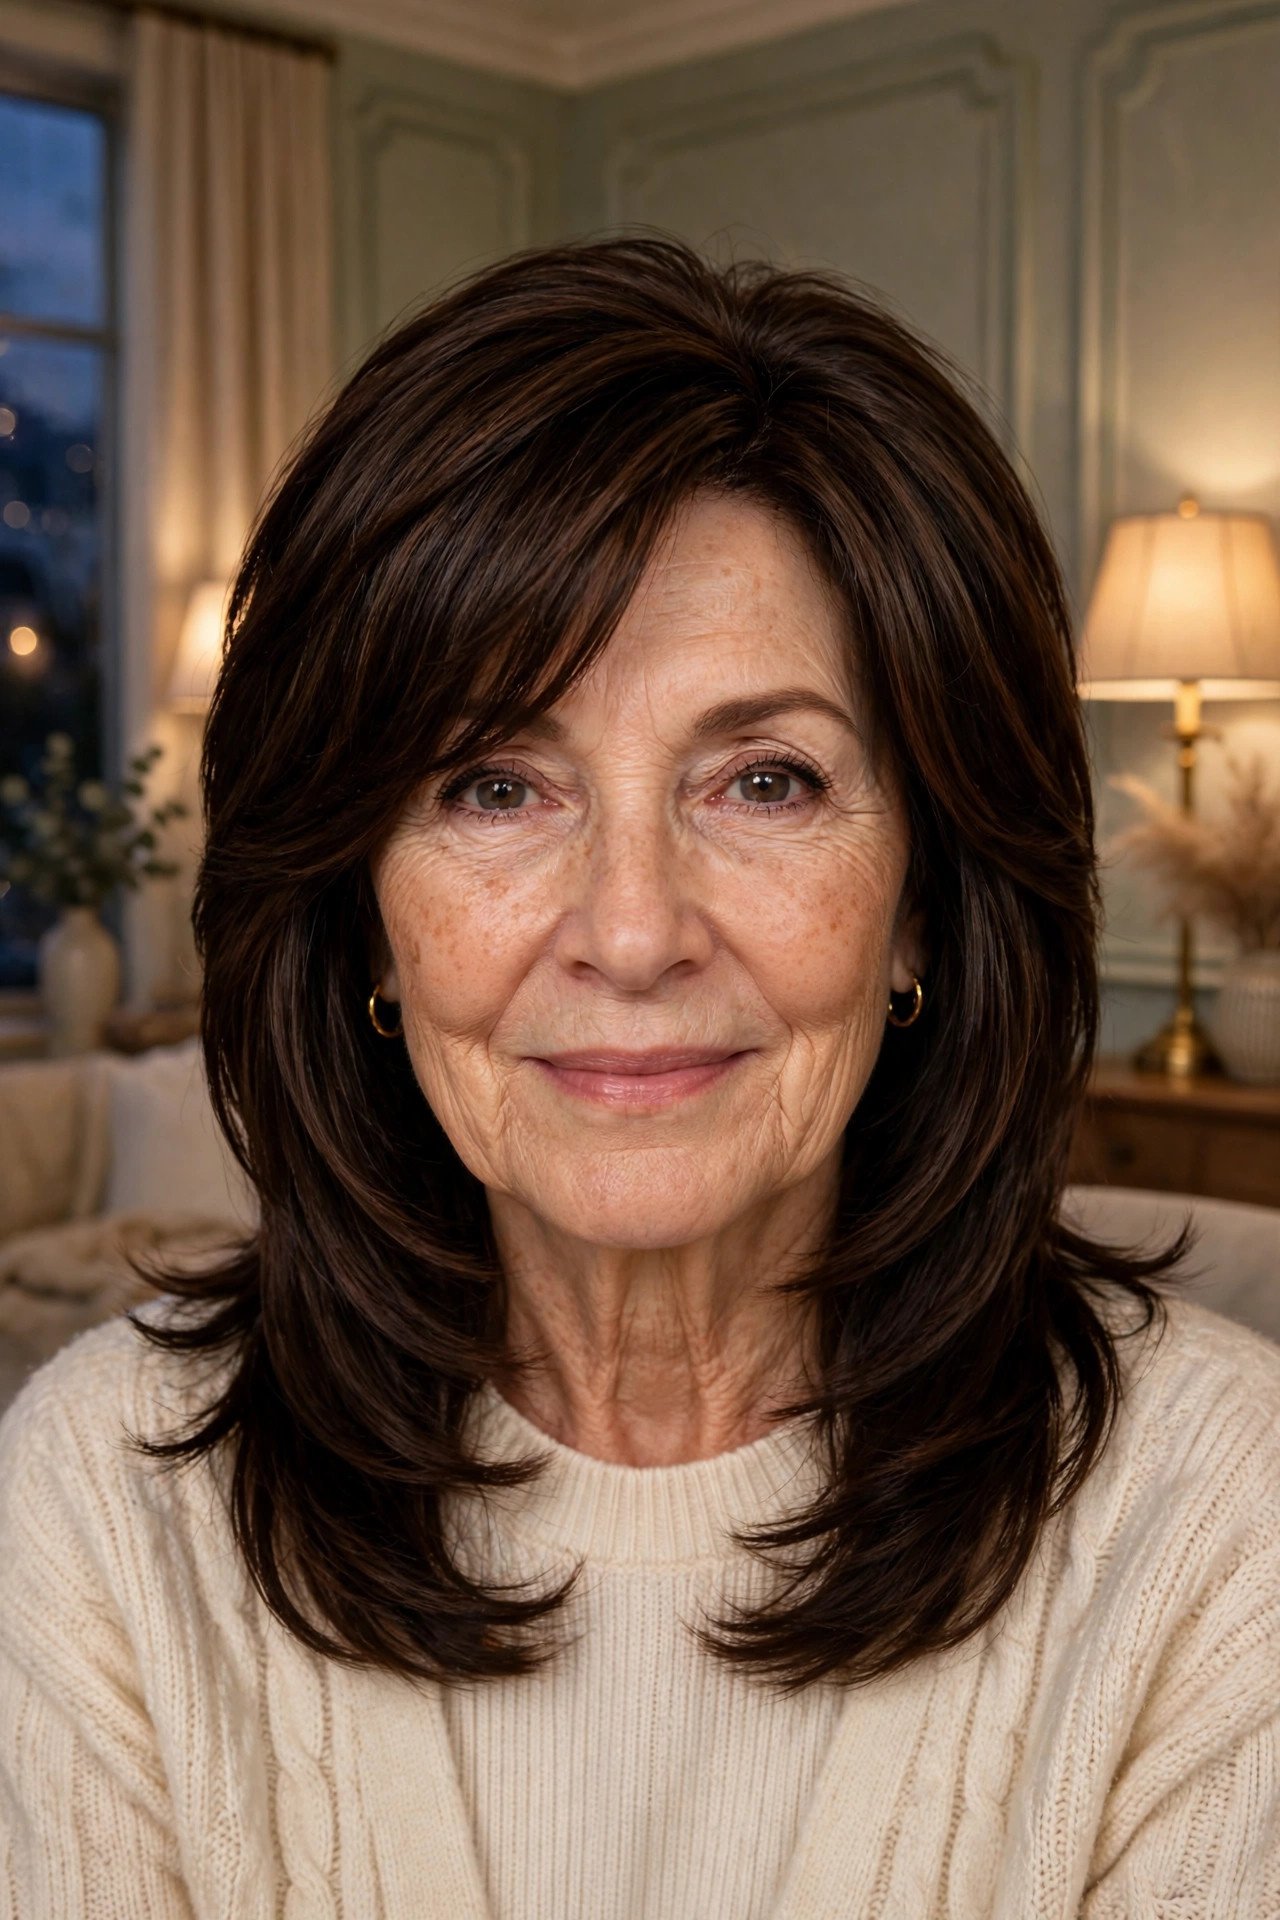
Shags do not have to look undone, and this one proves it.
The layers are the same as any medium shag. The finish is where it changes. Hair is dried smooth, the ends are pressed flat with one quick pass of a straightening iron, and a salon gloss treatment adds the kind of shine that makes dark hair look almost wet. The outline stays layered and light, so it never reads as a stiff helmet. This version suits straight hair and dressier settings, and it is a good answer for women who love the shag shape but work in conservative offices. Use a heat protectant spray first. Polished should not cost you your ends.
The shag has lasted this long because it bends. Short or long, curly or straight, silver or auburn, the layers adjust to the hair in front of the mirror. Choose the two or three modern shag haircuts over 50 from this list that fit your texture and your mornings, and save this list and the photos to your phone before your appointment. Show your stylist the crown, the fringe, and the ends in each picture, and say plainly which parts you want softer. A good shag grows out kindly, so the decision is easier than it feels.