23 Vintage Christmas Nails Red And Gold You’ll Want To Save Right Now
Red and gold is the Christmas pairing that never dates. It showed up on vintage tree ornaments, old ribbon boxes, and the manicures women wore to holiday parties decades ago, and it still looks right today. This list gathers 23 vintage christmas nails red and gold designs, and every single one sticks to those two colors. You will find glossy red with real gold foil flakes, gold chrome finished with red gems, plaid, holly leaves, tiny painted trees, and a Santa belt with a proper gold buckle.
Some sets are short and neat enough for baking days and gift wrapping. Others go long, glossy, and dramatic for party nights. Each design comes with a quick look at the finish, the nail shape that suits it best, and one simple tip to help the look last through the season. Read through, pick the two or three that match your plans, and show the photos to your nail tech. Vintage color, done the classic way, is hard to beat at Christmas.
1. Classic Glossy Red Nails With Gold Foil Flakes
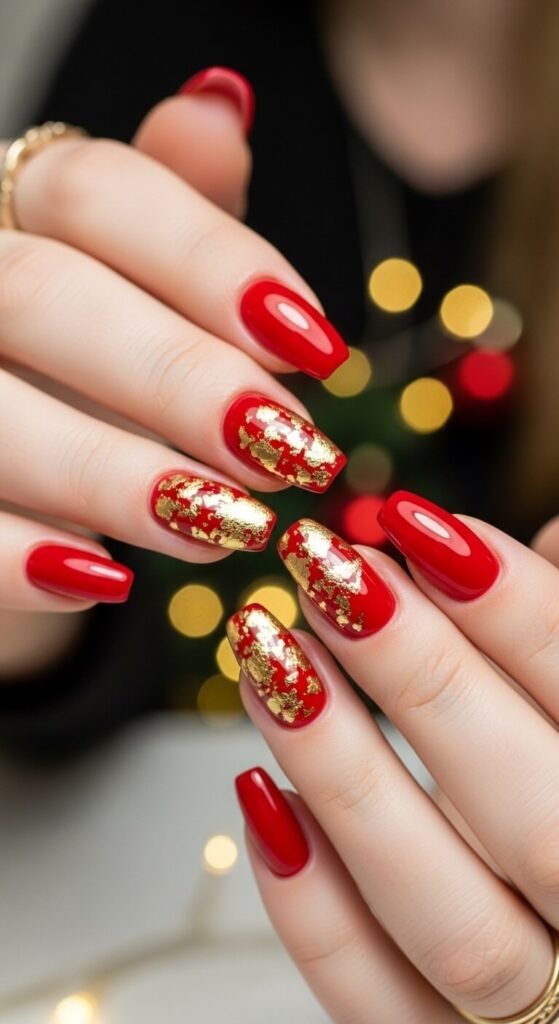
Glossy red polish and torn gold foil are the whole story here. Four nails stay plain shiny red, and the accent nails carry chunky flakes of gold foil pressed over the same red base. The foil sits under a clear top coat, so the surface stays smooth while the gold catches light from every angle. Medium coffin and almond shapes show the flakes best because they give the foil room to spread.
- Base: two coats of classic blue red gel
- Foil: irregular flakes, placed with tweezers, not full coverage
- Finish: high gloss top coat to seal the edges
Short nails can wear it too. Just scale the flakes smaller and keep them near the center of the nail.
2. Red Velvet Nails With Gold Glitter Tips
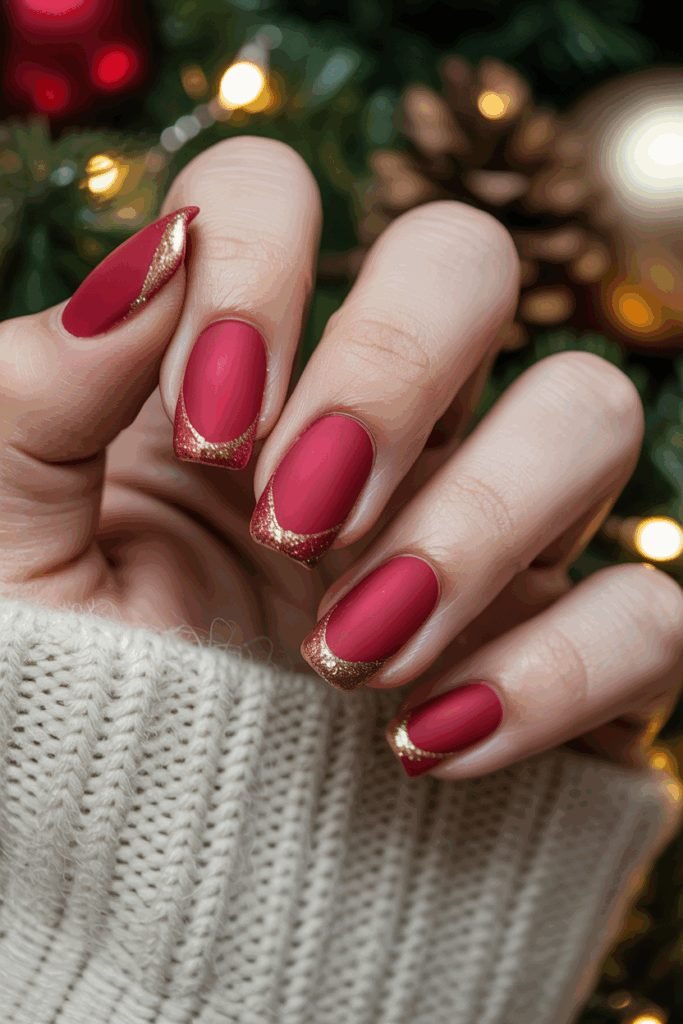
Velvet nails are really just matte nails with the right red underneath. A matte top coat over a warm red gives that soft, fabric like finish, and here the tips carry a band of gold glitter like a French manicure dipped in sparkle. The photo set leans dusty rose red, which reads even softer in person.
Keep the glitter band thin. A thick band fights the calm matte surface and makes short nails look shorter. Ask for the glitter to fade slightly at the edges instead of ending in a hard line. Skin tone matters with this one too. Dusty reds flatter fair skin, while deeper reds suit medium and deep skin better.
💡 Velvet Tip: Matte top coat shows every ridge, so a ridge filling base coat goes on first. The band of gold glitter goes on after the matte layer, which keeps the sparkle glossy against the flat red.
3. Gold Chrome Nails With a Red Gem Accent Nail
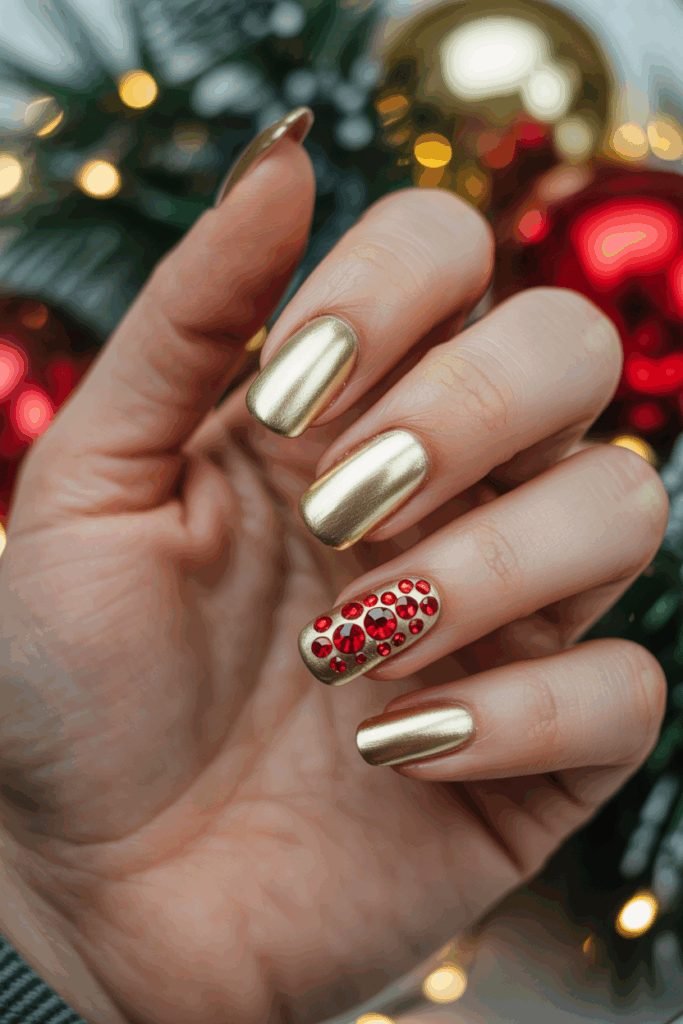
Gold chrome does not whisper, and this set knows it. Every nail is a smooth mirror gold except one, and that accent nail is packed with red gems in mixed sizes. The contrast is the design. Plain chrome on the other nails keeps the gems from tipping into costume territory.
Salon notes worth knowing:
Shape in the photo: short squoval, proof that chrome works on natural length nails.
Gems: flat back stones set into gel, largest at the center of the nail.
Upkeep: chrome powder needs a no wipe top coat to keep the mirror sharp.
Book this one close to your event. Chrome shows chips sooner than cream polish, and the mirror finish is the whole point.
4. Red and Gold Plaid Nails
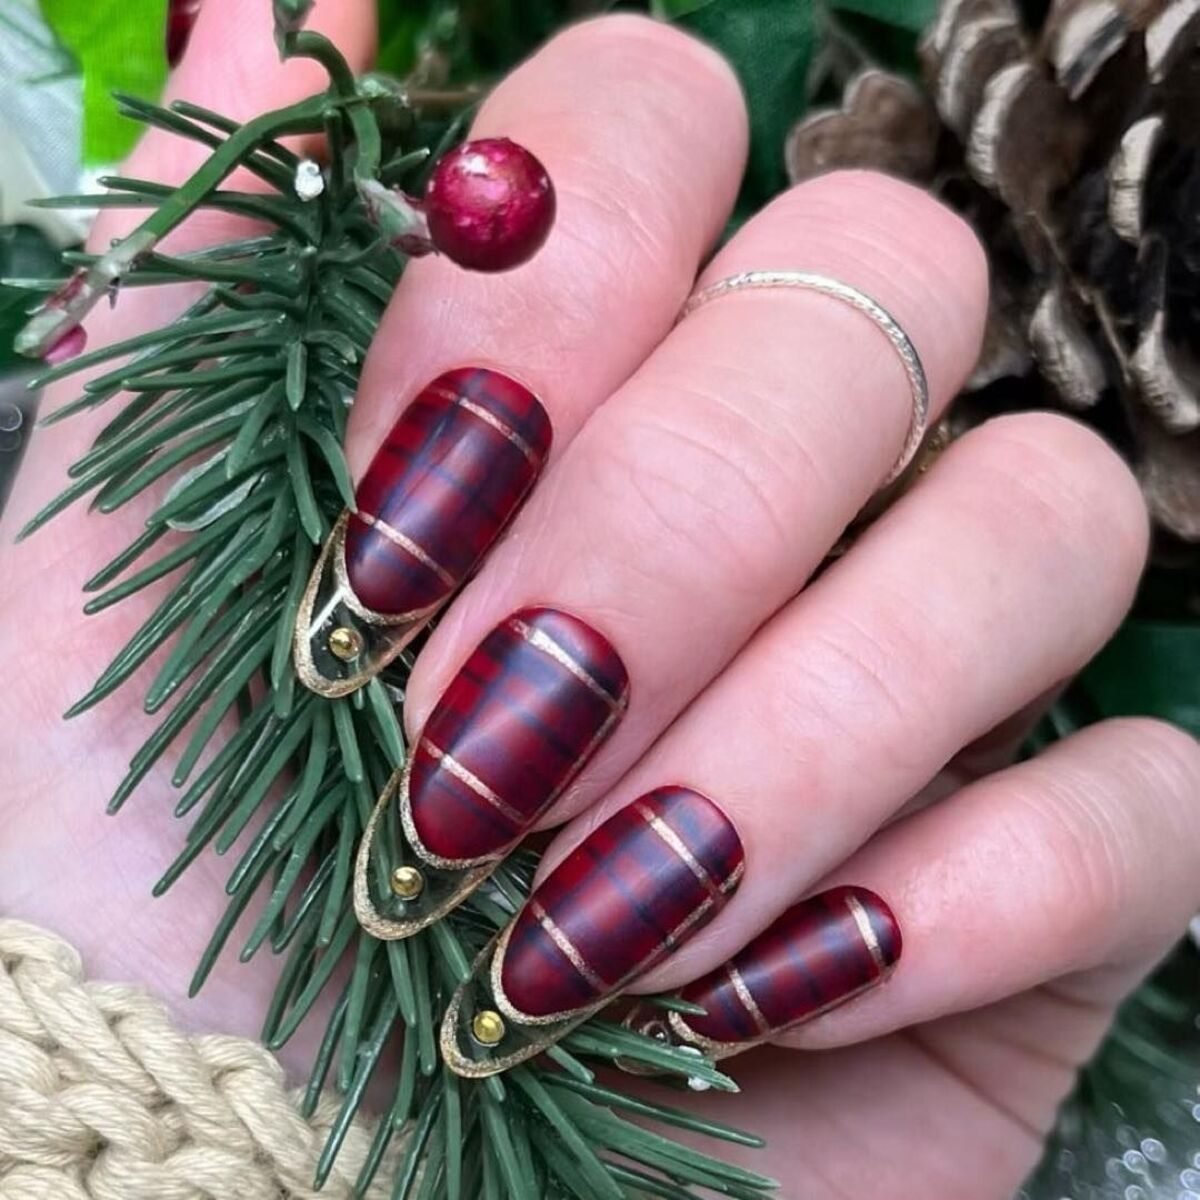
Plaid is the most vintage pattern on this list, borrowed straight from old Christmas blankets and ribbon. Deep red forms the base, darker red and near black lines build the check, and thin gold stripes cross over the top. A few nails even carry a tiny gold stud near the tip edge.
Recreate it in this order. Paint the full red base and cure it. Add the wide dark bands with a flat brush. Then pull the thin gold lines last with a striping brush, because metallic lines sit proud of the surface and read as woven thread. A matte or satin top coat keeps plaid looking like fabric instead of plastic.
| Top Coat | Look | Best For |
|---|---|---|
| Matte | Woven fabric, soft and vintage | Plaid purists and daytime wear |
| Satin | Gentle sheen, still fabric like | Anyone who finds matte too flat |
| Gloss | Shiny and bold, less like cloth | Party nights and photos |
5. Glossy Red Nails With Gold Holly Leaves
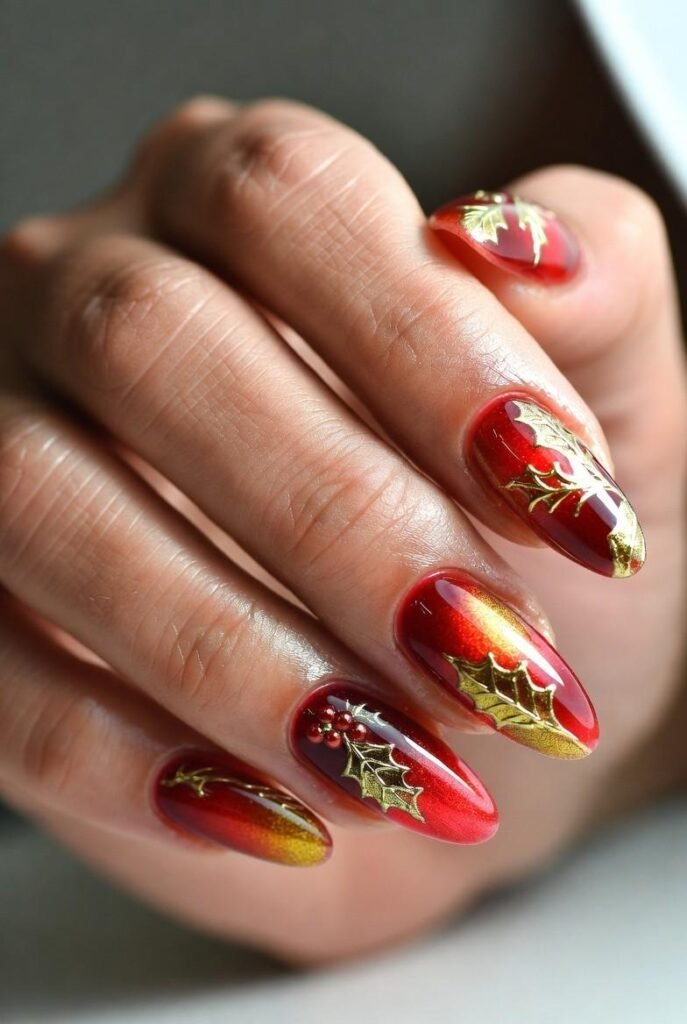
Gold holly leaves carry this design from plain red to Christmas in one step. The base is a glossy jelly red with a warm golden glow at the edges, and each nail gets one or two metallic gold holly leaves with tiny red berry dots. Because the leaves are gold instead of green, the set stays inside the red and gold palette while still reading as holly.
- Leaf placement: one large leaf per nail, angled in from a corner
- Berries: three tiny red dots clustered at the leaf base
- Base: jelly red, two to three thin coats
Long almond nails give the leaves the most room, but the design scales down well to medium lengths.
DO
✓ One or two leaves per nail, no more
✓ Berries in tight clusters of three
SKIP
✗ Green leaves, they break the two color palette
✗ A leaf on every nail at full size, it gets busy fast
6. Gold Glitter Ombre Over a Red Base
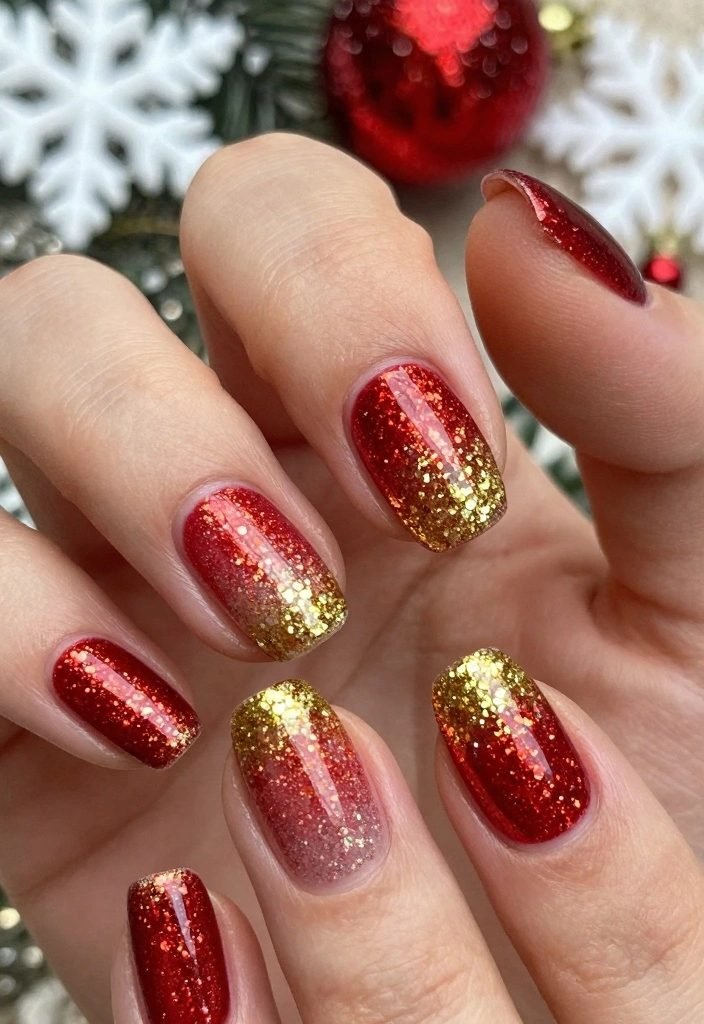
The gold starts at the tips and melts upward into a red glitter base, and the blend zone is where this design earns its keep. Both colors are glitter here, red sparkle underneath and chunkier gold sparkle fading in from the free edge. Short squoval nails wear it in the photo, which proves ombre is not only for long nails.
Sponge application gives the softest fade. Dab the gold glitter with a makeup sponge rather than brushing it, and keep the densest gold on the last third of the nail. Two thin passes beat one thick pass. Seal with a smoothing top coat, since layered glitter can feel gritty for the first day.
Paint the red glitter base and let it dry fully.
Dab gold glitter onto the tips with a makeup sponge.
Repeat the dabbing higher up the nail for a soft fade line.
Finish with a smoothing top coat so the glitter feels flat.
7. Matte Red Nails With Tiny Gold Stars

Tiny stars scattered over red is the quietest design in this roundup. The red leans satin matte, and the stars are small pale gold starbursts with tiny dots between them, like the print on vintage wrapping paper. Nothing is placed in a grid, and that looseness is what makes it look hand done and charming.
Ask your tech for:
Star size: mixed, most under a third of the nail width.
Placement: random, with two or three stars per nail.
Finish: matte or satin top coat.
Stamping plates give the crispest stars. Hand painted ones look softer and more vintage. Either suits the design, so pick based on the mood you want.
Plain matte red nails. Neat, classic, and a little flat on their own.
Scattered gold starbursts and dots over the same red. The vintage wrapping paper feel arrives at once.
8. Gold French Tips on a Metallic Red Base
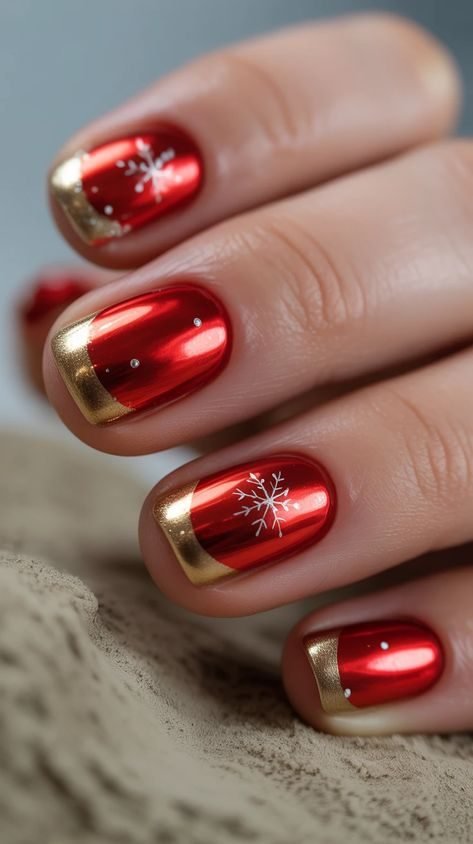
French tips in mirror gold turn a red manicure into jewelry. The base is a metallic red with a chrome like shine, and the tips are solid gold caps with a clean curved edge. Two nails add tiny white snowflakes, a small nod to the season that stays subtle against the red.
Short nails carry this design happily, as the photo shows. The gold tip follows the natural smile line, so it grows out gracefully for about a week before the line looks dated. Metallic red polish shows brush strokes more than cream red does. Long, single direction strokes fix most of that, and a ridge filling base helps too.
Before You Book
✓ Ridge filling base coat under the metallic red
✓ Metallic red applied in long, single direction strokes
✓ Gold chrome paint for the tip caps
✓ Snowflake detail on two nails only, kept small
9. Deep Red Nails With Gold Christmas Tree Designs
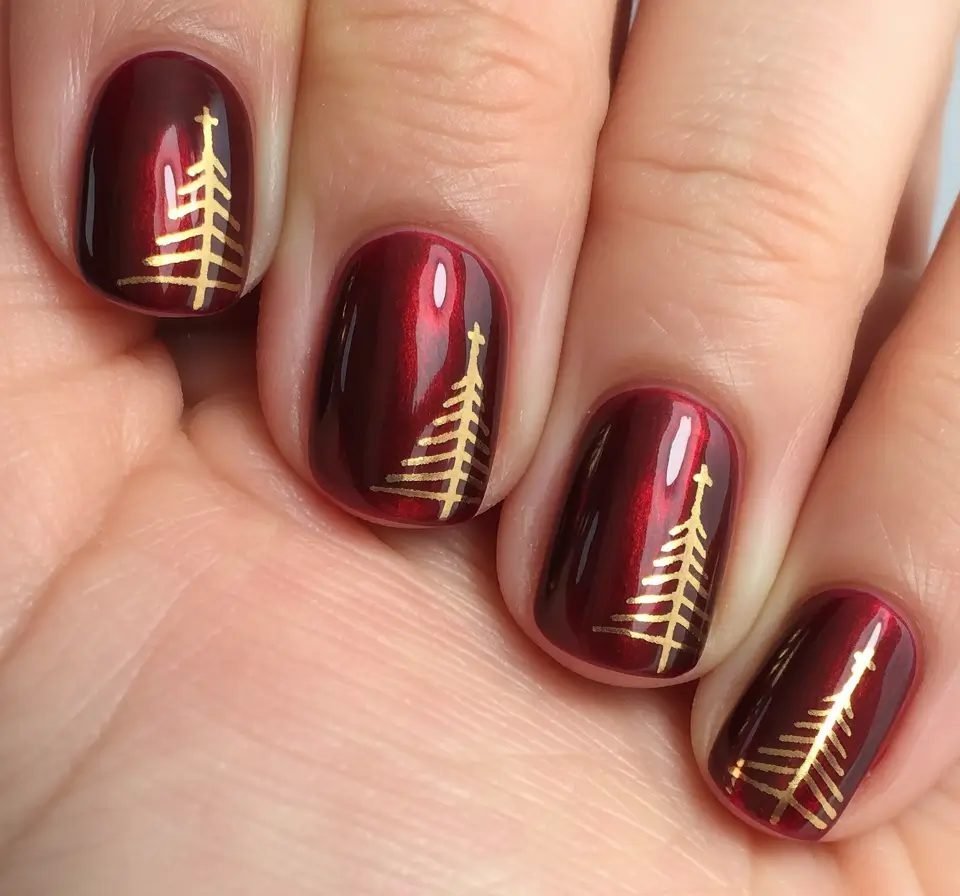
A Christmas tree drawn in five gold lines is hard to beat for charm per minute of work. Each short nail here is a deep glossy red, and each one carries a simple gold tree made of stacked horizontal strokes with a tiny trunk. The trees vary slightly from nail to nail, which keeps the set playful instead of stamped.
- Tree style: minimal line work, tallest at the center of the nail
- Base: deep red, almost burgundy in low light
- Length: short and rounded, very wearable
Stickers and stamping both copy this well at home. Keep the gold lines thin. Thick lines turn the tree into a plain triangle fast.
Key Takeaway: Five thin gold strokes per nail. That is the whole tree, and it works on the shortest nails in this list.
10. Vintage Red Nails With Gold Ornament Baubles
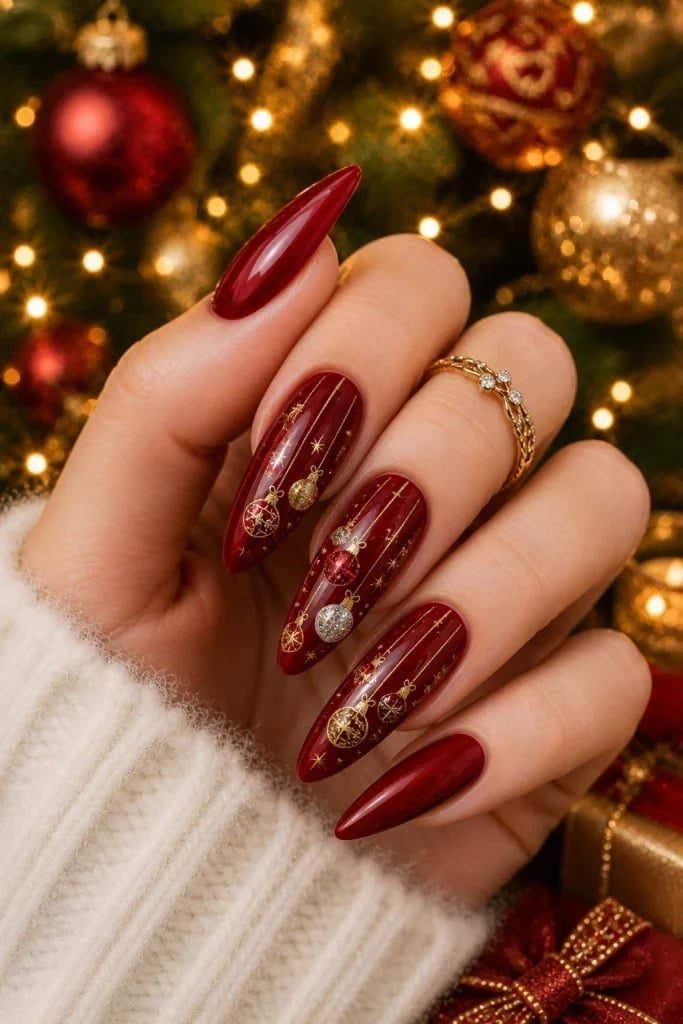
Long stiletto nails in deep red become the backdrop here, and the baubles hang from thin gold strings painted down each nail. The ornaments are round, patterned, and mostly gold, with tiny gold stars scattered in the gaps. It is the most detailed design in this list and the one most likely to get photographed at a party.
Budget real chair time for this set. Hand painted baubles with string lines can take a full extra half hour over a plain set. The payoff is a design that reads clearly from across a room. Keep one or two nails plain red, like the photo does, so the art has room to breathe.
▸ Thin gold string lines running the length of the nail
▸ Round patterned baubles, mostly gold with one red and one silver accent
▸ Tiny gold stars filling the empty space
▸ One or two plain red nails to rest the eye
11. Gold Snowflakes Over Red Glitter Nails
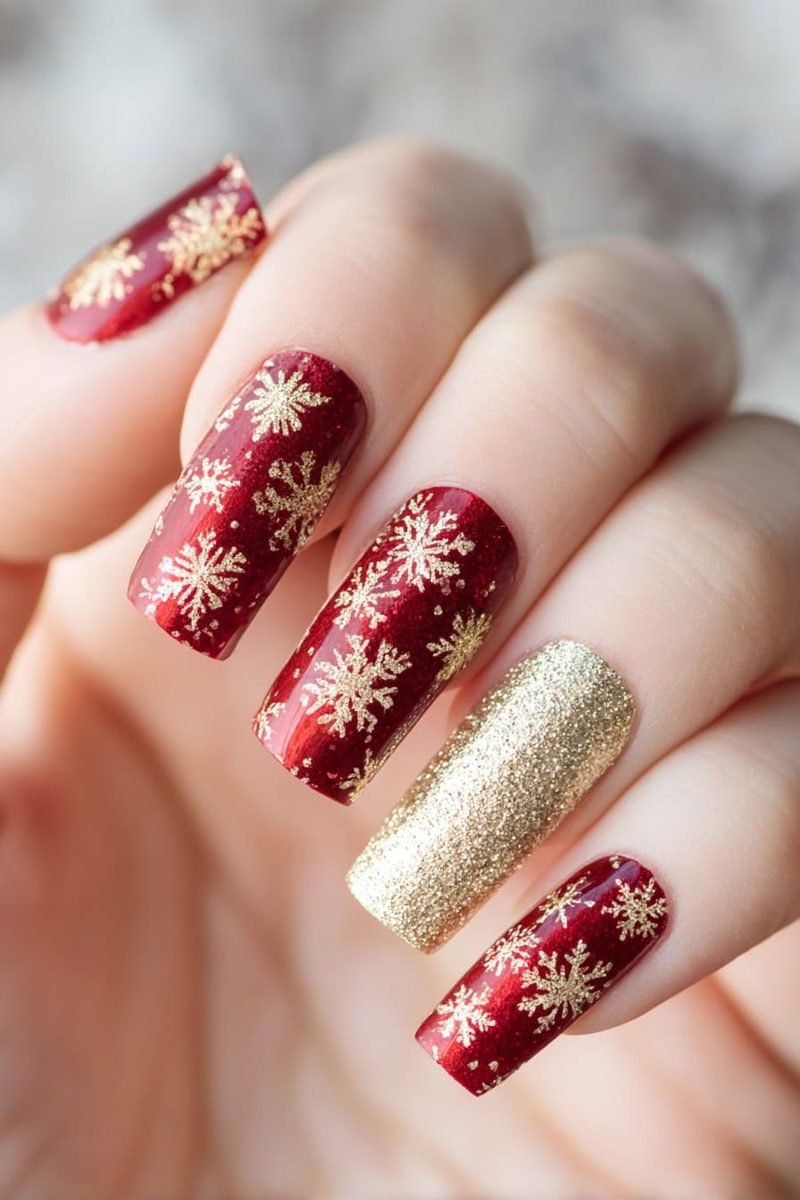
Snowflakes are usually white, so seeing them stamped in gold over red glitter feels like finding the vintage version. Every nail carries gold flakes of different sizes, and one nail skips the red entirely for full gold glitter. The red underneath is a glitter polish too, which gives the whole set a warm glow at night.
Stamped or freehand, keep these points in mind:
Flake sizes: mix large feature flakes with small fillers.
Accent nail: full gold glitter, worn here on the ring finger.
Top coat: glossy, to keep both glitters sparkling.
The square shape in the photo keeps the flakes looking crisp and graphic.
12. Deep Red Nails With a Gold Reindeer Accent
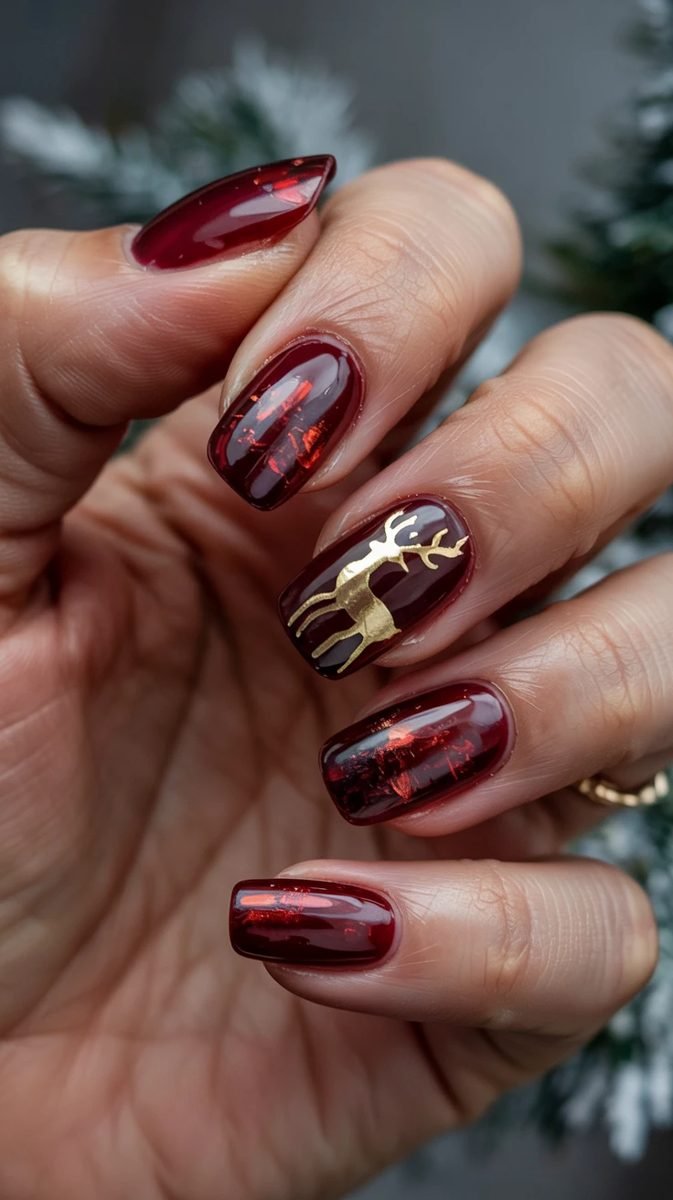
A single gold reindeer is enough, and this set proves restraint works. The nails are a deep glossy burgundy red with subtle red foil flecks under the surface, and one nail carries a gold reindeer silhouette with fine antlers. Nothing else competes with it.
Silhouette art like this is usually a sticker, a stamp, or a very steady hand with a detail brush. Ask which method your salon uses before you book, because the price differs. The foil flecks in the other nails are worth copying too. They add depth to plain red without adding a second design, so the reindeer stays the star of the set.
💡 Booking Tip: Ask if the reindeer is a stamp, a sticker, or hand painted before you book. Each method prices differently, and a sticker under gel looks just as sharp as brush work.
13. Red and Gold Candy Cane Swirl Nails

Candy cane stripes usually break the two color rule, so this set cheats smartly. The peppermint swirls run in red and white, but half of each long coffin nail is solid gold chrome. The gold is bold enough to pull the design back into red and gold territory, and the swirl tips look like the end of a wrapped sweet.
- Split design: gold chrome on one half, swirl on the other
- Swirl colors: red and white peppermint
- Shape: long coffin, because the swirl needs length
Press on sets copy this design well, since the split line hides the edge where the two patterns meet.
DO
✓ Keep the gold half as solid chrome, it balances the busy swirl
✓ Run the swirl on a diagonal for the wrapped sweet look
SKIP
✗ Thin gold lines instead of the chrome half, the design loses its balance
✗ Short nails, the swirl gets cramped and muddy
14. Gold Foil Marble Waves on Red Nails
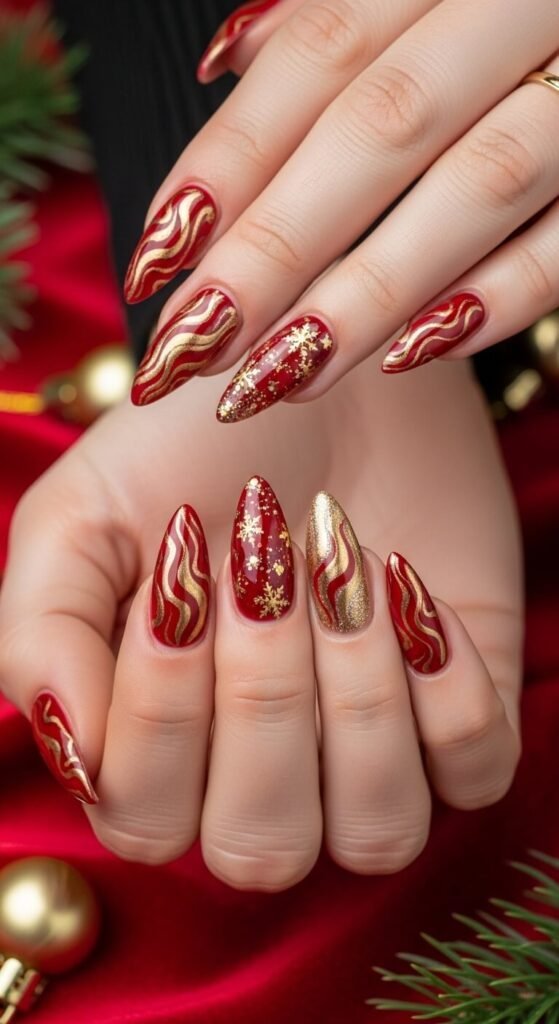
Marble goes wavy here, with gold veins that curve like ribbon instead of cracking like stone. The almond nails are a rich glossy red, and gold foil lines wander down each one in soft S curves. A couple of nails swap the waves for tiny gold snowflakes, and one nail is full gold with a red wave over it.
Foil transfer gives the cleanest waves. Paint a tacky layer, press gold foil in loose curves, and seal it well at the edges. Freehand chrome paint works too, with a slightly softer line. Either way, vary the wave direction between nails. Matching waves look printed, and printed is not the vintage mood.
Paint the glossy red base and add a tacky foil layer.
Press gold foil onto each nail in loose S curves.
Change the wave direction from nail to nail.
Seal the foil edges well so nothing lifts.
15. Red Nails With a 3D Bow in Red and Gold
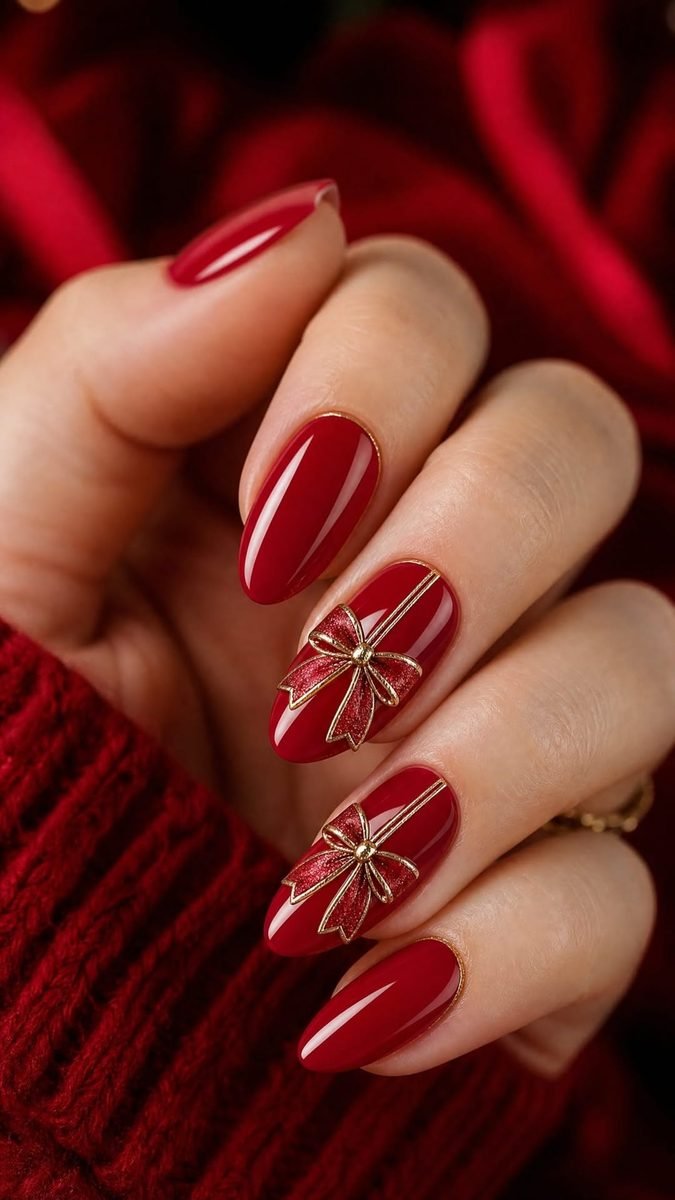
A bow you can feel with your thumb is the whole point of this set. Two nails carry raised bows in red glitter with gold edging, tied over gold ribbon lines that run the length of the nail, like a wrapped gift. The rest of the set stays plain glossy red, which makes the bows look even richer.
- Bow nails: two per hand is plenty
- Ribbon: thin gold lines crossing at the bow knot
- Finish: glossy, so the raised bow catches the light
Raised art snags on knitwear. Ask for the bow edges to be capped with gel so sweaters and hair survive the season.
16. Red Glitter Nails Framed With Gold Glitter Borders
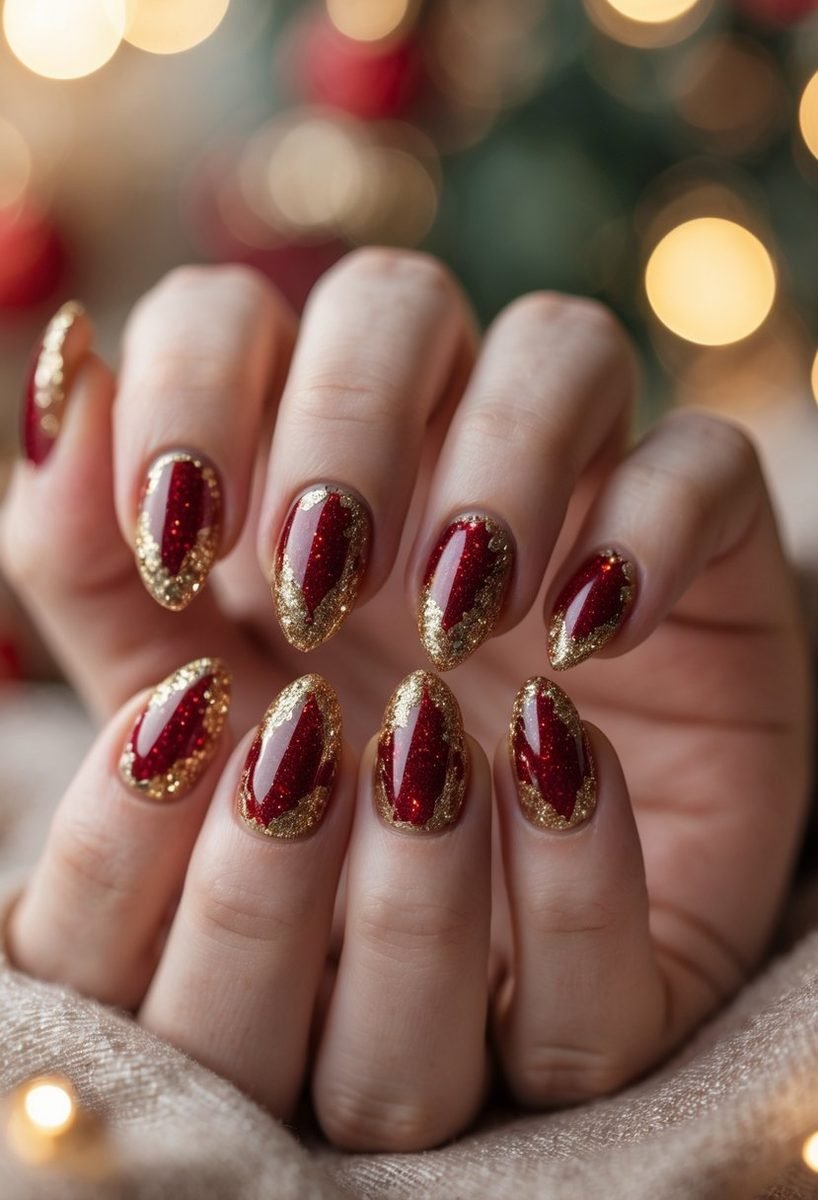
Gold frames do the decorating here, no painted art needed. Each almond nail is a deep red glitter, and chunky gold glitter borders run along both sides, meeting at the tip like a picture frame. The red center stays smooth and glossy, so the rough gold edges stand out by contrast.
This is a strong pick if you type all day. The design has no charms or raised art to catch, and the busy borders hide tip wear better than a plain polish does. Grow out is kind too, since the gold near the cuticle draws the eye away from the gap. Ask for the border width to match on every nail. Uneven frames are the one thing that can cheapen this look.
| Feature | Framed Glitter Design | Plain Red Glitter |
|---|---|---|
| Edge detail | Chunky gold borders on both sides | None, color only |
| Tip wear | Borders hide small chips well | Chips show right away |
| Grow out | Gold near the cuticle hides the gap | Gap line is easy to see |
17. Red and Gold Mistletoe Sprig Nails
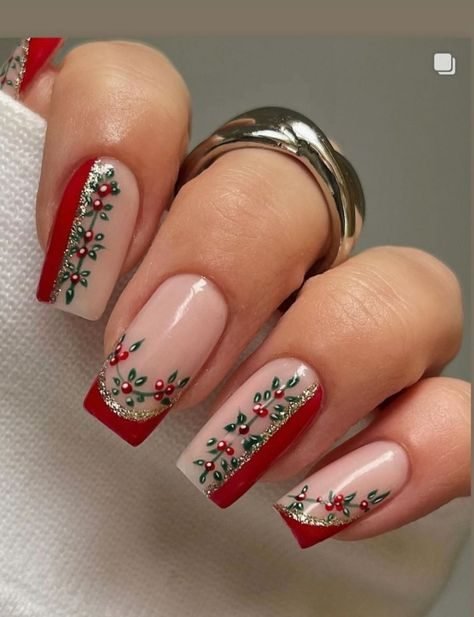
Photo: @sandrauvita23 via Pinterest
Mistletoe gets the delicate treatment in this set. Sheer nails carry red side panels edged with gold glitter, and fine painted sprigs with tiny red berries trail along the borders. The leaves stay small and the berries stay glossy, so the art reads as jewelry rather than a cartoon.
Details to show your tech:
Panels: red on one or both sides, edged in gold glitter.
Sprigs: fine green leaves with small red berry clusters.
Base: sheer nude, so the art floats over the natural nail.
Long square nails give the sprigs room to trail. On short nails, shrink the sprig to a single corner cluster and keep the red panel narrow.
Plain sheer nails with a red French tip. Pretty, but it could belong to any month of the year.
Red side panels with gold glitter edging and painted mistletoe sprigs. The Christmas story is unmistakable.
18. Sheer Jelly Nails With Red and Gold Chrome French Tips

Sheer jelly nails keep Christmas light, and this stiletto set is the proof. The base is a translucent pink red jelly, the tips turn solid red, and gold chrome swirls drip and curl over the top like melted tinsel. A few red gems dot the accents for sparkle.
Jelly polish needs thin coats. Two to three layers build the glassy depth, and rushing with one thick coat leaves streaks. The gold chrome work sits on top of the cured jelly, so it can be wiped and redone without starting over. That makes this a forgiving design to request even from a tech who has not tried it before. Keep the gems small. Big stones fight the airy base.
Application Checklist
✓ Thin jelly coats, two or three, never one thick coat
✓ Red tips painted after the jelly layers cure
✓ Gold chrome swirls added last, over the top coat
✓ Gems kept small and sparse
19. Red and Gold Nails With Painted Christmas Lights
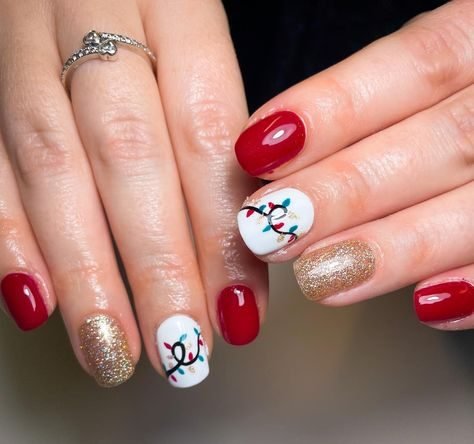
Photo: @jjzweifel via Pinterest
String lights are the oldest Christmas decoration trick there is, and they work on nails too. This short set mixes glossy red nails and gold glitter nails, then adds white accent nails painted with a looping string of tiny colored bulbs. The white accents act like the wall behind the lights, plain so the colors show.
- Mix: red gloss, gold glitter, and two white accent nails
- Lights: one looping string per accent nail
- Bulb colors: mixed, small, and glossy
Short nails suit this design because the string stays in proportion. On long nails the same art can look sparse, so add a second loop if you wear yours long.
Key Takeaway: Keep the light string on the white accent nails only. The red and gold nails around them do the Christmas heavy lifting.
20. Burgundy Red Nails With Antique Gold Filigree
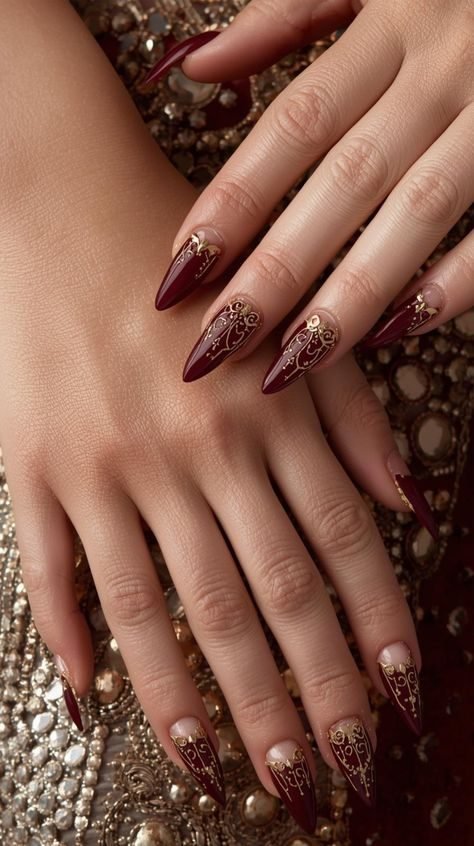
Filigree is the design language of old jewelry boxes and heirloom lockets, and it lands beautifully on burgundy. These long stiletto nails fade from a pale base near the cuticle into deep burgundy tips, and the gold scrollwork sits at the tip end like metalwork on a frame. Tiny gold dots finish each swirl.
This is fine brush work, so choose your salon with care and bring the photo. Stamping plates with scroll patterns give a similar feel at home with less risk. The fade base helps grow out too, since the pale cuticle area hides the new nail line for an extra few days.
📌 Salon Note: Filigree is fine brush work. Book a tech who shows detailed line art in their portfolio, and send them this photo before the appointment.
21. Short Red Squoval Nails With Gold Glitter Accents

Short nails get their moment here, in a neat squoval shape that handles keyboards, wrapping paper, and cookie dough without drama. Most nails are a warm glossy red. One nail goes full gold glitter, and one carries tiny gold stars with dots, like confetti caught mid fall.
- Shape: short squoval, corners softly squared
- Accent one: full gold glitter
- Accent two: gold stars and dots on red
Micro glitter is the forgiving glitter. It applies evenly, hides its own chips, and removes faster than chunky mixes. If your December is busy and salon time is short, this is the set that respects that.
22. Gold Stars on Classic Red Retro Nails
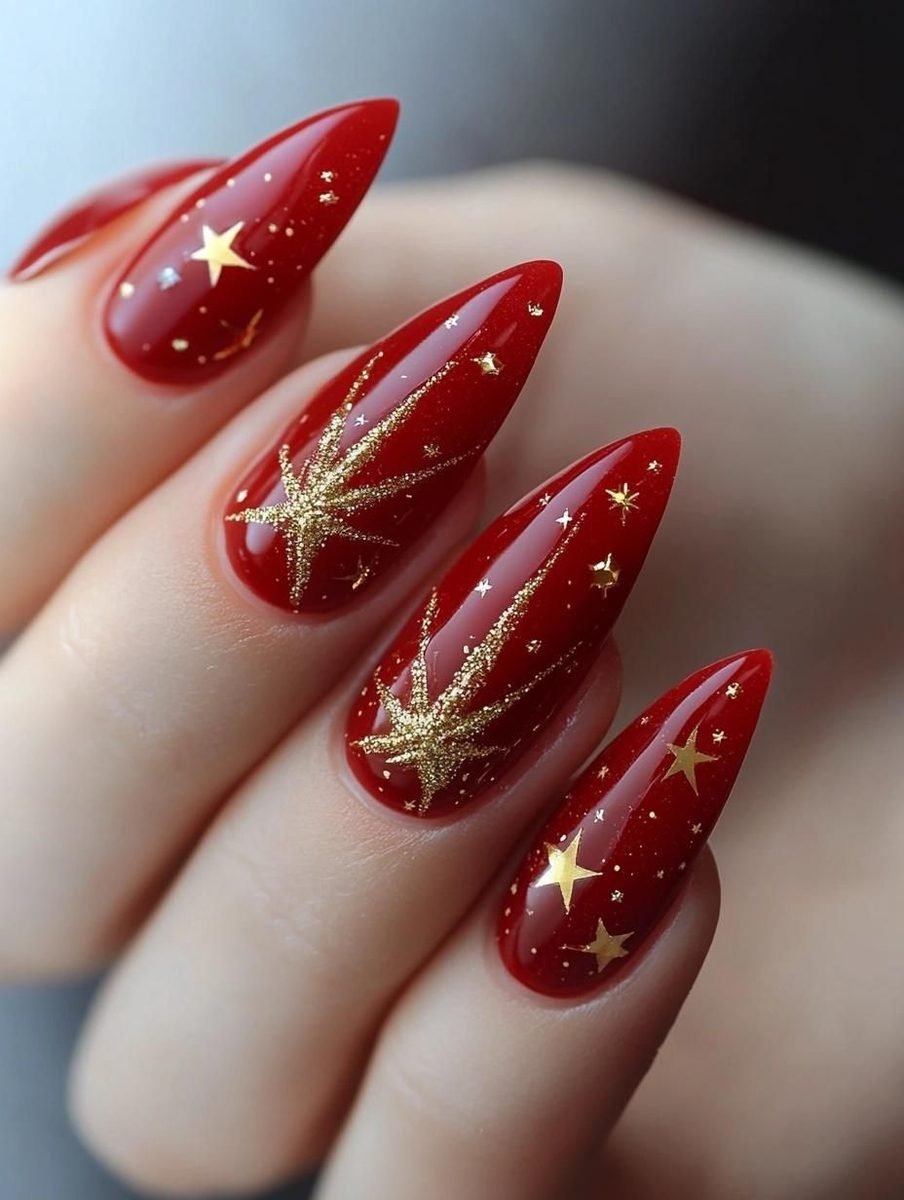
Big gold stars on red is pure retro, the kind of design you see in old holiday postcards. These long stiletto nails are a glossy candy red, and the stars come in two forms, solid gold shapes and large glitter starbursts that stretch across the nail. Tiny gold specks fill the gaps like dust.
Scale is the trick. One large starburst per nail reads bold and vintage, while many small stars read modern and busy. If you want the retro mood, keep the stars few and big. A gold glitter polish with a fine brush paints the starbursts well. Solid stars are easier as stickers sealed under top coat.
Paint the glossy candy red base.
Add one large glitter starburst per nail with a fine brush.
Place solid gold star stickers on two nails.
Fill the gaps with tiny gold specks and seal with top coat.
23. Red Santa Belt Nails With Gold Buckles
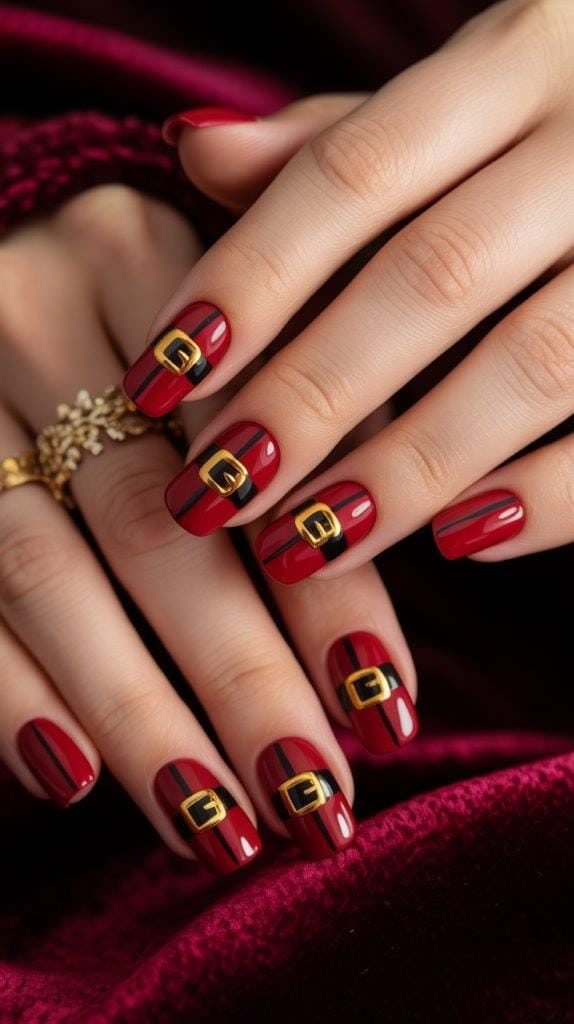
Santa’s belt, worn at nail scale, closes the list with a smile. Every short nail is glossy red with a black belt stripe across the middle and a gold buckle painted at the center. Some nails skip the buckle and keep just the stripe, which stops the joke from wearing thin.
Paint order matters here:
Red base first, fully cured.
Black stripe second, straight across the middle.
Gold buckle last, in chrome paint so it shines like metal.
A square buckle reads clearer than a round one at this size. This design suits short nails best, because the belt sits in proportion. It is also the easiest set here to copy at home with striping tape.
Key Takeaway: Red, stripe, buckle, in that order. Gold chrome paint for the buckle makes it read as real metal.
Twenty three designs, two colors, and not one of them needs anything extra. That is the charm of vintage christmas nails red and gold done the classic way. Short squoval sets handle the busy cooking and wrapping days, while the long glossy ones are ready for parties and photos. Save this list to your Christmas board on Pinterest so the photos are handy at your nail appointment, and send it to a friend who always leaves her holiday manicure to the last minute. Pick your favorite, book the chair time, and let red and gold do the rest.