16 Vintage Christmas Nails Green And Red That Actually Work
Red and green is the oldest Christmas pairing there is, and it still earns its place every December. The trick is range. Solid gloss in red on one hand and green on the other feels clean and grown up, while hand painted holly, tartan plaid and a small bow on every nail lean into the vintage side of the season. This list of vintage christmas nails green and red ideas covers both moods across 16 sets. You will find matte and glossy finishes, short nails and long almond shapes, simple two polish manicures and detailed art that needs a steady hand. Some sets use red as the base and green as the accent. Others flip the order, or split the two shades across a single nail. A few bring in gold, cream or white to soften the contrast. Read through, note the shapes that suit your own nails, and save the sets you want to show your nail tech or copy at home.
1. Glossy Red And Matte Green Mix And Match Nails
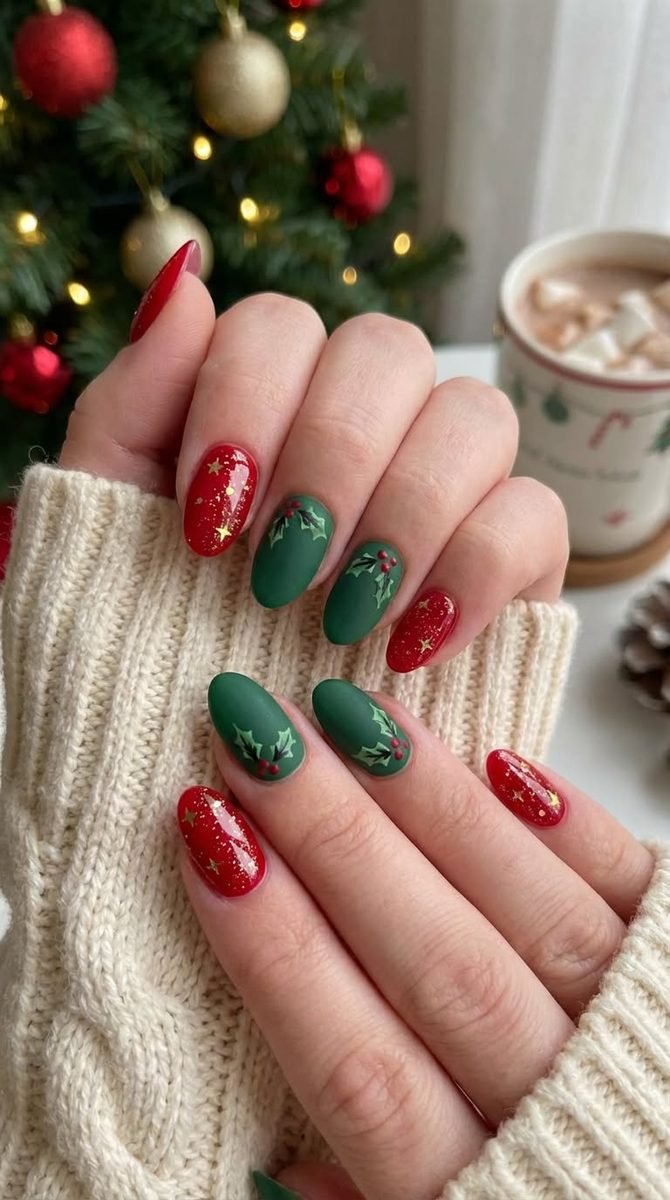
Two finishes share one manicure here, and that contrast carries the whole look. The red nails are glossy, sprinkled with fine glitter and tiny gold stars. The green nails are flat matte, each one finished with a small holly sprig and red berries near the tip. Both hands wear the same almond shape, so the set reads as one plan rather than two competing ideas.
What works here:
- The matte green calms the sparkle on the red, so neither finish shouts over the other.
- Holly sits on the green nails only, which keeps the art in one place and the red nails clean.
- The cream knit sleeve and the tree behind the hands push the whole photo toward a cozy, old fashioned December mood.
Ask for the holly as the only painted detail. Skipping extra art on the red nails is what keeps this set wearable all month.
2. Red And Green Tartan Plaid On Short Nails
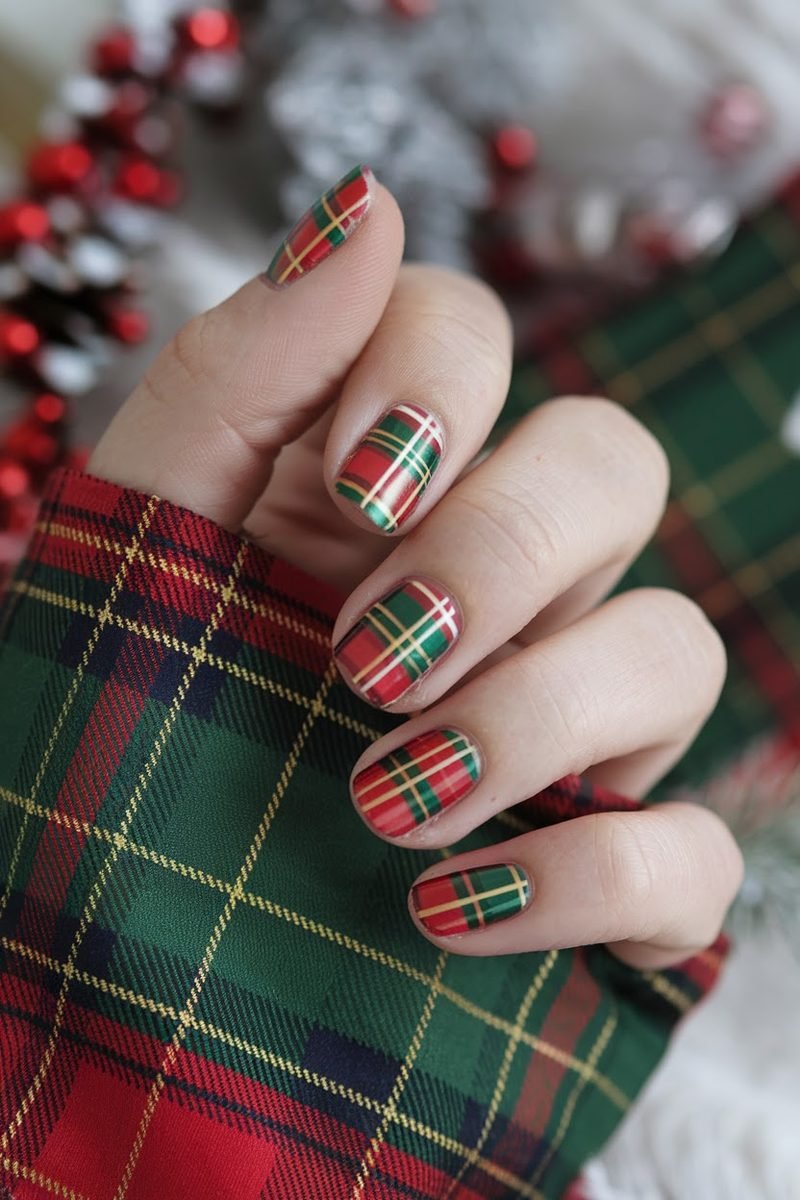
Tartan on short nails, matched to the tartan sleeve behind them.
Every nail carries the same woven pattern: deep red and forest green checks crossed with fine gold and white lines. The nails are short and squoval, which suits plaid well, since the pattern needs a flat, even surface to read clearly. Up close, the lines stay crisp because the checks are large for the nail size. Nothing competes with the pattern. No gems, no extra art, no second design fighting for space. The blurred pinecones and red berries in the background echo the colors without stealing focus. Short nails also make this a practical pick for anyone who types, cooks or wraps gifts all December. The plaid does the talking, and the length keeps daily life easy.
Recreate this look
3. Hand Painted Holly Leaves And Berries

Every nail in this set carries a small painting, and the subjects rotate like a wreath pulled apart. Holly leaves with glossy red berries sit on some nails. Mistletoe with tiny white pearl berries covers others. A few nails hold soft pine sprigs dusted with white, as if snow just landed on them. The base stays a pale ivory, so the green and red art keeps all the attention.
The nails are short and square, which gives each little scene a tidy frame. Painting at this size takes a fine brush and patience, so this is a salon set or a slow Sunday project. The payoff is a manicure that looks like it came off a vintage Christmas card. Keep the base sheer and pale if you try it at home. A darker base would swallow the fine leaf edges.
4. All Red On One Hand, All Green On The Other
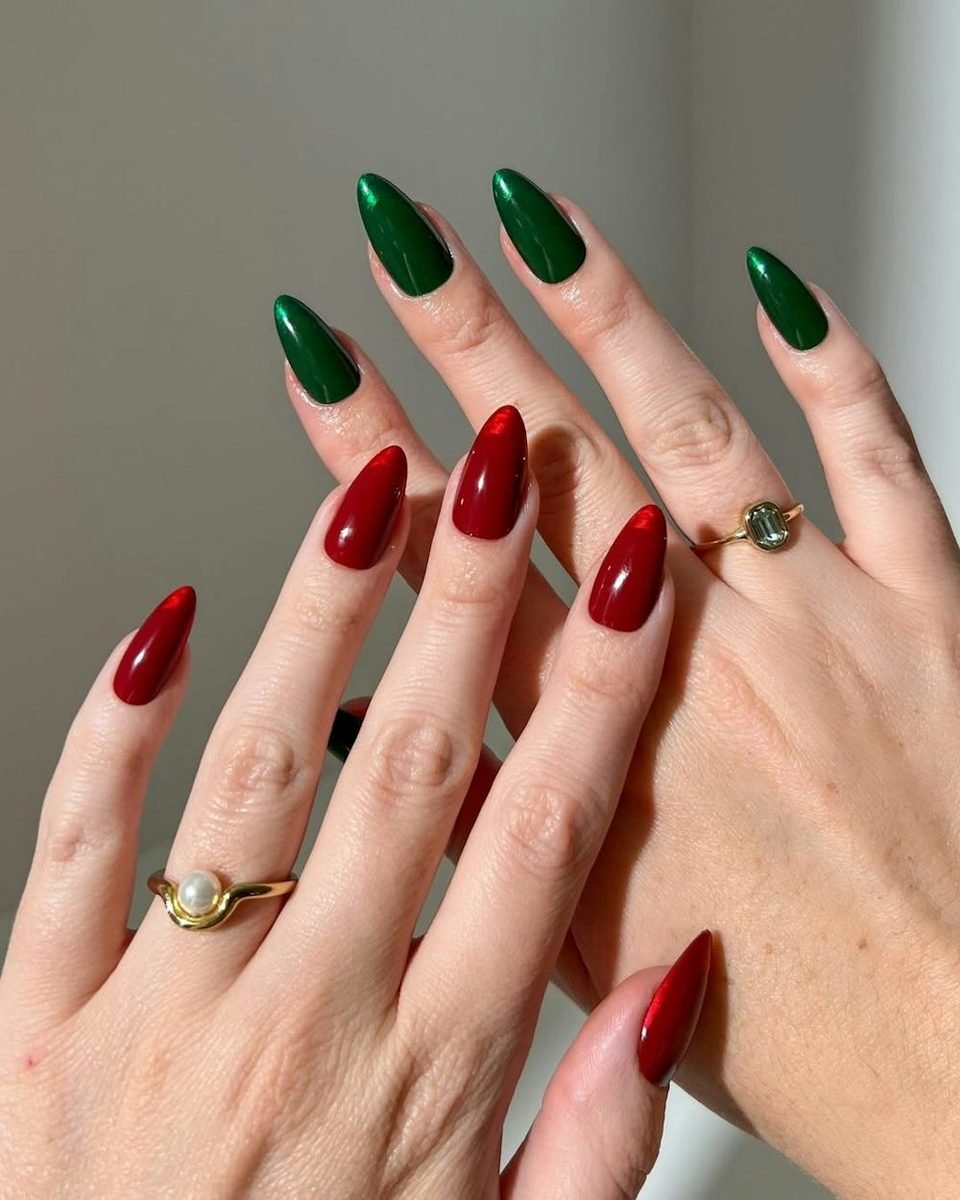
Red on one hand, green on the other, and nothing else. Each hand wears a single glossy shade on long almond nails: a deep blue toned red on one side, a rich emerald green on the other. Two gold rings, one with a pearl and one with a pale green stone, finish the photo.
The idea sounds almost too plain, yet it reads as a deliberate style choice because both shades sit at the same depth. A pale green against a deep red would look mismatched. These two match in weight, so the contrast feels balanced. It is also the fastest set on this list to copy. Two polishes, two coats each, one glossy top coat. No art skill needed, and regrowth shows less on solid color than on detailed designs. If most nail art feels like too much, start here.
💡 Quick Tip
Hold both polish bottles side by side in daylight before you start. The red and green should look equally deep. That one check keeps the two hands looking like a pair.
5. Deep Green Nails With Red Berry Sprigs
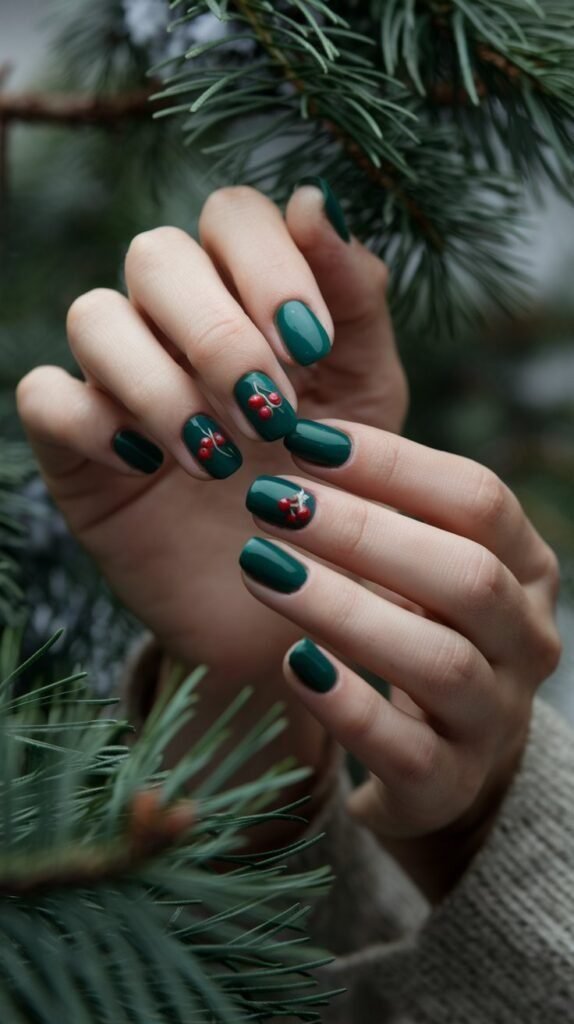
Pine branches frame this set, and the nails borrow their colors straight from the tree. The base is a deep glossy green on short, neat nails. Most nails stay plain. Two accent nails carry the detail: a small sprig of red berries on thin stems, with tiny white dots scattered like the first snow.
Keeping the art to two nails is the smart move here. Berry sprigs are quick to paint, three dots of red on a fine stem, and the plain green nails keep the set calm and grown up. The short length suits the design too. Berries read clearly on a small nail, and the deep green looks rich rather than loud. Wear it with a plain knit and let the hands carry the color. A red lip or a red scarf would tie the whole thing together without any more nail art.
Two painted nails do the work of ten. The plain deep green around them makes the red berries look brighter than they are.
6. Matte Red Nails With Tiny Green Christmas Trees

Short matte red nails keep the base calm, so the tiny trees can do the decorating. Each nail carries one or two small green Christmas trees, painted simply with a triangle shape and a few strokes for branches. Tiny gold stars and dots sit between the trees like ornaments and lights.
How the trees go on:
- Paint the matte red base and let it dry fully. Matte polish shows every bump, so thin coats matter.
- Mark each tree with three short green strokes that widen toward the bottom.
- Add a gold dot at the top of each tree and one or two beside it.
The soft matte finish gives the set its vintage feel. Gloss would make the same design look modern and sharp. Short nails suit it too, since the trees stay small and neat rather than stretched.
Two thin coats of matte red, dried well between coats.
Trees painted in deep green with a fine detail brush.
Gold dots for ornaments, then a matte top coat to keep the soft finish.
7. Candy Cane Stripes With Deep Green And Red Solids
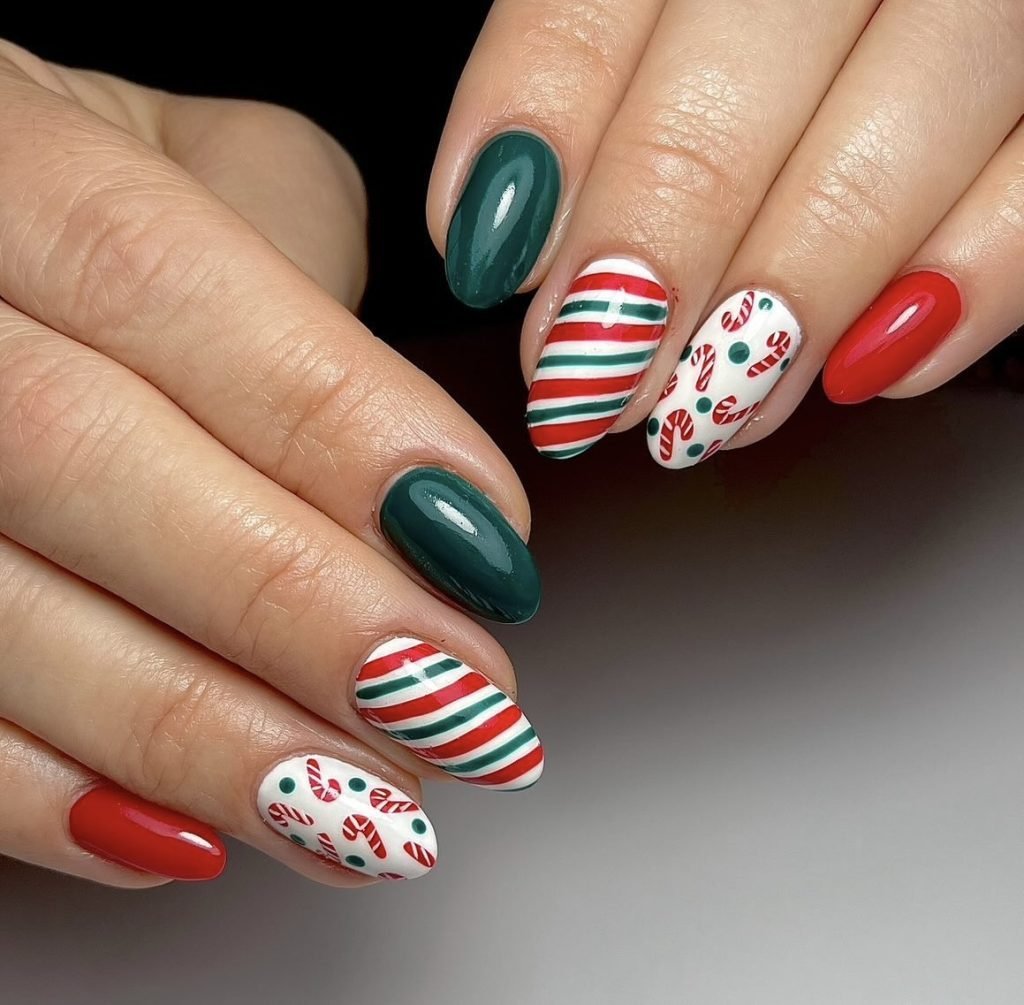
Candy canes show up in two forms in this set. Some nails wear bold diagonal stripes in red, white and green. Others are white, printed with small red candy canes and green dots. Deep green solids and one red solid nail rest between them, and that rest is what saves the design.
Stripes and prints on every nail would blur into noise. Here the plain nails give your eye a place to land, so the patterned nails look deliberate. The almond shape helps too, since the stripes follow the long curve of the nail. Copy the layout even if you change the art: two patterned nails, two plain, one accent. That ratio works with almost any busy design, and it keeps strong patterns like this one looking tidy instead of crowded.
Give busy stripes plain solid nails to sit beside.
Keep stripes wide. Wide bands read clearly from a distance.
Thin stripes on every nail. They blur into one busy block.
A third pattern. Stripes plus print is already plenty.
8. Emerald To Cranberry Ombre With A Gold Glitter Blend
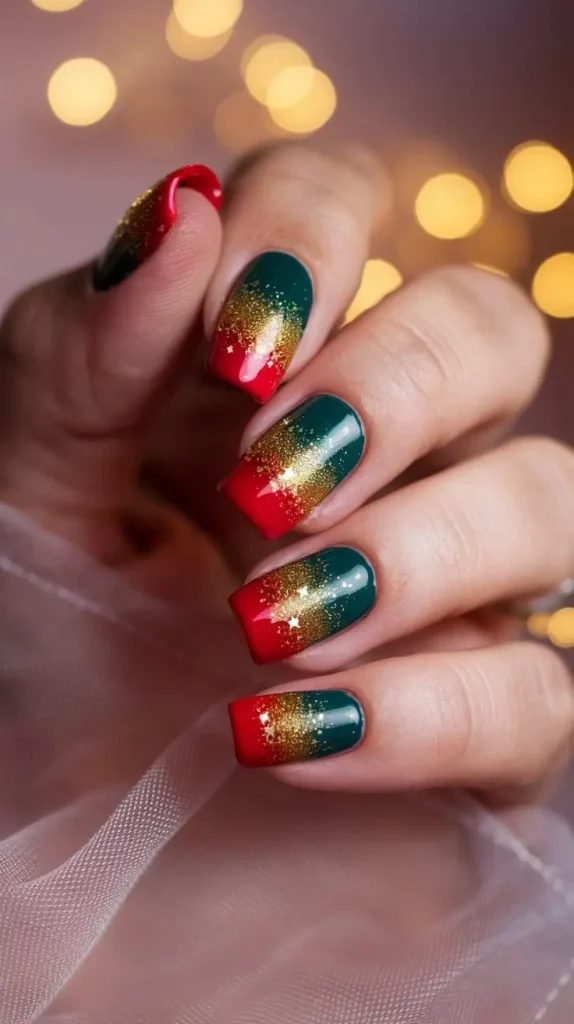
Green melts into gold, then lands on red. Each square nail starts in deep emerald at the cuticle, fades through a band of gold glitter in the middle, and ends in bright cranberry red at the tip. Tiny white stars are scattered through the glitter, and warm blurred lights glow behind the hand.
The gold band is doing real work in this design:
- It hides the blend line, so the fade looks smooth even up close.
- It links the two strong colors, which can clash where they meet directly.
- It catches light every time the hand moves, like tinsel on a tree.
Sponge the two colors toward the center, then press glitter over the join while the polish is still tacky. That order gives the soft fade without muddy stripes.
- ▸Base shades: deep emerald and cranberry red
- ▸Blend tool: a small makeup sponge
- ▸Middle band: gold glitter, pressed on last
9. Metallic Green French Tips With A Holly Berry Accent
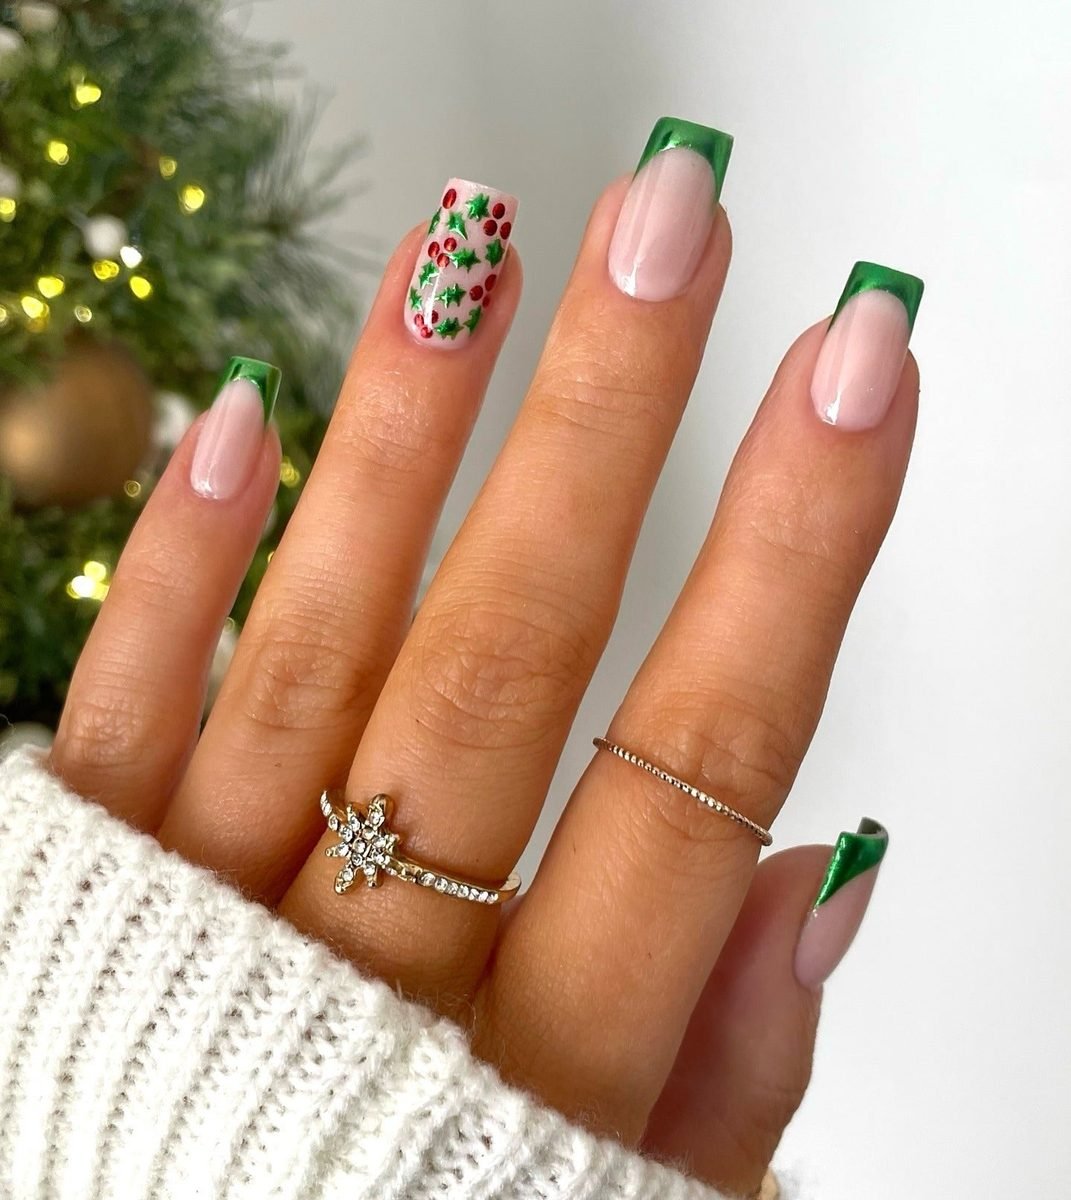
French tips get the holiday treatment in this set. The base stays sheer and pink, and the tips are painted in a metallic green with a mirror shine. One accent nail breaks the pattern: a pale nail covered in tiny green holly leaves and red berry dots, like wrapping paper in miniature.
Metallic tips are a kind way to wear green. The color sits only at the edge of the nail, so the look stays light and clean, and the sheer base grows out softly with no harsh line. The nails are long and square, which gives the tips a bold, straight edge. On shorter nails the same idea works with a thinner tip line. Wear this set when you want Christmas color at a formal dinner or office party, where full red and green nails might feel like too much.
10. Red Glitter Nails Mixed With Deep Green Gloss
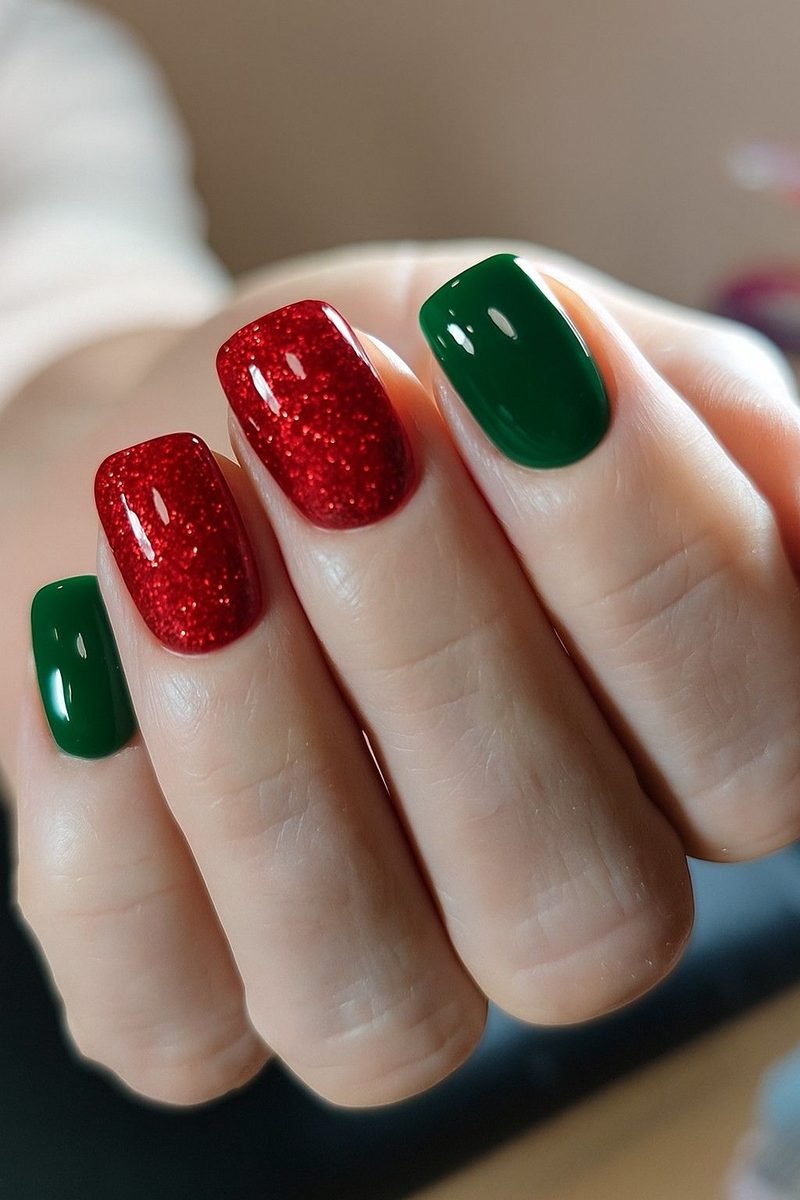
Glitter does the talking on two nails of this hand, and plain gloss answers on the other two. The glitter nails are a dense, sparkling red that catches light from every angle. Beside them, the deep green nails are smooth and glossy with no art at all.
Short square nails keep the pairing neat:
- The glitter stays on the middle nails, where it gets seen the most.
- The green gloss frames it, the way dark leaves frame bright berries.
- Square tips give the glitter a flat surface, so the sparkle spreads evenly.
This is one of the easiest sets on the list to copy at home. Glitter polish hides its own mistakes, and the green nails need nothing but two careful coats. If full glitter on every nail feels like too much sparkle for daytime, this half and half layout is the middle ground.
Recreate this look
11. Deep Green Nails With A Red Bow And Bell
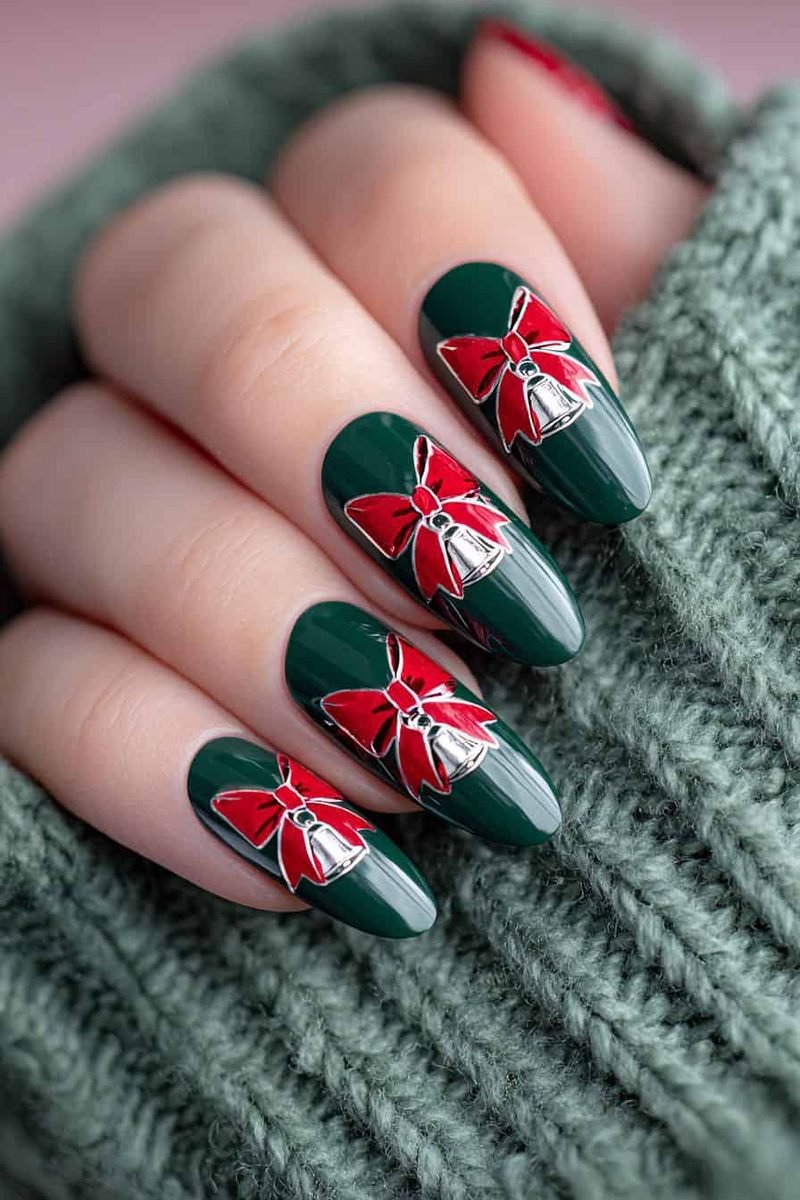
A red bow lands on every nail in this set, each one tied around a small silver bell. The base is a deep green gloss on long almond nails, dark enough that the bright red bows jump straight off it. The hand rests on a sage knit sleeve, which softens the strong colors in the photo.
Repeating one motif on all ten nails is a bold choice, and it works because the bow is simple: two loops, two ribbon ends, one bell. Painted bows at this size need a steady hand and a fine brush, so most people will book this one at a salon. Show the photo and ask for the bow placed high on the nail, near the cuticle, so the green tips stay visible. The set suits evening events best. Under party lights, the gloss base and the silver bells will do plenty of shining on their own.
12. Green Glitter Tips With A Red Bulb Garland Line
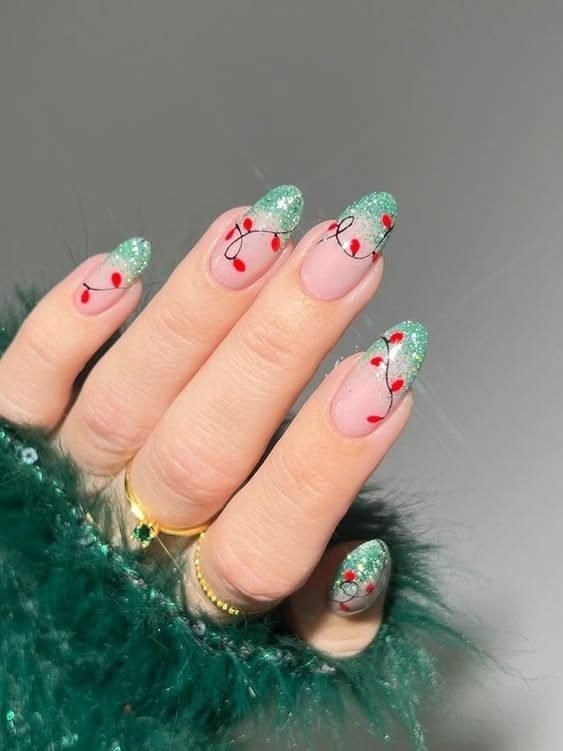
A string of lights loops across these nails. The base is a soft pink, the tips fade into green glitter, and a thin black line curves from nail to nail with small red bulbs hanging along it, like a garland strung across a mantel. A green fuzzy sleeve and gold rings finish the cozy photo.
The design reads as one scene spread over five nails, which is why the line has to flow at the same height on each nail. Paint the glitter tips first and let them set. Then lay the black curve in one sitting, nail by nail, checking the flow across the whole hand before adding the red bulbs. The bulbs are simple dots with a tiny highlight. Keep them small. Big bulbs would crowd the glitter and turn a delicate garland into polka dots.
📌 Good To Know
Photograph or sketch the garland curve on paper first. A line that flows across five nails is far easier to paint when the path is already decided.
13. Diagonal Two Tone Tips Split By A Gold Line

Diagonal lines change everything about a french style tip. Instead of a straight smile line, each nail in this set splits on a slant: deep green on one side, rich red on the other, with a thin gold line running along the split. The base under the tips stays nude, and no two nails split at quite the same angle.
A diagonal split flatters almond nails because it follows their natural taper and makes the nail bed look longer. A straight across split can cut the nail visually in half. The gold line earns its place too. Where red meets green directly, the edge can look muddy. The gold seam keeps both colors clean and adds the vintage jewelry feel this list keeps coming back to. Tape can mark the diagonal for a home attempt. Peel it off while the second color is still wet for the sharpest edge.
Run a thin gold line along the split to keep the edge crisp.
Let each nail split at a slightly different angle for a relaxed feel.
A straight split across the middle. It shortens the nail visually.
Thick gold lines. They swallow the two colors they should frame.
14. Green Chrome Nails With Red And White Stripe Accents

Mirror shine is the whole point of this set. The nails are a bright green chrome with a true reflective finish, worn on a medium square shape. Two accent nails carry thin diagonal stripes in red and white, a quiet nod to candy canes that keeps the chrome from feeling cold. Red and green baubles blur in the background, echoing the shine.
Chrome shows every ridge and bump in the nail under it, so prep decides how this set turns out:
- Buff the nail smooth and keep the surface dust free before the base goes on.
- Apply chrome over a glossy black or deep green base for the richest mirror.
- Seal with a no wipe top coat, since regular top coat can dull the shine.
The striped accents are best painted after the chrome is sealed, so the lines stay sharp against the mirror.
| Salon Chrome Powder | Chrome Effect Polish |
|---|---|
| True mirror finish, like the photo | Softer metallic sheen, less reflective |
| Needs gel base and a lamp | Applies like regular polish at home |
15. Cream White Nails With Red And Green Polka Dots
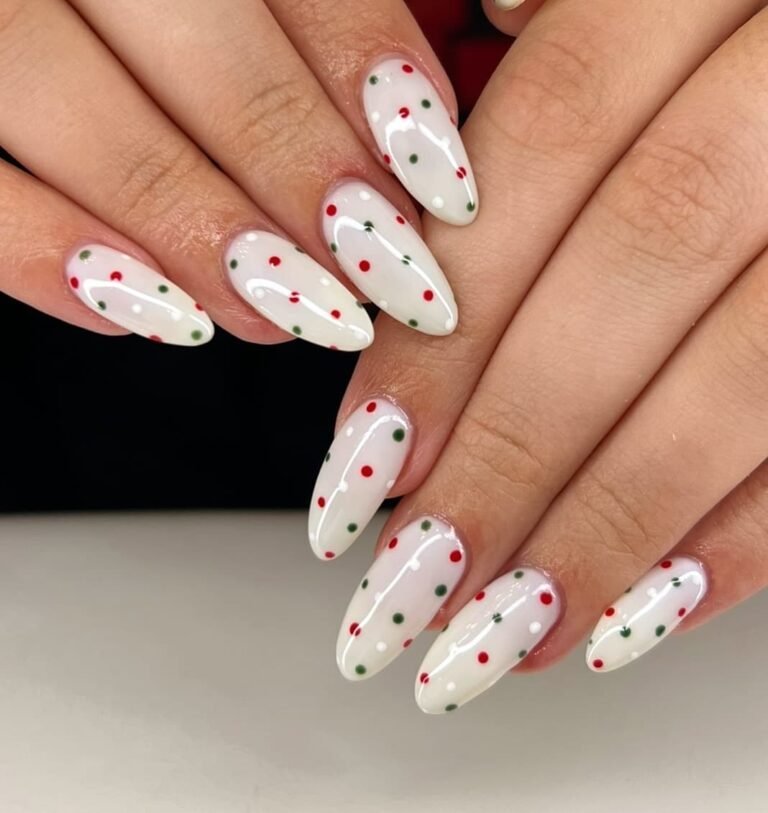
Dots are the friendliest design in nail art, and this set shows why they keep coming back. Long almond nails wear a milky cream white base, scattered with small red and green polka dots of slightly different sizes. The dots sit at random spacing, like confetti that just landed.
The build is simple enough for a first try at nail art:
- Paint two coats of cream white and let them dry until hard.
- Dip a dotting tool, or the end of a hair pin, in red polish and place dots at random.
- Repeat with green, filling the gaps without crowding.
- Finish with a glossy top coat to level the dots into the surface.
Vary the dot sizes on purpose. Uniform dots look stamped, while mixed sizes look hand done and playful, which suits the vintage mood of this list.
Cream white base, two coats, fully dry.
Red dots first, placed at random spacing.
Green dots in the gaps, then a glossy top coat.
16. Deep Green And Cranberry Gloss With A Metallic Sheen
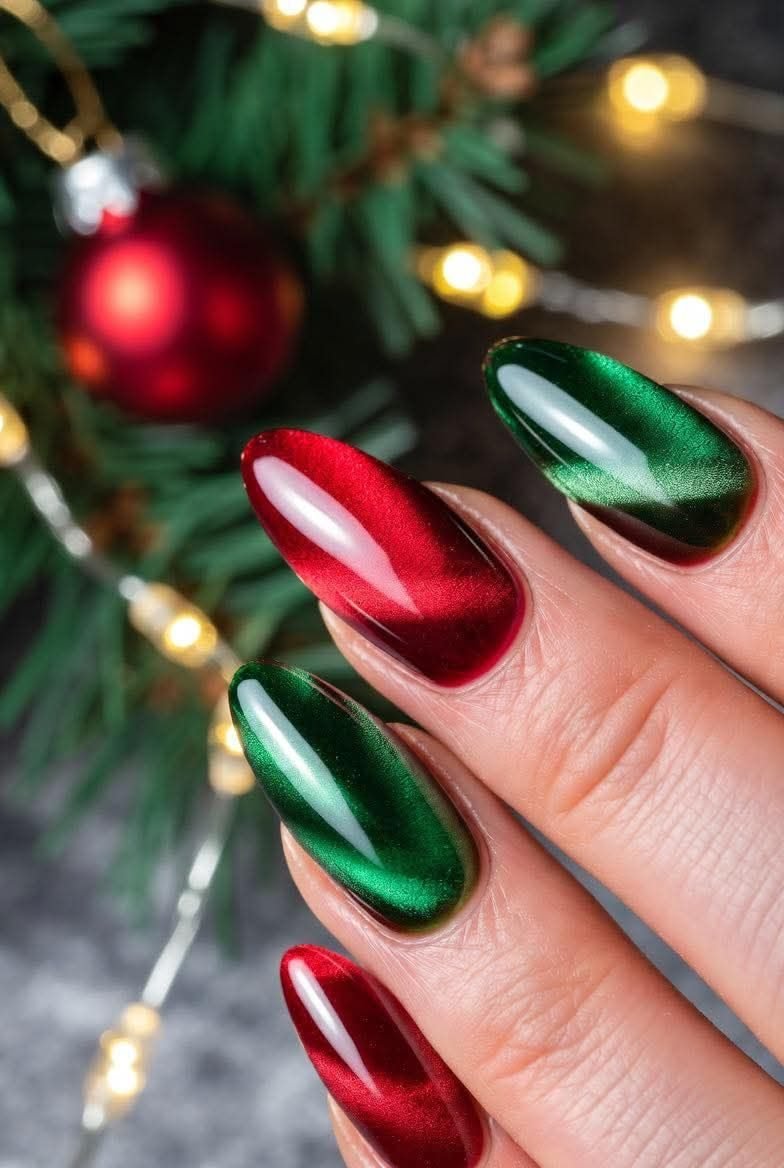
Deep shades close the list. These almond nails alternate between a cranberry red and a deep green, both with a metallic sheen that shifts as the light moves, the way a cat eye polish catches a beam and throws it back. Behind the hand, a tree branch holds a red bauble and a string of warm fairy lights.
There is no painted art here at all. The finish does everything. That makes this a strong pick for anyone who loves the deep end of the red and green pairing but has no patience for detail work. The two shades share the same metallic finish, so the alternation looks planned rather than random. Wear it for evening plans, dinners and photos after dark. Under warm light, the sheen turns both colors almost jewel like, and plain nails suddenly look like the most dressed up set in the room.
One shared finish ties two deep colors together. The sheen is the decoration, so the nails stay simple and still look rich.
Sixteen sets later, a pattern shows up. Red and green works at every level of effort, from two plain polishes worn on opposite hands to holly painted leaf by leaf. Pick the set that matches the time you have and the length you wear, then make it yours with a finish swap or a shape change. Vintage christmas nails green and red never really leave the December rotation, so a saved set is never wasted. Pin this list for your next salon visit, or for the next quiet evening with your polish bag open.