15 Red Makeup For Beginners Step By Step That Actually Works
Red has a scary reputation for first timers, mostly because one heavy hand can turn a fresh face into a costume. The looks in this list prove the opposite. Each one keeps red in a single place, uses a light layer, and leaves the rest of the face calm, so the colour reads soft instead of loud. You will find a one product tint, a plain red lip, gentle blush placement, a single shadow wash, and a few easy eye ideas that ask for one or two products at most. None of them needs a drawer full of products, a ring light, or years of practice. Most take five to ten minutes once you have done them twice. Every entry breaks the look into small steps with a short visual guide, so red makeup for beginners stops feeling like a risk and starts feeling like a routine you can repeat on a busy morning.
1. One Product Red Tint Dabbed On Lips And Cheeks
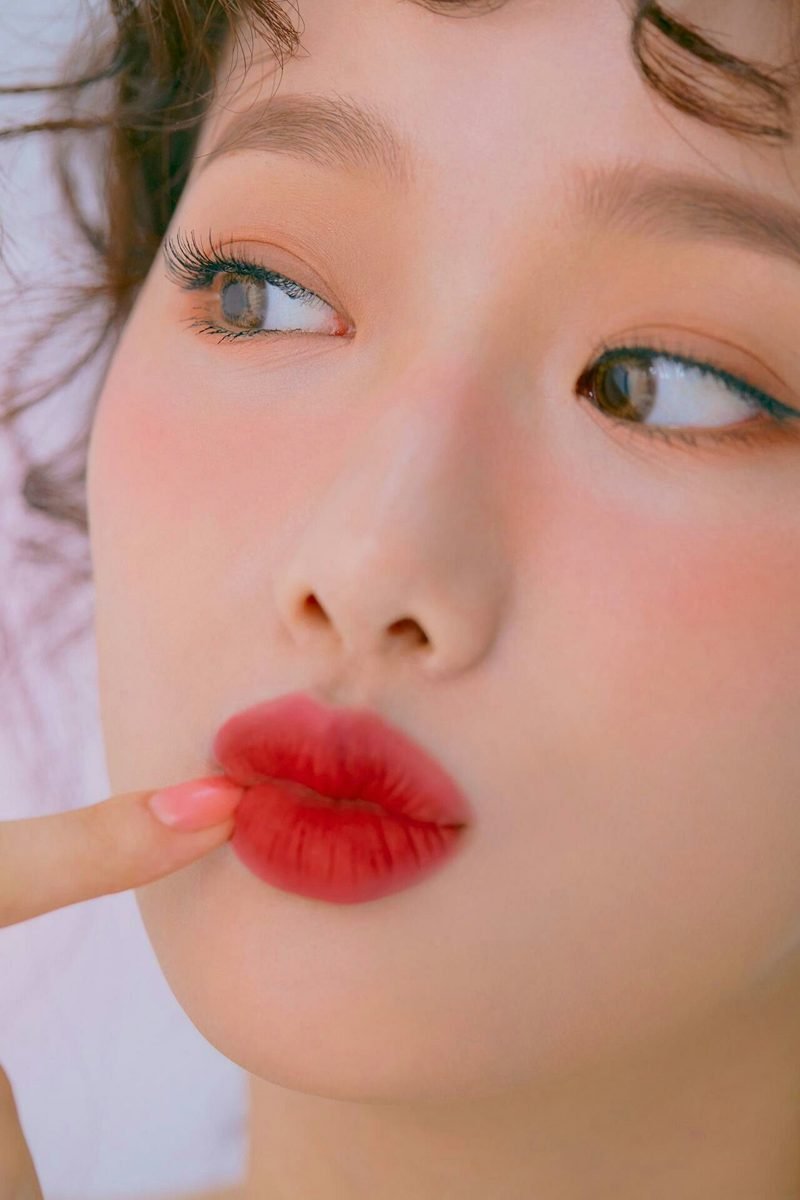
One tube does the whole job here. The tint sits strongest at the centre of the lips, fades out at the edges, and shows up again as a soft wash high on the cheeks. Skin stays bare and dewy, brows are brushed up, and nothing else competes. That sameness is the trick. When lips and cheeks share one shade, the face looks planned even though you used a single product and your fingers.
Warm a pea sized amount between two fingertips first. Cold tint grabs in patches, while a warmed layer melts in and gives you those blurred edges for free. Press, lift, press again. Dragging smears the colour past the lip line.
Dab three small dots of tint at the centre of the lower lip and press lips together.
Pat the leftover colour onto the apples of the cheeks with the same fingertip.
Soften every edge with a clean finger until no hard line shows.
2. Simple Red Lip With Soft Neutral Eyes
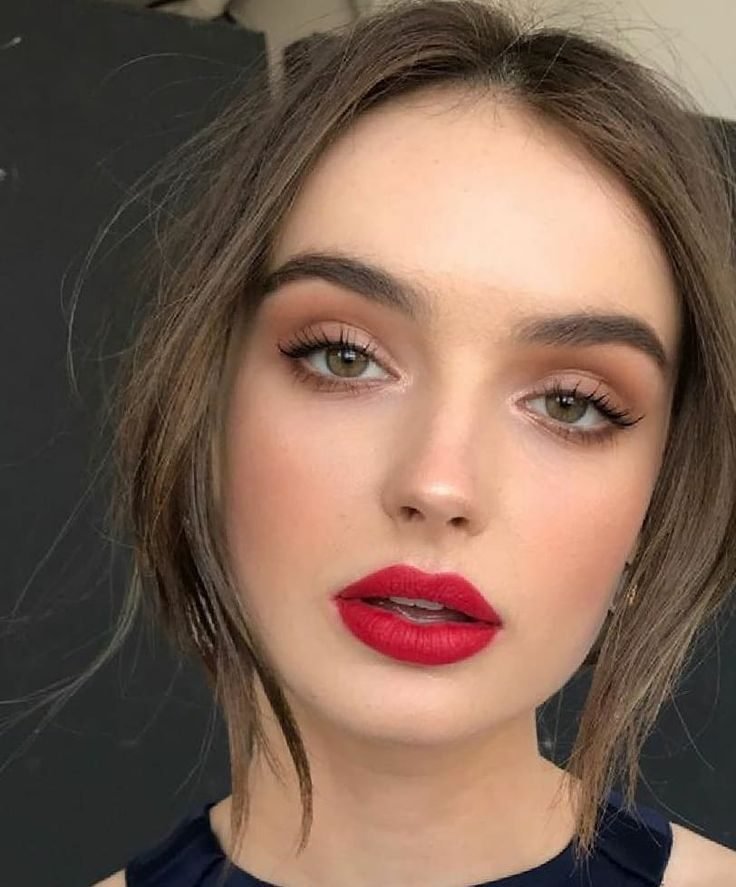
Nothing in this look fights the lip. The eyes carry a light neutral shadow and tidy lashes, the skin is even and calm, and the red lip is full, matte, and clean at the corners. It is the starter red lip most people picture, and it works because the balance is right. One strong feature, everything else quiet.
Two habits keep it simple. First, fill the whole lip instead of outlining only, so the colour wears evenly. Second, check the corners in daylight. Corners collect extra product and are the first place a red lip starts to look messy. Blot once with tissue before you judge the colour, since the first layer always looks stronger than the settled one.
3. Soft Red Blush Placed High On The Cheeks
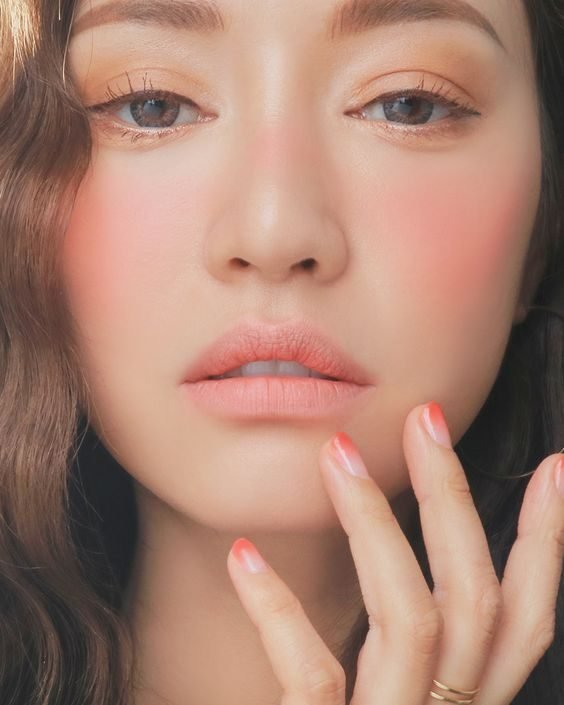
Blush does the talking in this one. A soft red wash sits high on the cheekbones and melts toward the temples, while lips stay close to bare and the eyes keep only a wash of warm neutral. Placing blush high lifts the face on camera and in person, and keeping it sheer stops the sunburnt look beginners worry about.
Smile lightly, then place the colour on the part of the cheek that rises, and blend upward, never down. Two thin layers beat one strong layer every time. Step back after the first layer, because blush always looks weaker in the mirror than it does across the room. Natural light near a window tells the truth better than a bathroom bulb.
💡 Quick Tip
Tap extra blush off the brush before it touches your face. Building up is easy. Taking colour back down means starting the base again.
4. Single Red Eyeshadow Wash Across The Lid

Red eyeshadow scares people more than red lipstick, and this photo shows the gentle way in. One red shade is washed around the eye and faded out before it reaches the brow, the lower line gets a softer echo of the same colour, and the lips stay plain. The red reads warm and rosy rather than harsh because the edges are fully blended and the colour stays light.
Pack the shade onto the lid first, then use a clean fluffy brush to blur the top edge. That second brush, with nothing on it, is what turns a block of colour into a wash. Keep the colour below the crease on your first tries, and raise it only when the soft version feels easy.
5. Red Lip With Bare Eyes And Mascara Only
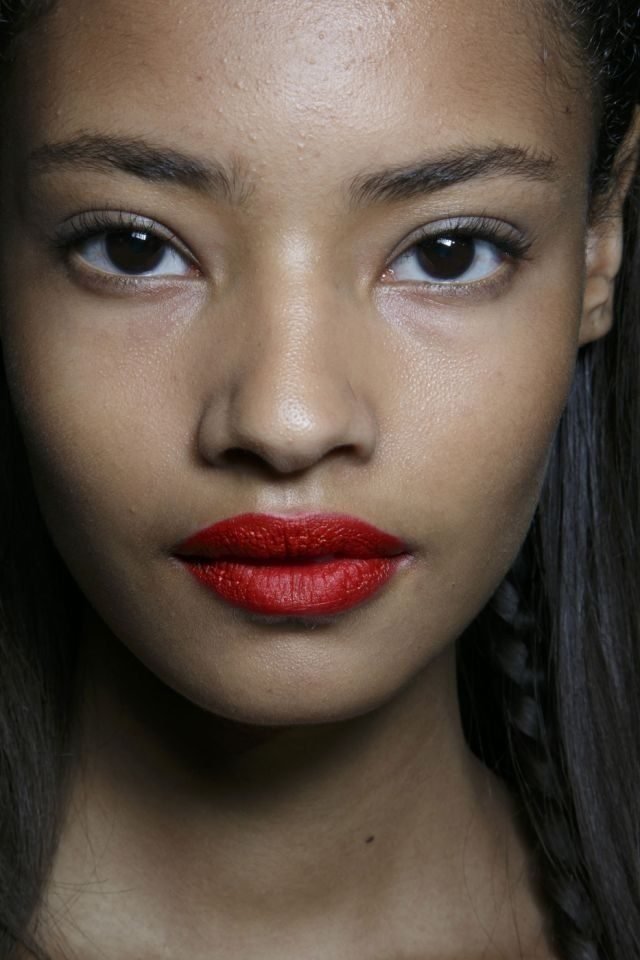
Bare skin, brushed brows, a coat of mascara, and a full red lip. On this deep skin tone the red looks rich and deliberate, and the empty eye area is exactly why. Skipping eyeshadow removes the step beginners mess up most, and mascara alone keeps the eyes awake without adding colour that could clash.
Curl lashes before mascara so the eyes hold their own next to a strong lip. If your eyes water, keep the mascara on the top lashes only. Smudged lower lashes plus a bold lip can tip a clean look into a tired one by midday. A little powder under the eyes in the morning helps the skin stay as fresh as the lip.
Keep the rest this short
6. Small Red Wing With A Nude Lip
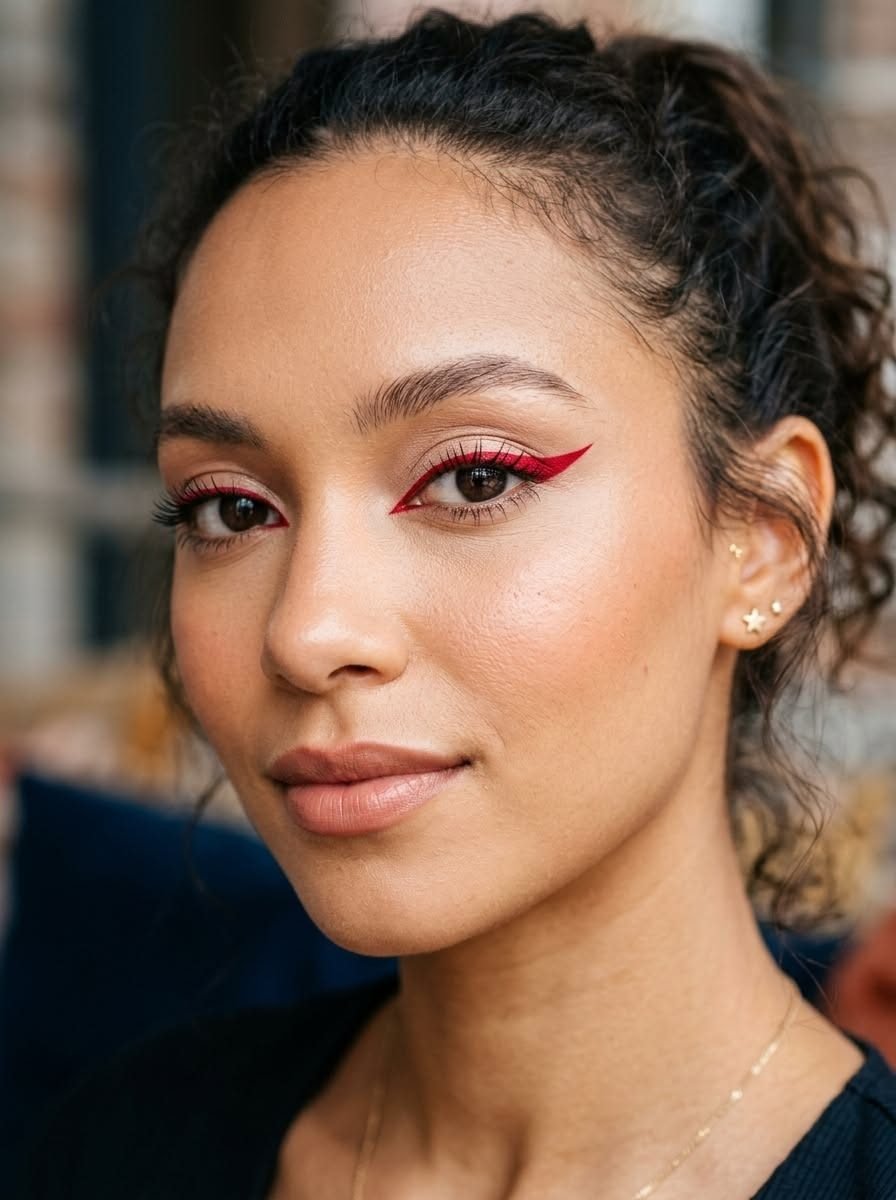
Scale is the lesson in this photo. The red wing is short, thin, and tucked close to the lash line, and the rest of the face stays warm and neutral with a nude lip. A small wing gives the fun of red liner without the graphic shapes that take practice. From a normal distance it reads like a neat flick with a twist.
Rest your elbow on the table before you draw. A floating hand shakes, and liner shows every shake. Draw the flick first while your eye is open and looking straight ahead, then join it to the lash line in short strokes. If one wing ends up thicker, thicken the other to match instead of wiping both off and starting again.
Draw the flick with your eye open, looking forward
Keep the wing shorter than your lash line
Copy the long graphic wings from photo shoots
Pair a red wing with a red lip on your first try
7. Glossy Red Lip With A Fresh Bare Looking Face
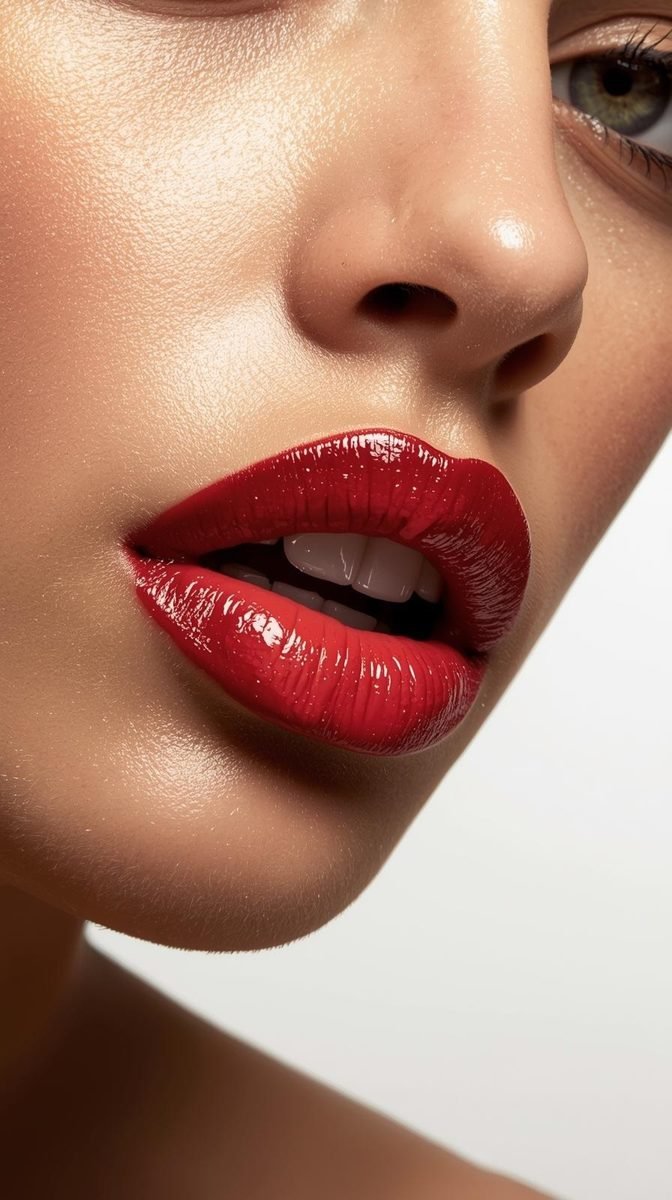
Shine changes everything about red. This glossy lip looks juicy and relaxed where a matte red can look strict, and the skin around it stays fresh with neat brows and soft lashes. Gloss is also kind to beginners. It forgives a slightly uneven edge, it fades evenly, and topping it up takes ten seconds without a mirror check every hour.
One warning from experience. Gloss travels. Keep it a fraction inside your natural lip line, and blot once before you leave. The shine stays, the bleeding does not. Hair on a windy day is the other enemy, so tie it back or accept the trade. A clear gloss over a red stain gives the same shine with a little more grip.
- ▸Gloss hides small edge mistakes better than matte
- ▸Apply to the centre first, then press lips together
- ▸Keep the layer thin at the outer corners
- ▸Carry the tube, since gloss needs one top up
8. Two Shade Red Blend, Pale Lid And Deep Corner

Two shades, clearly placed. A pale shimmery red covers the lid, a deeper red settles into the outer corner and along the lower lash line, and the join between them is blurred. It looks advanced, yet the method is simple. Light shade everywhere first, dark shade only in the corner, then blend the border where the two meet.
Work with the eye open when you place the dark shade. Hoods and creases hide colour when the eye closes, and beginners often place the deep shade too high. Small circles with the brush tip keep the dark colour where you put it. Two shades from the same palette family always blend kindly, so buy them together when you can.
One flat wash of red that stops at the crease and can look a little plain on its own.
The same wash with a deeper red pressed into the outer corner, giving shape and depth with no extra steps.
9. Blurred Red Lip Stain With No Hard Edge
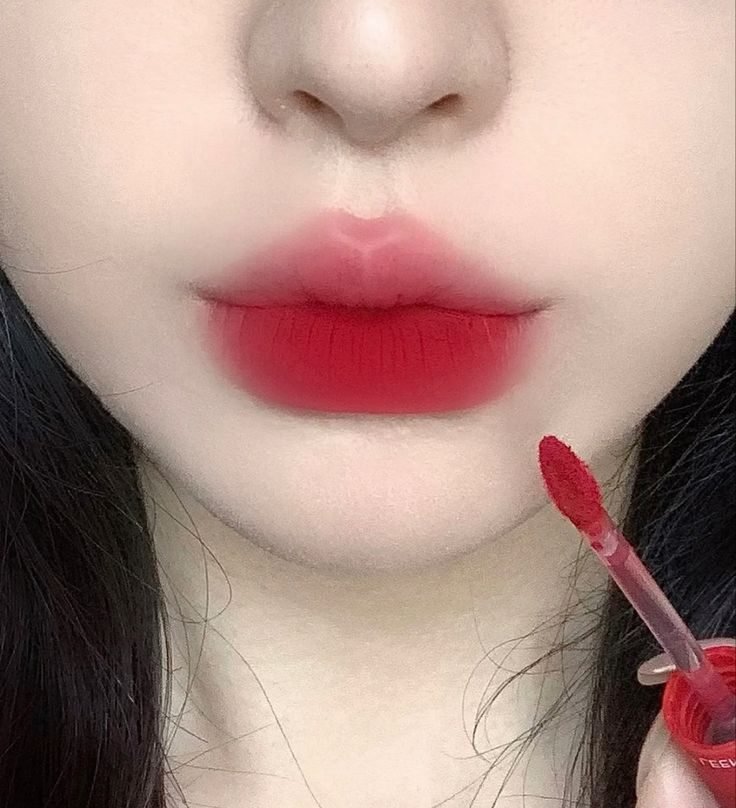
Edges are optional. This stain is deepest at the centre of the mouth and melts outward until it disappears into the skin, and the applicator in the frame hints at how little product that takes. A blurred lip is the most forgiving red of all. There is no line to keep straight, nothing to repair after coffee, and the fade looks natural instead of patchy.
Start with balm, blot it off, then dot stain at the centre only. Press lips together five or six times and let the pressing do the spreading. Adding product at the edges is what ruins the effect, so keep the wand away from them. The whole application takes under a minute once the pressing habit feels normal.
Dot stain three times at the centre of the lower lip.
Press lips together repeatedly to push colour outward.
Blur the outer edge with a fingertip or a cotton bud.
10. Burgundy Lip, The Gentle Swap For Bright Red
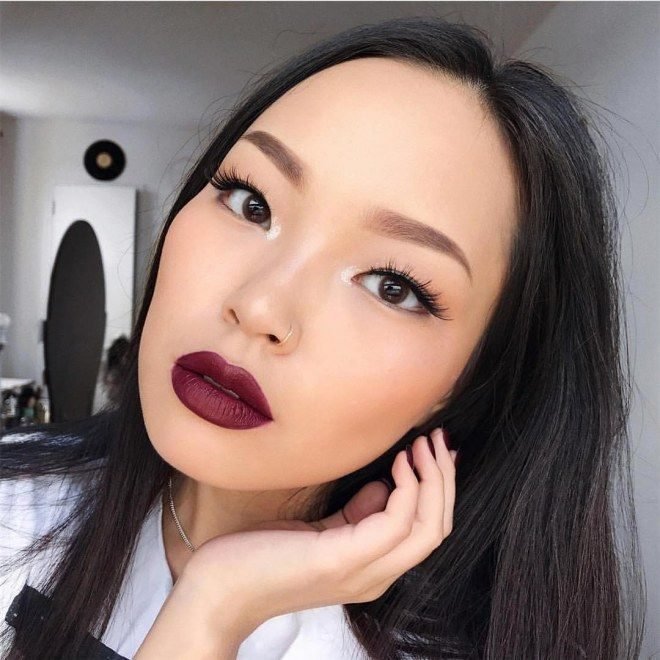
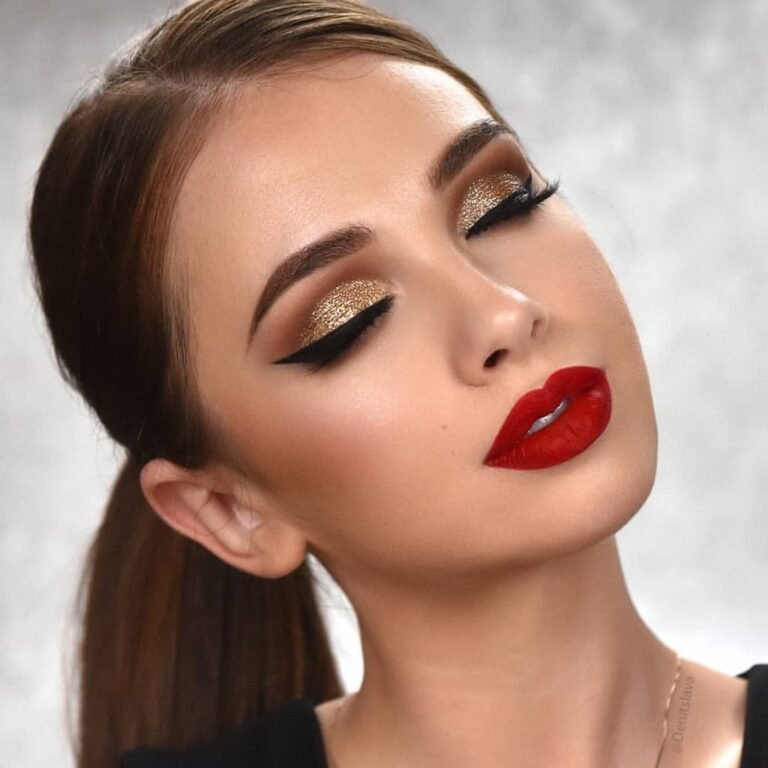
Bright red feels loud to many first timers, and burgundy is the softer door into the same family. This matte burgundy lip sits next to simple winged liner and clean skin, and the whole face reads calm. The deeper tone flatters a wide range of skin tones and hides small application slips better than a bright, blue based red.
Keep the rest of the face warm when you wear burgundy. A cool grey shadow next to it can look muddy. The soft brown liner and warm skin in this photo show the pairing that works. Start here if classic red still feels like too much. Burgundy also suits evening plans and winter clothes, where a bright red can fight with heavy fabrics.
A deeper red asks less of you. It reads polished at half the volume, so it is the smartest first red for anyone who finds bright shades hard to wear.
11. Red Shimmer Lid Pressed On With A Fingertip
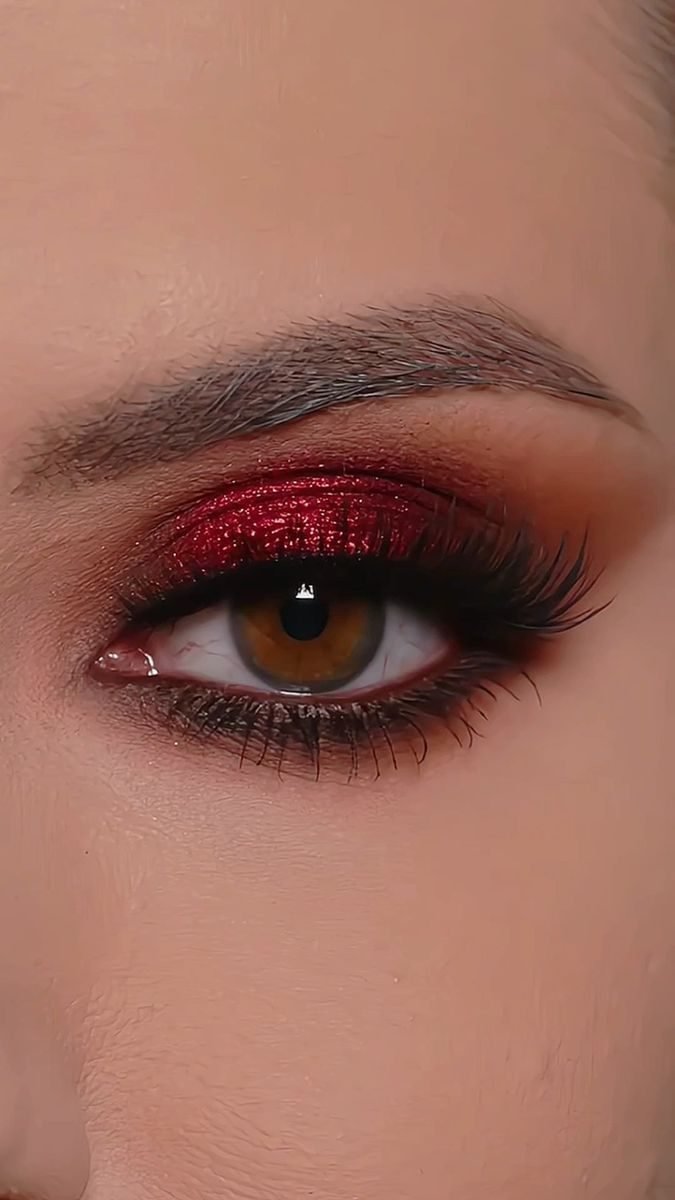
Metallic red sounds like a party look, yet worn this softly it reads like a warm glow. The shimmer sits on the lid only, the crease stays matte and warm, and thick lashes keep the eye defined. The finish does the work, so the placement can stay basic. That is why a fingertip beats a brush here. It presses the shine down flat and stops loose sparkle falling onto the cheeks.
Tap, do not swipe. Swiping drags shimmer past the crease and onto the brow bone. Two taps per eye is plenty. If fallout lands anyway, lift it with a small piece of tape instead of wiping, which only spreads it.
⚠️ Watch Out
Do your eyes before your base when you try shimmer for the first time. Any fallout wipes away clean, and your foundation stays fresh.
12. Red Lip Built Over A Liner Base
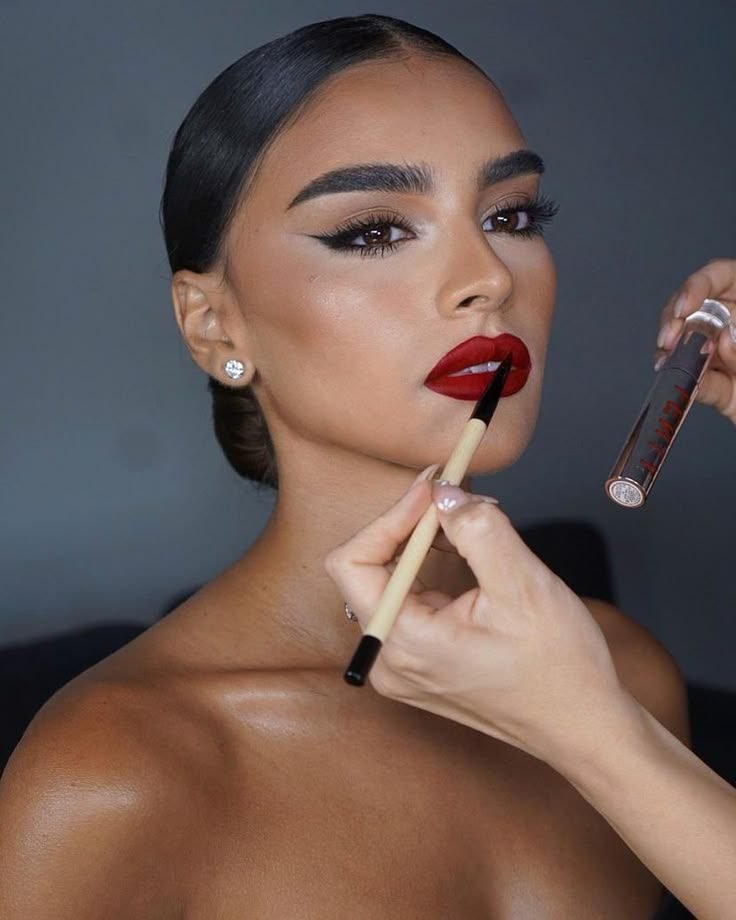
Liner first, lipstick second. In this photo the brush is finishing a red lip that already has a clean, even shape, and that shape came from the base layer. Filling the whole lip with liner, rather than tracing the outline alone, gives lipstick something to grip. The colour lasts longer, fades evenly, and keeps its edge through a meal.
Match the liner to the lipstick as closely as you can. A darker outline belongs to another era and shows the moment the lipstick fades. Short strokes beat one long line, and a slightly sharpened pencil gives a cleaner edge than a blunt one. Store the pencil tip down in a cup so it stays ready and clean.
13. Soft Red Smoky Eye With Diffused Edges
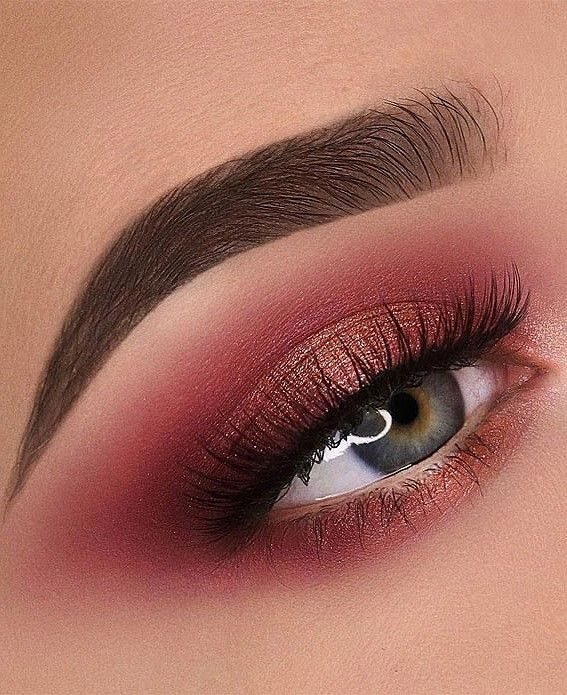
Smoky does not have to mean black. This version wraps the eye in a diffused red brown, deepest along the lashes and fading out in every direction, with no hard line anywhere. It is the evening step up from the single wash earlier in this list, and it stays beginner friendly because blending hides uneven placement.
Build it in two passes. Lay the colour down, blend until the edge disappears, then add a second light pass only near the lash line. Stopping to blend between passes is what keeps a soft smoky from turning into one heavy block. Keep lips and cheeks quiet here, since the eye already carries the colour story.
Blend like this
14. Red Monochrome With Eyes, Cheeks And Lips Together
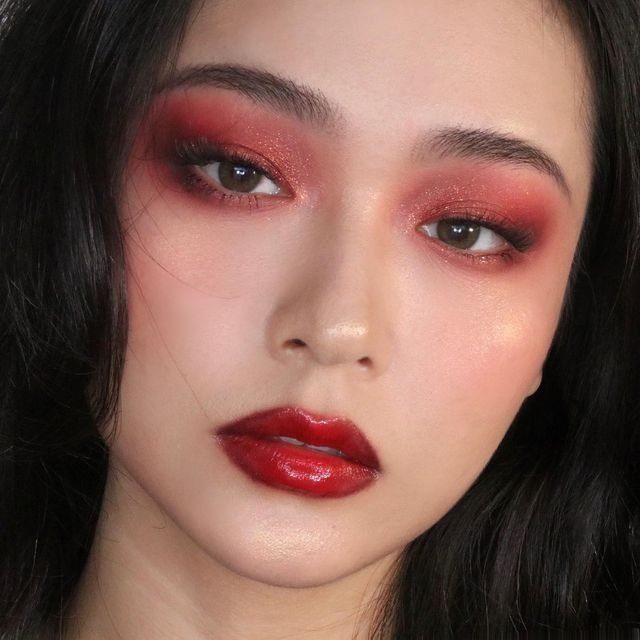
Three features, one colour family. The eyes carry a red wash, the cheeks glow with the same warmth, and the lips finish in a glossy red. Using related shades in three places sounds bold, but it is one of the easiest systems to learn, because you never have to guess if colours clash. They match by design.
Keep one feature strongest and let the other two support it. Here the eyes lead, the lips follow, and the blush stays light. Three products are enough. One red shadow, one red blush or the same shadow used lightly, and one red lip product. A tint that works on lips and cheeks cuts the kit down even further.
15. Clean Red Lip Edges For A Polished Finish
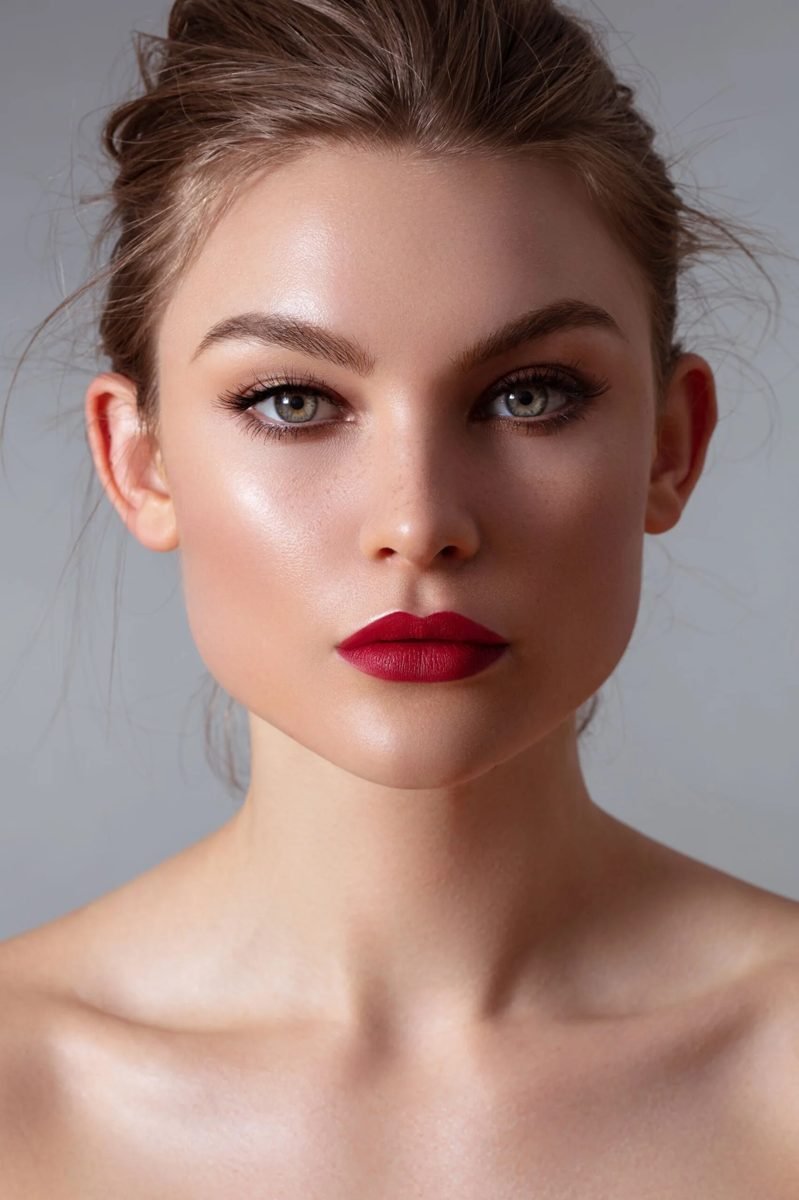
Finish with the detail that makes every red in this list look expensive. Crisp edges. This portrait shows a red lip with a clean border all the way around, soft eye makeup, and skin that glows without shine in the wrong places. The lip looks done by a professional, and the gap between this and a rough first try is about sixty seconds of cleanup.
Run a flat brush with a little foundation around the outside of the lip line, or trace the border with a cotton bud. Fix one side, then match the other. Check the corners last, since they collect the most extra colour. Do the cleanup in natural light when you can, because bathroom bulbs hide small smudges.
📌 Good To Know
Clean the edges after the lip colour, never before. Fresh lipstick will always creep a little during application, and one final pass keeps the border sharp.
You now have fifteen ways into red, and none of them asks for a full kit or a steady expert hand. Start with the tint or the blurred stain if bold colour still feels new, move to the plain red lip when you want the classic look, and try the wash, the wing, and the soft smoky on days when you have ten spare minutes to play. The habits repeat across every entry. Thin layers, blended edges, one feature at a time. Keep those three rules and red makeup for beginners becomes a small set of looks you can trust. Save this list for the next morning you want colour without the stress.