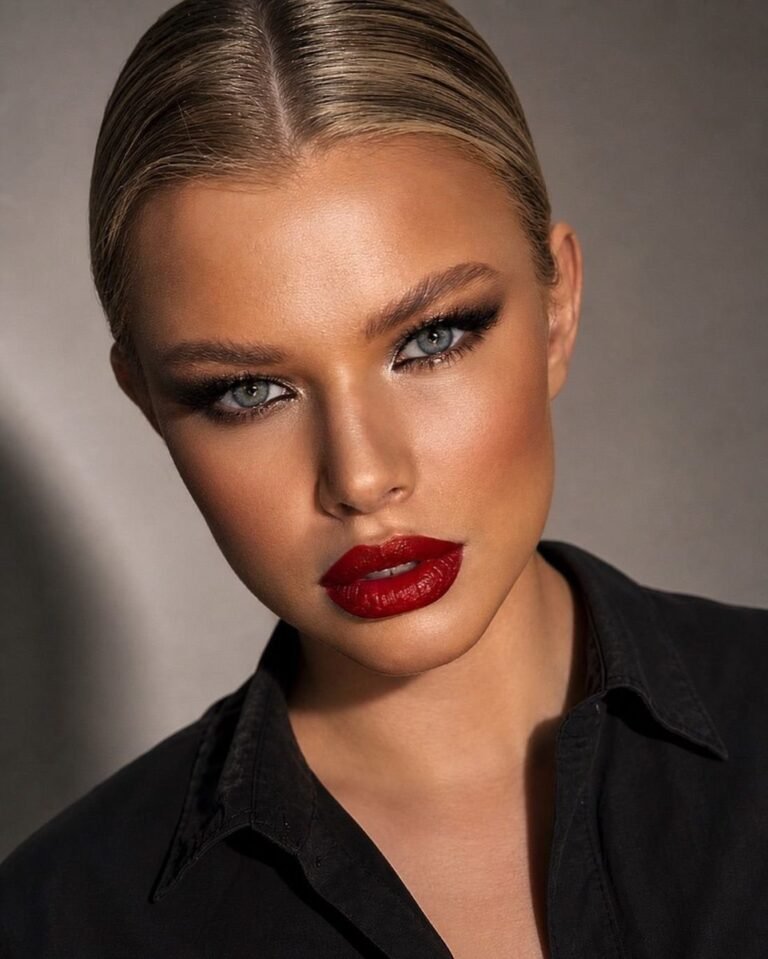
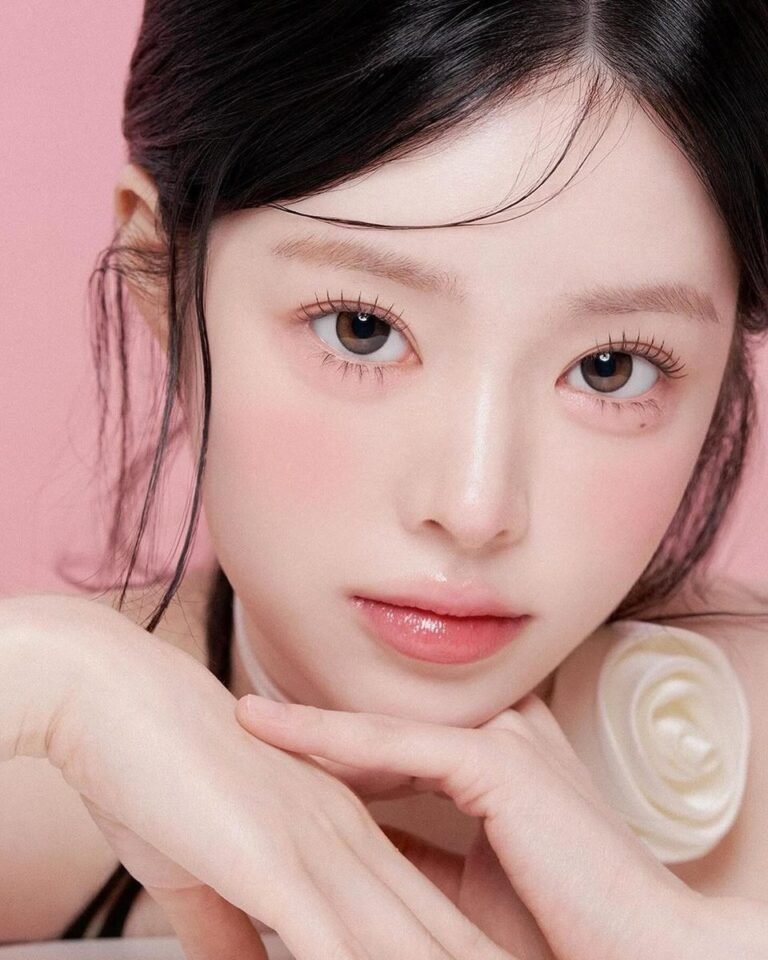
23 Dolly Makeup For Photos That Look Stunning On Anyone
Phone cameras are honest in the worst way. Flash flattens blush, a close lens enlarges every shiny patch, and lashes that looked full in the mirror can vanish in a group shot. Dolly makeup already has the right ingredients for the camera: big defined eyes, colour placed high on the cheeks, lips with a soft centre glow. It just needs small adjustments in strength and placement so those features survive bright light and compression. That is what this list is for. Each of the 23 looks below was picked because one camera problem is solved in it, from matte skin that stays calm under flash to gradient lips that still read after a long shoot. Use the full routine for a portrait session, or steal single ideas, like the high blush placement or the cluster lashes, for everyday photos. Every entry names what to copy and what to keep softer, so dolly makeup for photos stays sweet on screen instead of washed out or heavy.
1. The Camera Ready Dolly Base
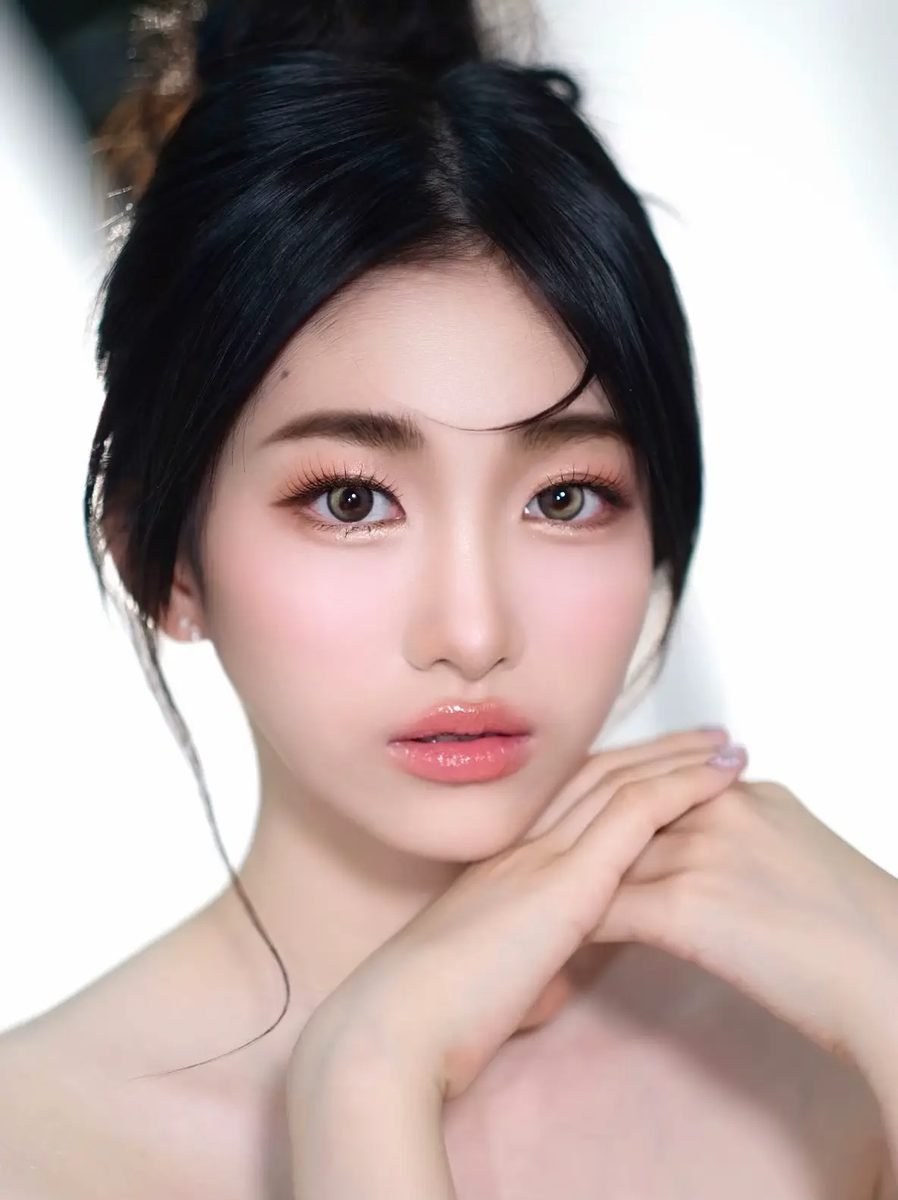
Studio light is the fairest test a dolly face gets, and this portrait passes it because every layer is doing quiet work. The base is even but still looks like skin, with light pooled on the cheekbones and the bridge of the nose instead of spread everywhere. Blush sits on the apples and melts upward, strong enough to register from a distance yet soft at the edges. The eyes carry the dolly shape through separated lashes and a pale puff under the lower lash line, and the lips stay glossy with the colour centred. Nothing here is extreme, which is the point. A camera ready base is balance: colour placed where the lens looks first, shine kept on the high points only, and edges blended so no line announces itself. Copy this order and the rest of the list becomes detail work.
A camera reads balance before detail, so an even base with colour on the high points survives any lens.
2. Blush Placed High For Flash Photography
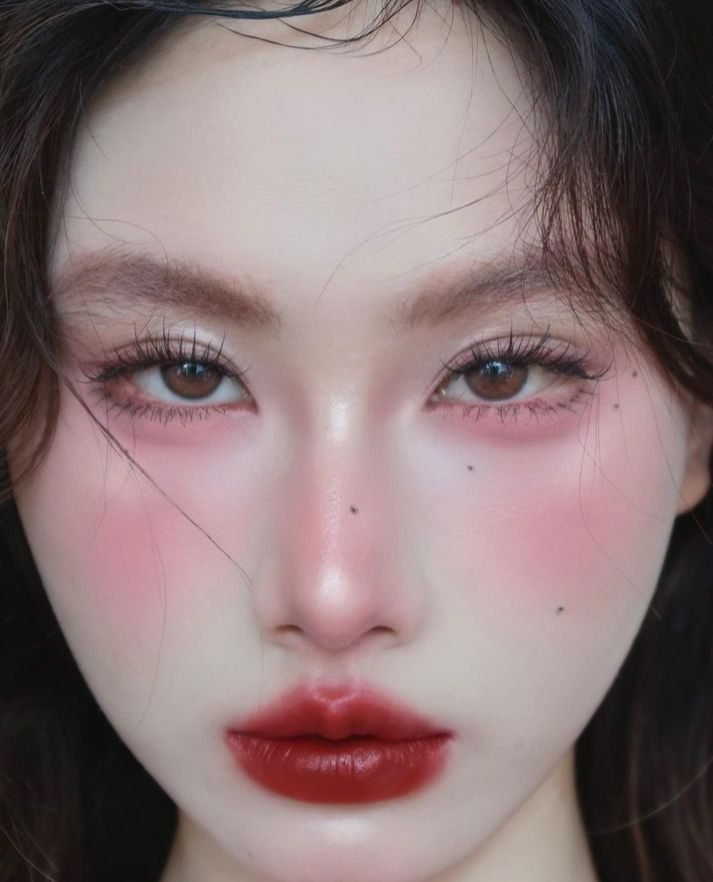
Flash eats blush first, so this look wears it higher and wider than feels natural in the mirror.
The pink starts on the upper cheek, almost level with the lower lash line, and sweeps across the nose bridge in one soft band. Placed there, it does two jobs on camera. It shortens the mid face in photos, and it keeps colour in the frame after flash washes the centre of the face pale. The edges are feathered, with no hard border where the blush stops.
- Place the strongest colour on the upper cheek, not the apple.
- Carry a whisper of the same pink across the nose to join both sides.
- Stop the sweep below the eye puff so the aegyo-sal stays clean.
Paired with the deep red gradient lip, the face keeps its structure even in a harsh, straight-on flash shot.
💡 Quick Tip
Check blush with your phone flash before the real photos. If the colour disappears on screen, move it higher rather than adding more.
3. Matte Skin That Does Not Shine On Camera
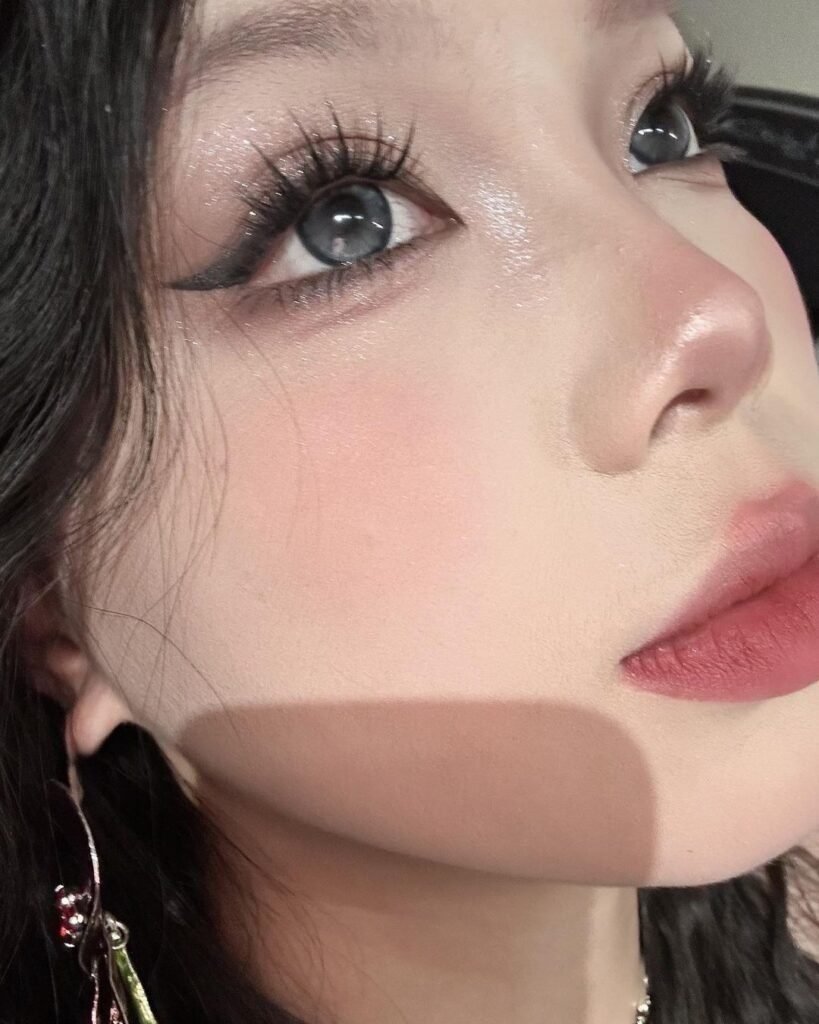
The finish. Skin here has a satin matte surface with no wet highlight on the forehead, nose or chin, the three spots flash turns into white patches first.
The colour. Blush and shadow stay powdery and diffused, so the matte base does not flatten the face. Pink sits high on the cheek and the eye keeps a soft brown depth.
The lips. A muted mauve with a dry finish matches the base, keeping the whole face in one texture family, which reads tidy in close portraits.
Matte does not mean flat. It means shine is banned from the centre of the face and allowed nowhere the lens will blow it out.
4. Lashes That Read At A Distance
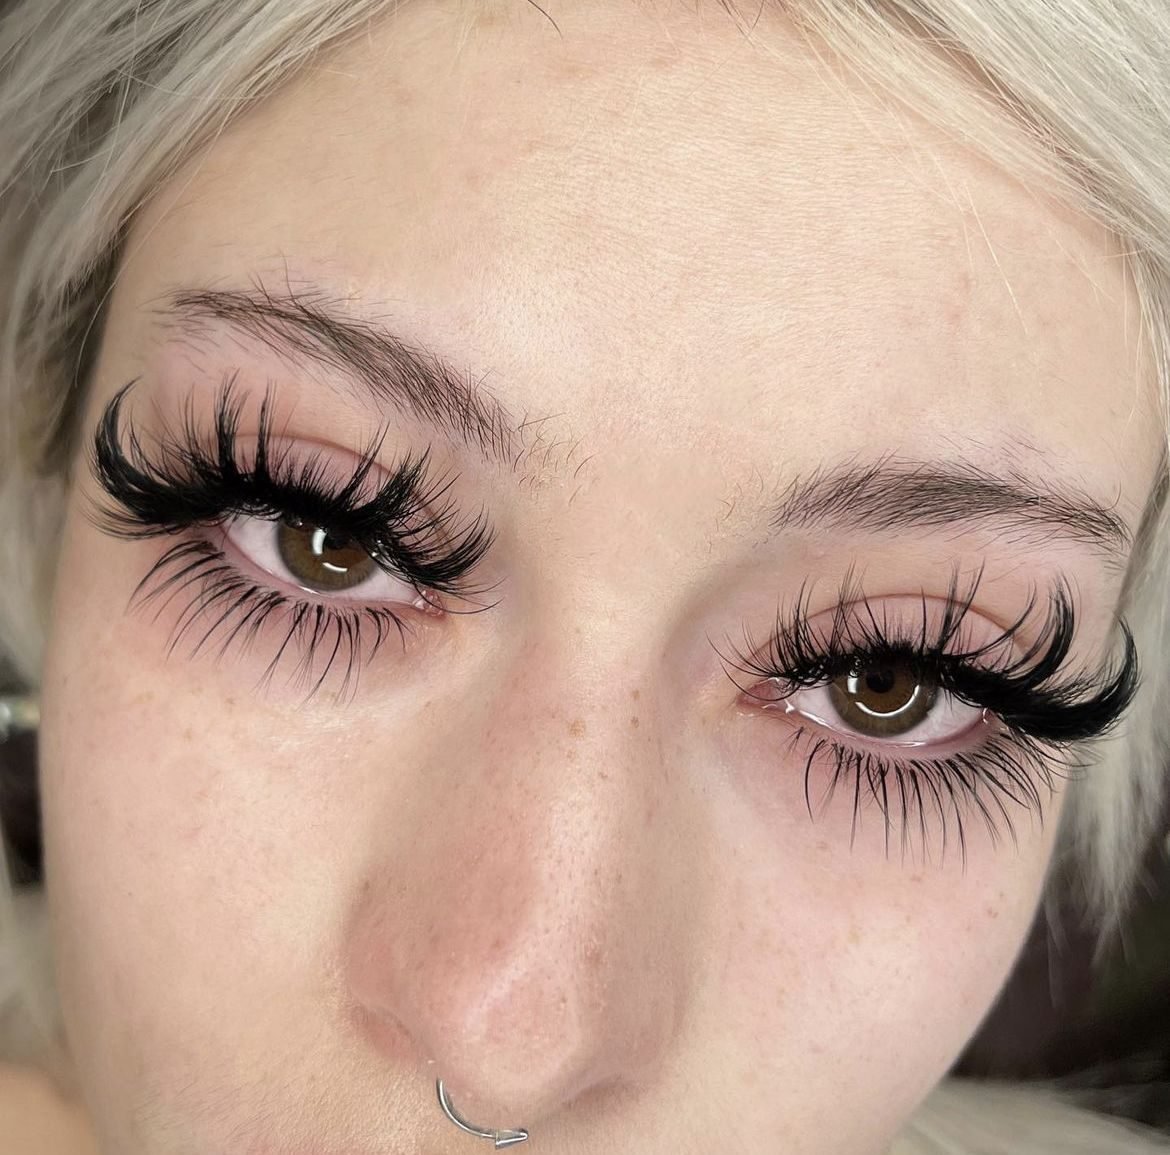
From two steps back, most lash looks merge into one dark smudge. These do the opposite. The fibres are grouped into long, separated spikes with clear gaps between them, so each spike stays visible when the photo is small on a screen. The lower lashes are drawn into fine points too, which keeps the eye shape open instead of top heavy.
Length is placed through the centre and outer third, and the roots sit in a tight dark line that frames the eye even where individual lashes blur. Skin around the eyes is left fairly bare, which gives the lashes contrast to read against. For group photos and full length shots, this is the lash style that survives.
Recreate this look
5. Gradient Lips That Do Not Fade In Photos
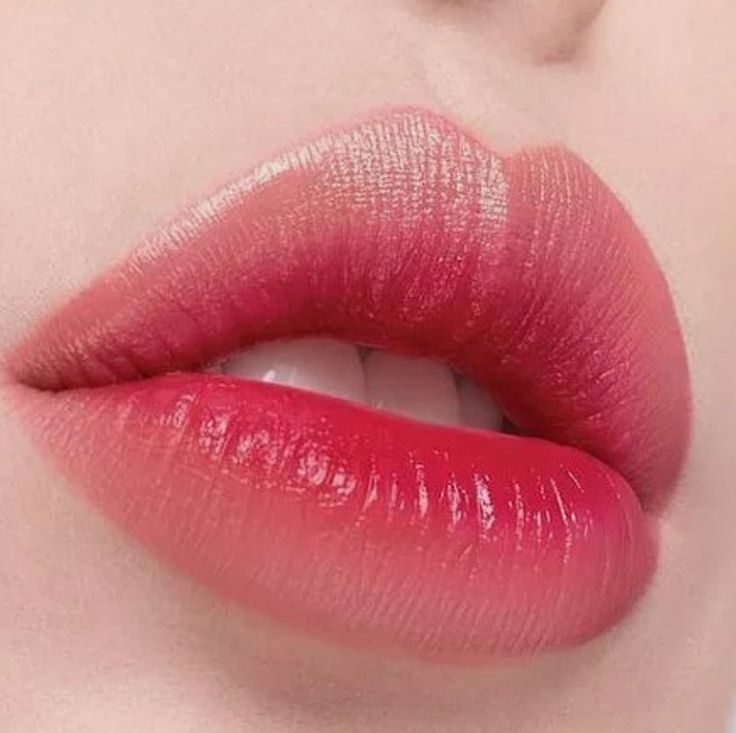
Lip colour fades from the centre outwards in real life, and photos speed the process up.
This gradient works with that pattern instead of fighting it. The deepest rose sits at the centre of the lips, where colour lasts longest, and fades toward the edges into a softer pink. A satin sheen on top catches light so the mouth keeps a highlight in every frame. Because the edge is faded on purpose, small losses during a shoot never show as a harsh lip line. The shape also photographs fuller than a flat matte lip, since the bright centre reads as the fullest point. Order matters here: stain the centre first, blur the edge second, and add the sheen last so it sits on top of the colour instead of diluting it.
6. Aegyo-Sal Kept Soft Under Bright Light
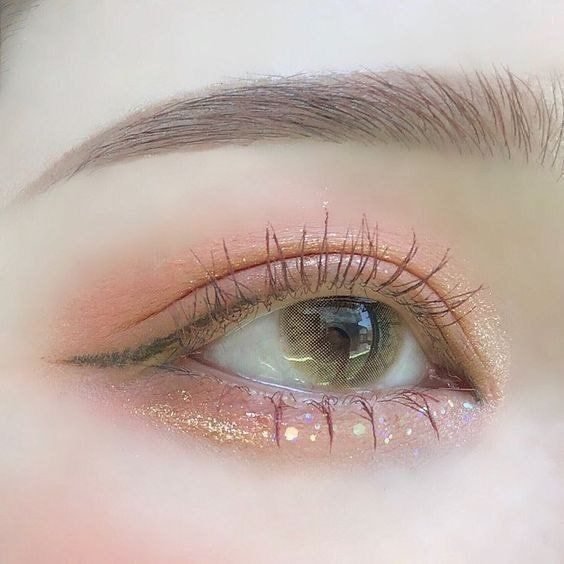
Bright light can erase the aegyo-sal or turn it into a grey shadow, and this close-up shows the middle path. The puff itself is left almost bare, just warmed with a peachy tone, while the line beneath it stays thin and light brown. A row of fine gold glitter sits on the puff, catching light in place of heavy shading.
The result reads as a real feature rather than drawn makeup, even at close range. Keeping the glitter particles fine matters here. Large chunks photograph as specks, while this dusting registers as brightness. Smile when you place the lower line, keep it shorter than the full width of the eye, and the puff will hold its shape under the strongest ring light.
Warm the puff with a soft peachy wash and leave it almost bare.
Draw the line beneath it thin, light brown and shorter than the eye.
Press fine gold glitter along the puff only, never on the line.
7. Pink Tones That Survive Flash
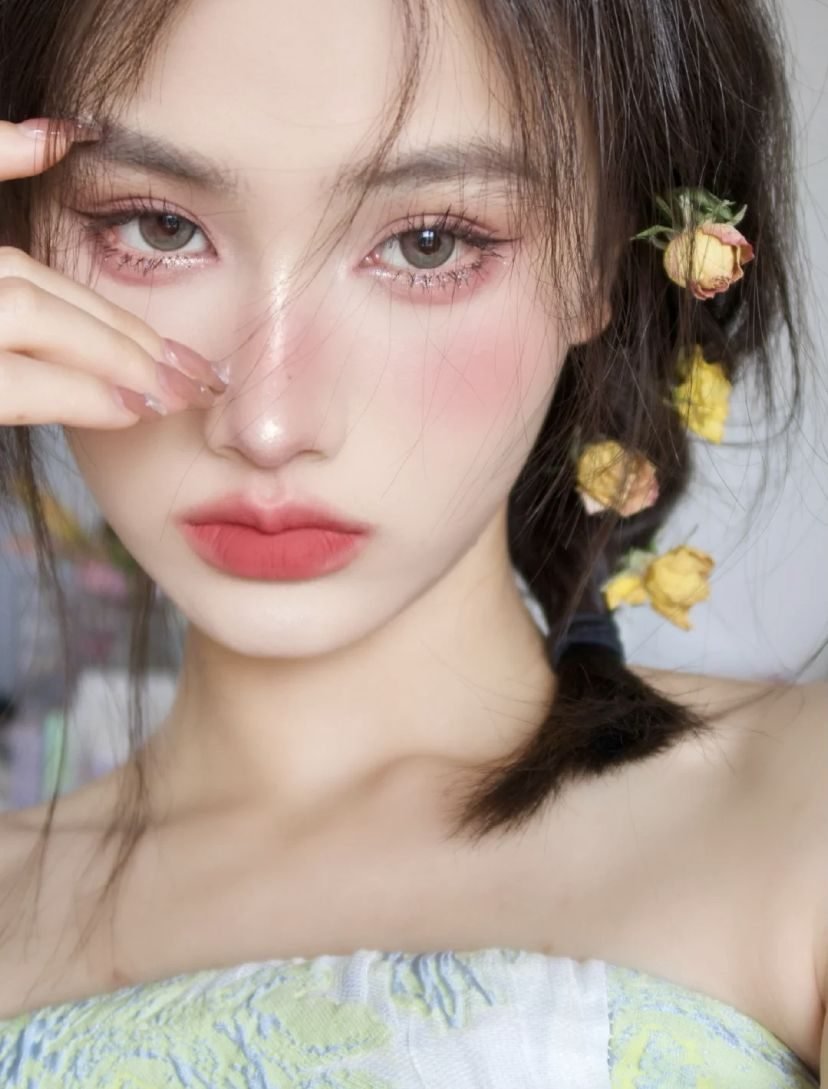
Pink is the first colour flash tries to delete, so this look spreads it across three zones instead of betting on one. The cheeks carry a clear pink that starts high and melts downward. The lids repeat the same family in a softer wash. The lips finish the chain in a matte coral pink that keeps its depth without shine.
Because the three pinks sit at different strengths, the camera keeps at least two of them in any light. The small flowers in the braid are styling, but they echo the palette and make the pink read deliberate in outdoor frames too. Wear the strongest pink on the cheeks, where flash lands first, and let the other two support it.
Repeat pink on cheeks, lids and lips at three different strengths.
Blend every edge so flash finds no border to expose.
One pale pink product spread over the whole face.
Icy pastel pink, which turns grey under a camera flash.
8. Close-Up Ready Eye Detail
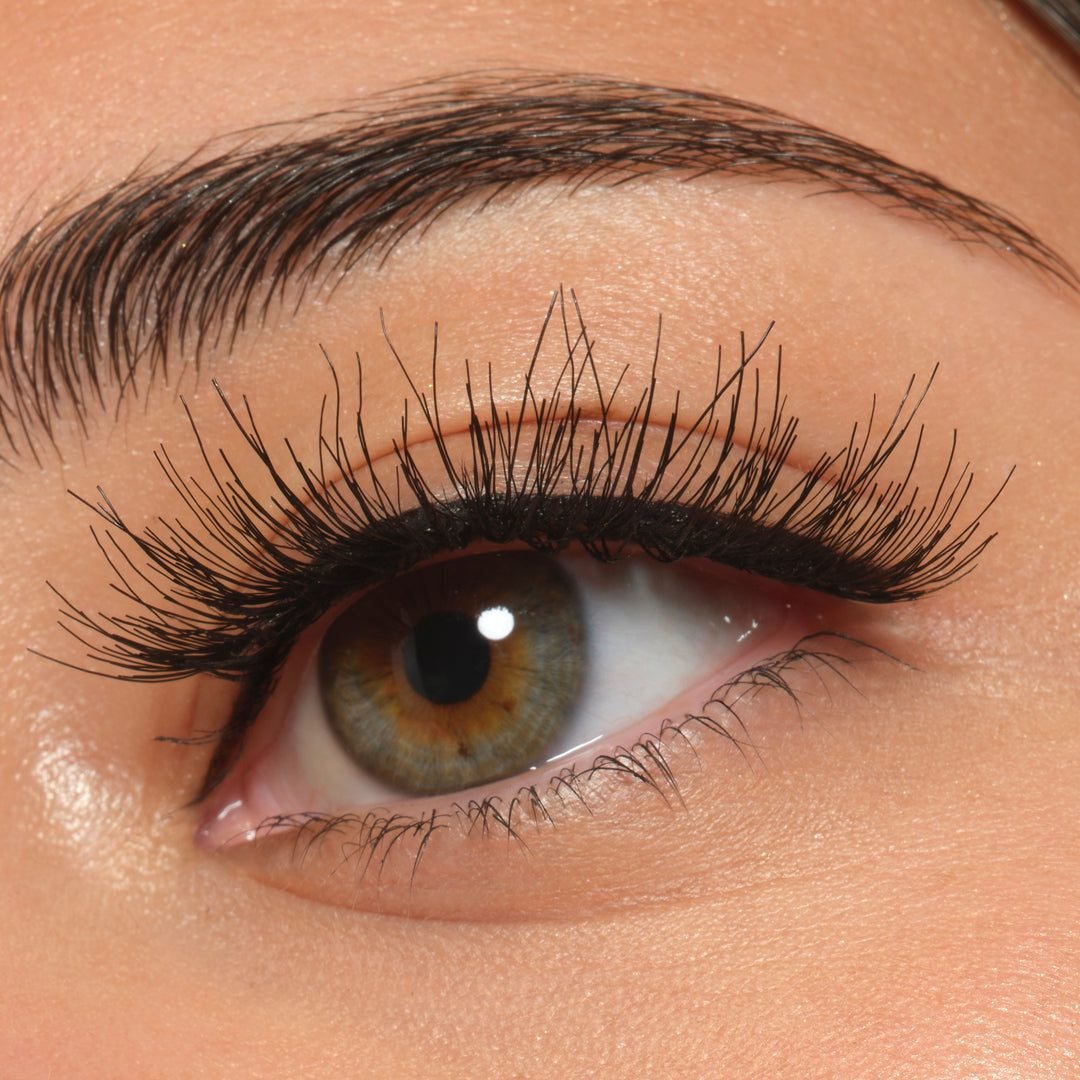
The lash line. Liner is pressed into the roots only, so the line looks like lash density rather than a drawn stripe, even at full zoom.
The lashes. Fibres are separated and varied in length, longest through the middle, which keeps the eye round and open in macro shots.
The skin. The lid and brow bone are clean, with warm shadow blended to nothing at the edges. No fallout, no crease line, nothing for a close lens to magnify.
Close-ups reward restraint. Every element here is small, placed exactly, and blended past the point where it can be spotted.
- ▸Roots filled with liner, no floating line above the lashes.
- ▸Shadow blended past the crease until the edge disappears.
- ▸Lower lash line kept clean, with fallout brushed away before the shot.
9. Dewy But Not Greasy Under Studio Light
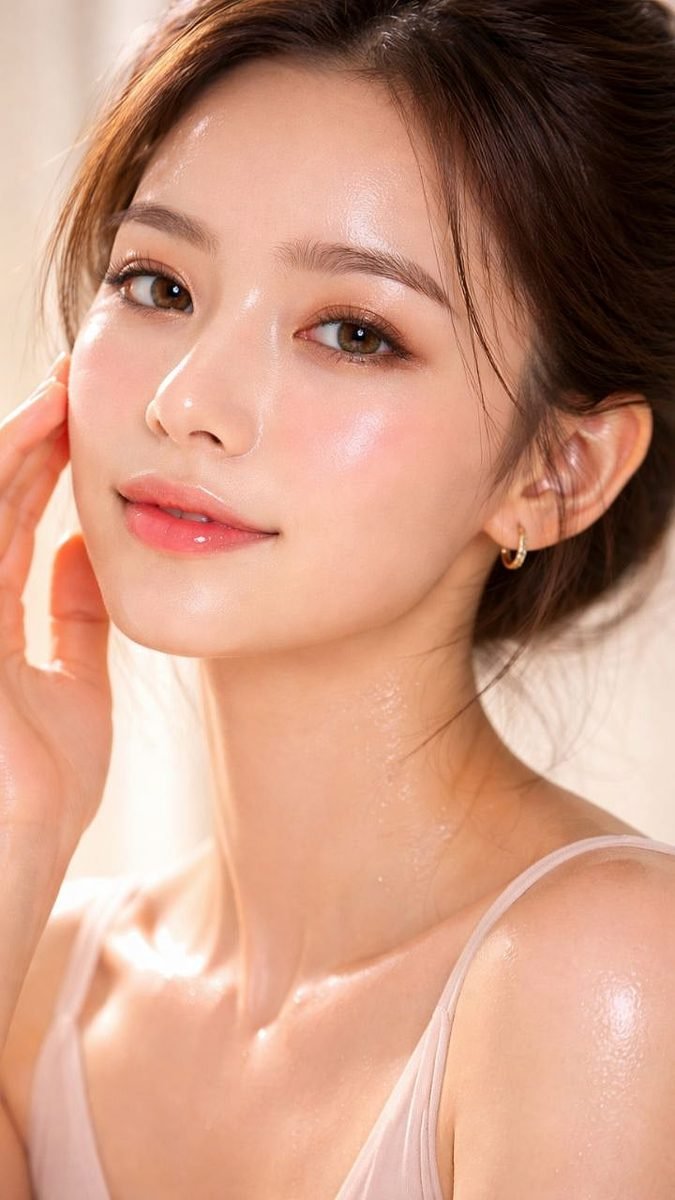
Dewy skin fails in photos when the shine spreads. Here it stays parked on the high points: the top of the cheekbone, a touch on the nose bridge, and the centre of the lip. The forehead, chin and sides of the nose stay calm, so the face reads lit rather than oily.
The hand resting at the cheek gives the shot scale, and the skin still looks like skin, with a soft sheen rather than a wet layer. Blush is light and warm, placed under the glow so colour and shine support each other. This is the finish to copy for window light portraits and warm outdoor shots, where a fully matte base can look dull by comparison.
Shine spread across the whole face, which the camera reads as oil.
Shine kept on the cheekbones and lip centre, which the camera reads as light.
10. Contour Kept Gentle For The Lens
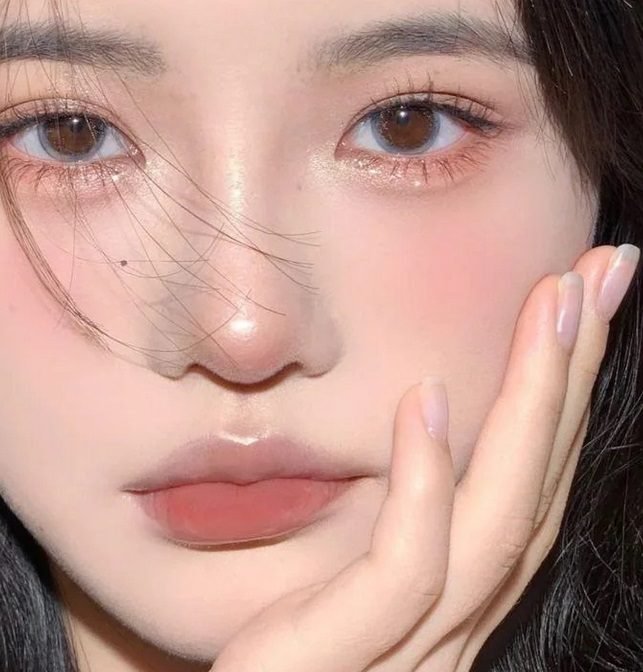
Lenses flatten faces, so a little shading earns its place, but this close-up keeps it whisper soft.
The shadow under the cheekbone is a gradient, not a stripe, and the nose shading is a faint wash along the side rather than two hard lines. Blush sits above the shading and overlaps it slightly, which hides the join. On camera the face gains depth without any visible contour edges, and in person the makeup still looks like a normal dolly face. The matte rose lip keeps the lower face grounded so the soft sculpt does not float. Blend longer than feels necessary; the lens forgives soft shading and punishes edges. That softness is also what keeps the face dolly rather than carved, which matters when the rest of the look is sweet.
📌 Good To Know
Blend contour upward and stop early. A shadow that ends before the midpoint of the cheek photographs as depth, while one dragged too low reads as dirt.
11. Glitter That Catches Light Without Fallout
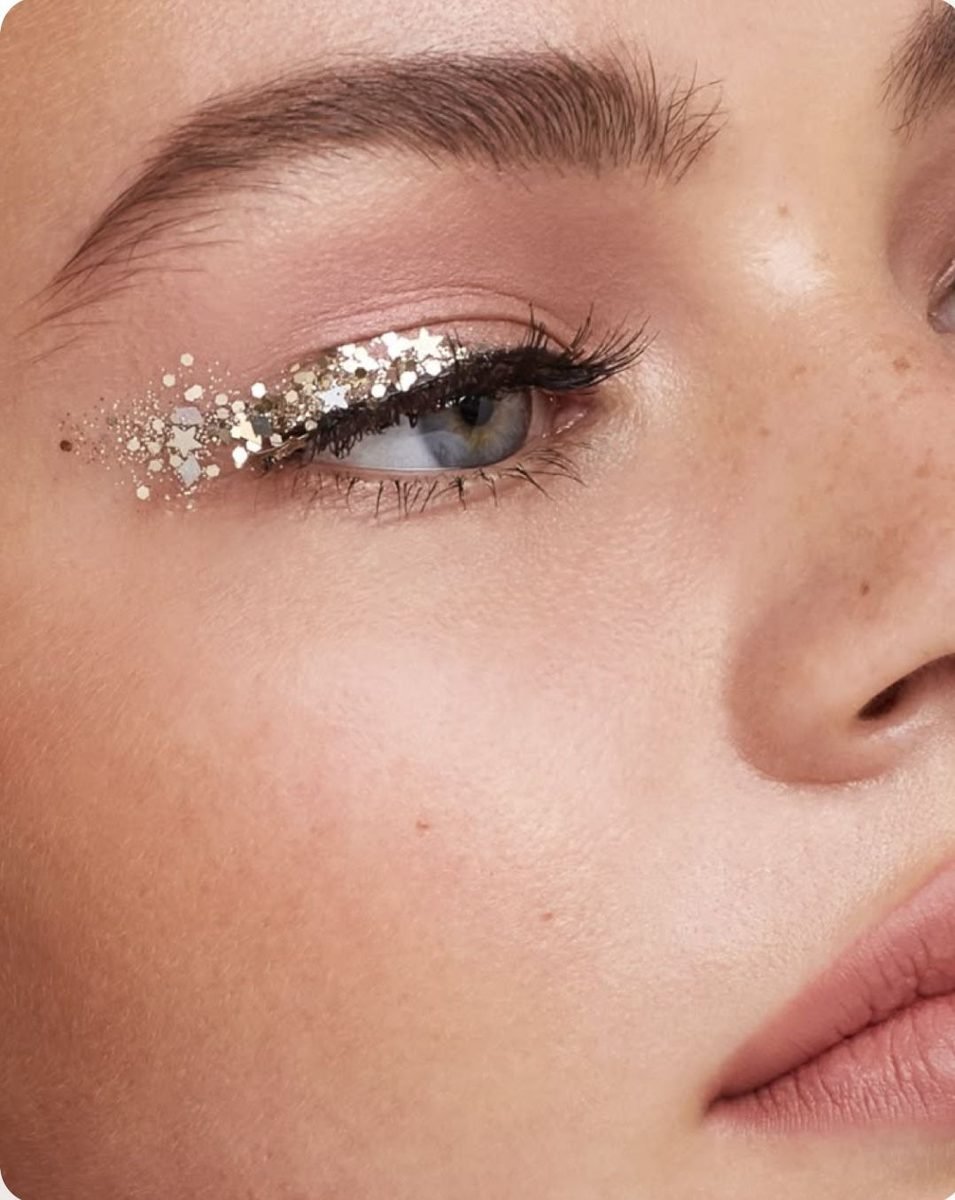
Glitter usually fails in photos through fallout, with specks scattered across the cheek by the second frame. This look avoids the problem by placement. The silver glitter is packed into a wing shape along the lash line, dense and deliberate, like a liner drawn in sparkle. Below it, the cheek is completely clean, with only natural freckles showing.
Confining glitter to one firm shape means the camera reads it as design, and light catches it from every angle as the head moves. Pressed over a sticky base and kept off the lower lid, it stays where it was placed for the whole shoot. Tap the brush off before every pass; loose sparkle has nowhere good to land.
12. Selfie Angle Friendly Dolly Look
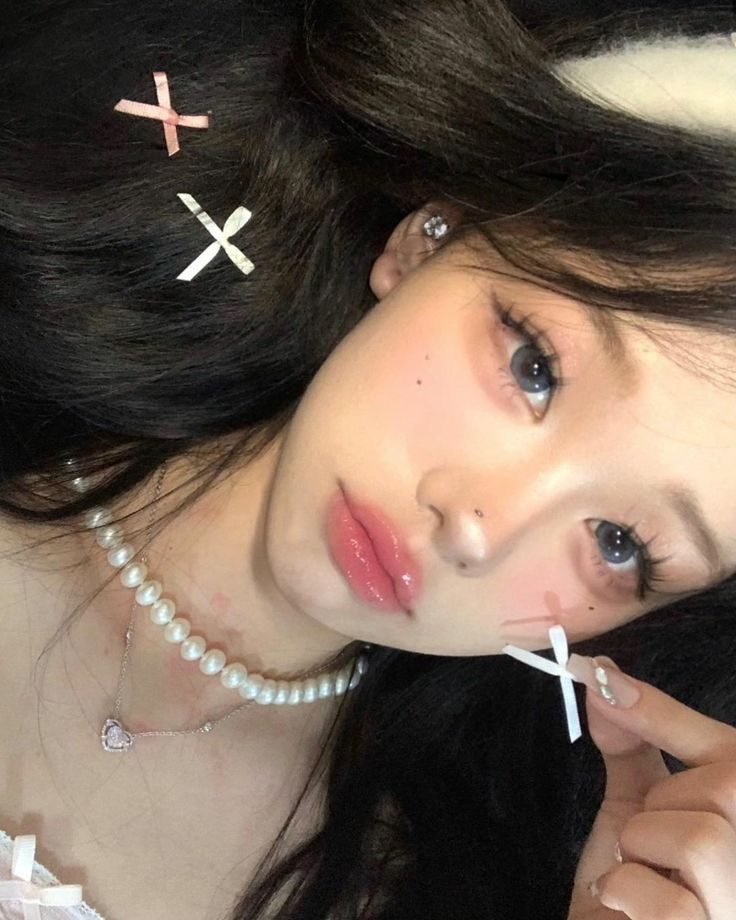
A tilted selfie angle changes where makeup needs to work. The higher cheek comes closer to the lens and catches more light, while the lower side falls into soft shadow. This look is built for that geometry. Blush is placed high and round on both cheeks, so the near cheek does not lose its colour and the far cheek keeps its shape.
The aegyo-sal and the glossy gradient lip sit at the centre of the frame, where a front camera sharpens most, and the lashes are long enough to read at arm’s length. The cross hair clips are a bonus: small bright shapes near the face give the eye a second place to land, and they make the tilt look deliberate.
| Higher cheek | Lower cheek |
|---|---|
| Blush high and round, so the extra light cannot wash it out. | Softer shading, so the shadow side never turns muddy. |
| Centre frame holds the aegyo-sal and gloss, where the lens is sharpest. | Lashes stay long enough to read at arm’s length. |
13. Golden Hour Soft Dolly Glow

Late light does half the work in this portrait, and the makeup is smart enough to let it. Warm blush melts into the sunlit side of the face, and the red lip is deep enough to hold its own against the orange cast that low sun throws over everything. Skin is left satin, so the light adds glow without turning the forehead into a mirror.
The wavy hair and the soft knit keep the frame warm, which supports the palette. Notice how simple the eyes stay: defined lashes, a soft wash of shadow, nothing that fights the light. Golden hour portraits fail when makeup runs cool toned or fully matte. This one leans into the warmth and stays soft everywhere except the lip, which anchors the whole face.
Warm light flatters warm makeup, so peach and red tones glow at golden hour while cool tones turn grey.
14. Black And White Photo Friendly Contrast

Strip the colour away and a dolly face survives on tone alone. In this monochrome portrait, the lash line reads as a deep frame around the eye, the brows hold the top of the face, and the full lip keeps a mid-dark tone that balances the eyes. The blush you cannot see still matters: it darkens the cheek just enough to separate it from the highlight beside it.
Freckles and real skin texture help too, giving the grey tones somewhere to vary. If you know a shoot will run black and white, deepen the lip one shade, tighten the lash roots, and keep the blush a touch stronger than feels natural in the mirror.
Deepen the lip one shade past your usual comfort zone.
Tighten liner into the lash roots so the eyes keep a dark frame.
Keep blush slightly stronger so the cheeks separate in grey tones.
15. Group Photo Ready Balanced Blush

Group photos punish extremes. One face in heavy blush makes the softer faces beside it look bare, and this selfie shows the fix: both friends wear blush at the same strength, placed at the same height. The colour sits mid cheek and blends toward the nose, so neither face steals the frame.
The playful whisker marks on one cheek are drawn with the same blush tone, a small detail that ties the pair together. Lips stay in the same pink family at a similar depth. When everyone in the frame shares placement and strength, the photo reads as a group instead of a competition, and every face keeps its dolly shape at a distance.
16. HD Friendly No-Cakey Foundation Finish
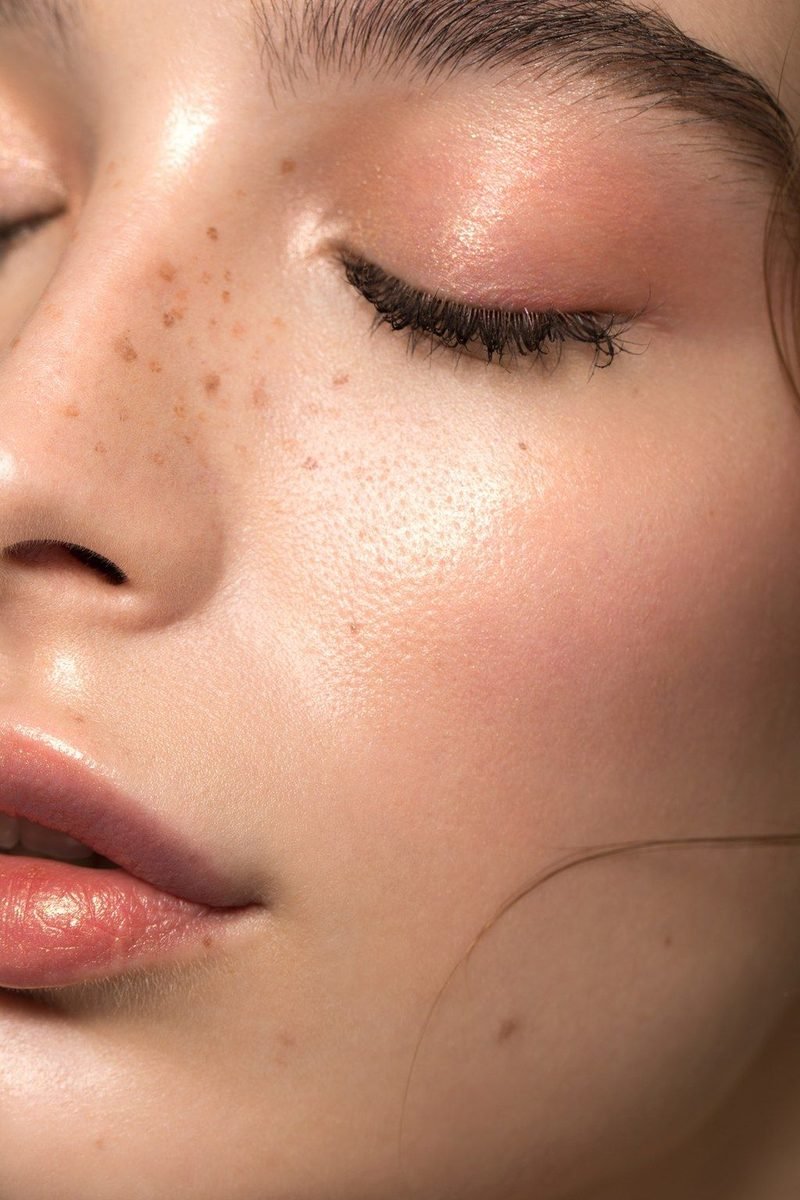
High definition lenses find every thick edge of foundation, and this close-up has none to find.
The base is thin enough that freckles show straight through it, and the skin keeps its natural texture on the cheek and nose. Coverage is concentrated only where the light hits first, then faded out toward the jaw and hairline. The eye area carries a soft shimmer shadow and natural lashes, and the lip at the edge of the frame is glossy, which keeps the whole face in a light, skin-first register. Powder, if it is there at all, is invisible. This is the finish that survives a close crop without a filter, because there is nothing sitting on top of the skin to catch the light wrong.
Recreate this look
17. Puppy Liner That Photographs Sweet

A cat flick points up and sharpens the eye. The liner here does the reverse, and the camera loves it for close portraits. The line hugs the upper lashes, then slopes gently down past the outer corner, following the natural curve of the eye. That downward tail makes the eye look rounder and softer in photos, with none of the stern angle a hard wing can give.
The aegyo-sal puff below is shaded lightly to match, so the whole eye reads as one sweet shape. The matte rose lip keeps the rest of the face quiet. For headshots and profile photos where the eyes carry the frame, the puppy line is the safer, softer bet.
Follow the lash line, then slope the tail gently downward.
Keep the line thin and the puff below it softly shaded.
A long tail that drags the whole eye downward.
Heavy lower liner, which closes the sweet shape back up.
18. Peach Dolly For Outdoor Photos
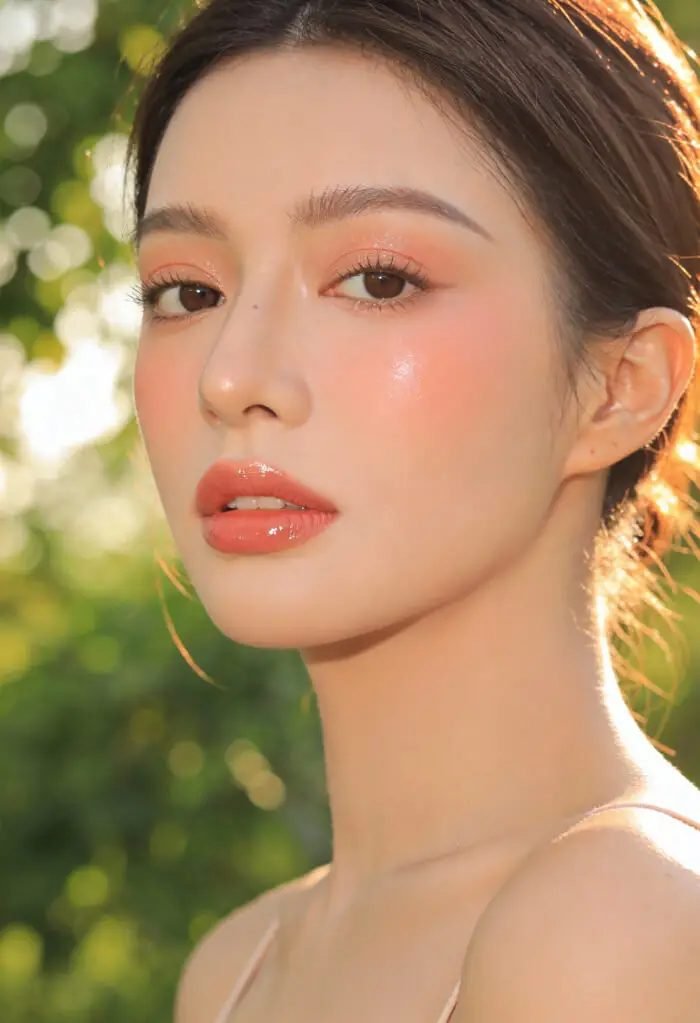
Outdoor light is bright, green and unforgiving, and peach is the dolly palette that handles it best. The blush here is a warm peach spread across the cheeks, echoing the sunlight instead of fighting it, and the lip repeats the same family in a glossy coral. Pink can turn cool and blue-ish in open shade, but peach stays warm in both sun and shadow. The eyes stay simple, with defined lashes and a soft peach wash, so the colour story stays on the cheeks and lips where daylight shows it best.
- Match blush and lip inside one peach family.
- Keep lashes defined, since bright daylight thins them out.
- Let the aegyo-sal stay subtle; daylight exaggerates shading.
With greenery behind her, the warm face holds the frame and the background stays background.
💡 Quick Tip
Test peach in open shade before the shoot. Shade cools every colour, and peach is the rare dolly tone that stays warm in both.
19. Rosy Dolly For Indoor Party Photos
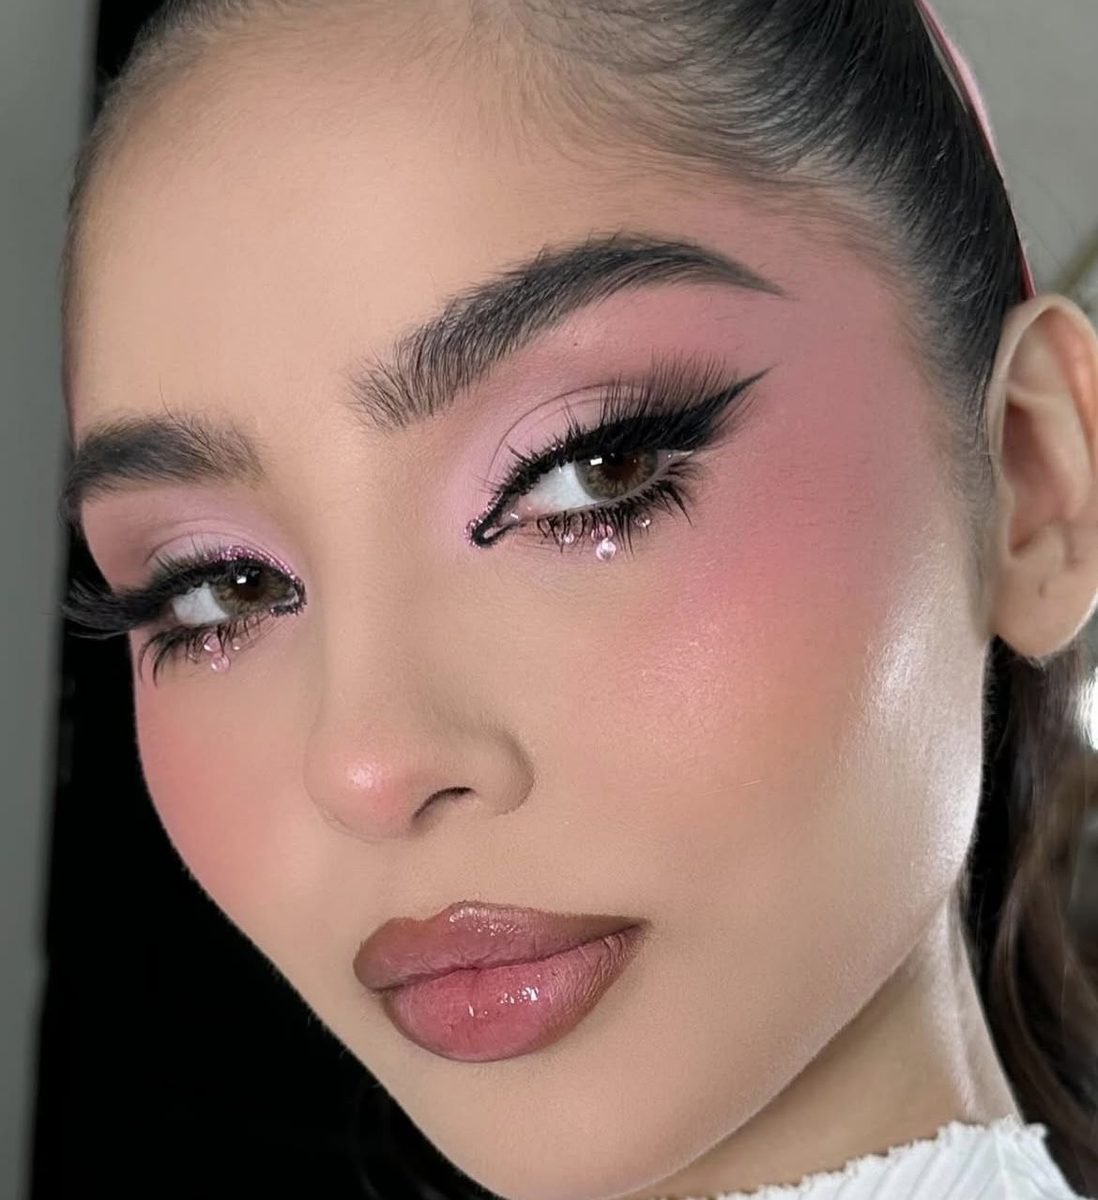
The blush. Rose pink is draped from the cheeks up to the temples, the placement party lighting rewards, since warm indoor bulbs deepen colour that sits high on the face.
The eyes. A black wing and long lashes give the softness a frame, and tiny gems under the lower lashes catch the light every time she turns her head.
The lip. Glossy mauve keeps the mouth inside the rose family without competing with the cheeks for attention.
Indoor party photos are warm, close and unplanned. This balance of strong blush, sharp liner and a quiet lip is built for exactly that. The gems are optional, but the blush placement is not; it is what keeps the face awake under warm light late into the night.
20. Lash Clusters For Close Portraits
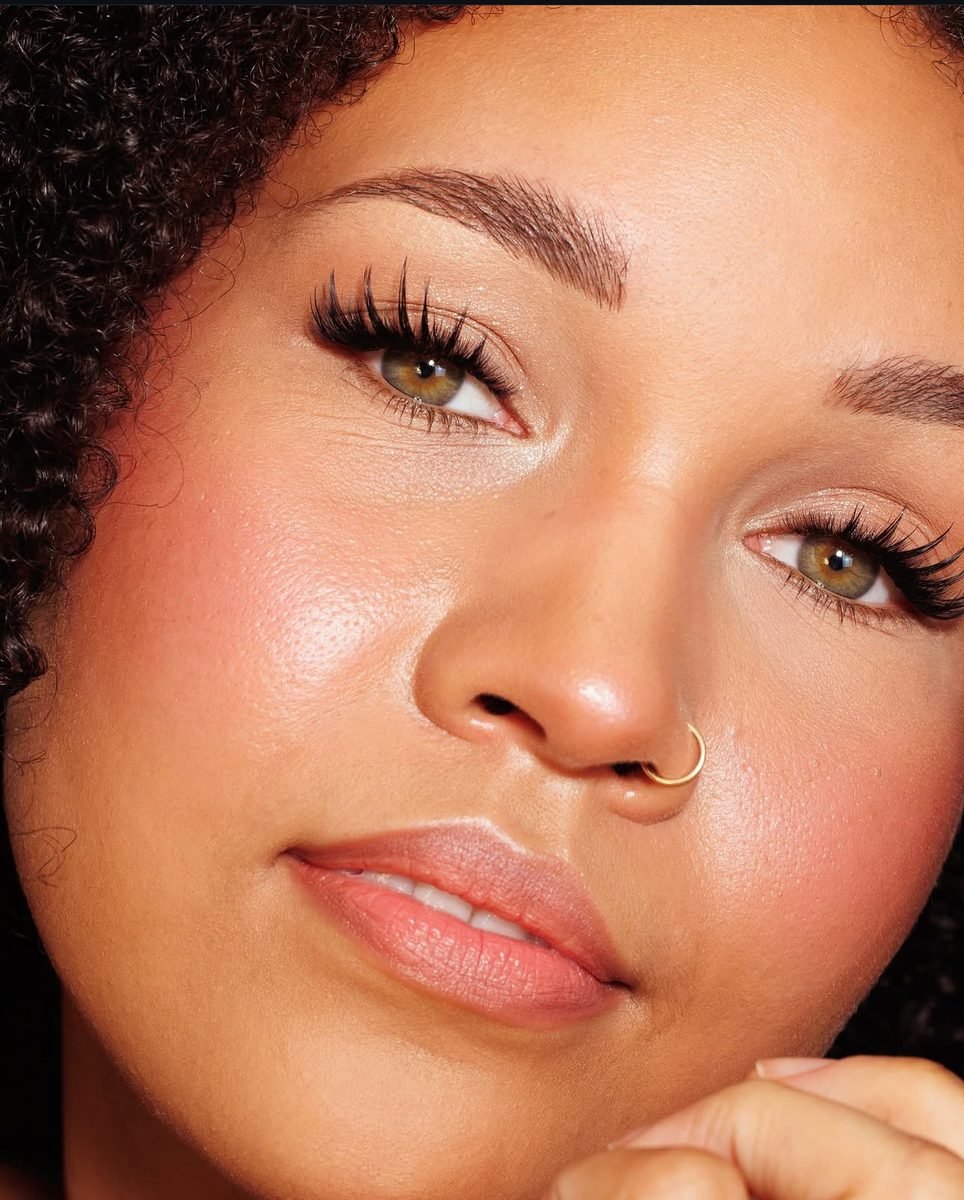
A strip lash can look like a strip in a close portrait. Clusters avoid that tell. In this portrait the lashes sit in small separated groups with skin visible between them at the root, so the eye reads as naturally full even from a few inches away. The lengths vary, longer at the outer half, which keeps the shape lifted instead of flat.
Because each cluster is placed on its own, gaps can be filled where your own lashes run sparse and left alone where they are dense. Paired with a rosy cheek and a soft gloss lip, the eyes carry the portrait without any single element looking applied. For headshots, clusters are the detail that separates a good photo from a great one.
- ▸Clusters in small groups, with skin showing at the roots.
- ▸Lengths varied, with the longest groups at the outer half.
- ▸Fill the sparse spots only, and skip the dense ones.
21. Brow Shape That Frames The Face On Camera
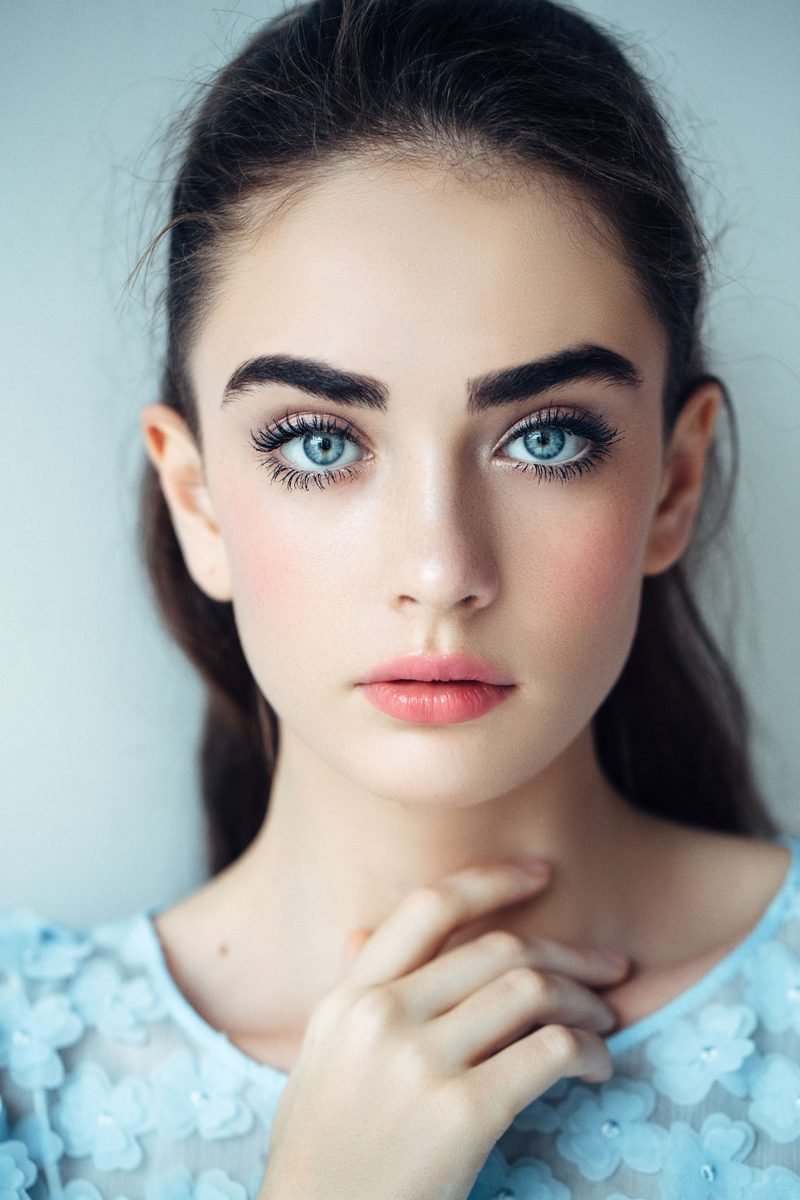
Brows are the frame the camera crops to first, and this straight-on portrait shows a shape built for the lens. The brows run fairly straight with a soft tail, full through the front and tidy underneath. That line holds the top of the face in every shot, keeping the eyes as the clear centre of the frame.
Because the shape is strong, the rest of the makeup can stay gentle: curled lashes, a wash of blush, a natural pink lip. Arched brows can read surprised under flash, and very thin brows disappear at a distance. This middle shape, straight, full and clean underneath, photographs the same from every angle, which is what a full day of photos needs.
Thin or highly arched brows, which vanish at a distance or read as surprise under flash.
Straight, full brows that hold the frame and keep the eyes centred.
22. Setting The Look So It Lasts The Shoot
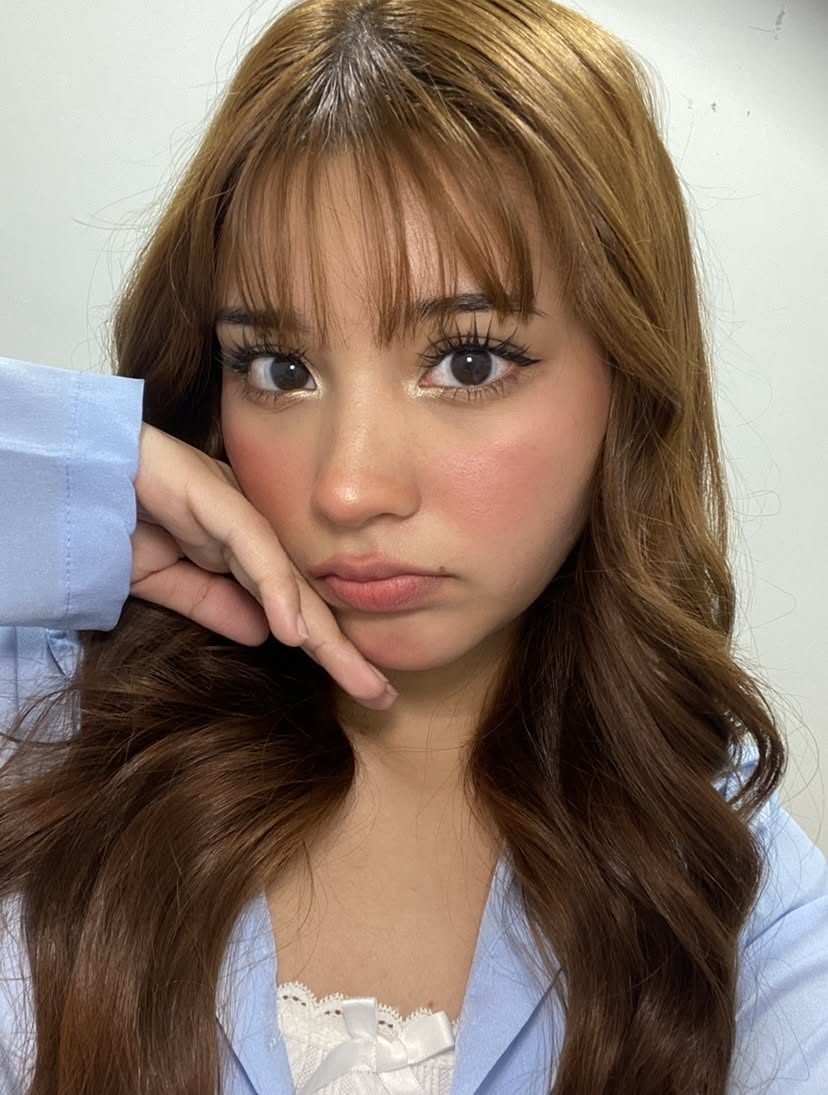
A finished dolly face at minute one is easy. This selfie is the version that matters: satin skin with no separation at the edges, blush still sitting where it was placed, lashes neat, and the lip colour even. That staying power comes from the last two minutes of the routine, not the first twenty.
Set the centre of the face with a light hand, keeping powder off the aegyo-sal and the lip. Mist from a distance so droplets land as a veil rather than spots. Then leave the face alone. Every touch with fingers moves blush and breaks the skin finish, so blot with paper if shine appears and rebuild only the lip.
Powder the centre of the face lightly, skipping the puff and the lips.
Mist from arm’s length so the spray lands as an even veil.
Blot shine with paper later, and rebuild only the lip colour.
23. The Full Camera Dolly Finish
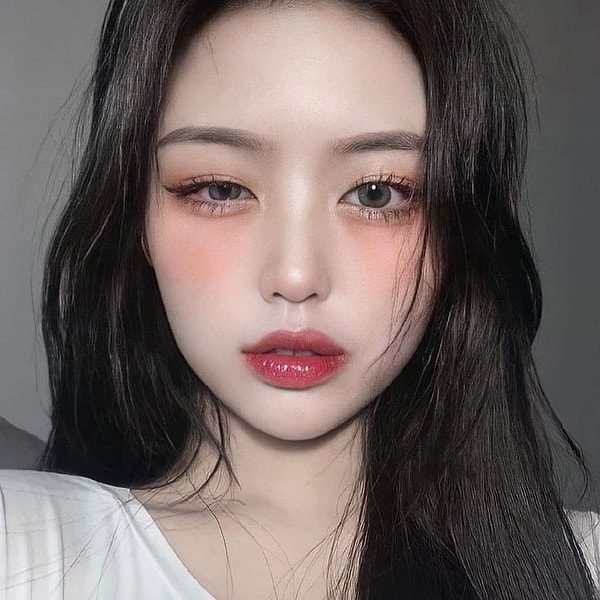
Everything in this list lands in one face here. The base is even and calm, blush sits high enough to survive flash, and the aegyo-sal is shaded softly so it reads as a feature. Lashes are separated and dark at the roots, the brows are straight and tidy, and the red gradient lip holds the centre of the frame with its colour concentrated where it lasts.
Shot straight on, nothing hides and nothing needs to. That is the real test of dolly makeup built for photos: it looks deliberate from the front, at close range, in plain light. Build toward this balance and any single element can be swapped, peach for pink or clusters for spikes, without the face losing its shape.
When base, blush, lashes and lip are each placed for the lens, the full face holds together from any angle.
A camera rewards the parts of dolly makeup that are placed with intent: blush high enough to survive flash, lashes separated so they read from two steps back, a lip with colour concentrated where light hits last. Keep the skin finish matched to the light you will stand in, matte for flash, dewy for soft window light, and set the finished face so it stays put through the last frame. Save this list before your next shoot, pick the three entries that match your setting, and your dolly makeup for photos will look on screen the way it looked in the mirror.