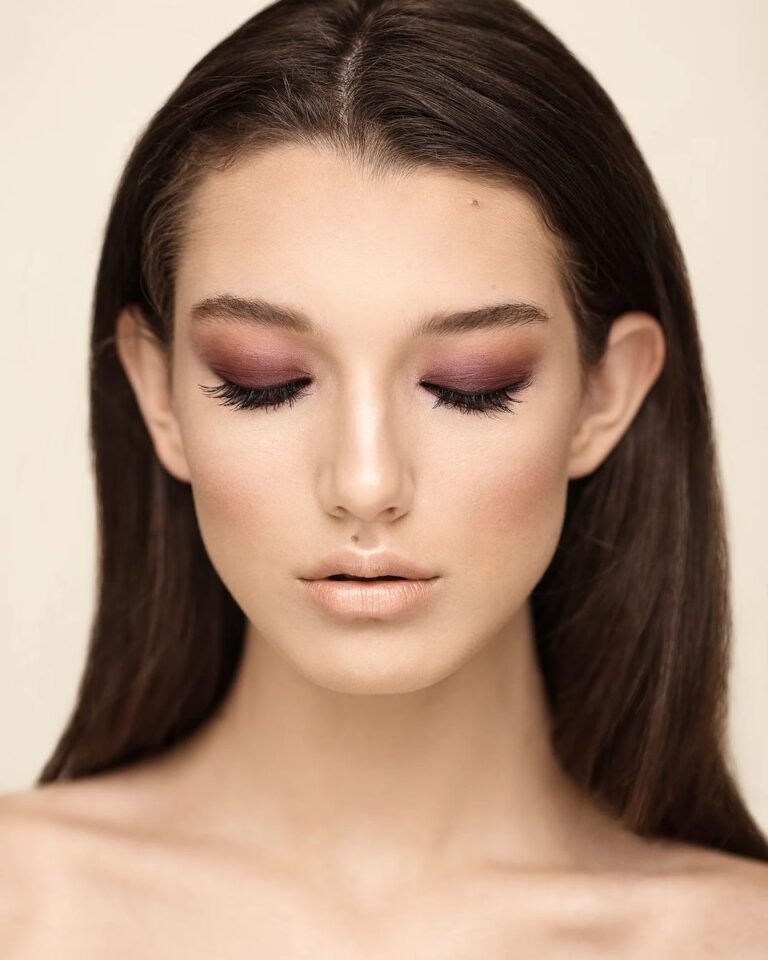
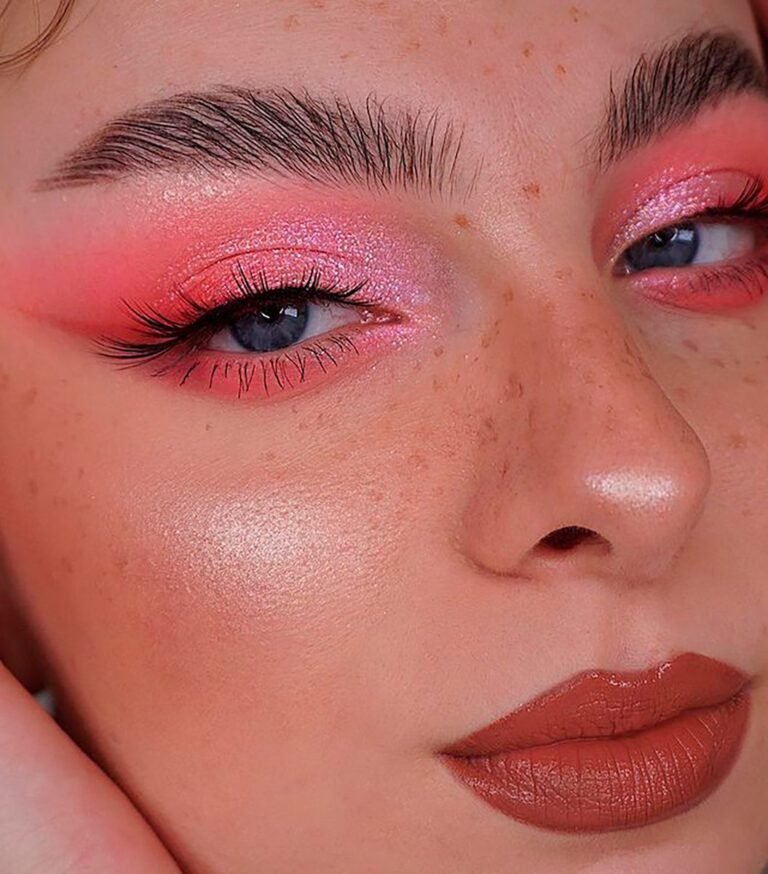
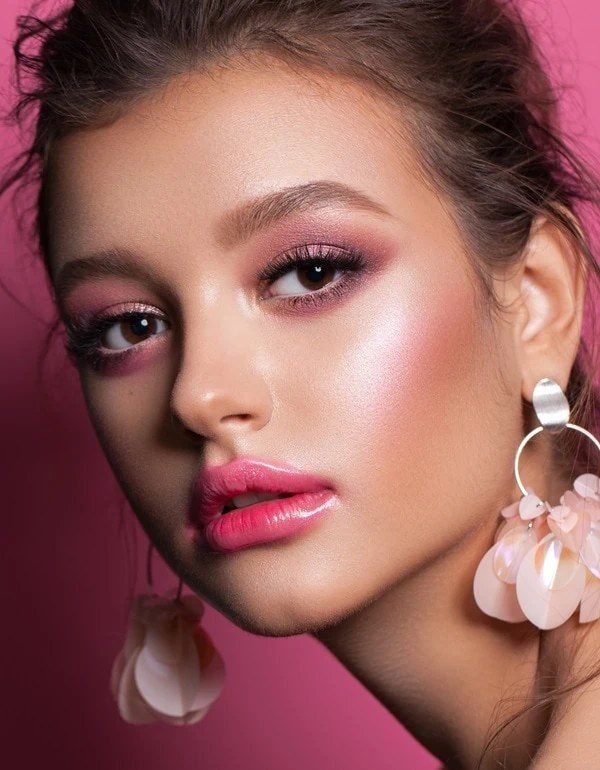
15 Pink Eye Makeup For Beginners Step By Step That Actually Works
Pink eyeshadow scares a lot of beginners for one reason: the first try often ends up looking like a bruise or a rash. That almost never comes down to the colour. It comes down to order. Pink behaves when it is built in thin layers, one small job at a time, and it falls apart when everything goes on at once. This guide breaks pink eye makeup for beginners into fifteen small steps, each with a photo of what that stage should look like on a real eye. You will prime first, lay down a pale wash, add depth slowly, and only bring in liner and lashes once the colour is sitting right. Nothing here needs a big palette or a steady artist hand. One pink in three depths, a couple of brushes, and patience between layers will carry the whole look. Follow the steps in order the first few times. Once your hands know the sequence, you can start skipping, swapping, and making it yours.
1. Step 1: Start With A Clean Primed Lid

Every later step leans on this one. Look at the lid in this photo: smooth, even in tone, with no shine sitting on the skin and no colour anywhere yet. That flat, calm surface is what primer gives you. Start with a clean, moisturised face, then pat a pea sized amount of eye primer, or a thin layer of concealer set with translucent powder, from lash line to brow. Work it in with a fingertip and let it settle for a full minute. Skin oils are the main reason pink shadow fades, creases, or turns patchy by lunchtime, and this thin barrier keeps the oils away from the colour. It also evens out any redness or veins on the lid, so the pink you lay down next reads true instead of muddy. Keep the layer thin. A thick, wet base grabs shadow in dark patches that no amount of blending will rescue.
💡 Quick Tip
Do your eye makeup before foundation. Any pink fallout can be wiped away without disturbing your base, and the finished look stays clean.
2. Step 2: Lay A Pale Pink Wash All Over
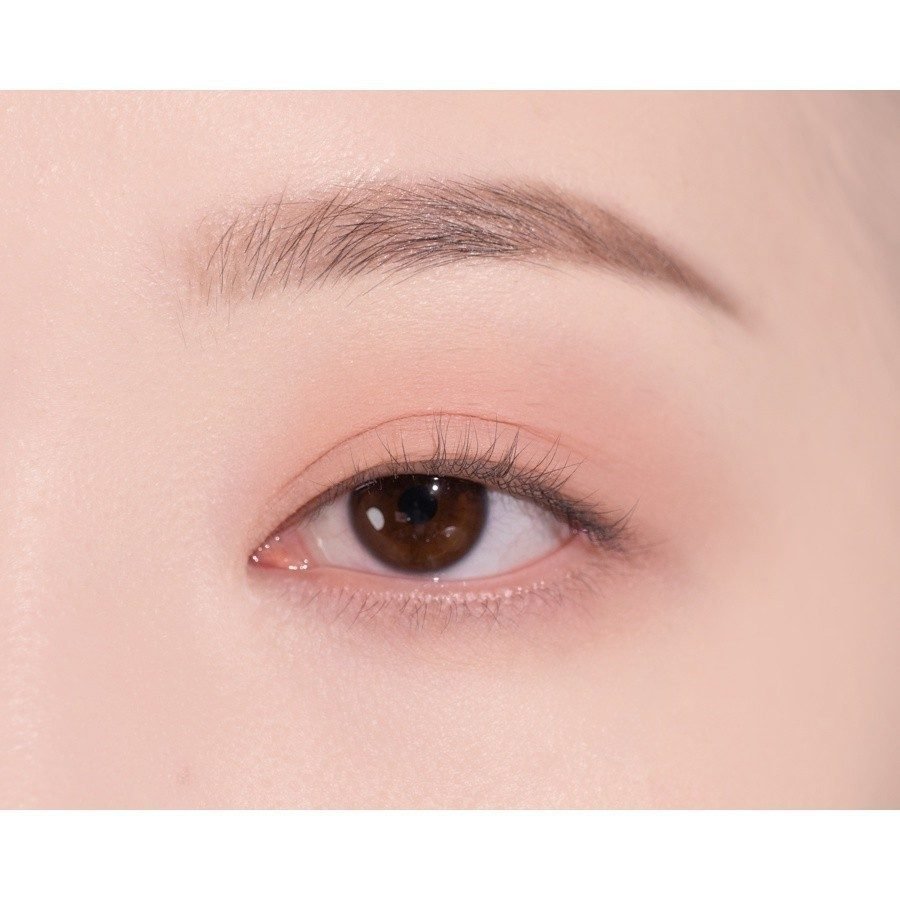
Colour starts here, but barely. A pale peachy pink covers the whole lid in one sheer layer, soft enough that the skin still shows through at the edges. Sweep it on with a large fluffy brush, from the lash line up to just under the brow, using slow back and forth strokes and a light hand. This wash is the background of the whole look. It tints the lid, warms up the eye area, and gives the deeper pinks something to blend into later. One layer is enough. If the colour looks uneven, blend the edge rather than adding more shadow, because a wash that gets packed on stops being a wash and starts fighting every step after it. Hold the brush at the very end of the handle. The lighter grip keeps the pressure low and the colour soft, almost like dusting rather than painting.
3. Step 3: Add A Mid Pink Through The Crease
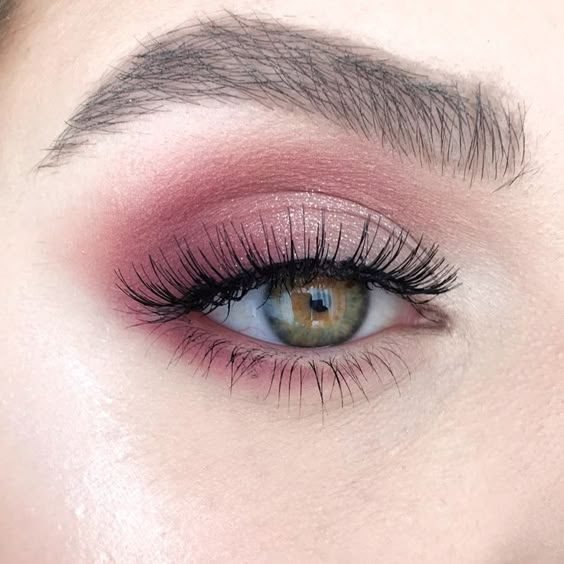
Now the eye gets its shape. A mid depth mauve pink sits in the crease, the fold above the lid, and it is this band of colour that makes the eye look deeper and more defined. Keep your eye open and look straight into the mirror while you work, because the crease you see with the eye open is the one other people see. Load a smaller, tapered brush, tap off the excess, and place the colour along the fold in short back and forth strokes. Build it in two or three thin passes instead of one heavy one. Placing colour with the eye open stops the common beginner trap of painting a beautiful crease that vanishes the moment the eye opens. Stop the colour a little short of the inner corner. That gap keeps the look soft and leaves room for the bright inner corner coming later.
Look straight ahead into the mirror and find the fold above the lid.
Place the mid pink along the fold with a tapered brush, in short strokes.
Build in thin passes and stop short of the inner corner.
4. Step 4: Deepen The Outer Corner Gently
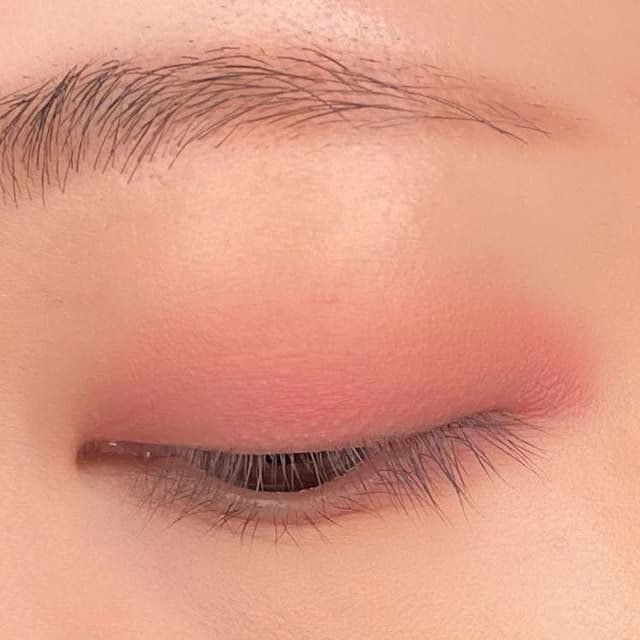
Depth arrives in the smallest dose of the whole routine. With the eye closed here, you can see how the pink stays soft across most of the lid and only gathers a little deeper at the outer corner. That small pocket of depth is what stops a pink look from reading flat. Take the deepest pink you own on a small, dense brush and press it into the outer third of the lid, right against the lashes, then soften the top edge with two or three small circles. Think of it as a shadow falling across the corner, not a new block of colour. If it looks too strong, you have used too much. Blend first, and only add a second light layer if the first one disappears. Keeping this depth low and outward also lifts the eye, because the darkest point sits where the eye naturally turns down.
Press the deep pink into the outer third only.
Soften the top edge with small circles.
Dragging the deep shade across the whole lid.
Packing it on in one heavy layer.
5. Step 5: Pat Shimmer On The Centre Lid

This is the step that makes people ask what you are wearing. A gold toned shimmer glows at the centre of the lid while the pink holds the inner and outer edges, so the eye catches light every time it moves. Use a fingertip rather than a brush. The warmth and pressure of skin presses shimmer flat against the lid, which makes it shine harder and drop less fallout. Pat it onto the middle third only, right over the iris, and stop there. Spreading shimmer across the whole lid kills the contrast that makes the centre glow. Matte around, shimmer in the middle: that contrast is the whole trick. If loose sparkle lands on your cheeks, leave it alone for now. The tidy up step near the end handles fallout in one pass, and brushing at it now only smears it wider.
Matte pink at the edges and shimmer only in the middle makes the centre of the eye glow, so the eye looks rounder and more awake.
6. Step 6: Brighten The Inner Corner
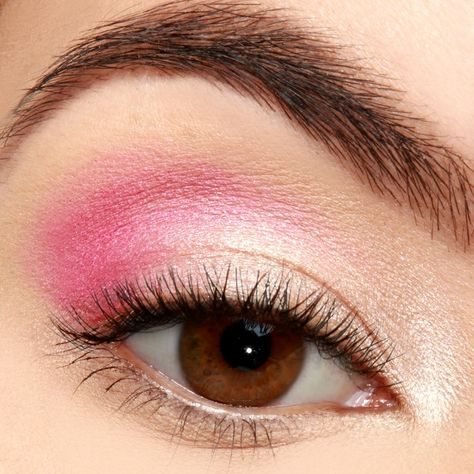
A tiny spot of light does an outsized job here. The palest, brightest shimmer in the look sits packed into the inner corner, that small V where the eye meets the nose, and it makes the eye look wider awake straight away. Against the vivid pink around it, the pale corner reads almost white, and that contrast is what opens the whole face up. Use the tip of a small brush or a cotton bud, pick up a pale champagne or icy pink shimmer, and press it into the inner corner and the first few millimetres of the lower lash line. Keep it tight. This highlight should stay a dot, not a smear. If it spreads onto the lid it starts competing with the centre shimmer from the last step, and the eye loses the two separate points of light that make this stage work.
Where the bright shade goes
7. Step 7: Soften Every Edge With A Clean Brush
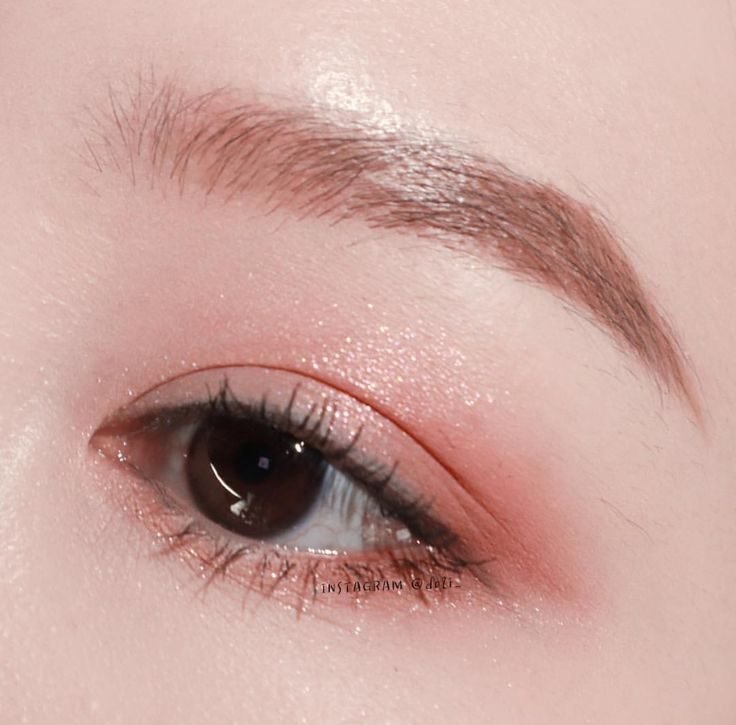
Halfway through, stop adding colour and start tidying it. Every edge in this photo melts into the skin. There is no line where the pink stops, no hard border at the crease, nothing that gives away where one shade ended and the next began. That softness comes from a clean, dry, fluffy brush and about thirty seconds of patience. Load nothing onto it. Sweep the brush in small circles along the outer edge of the shadow, then across the top of the crease colour, using almost no pressure. Work around the whole shape once, check the mirror, and repeat only where a line still shows. Clean brushes matter here. A brush carrying yesterday’s brown will drag mud into the pink, so keep one brush in your kit that only ever blends. Blending cannot fix colour placed in the wrong spot, but it can rescue almost any edge.
Hard edges, visible lines where each shade stops, pink that looks painted on.
Edges melted into the skin, shades flowing into each other, like the photo above.
8. Step 8: Line The Upper Lash Line Thinly
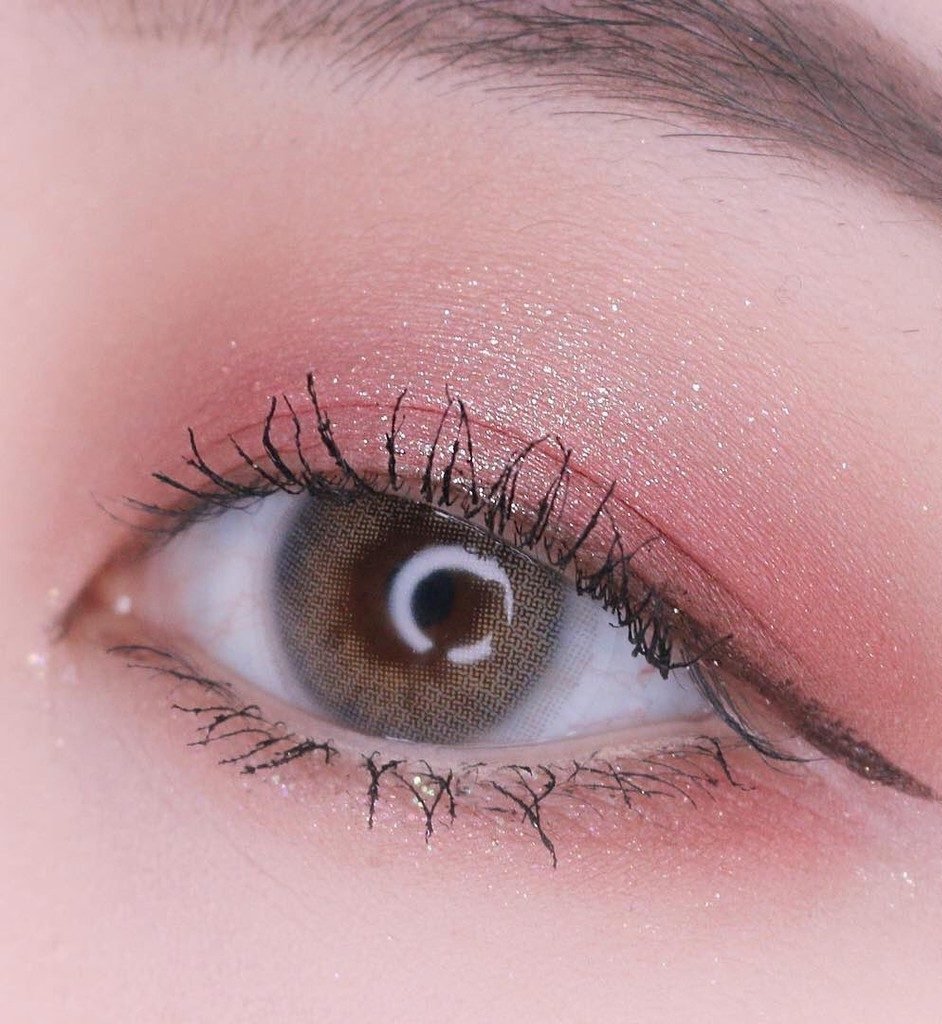
Colour is done. Now the eye needs a frame. A thin dark line hugs the upper lashes in this photo, no thicker than the lash band itself, ending in the smallest flick at the outer corner. That slim line makes the lashes look denser and gives the soft pink a clean edge to sit against. Rest your elbow on the table before you start. A floating hand shakes, and a supported one draws straight. Then work in short dashes rather than one long stroke:
- Start at the inner corner with the thinnest possible line
- Keep the pen or brush pressed into the roots of the lashes
- Let the line thicken very slightly toward the outer third
- Stop at the last lash, then add the flick only if you want one
Thin is the rule. A thick band of black over soft pink swallows the colour you just built, and the look turns heavy in one stroke.
| Felt tip pen | Gel pencil |
|---|---|
| Crisp, steady line, easiest to keep thin. | Softer line, kinder on sensitive lids. |
| Less forgiving, mistakes show right away. | Can be smudged for a few seconds, then it sets. |
9. Step 9: Smoke A Little Pink Under The Lower Lashes

The top half of the eye has carried the look so far. This step balances it. A band of pink runs under the lower lashes in this photo, soft and smoky, echoing the colour above so the eye reads as one finished shape instead of a floating lid. Use the mid pink from the crease step on a small flat brush, and press it along the lower lash line from the outer corner to about halfway in. Keep the band narrow, hugging the lashes. Stray too low and the same colour starts reading as tiredness or a late night, which is the one thing pink beginners fear most. A cotton bud dragged gently along the lower edge cleans the band up and keeps it close. Leave the inner third bare or carry the pale inner corner shade into it, so the eye keeps a bright point at the front.
10. Step 10: Curl Lashes And Add Mascara
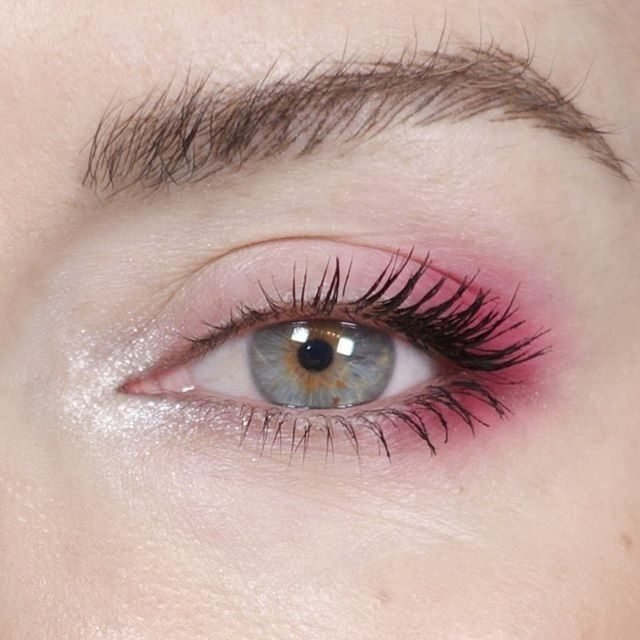
Shadow can only take an eye so far. Lashes finish the frame. Look at how the lashes in this photo lift up and out in a clean curve, separated rather than clumped, with the pink still visible at the outer corner behind them. Curl first, before any mascara goes on. Rest the curler at the base of the lashes, squeeze gently, hold for five seconds, then walk it halfway up the lash and squeeze once more for a curve instead of a sharp bend. Then take mascara from root to tip in a slow zigzag, one coat on the top lashes and the lightest touch on the lower ones. One honest coat beats three rushed ones. Extra coats clump, weigh the curl down, and start flaking pink shadow off the lid underneath. If the wand carries too much product, wipe it on the tube rim first.
💡 Quick Tip
Warm the curler for a few seconds between your hands first. A slightly warm curler holds the curl longer. It should feel warm on your wrist, never hot.
11. Step 11: Tidy Fallout And Sharpen The Edge
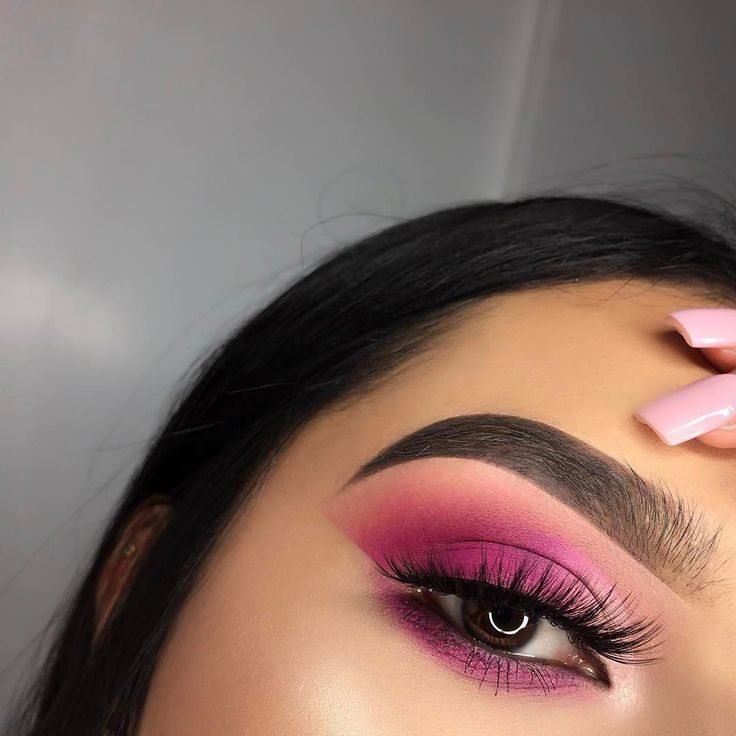
Almost there. Time to clean the work. The outer edge of the pink in this photo is razor sharp, a clean diagonal line running from the outer corner up toward the brow tail, and the skin under the eye is spotless. That polish comes from two small moves. First, sweep any fallen sparkle or pink dust off the cheeks with a big clean brush, using light downward strokes. Second, sharpen the edge. Fold a makeup wipe, or dip a flat brush in micellar water, and drag it once along the line from the outer corner toward the end of the brow. One confident pass cleans the edge. Sawing back and forth just pushes colour around. This is also the moment to fix small mistakes: a cotton bud with a little moisturiser lifts stray liner or a too dark patch without disturbing the rest. Sharp edges are optional, but a clean face is not.
12. Step 12: Add Blush That Matches The Eye Tone
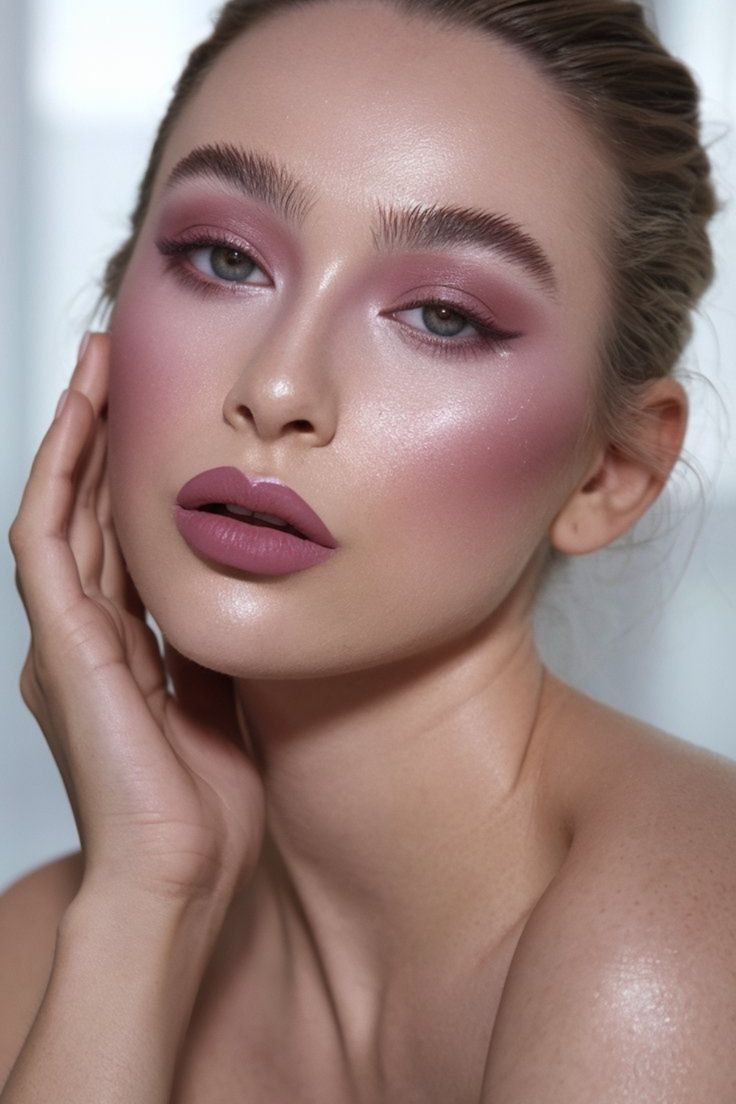
Eyes done, the rest of the face joins in. The blush on these cheeks sits in the same mauve pink family as the shadow, swept high and wide until the two almost meet at the temples. That colour match is what pulls a pink eye look together. Without it, pink eyes can float on the face, disconnected from everything else. Pick a blush close in tone to your crease colour, smile lightly, and place it on the apples of the cheeks, then blend it up and out along the cheekbone. Build it slowly. Blush that matches the eyes needs to be a little stronger than your everyday blush to hold its own, but it should still look like colour in the skin, not stripes on it. If you go too far, pat a layer of powder over the top to knock it back rather than wiping it off and starting again.
| Everyday blush | Matching blush |
|---|---|
| Sits low on the apples of the cheeks. | Swept high, up toward the temples. |
| Any soft shade that suits your skin. | The same pink family as the eyeshadow. |
| A gentle hint of colour. | Strong enough to balance the eyes. |
13. Step 13: Choose A Lip That Stays In The Pink Family
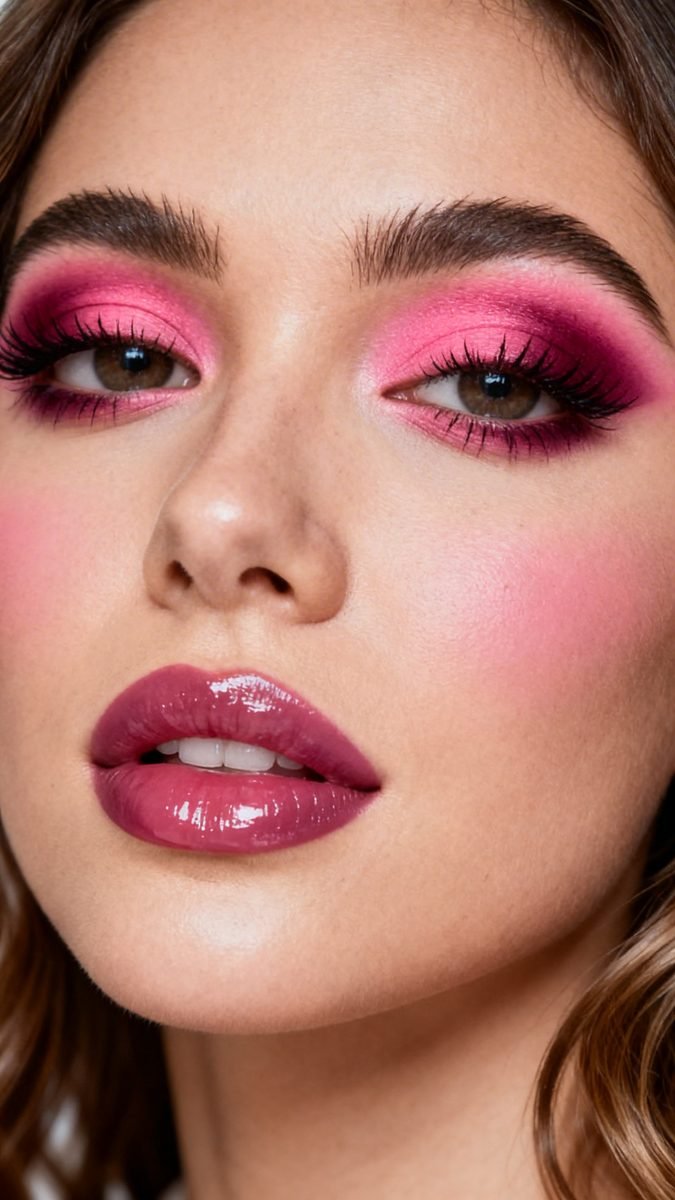
One feature left, and it can make or break the colour story. The lip in this photo is a glossy deep pink, a few shades stronger than the shadow, and because it lives in the same family the whole face reads as one planned look. An orange, brown, or brick lip would fight the eyes for attention and win, leaving the pink shadow looking accidental. Stay in the family, but do not try to match the eye colour exactly. A lip one or two shades deeper or softer than the shadow looks deliberate. Glossy finishes suit pink eyes well, because they bounce light the way the shimmer on the lid does. If a strong lip feels like too much with a bright eye, sheer it out: press the colour on with a fingertip and blot once, keeping the tone while dropping the intensity. The family matters more than the strength.
One colour family in different depths reads as one planned look. The eyes lead, the lip supports, and nothing fights.
14. Step 14: Check The Look In Daylight

Bathroom light lies. Before you call the look finished, take it to a window. This portrait was shot in plain daylight, and you can see exactly what the sun shows: soft pink that reads fresh rather than heavy, skin that still looks like skin, nothing hiding in shadow. Daylight is blunter than any bathroom bulb. It shows unblended edges, shadow that crept too far down, and blush sitting stronger on one cheek than the other. Stand facing the window, not with the light behind you, and look at the two eyes side by side. Fix small problems now with a clean brush or a cotton bud. Pink that looks right in daylight will look right anywhere. Pink that only works under warm bathroom light will surprise you in every photo taken outdoors.
The daylight check
15. Step 15: The Finished Beginner Pink Eye
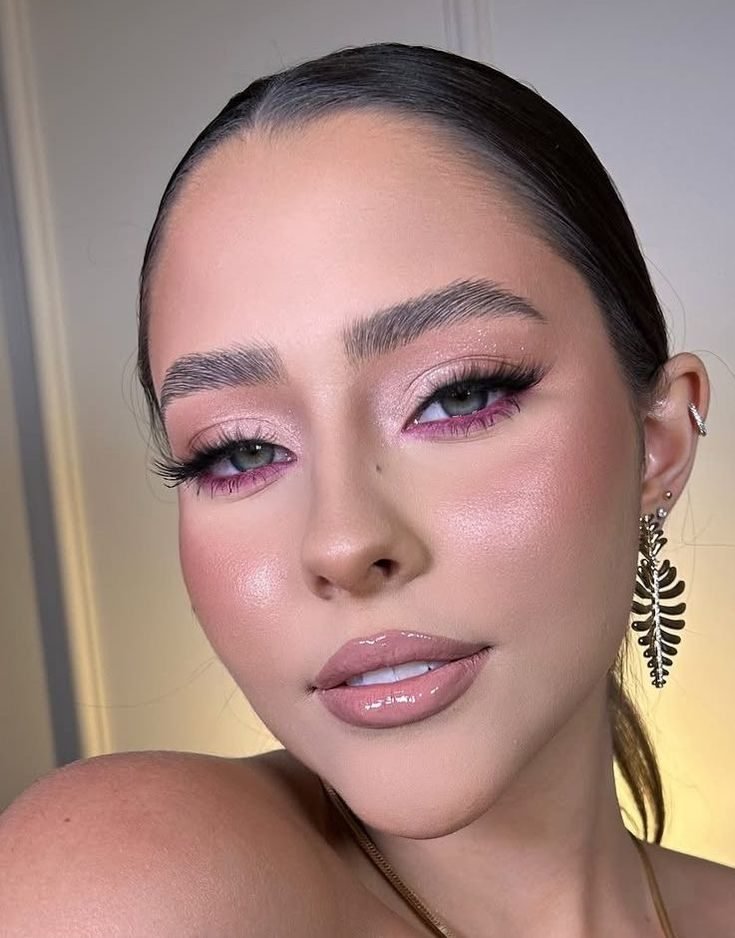
Here is where the fifteen steps land. The finished look in this photo pulls every stage together: a smooth base, pink built in soft layers, a point of light at the inner corner, clean edges, framed lashes, and a lip that stays in the family. Nothing about it is complicated on its own. Each step did one small job, and the jobs stacked. That is the real lesson of building a look this way. When something goes wrong on your own face, you can spot which step caused it and fix that layer instead of wiping everything off and starting over. Wear the full version when you want the whole effect, or stop after the wash and crease steps on busy mornings for a smaller, softer take. The order stays the same either way. Practise the sequence twice and your hands will start doing it without much thought.
Fifteen steps sounds like a lot written out, but in front of a mirror this whole routine takes about ten minutes once your hands know it. The order does the hard work: prime, wash, depth, light, line, lashes, then tidy. Keep your layers thin, keep your brushes clean, and let each stage settle before the next one starts. Pink eye makeup for beginners stops being scary the moment it becomes a sequence instead of a guess. Save this guide for the next morning you want soft colour on your eyes, and work through it step by step.