
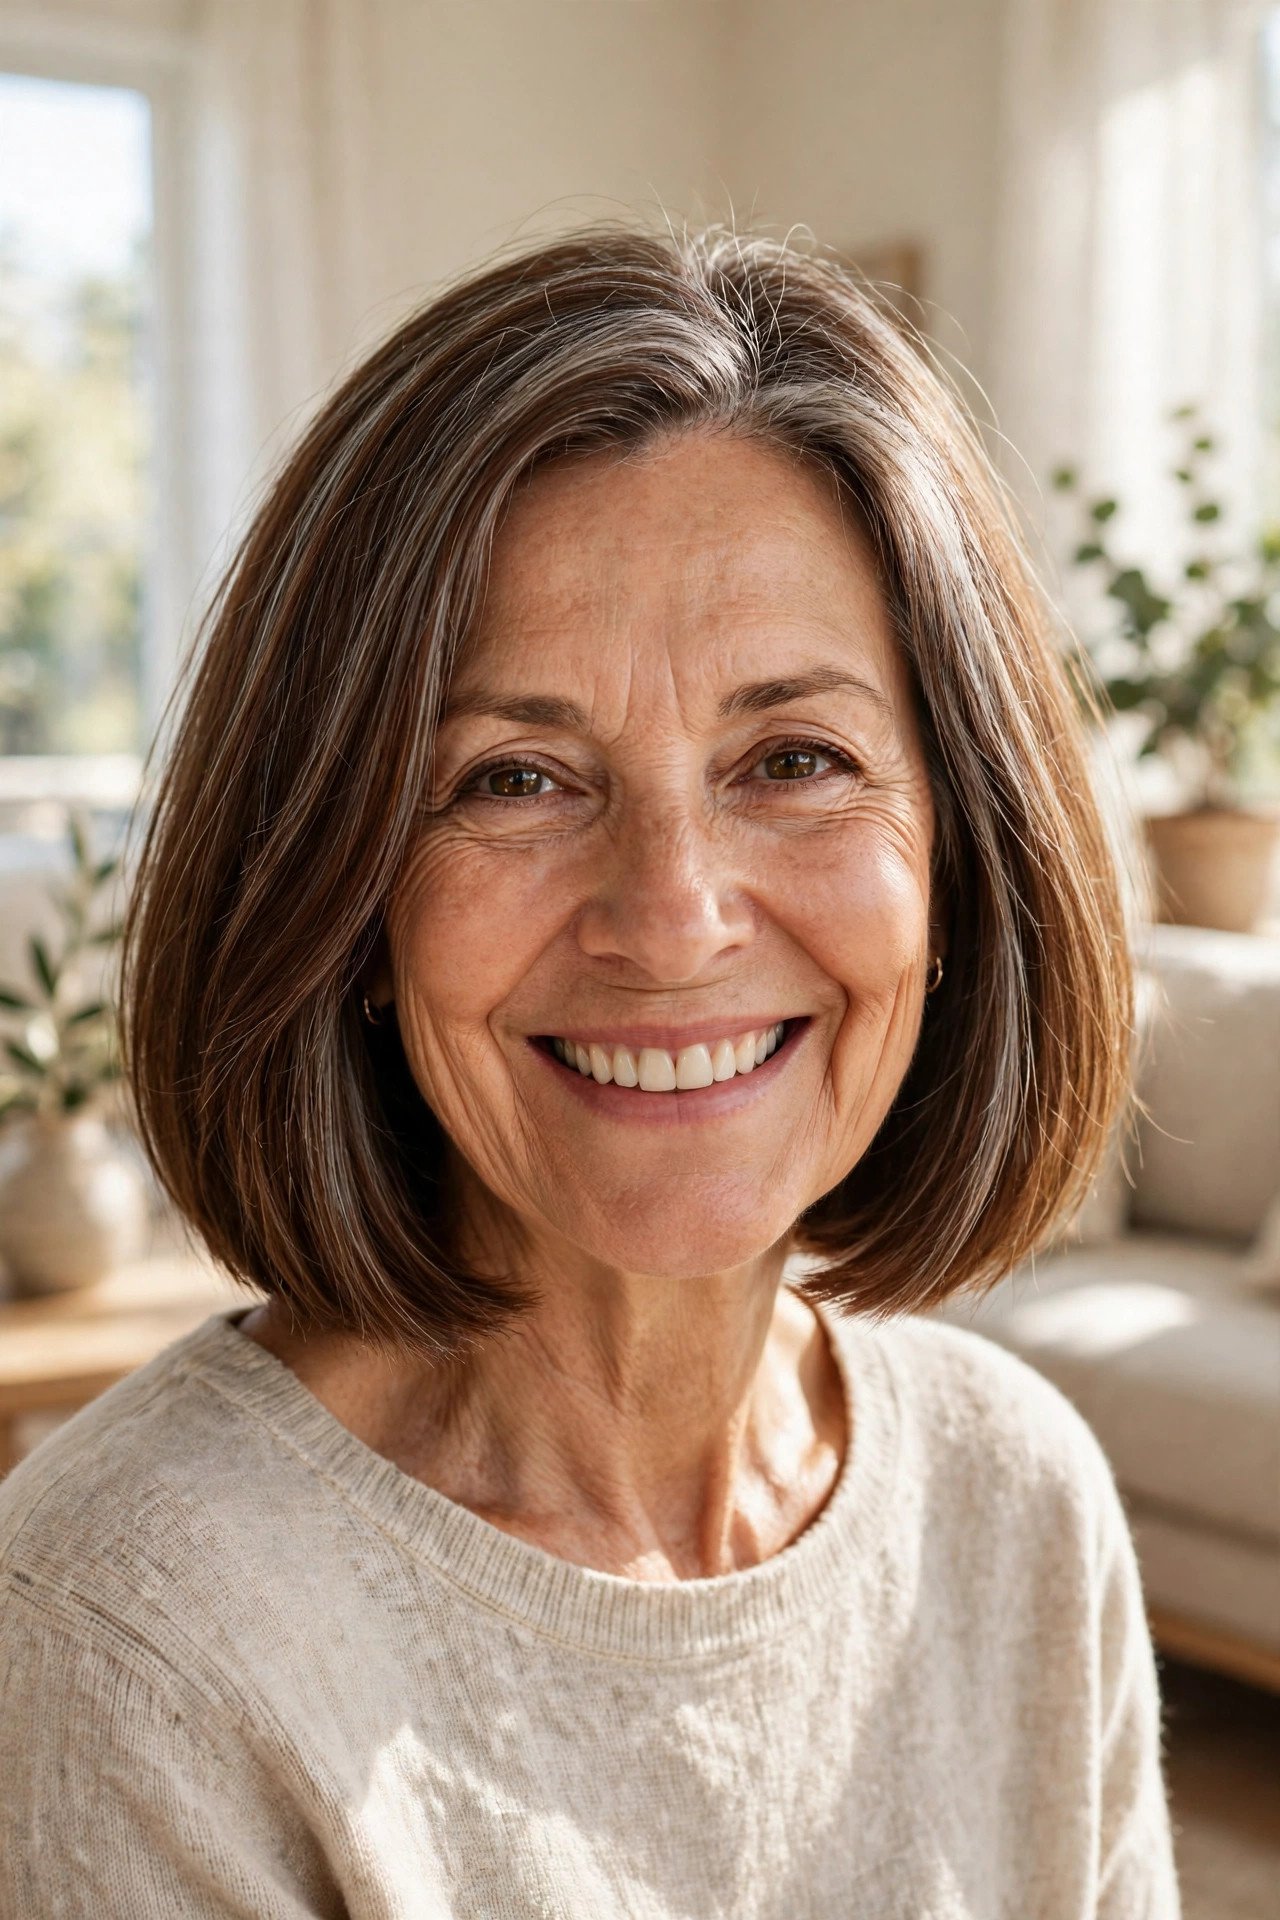
23 Hairstyles for Thin Hair Over 50 That Look Fuller
You know the feeling you are after. Hair that holds its shape past breakfast, ends that look solid instead of wispy, a parting that does not widen by lunchtime. Thin hair rarely plays along, and most advice aims at twenty year olds with twice the hair you have.
These hairstyles for thin hair over 50 work with the hair on your head right now. The tricks are honest ones: blunt edges that keep every strand in the outline, parts flipped for lift, colour placed where shadow makes hair read thicker, and styling that adds width instead of weight.
Nothing here promises new hair growth, and nothing needs a drawer full of products. What you get is the fullest version of the hair you already have, which is the version people actually notice.
Some are cuts to ask for at your next appointment. Some are five minute changes you can try this week. Read through, note the two or three that match your length and your mornings, and start there.
1. The Blunt Bob With Ends That Land Together
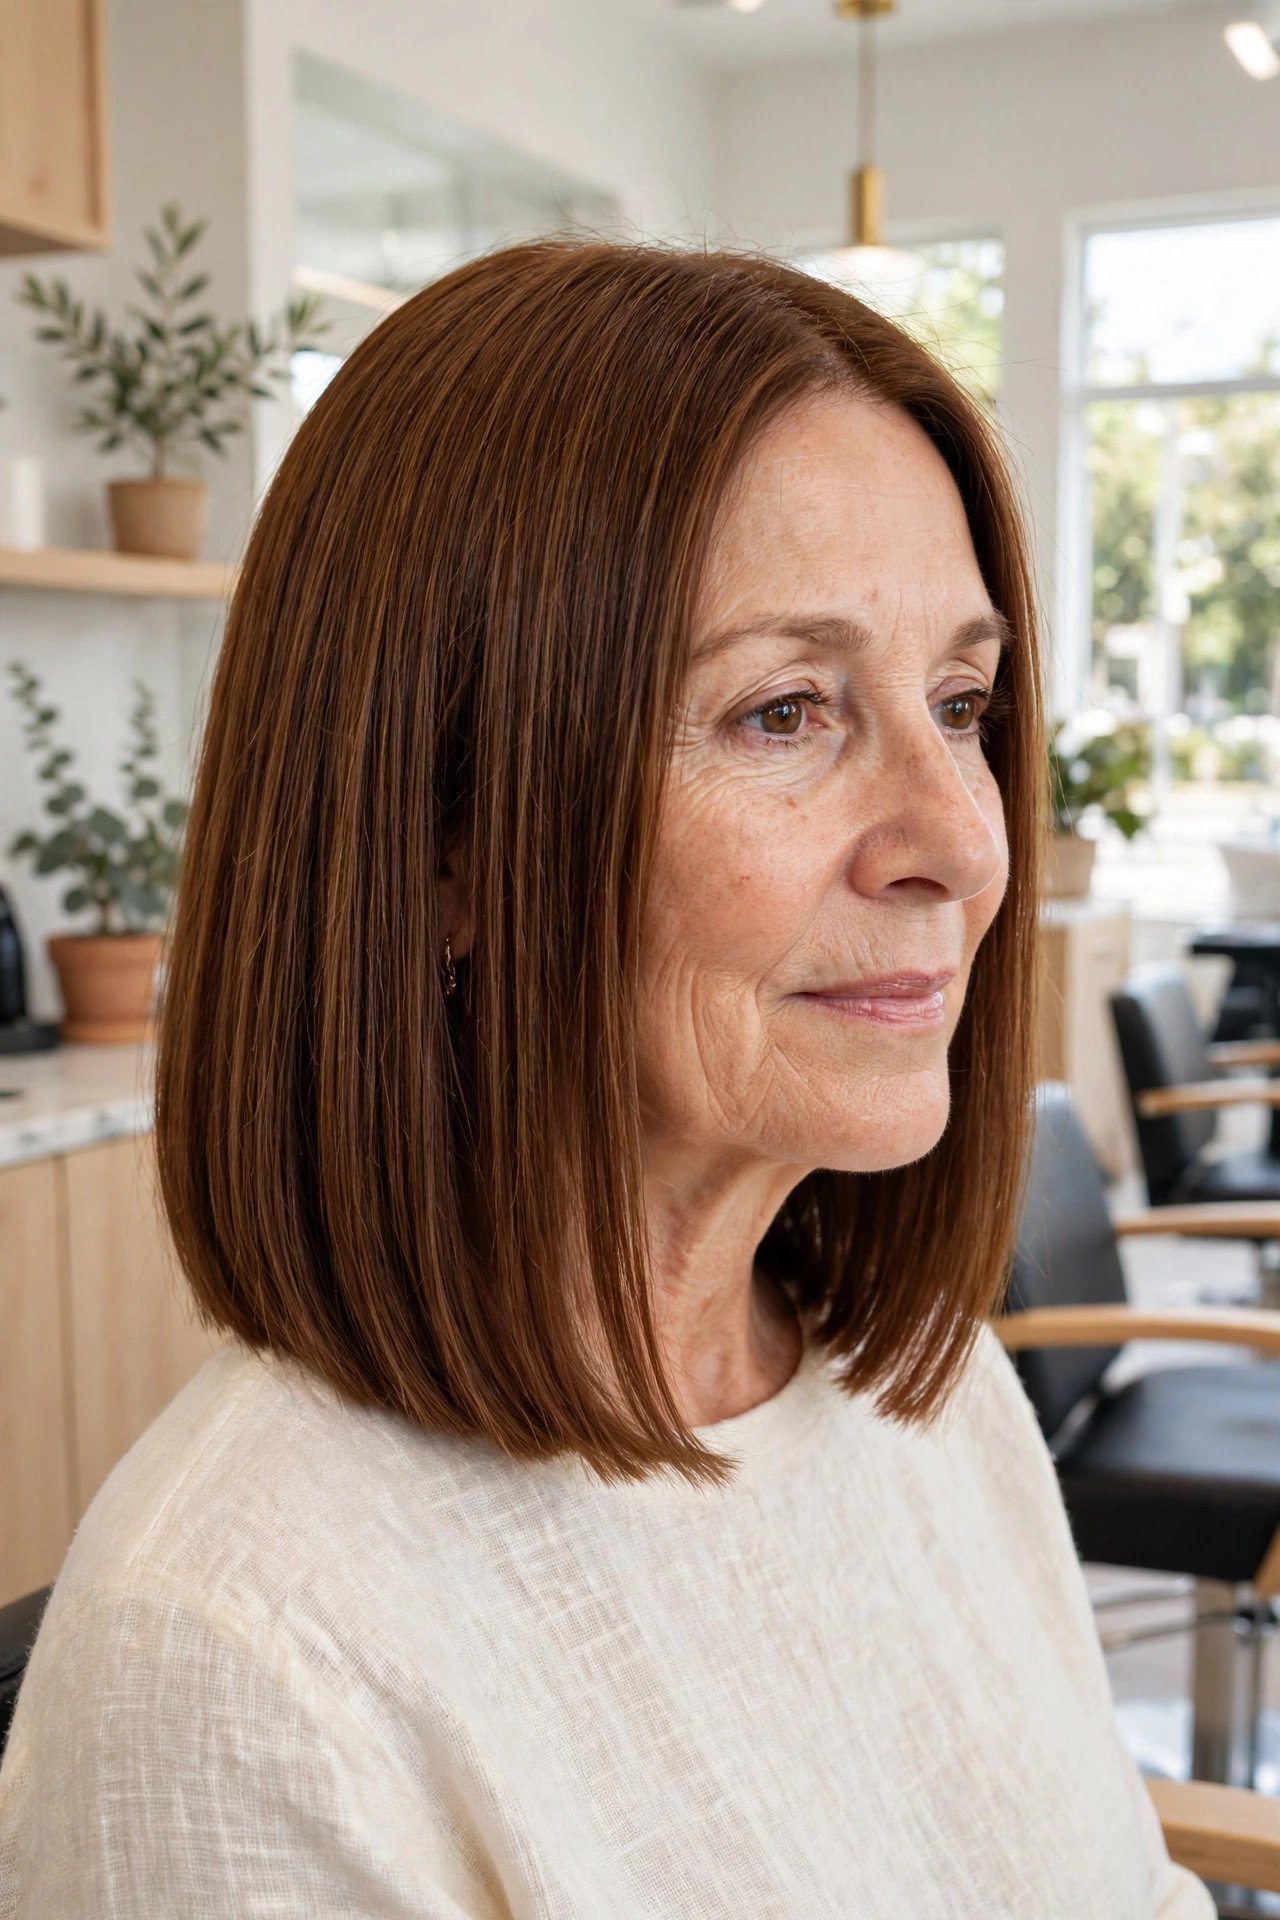
One length is the oldest trick in the book, and it still works.
When every strand ends at the same point, the bottom edge reads as one solid line. Nothing tapers away, nothing drifts into wisps. Thin hair looks thinnest at the ends, so keeping those ends together is where the fullness illusion starts. Ask for a bob that sits between the chin and the collarbone, cut straight across with no layering at the front.
- One length, all the way around
- Ends cut straight across, never razored
- A trim every six to eight weeks to hold the edge
It is the cut hairdressers reach for first when a client says her ends have gone see through.
2. Flip Your Parting for Lift That Costs Nothing
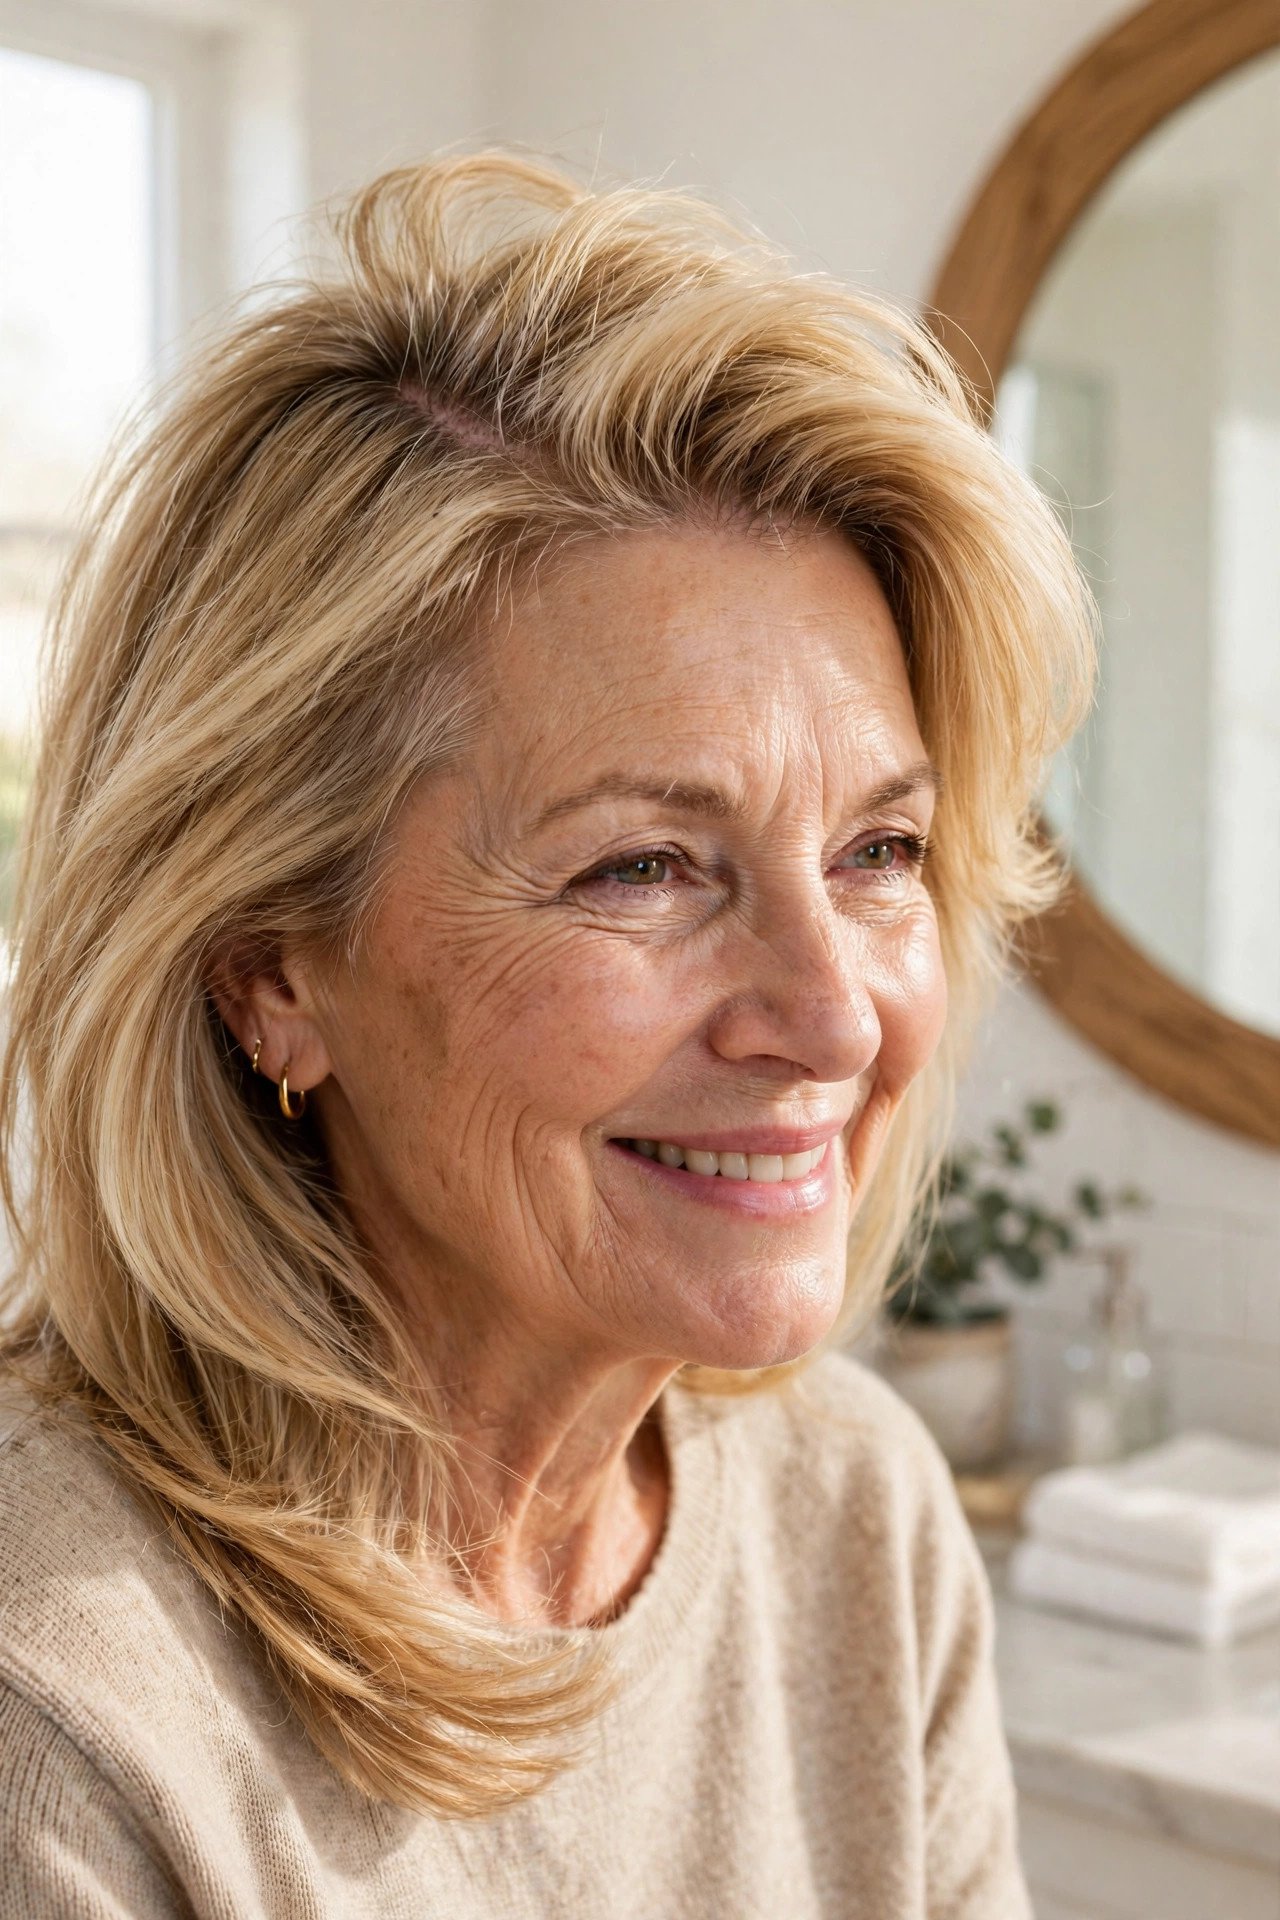
Hair learns its parting the way a path wears into grass.
Lie it in the same groove every day and it flattens along that line, roots pressed down, scalp showing through. Flip the parting to the opposite side and the roots suddenly stand against the direction they were trained in. That small rebellion is real lift, and it shows most right at the front, where flatness reads as thinning.
Flip it while your hair is damp, not dry. Dry hair snaps back within the hour. Damp roots can be set, and they hold the new direction far longer.
- Works on bobs and lobs of any length
- Works on pixies with a longer top
- Works on any cut worn with a side sweep
💡 Quick Tip
Clip the flipped parting down with a flat clip while it dries. Ten minutes of setting time buys you lift that lasts into the afternoon.
3. The Pixie With Layers and Length Left on Top
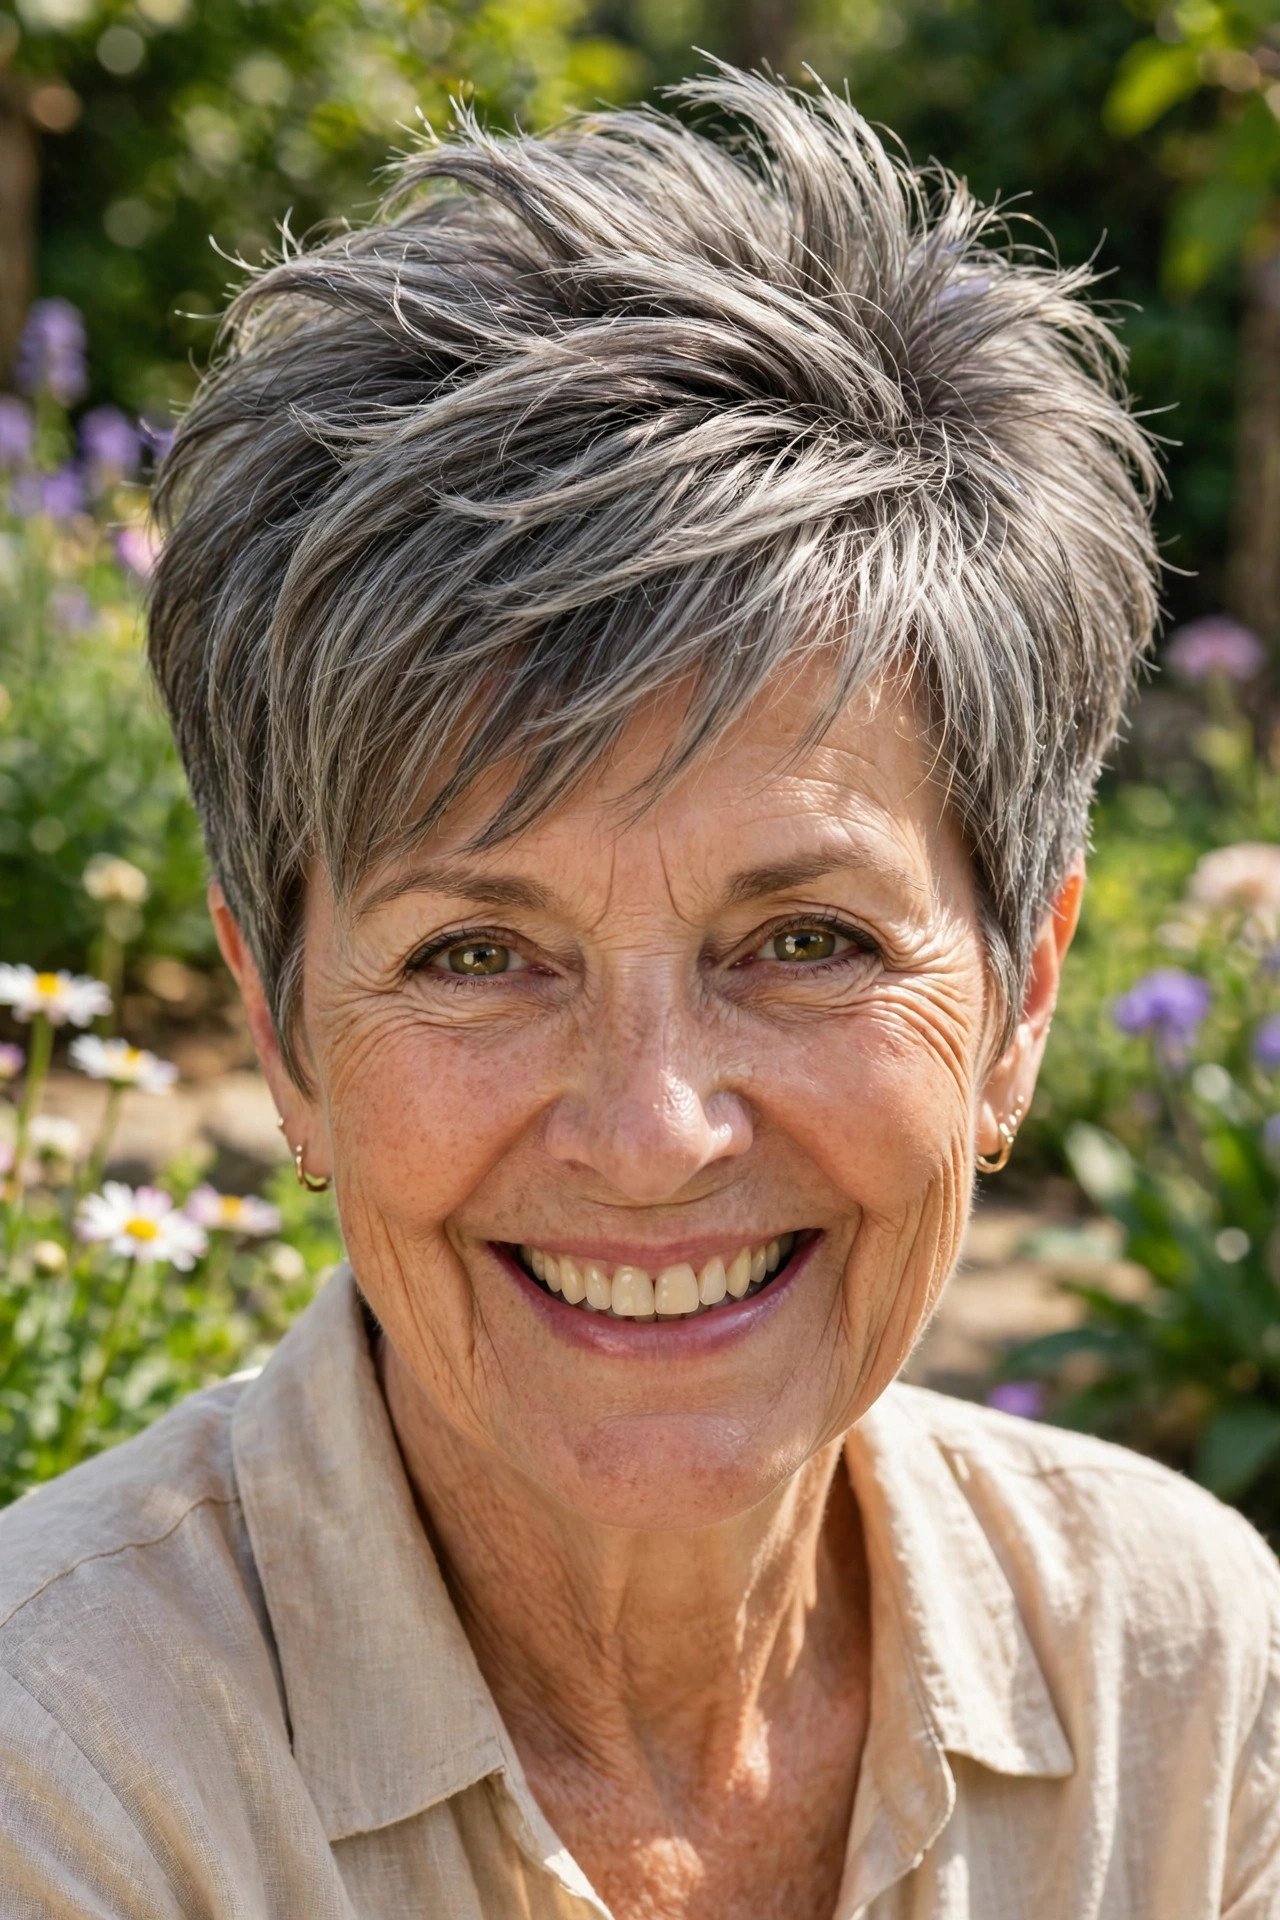
Short sides are what make the top look generous.
When the back and sides are clipped close, the longer top reads fuller by contrast. Keep three to four inches on top, with short layers cut through it so the hair can be pushed up and forward instead of lying in one flat sheet. The layers here are not about removing bulk. On thin hair, they give short pieces that support each other.
- Length kept on top, three to four inches
- Short layers, never long stretched ones
- Sides neat, but not clipped down to the scalp
Best on oval and heart shaped faces, and on anyone tired of a long blow dry routine.
4. Loose Waves That Give Fine Hair Width
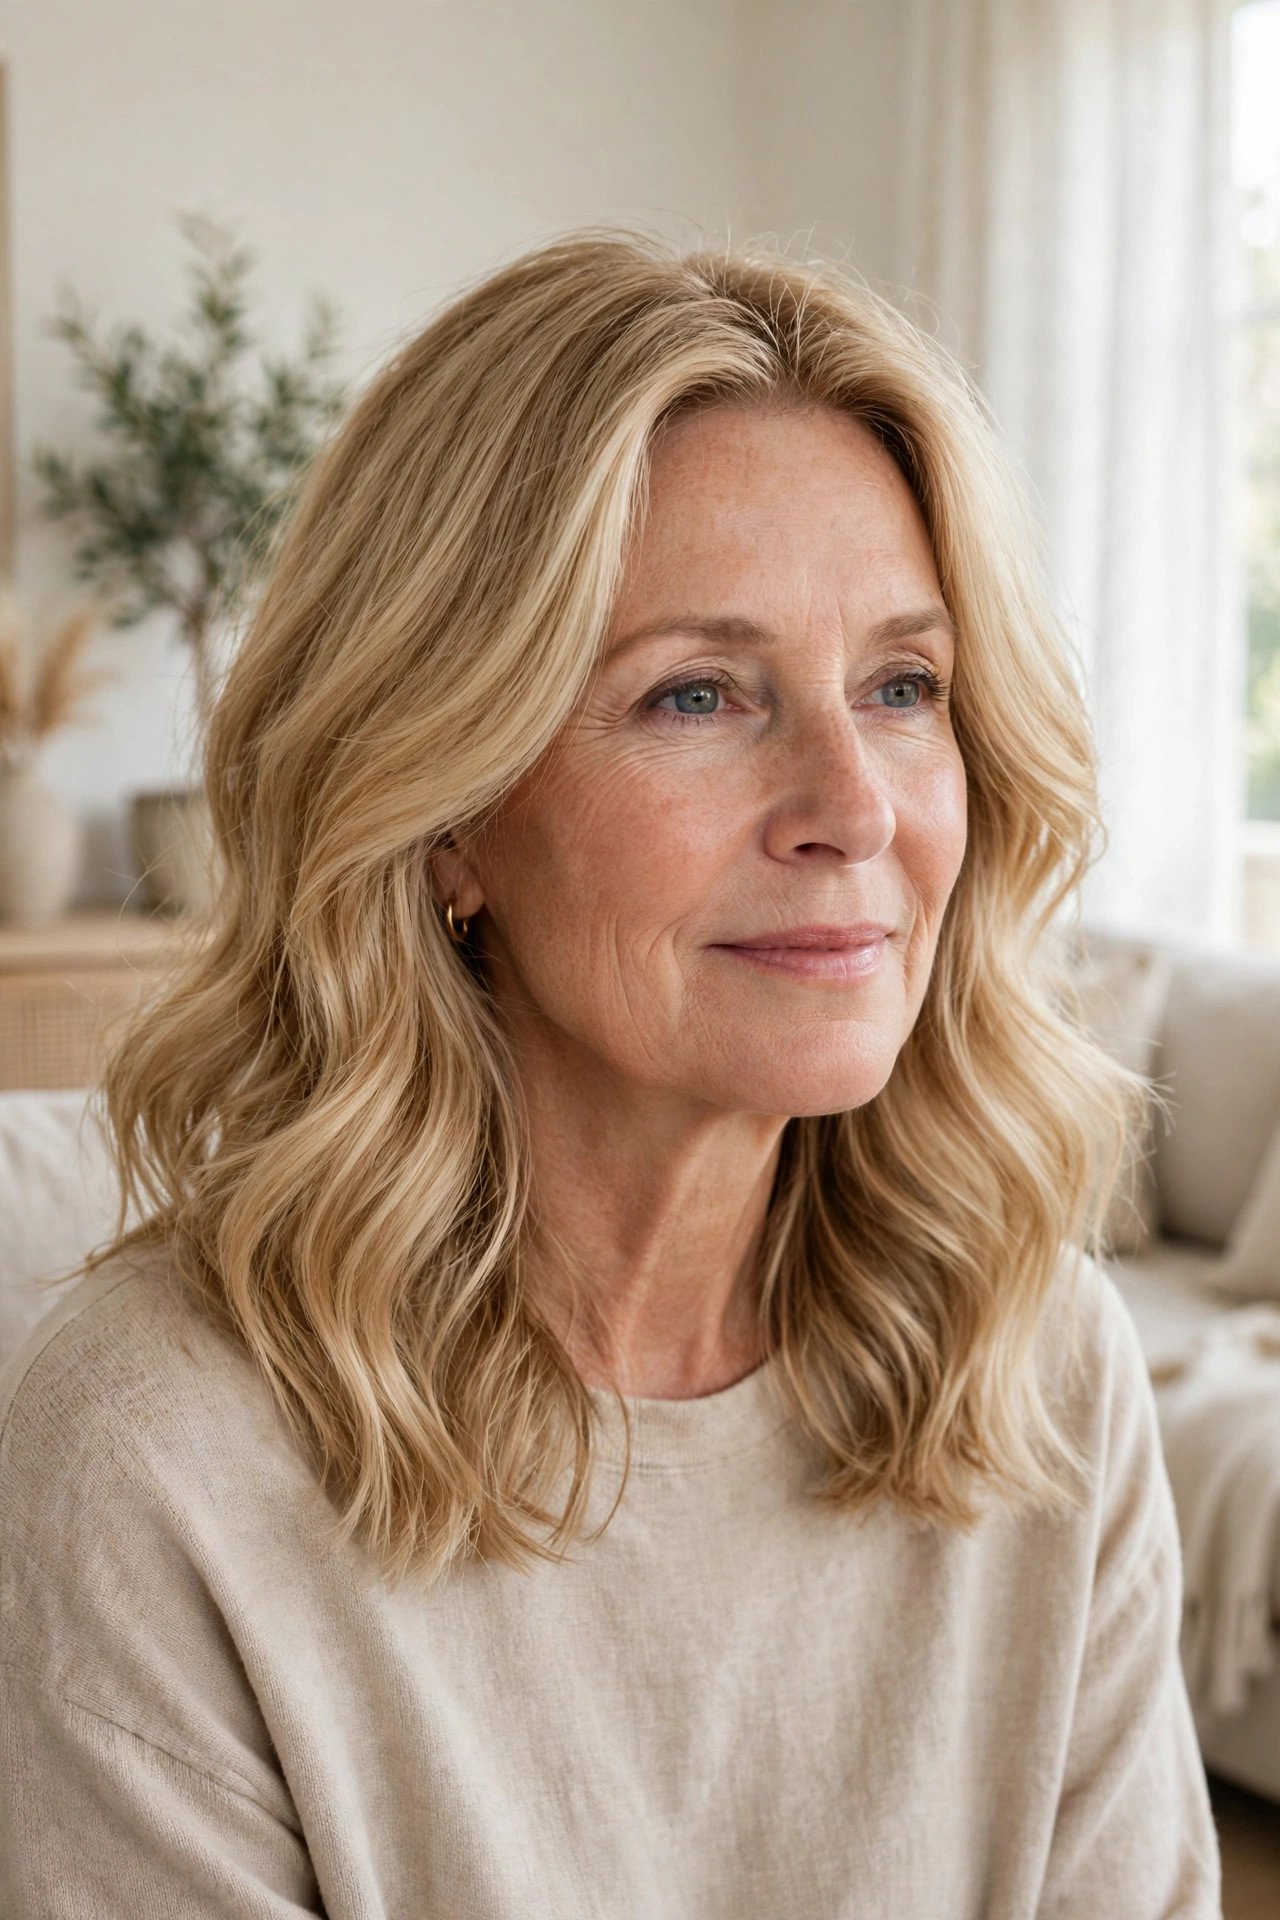
Straight thin hair hugs the head. A bend pushes it outward.
Waves work because they change the direction hair travels. Instead of falling in one thin curtain, each section takes up sideways space, and the whole head of hair looks wider. The bend needs to be loose. Tight curls on fine hair shrink up and separate, which shows more scalp, not less. Work in big sections, leave the last inch of the ends straight, and let everything cool before you touch it.
Fingers only when you break the waves up. A brush pulls the width straight back out.
Wrap large sections around a medium barrel, away from the face.
Alternate the direction on each row so the waves do not clump into one rope.
Leave the last inch of the ends out for a straighter, modern finish.
Let the hair cool fully, then rake through with fingers only.
5. The Stacked Bob With a Lifted, Rounded Back
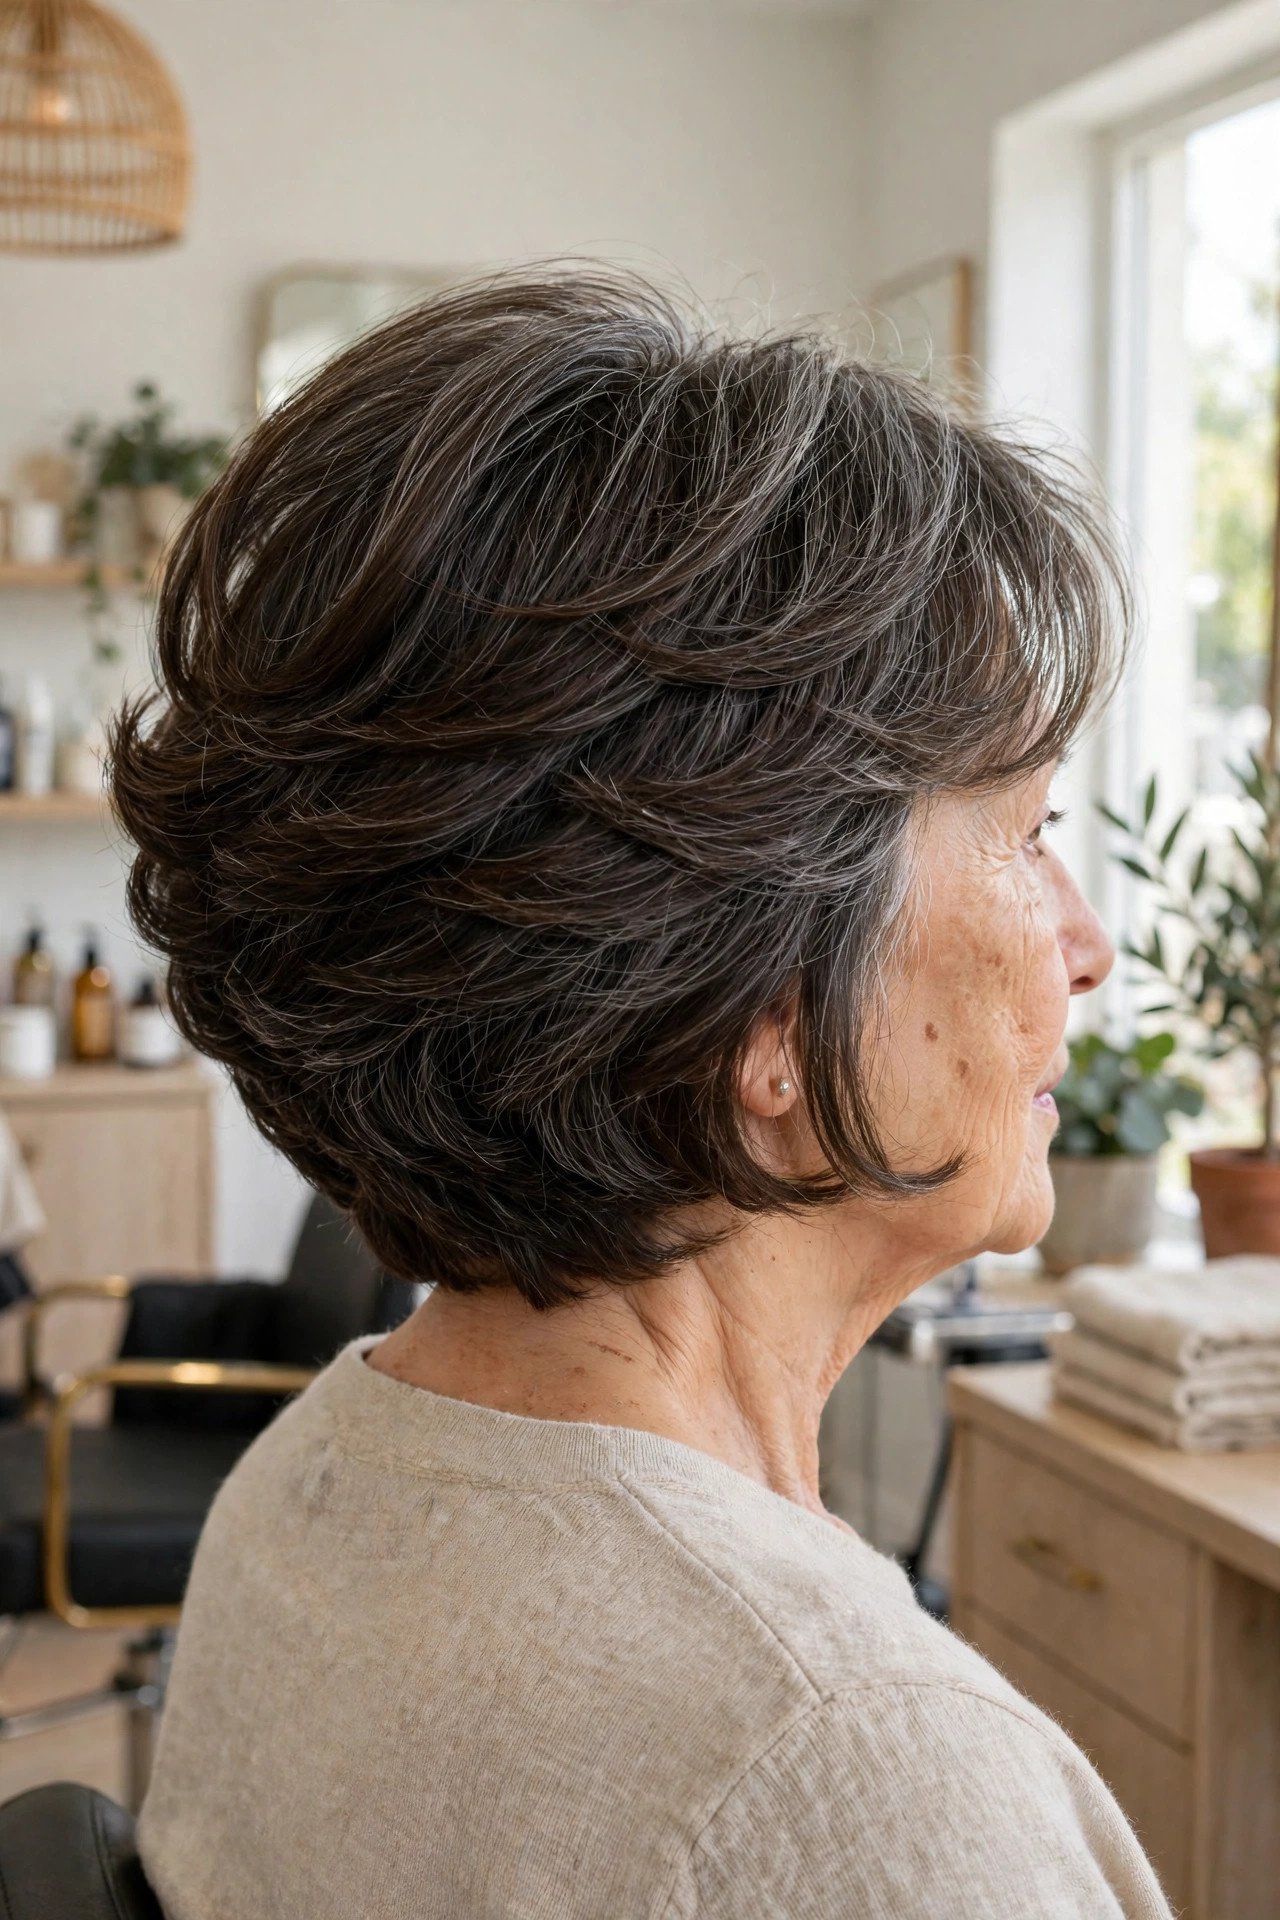
The back view is where thin hair gets found out.
A stacked bob answers that directly. Short graduated layers at the back build on top of each other, so the hair forms a rounded shelf instead of one flat layer over the neck. From behind, the shape looks piled and full. Keep the front longer, around chin length, so the cut still feels soft from the front and frames the face.
- Your hair is at its finest across the back
- You like a polished, shaped outline
- You are fine with trims every five to six weeks
One flat layer hangs at the back. The neck shows through it and the shape reads thin from behind.
Graduated layers stack into a rounded shelf. The back looks piled, shaped, and noticeably fuller.
6. Wispy Curtain Bangs That Frame Instead of Cover
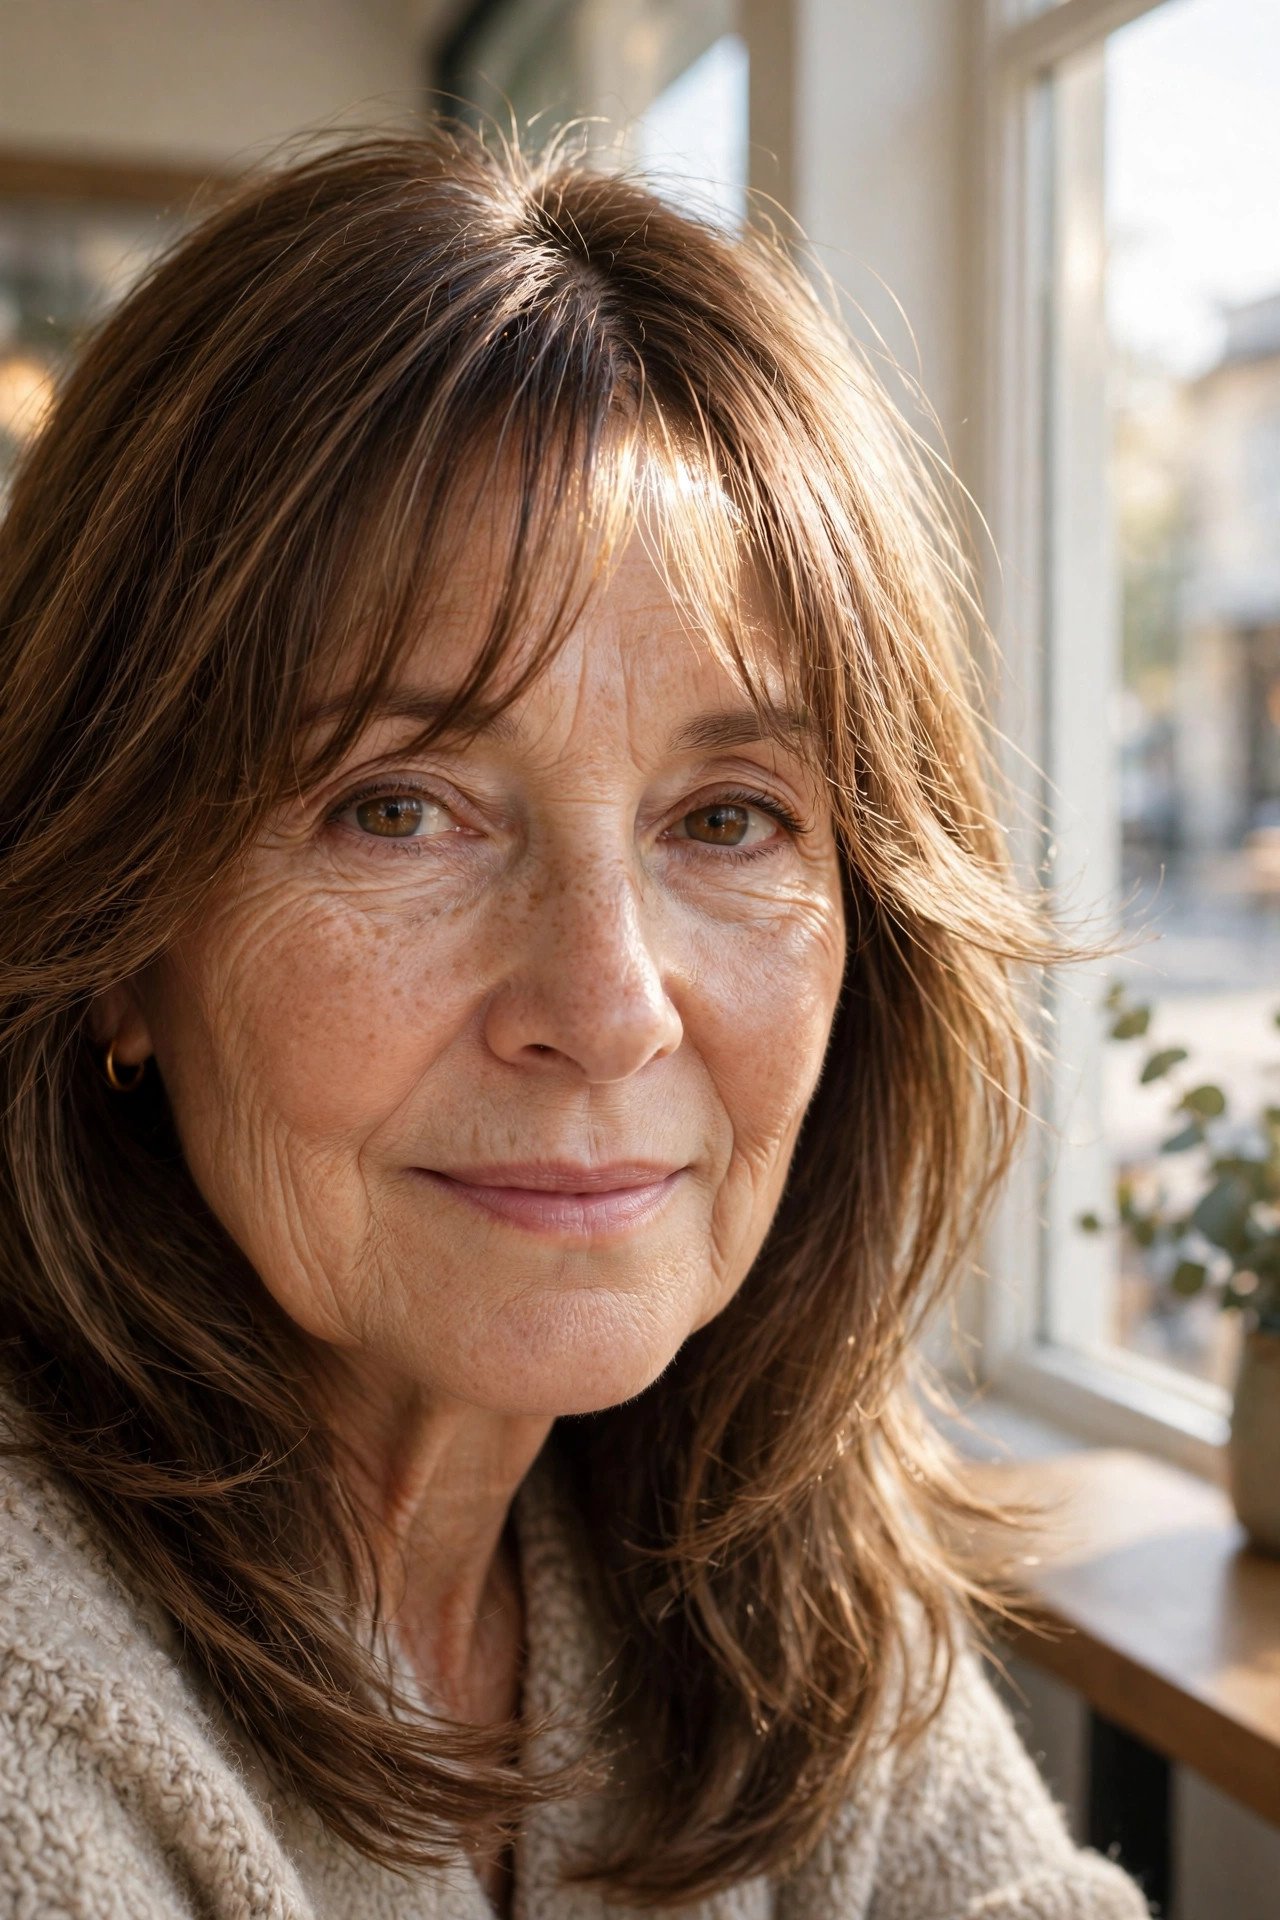
A heavy fringe is a bad trade on thin hair.
Every strand in a thick blunt fringe is a strand taken from the top, where you need coverage most. Curtain bangs ask for far less. They split in the middle, feather out at the edges, and blend into the sides, so the face gets framing without the top paying for it. The longest pieces should land around the cheekbones, where they draw the eye outward.
If your forehead is on the shorter side, keep the centre pieces shorter so they open up instead of closing the face down.
Ask your stylist for
7. The Short Shag With Feathered Layers
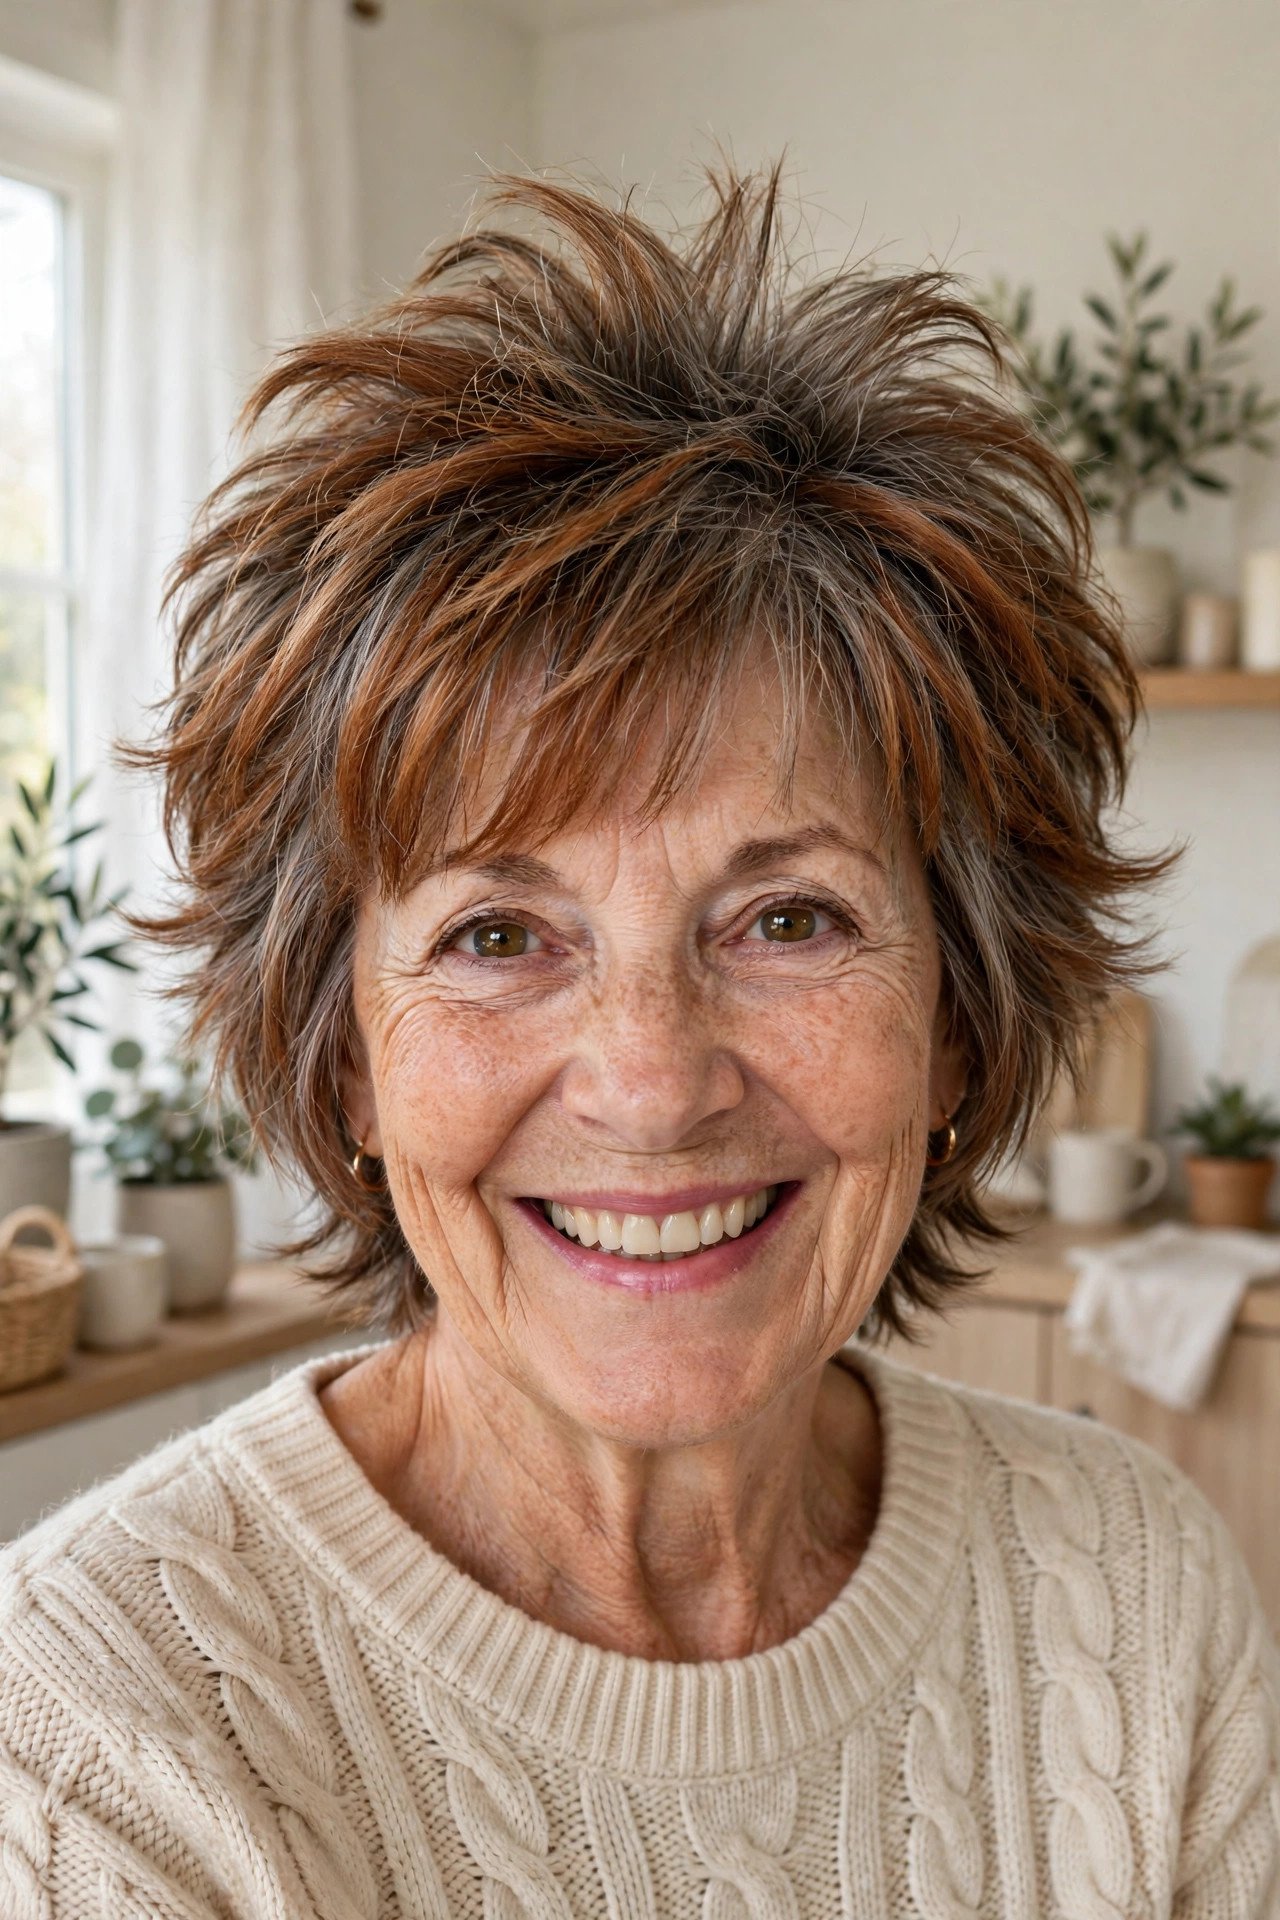
Layers are not the enemy of thin hair. Long, stretched out layers are.
A short shag keeps its layers high and close together, around the crown and the top of the head. Short layers stand up better than long ones, and feathered ends keep the outline soft instead of stringy. The result is movement at the top, where flat hair needs it most, without the see through tail that a longer layered cut leaves at the bottom.
It suits wavy hair especially well, since the natural bend does half the styling work for you.
Keep the layers short and stacked high, around the crown.
Feather the ends so the outline stays soft and full.
Razoring the ends down to thin points.
Letting the layers stretch out past the chin.
8. Lowlights That Add Shadow and Depth
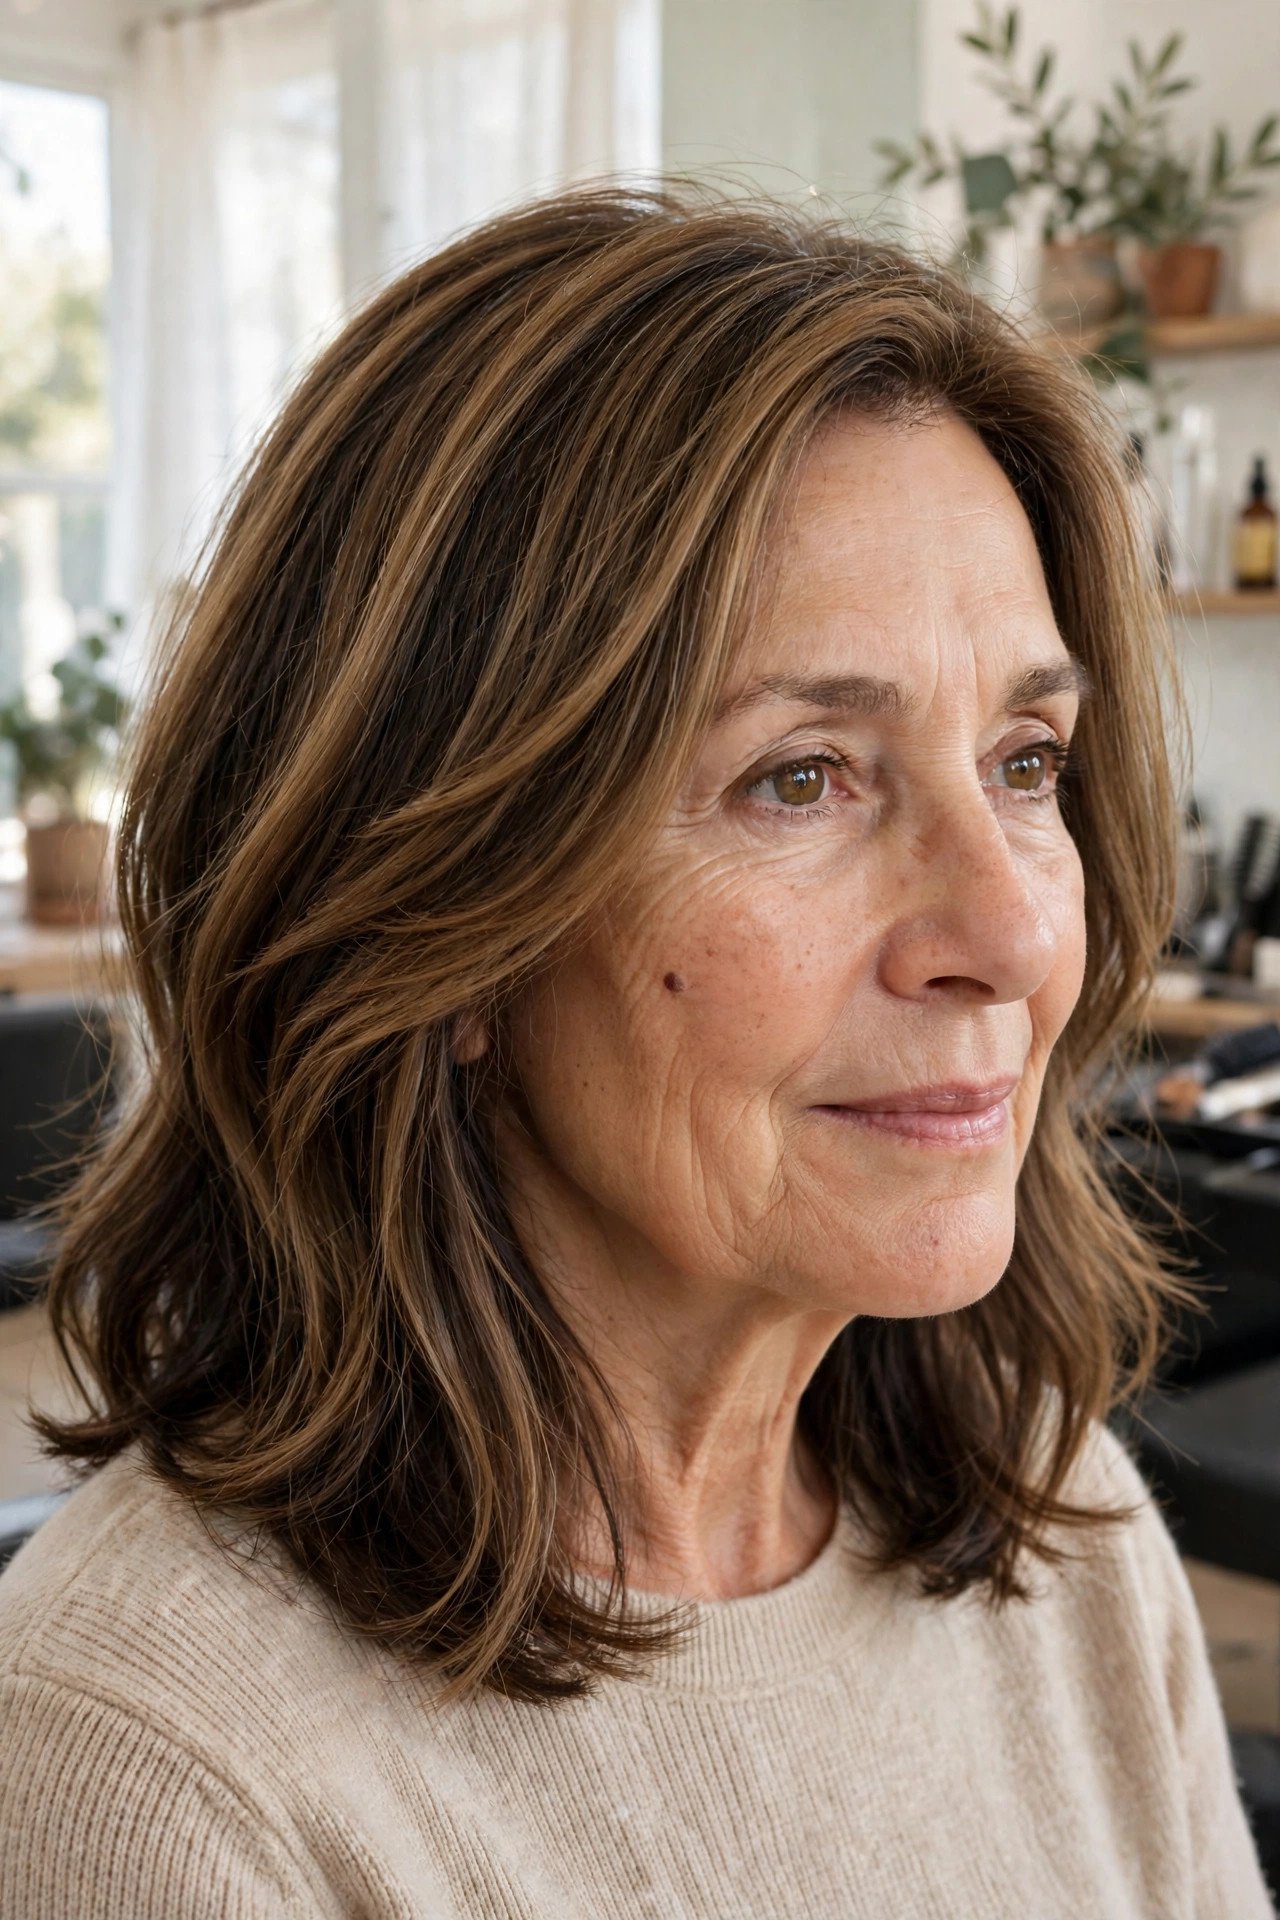
One flat colour lets the eye travel straight through your hair.
Lowlights break that up. A colourist weaves in pieces one or two shades deeper than your base, mostly through the middle lengths and underneath. Those darker strands sit behind the lighter ones and read as shadow, and shadow reads as depth. Hair with depth looks denser, the same way a shaded drawing looks more solid than an outline.
The grow out is gentle, too. There is no hard line at the roots, which suits anyone who stretches the time between salon visits.
| One flat colour | With lowlights woven in |
|---|---|
| Falls in one flat sheet and reads pale | Shadow behind the top strands makes lengths look denser |
| Needs a full colour refresh to look alive again | Grows out soft, with no hard line at the roots |
9. The French Bob With a Straight Across Fringe

This is the fringe that pays for itself.
A French bob sits at the jaw, cut blunt all the way around, with a full fringe worn straight across. The fringe is brought forward from further back on the head, so the front hairline looks deep and dense instead of sparse. Because the length is short, the ends stay thick rather than trailing off, and the whole shape has a neat, deliberate outline.
- Length at the jaw, not drifting below it
- Fringe worn full, not wispy
- Ends blunt, in one clean line
It asks for a fringe trim between cuts, which takes minutes at the salon.
A full fringe borrows hair from further back, so the hairline and the blunt ends read thicker at the same time.
10. A Textured Crop With Piecey, Separated Ends
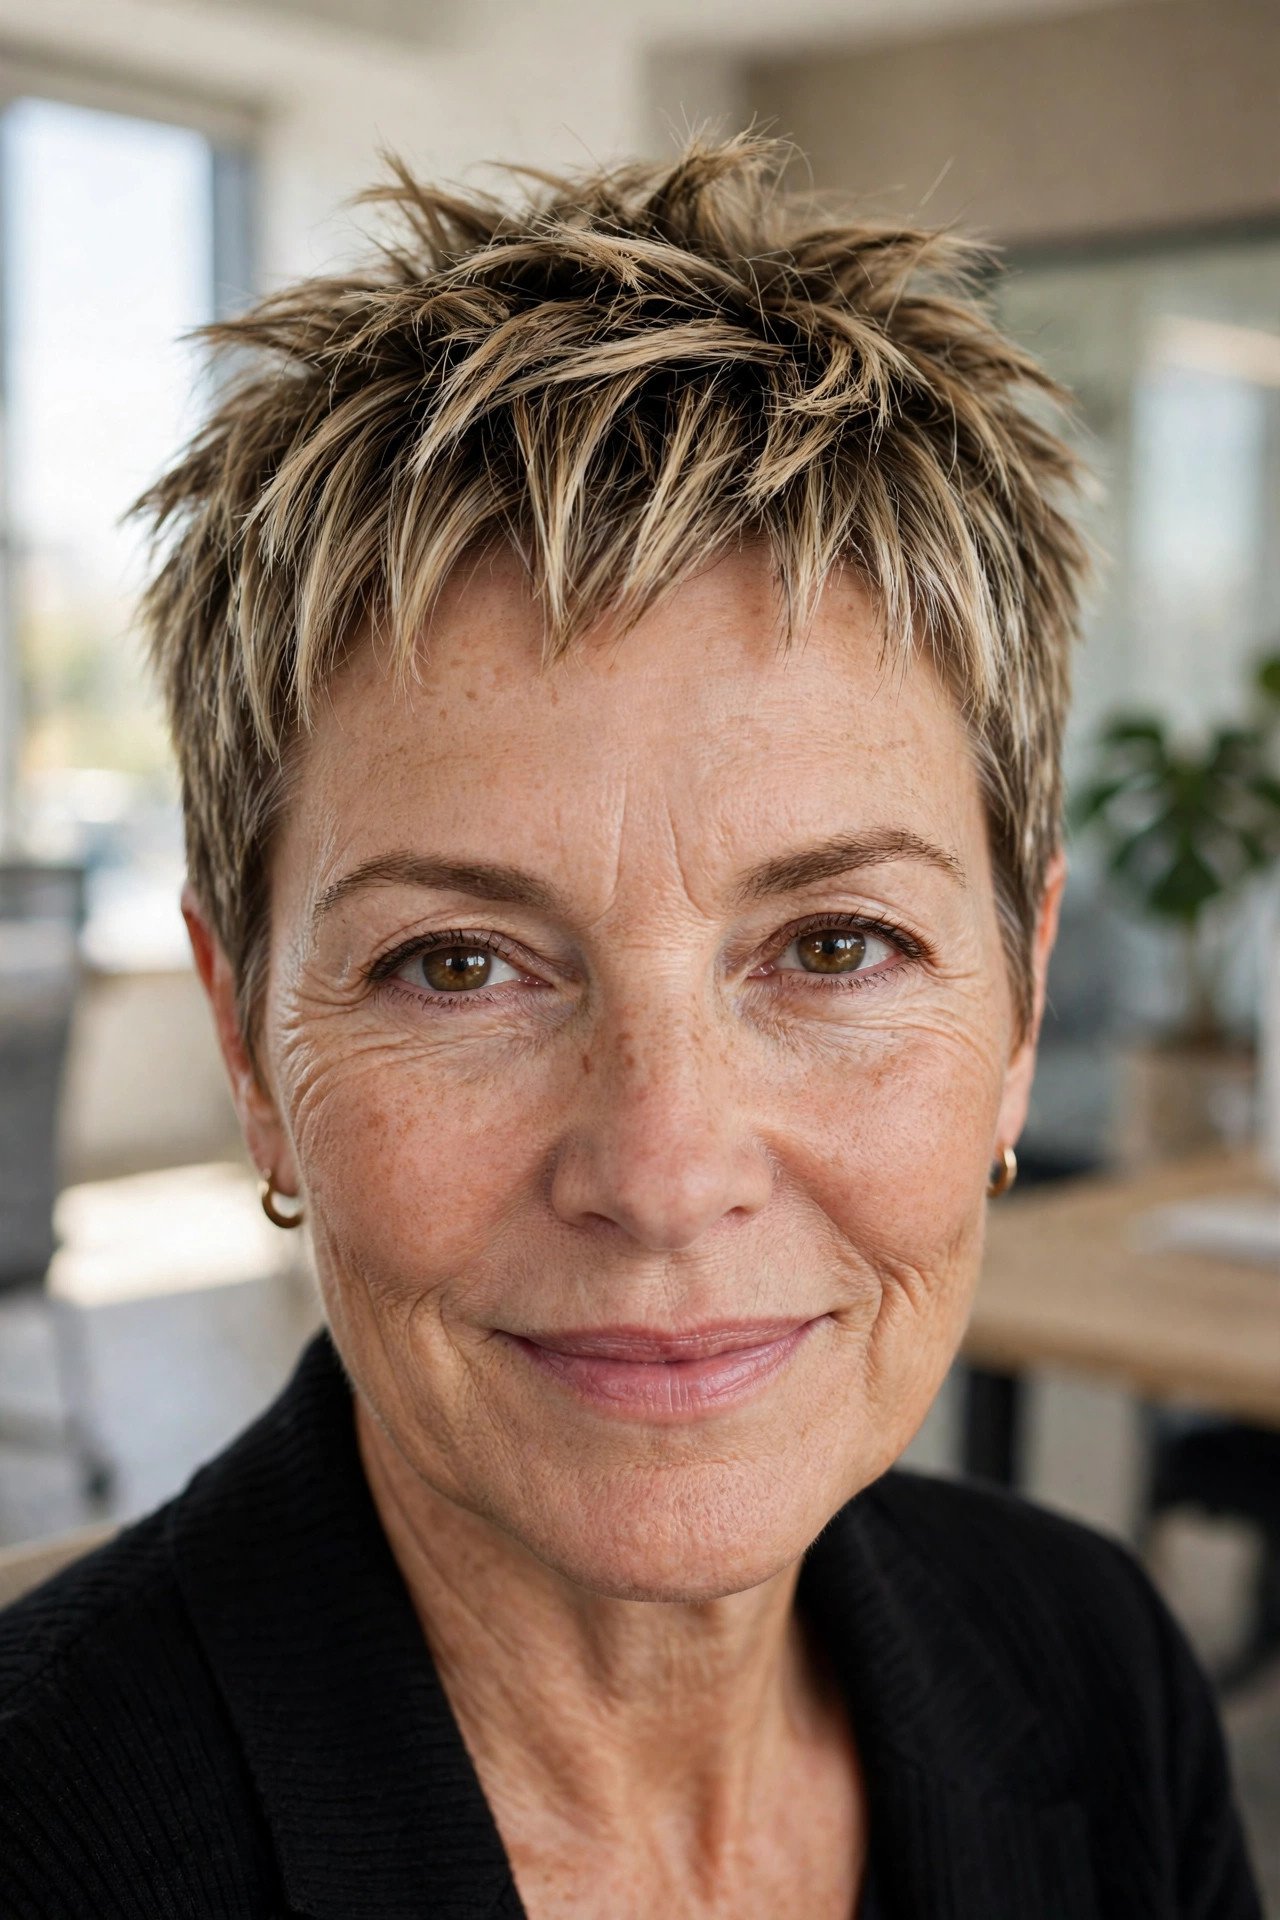
Smooth and sleek is hard mode for thin hair.
A short crop with point cut texture plays a different game. The ends are cut into small, uneven pieces, then separated with the tiniest amount of styling wax worked through the last inch only. Separated pieces read to the eye as more strands. One flat sheet reads as one thin layer. Keep the product off the roots, where it only weighs hair down and glues it together.
On day two, mist with water and pinch the ends again instead of adding more product.
- ▸Piecey, separated ends read as more strands
- ▸Product goes on the ends only, never the roots
- ▸Refresh with water and a pinch, not more wax
11. The Side Swept Pixie With Height at the Crown
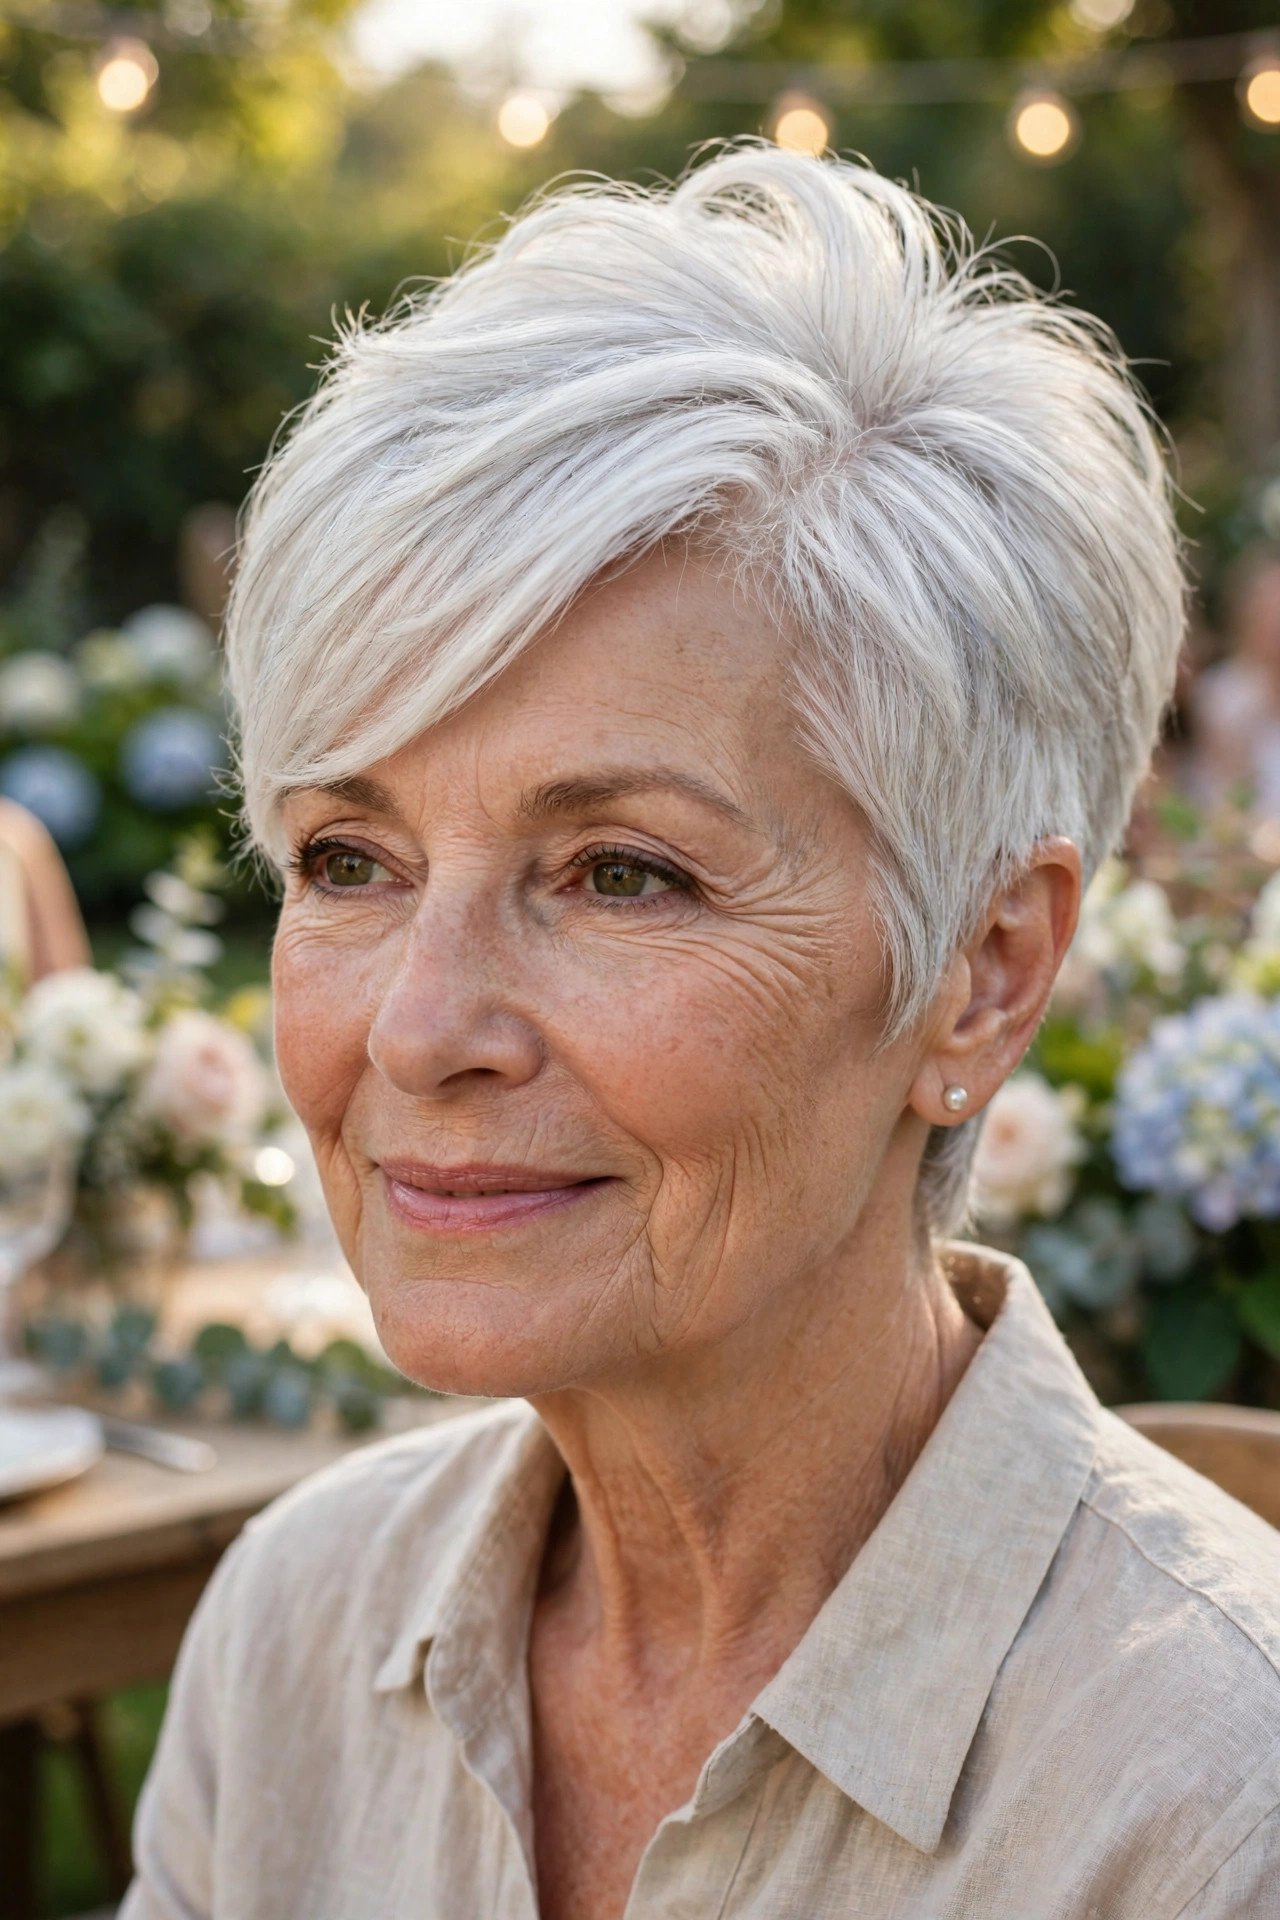
Direction is a styling tool, and this cut uses all of it.
The top is left long enough to sweep across the forehead in one smooth diagonal, while the crown is lifted so the shape has a high point. That diagonal does two jobs. It covers more of the forehead and hairline, and it keeps the eye moving sideways instead of settling on any thin patch. The sides stay short and tidy, which makes the swept top look even fuller by comparison.
Blow dry the top forward first, then sweep it across. The lift survives the sweep.
12. A Root Shadow That Softens a Wide Parting
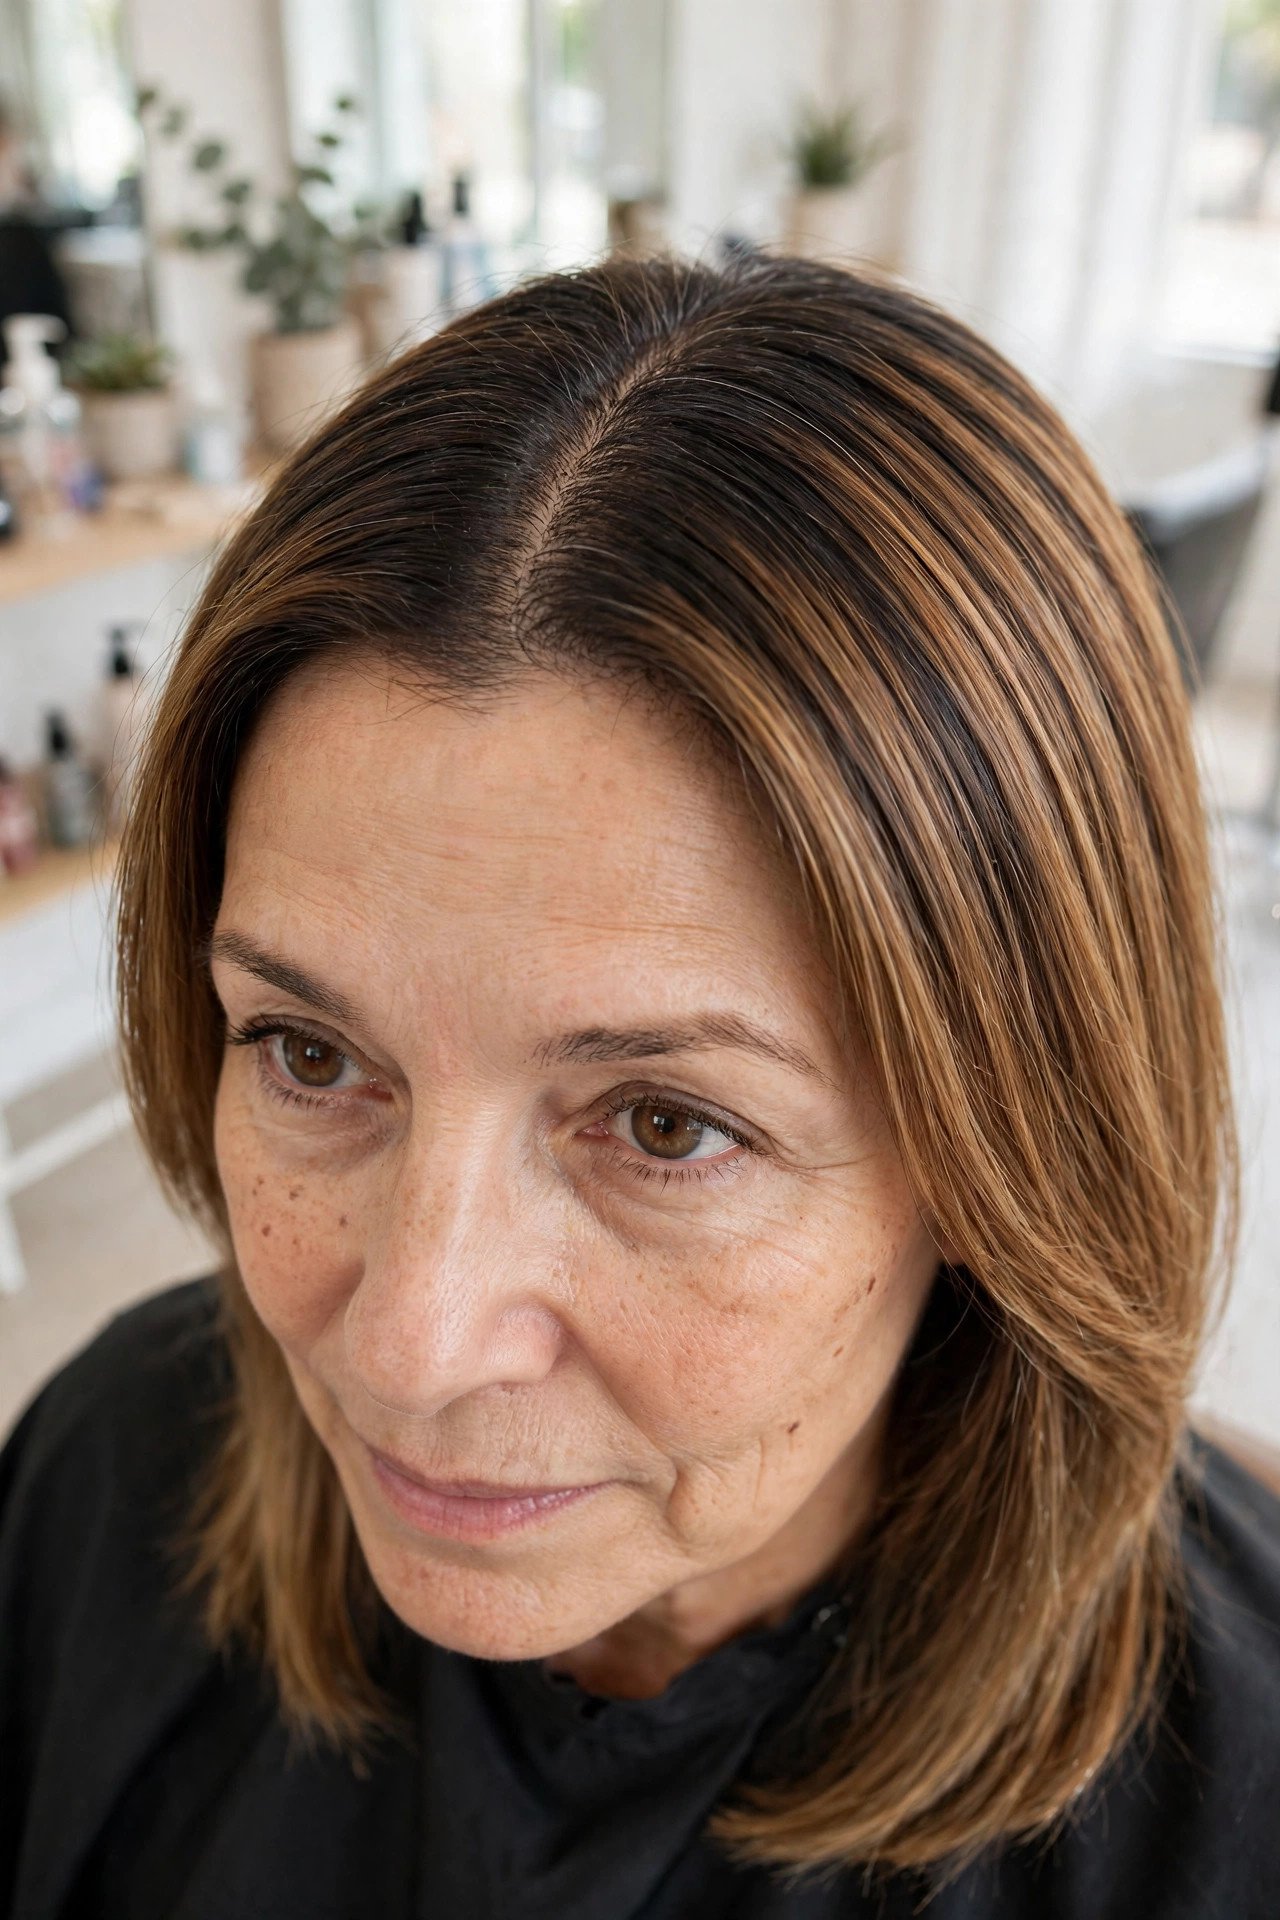
Sometimes the hair is fine. It is the contrast that gives it away.
Pale scalp against darker hair draws a bright line down the parting, and that line is what reads as thinning. A root shadow closes the gap. Your colourist paints a shade slightly deeper than your lengths just at the roots, then melts it downward so there are no edges. With the contrast lowered, the parting looks narrower and the hair around it looks thicker.
It is a small colour job, not a full head change, and it fades out softly over the following weeks.
📌 Good To Know
A root shadow sits one to two shades deeper than your lengths. It is painted on and melted downward, so it grows out with no hard line to hide.
13. The Loose Updo Built Over a Padded Base
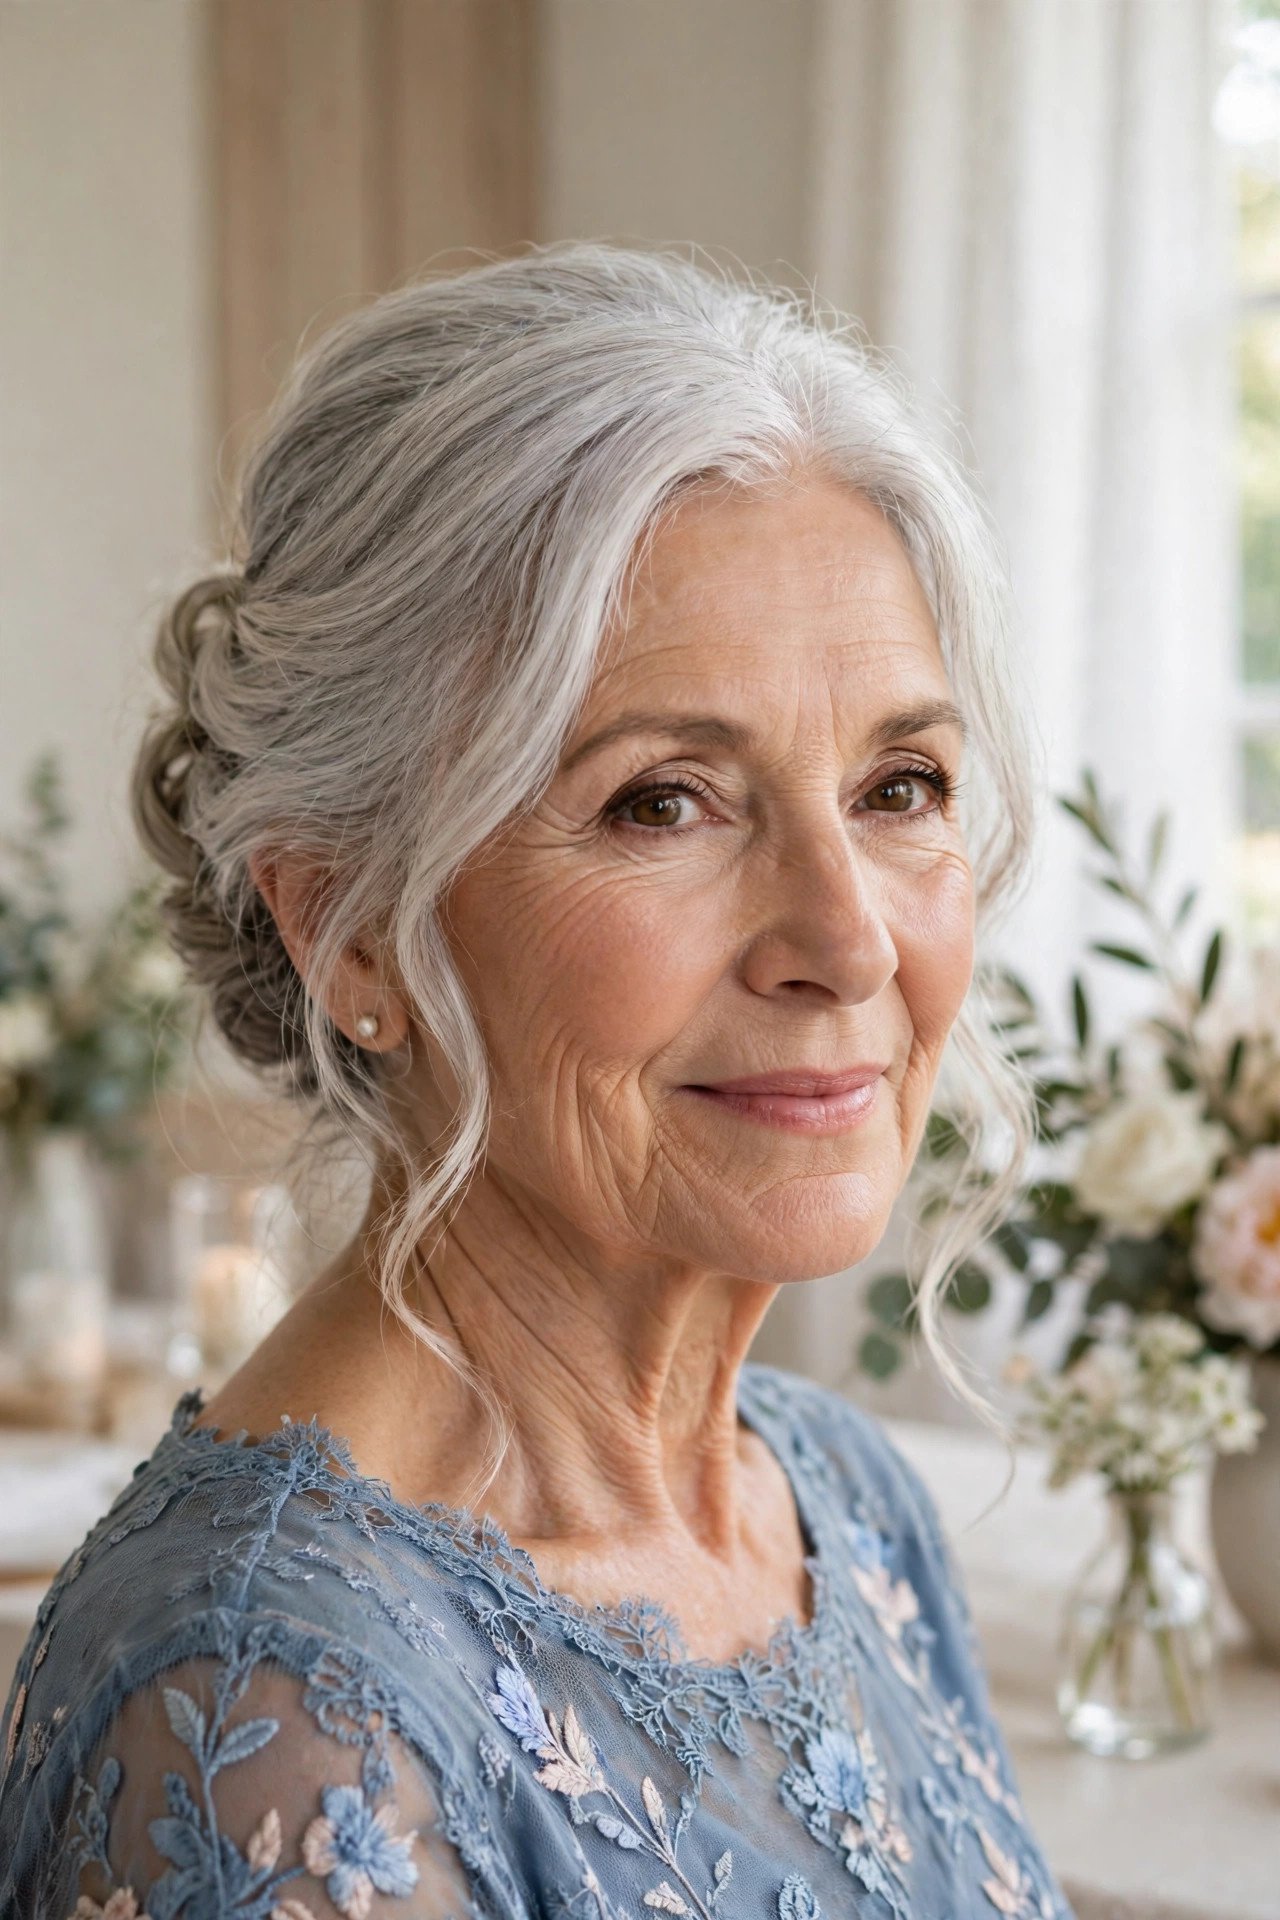
Special occasions are where a thin crown feels most exposed.
The fix is to give your hair something to cover. A small hair padding, the kind shaped like a little cushion or doughnut, sits at the crown under your own hair. Your lengths are then smoothed back over it, pinned loosely, with soft pieces left out around the face. The padding supplies the volume your hair does not have, and nobody sees anything but a full, soft updo.
Keep it loose. A scraped back, tight style shows every gap the padding was meant to hide.
Place the padding at the crown and pin it flat and secure.
Smooth your hair back over it and pin loosely underneath.
Pull a few soft pieces free around the face so nothing looks scraped back.
Finish with a light mist of spray, held well away from the hair.
14. The Blunt Lob With a Soft Bend in the Ends

Length past the shoulders is where fine hair starts to separate into strings.
A lob stops the problem at the collarbone. The ends are kept one length so they hang as a group, and a soft bend through the last few inches stops the shape looking blunt and boxy. Worn with the part slightly off centre, it has the polish of longer hair with none of the see through ends that give longer fine hair away.
If your ends are already wispy, the first cut may need to go a little shorter. The blunt edge is the whole point.
The blunt lob checklist
15. Face Framing Layers With the Back Kept Blunt
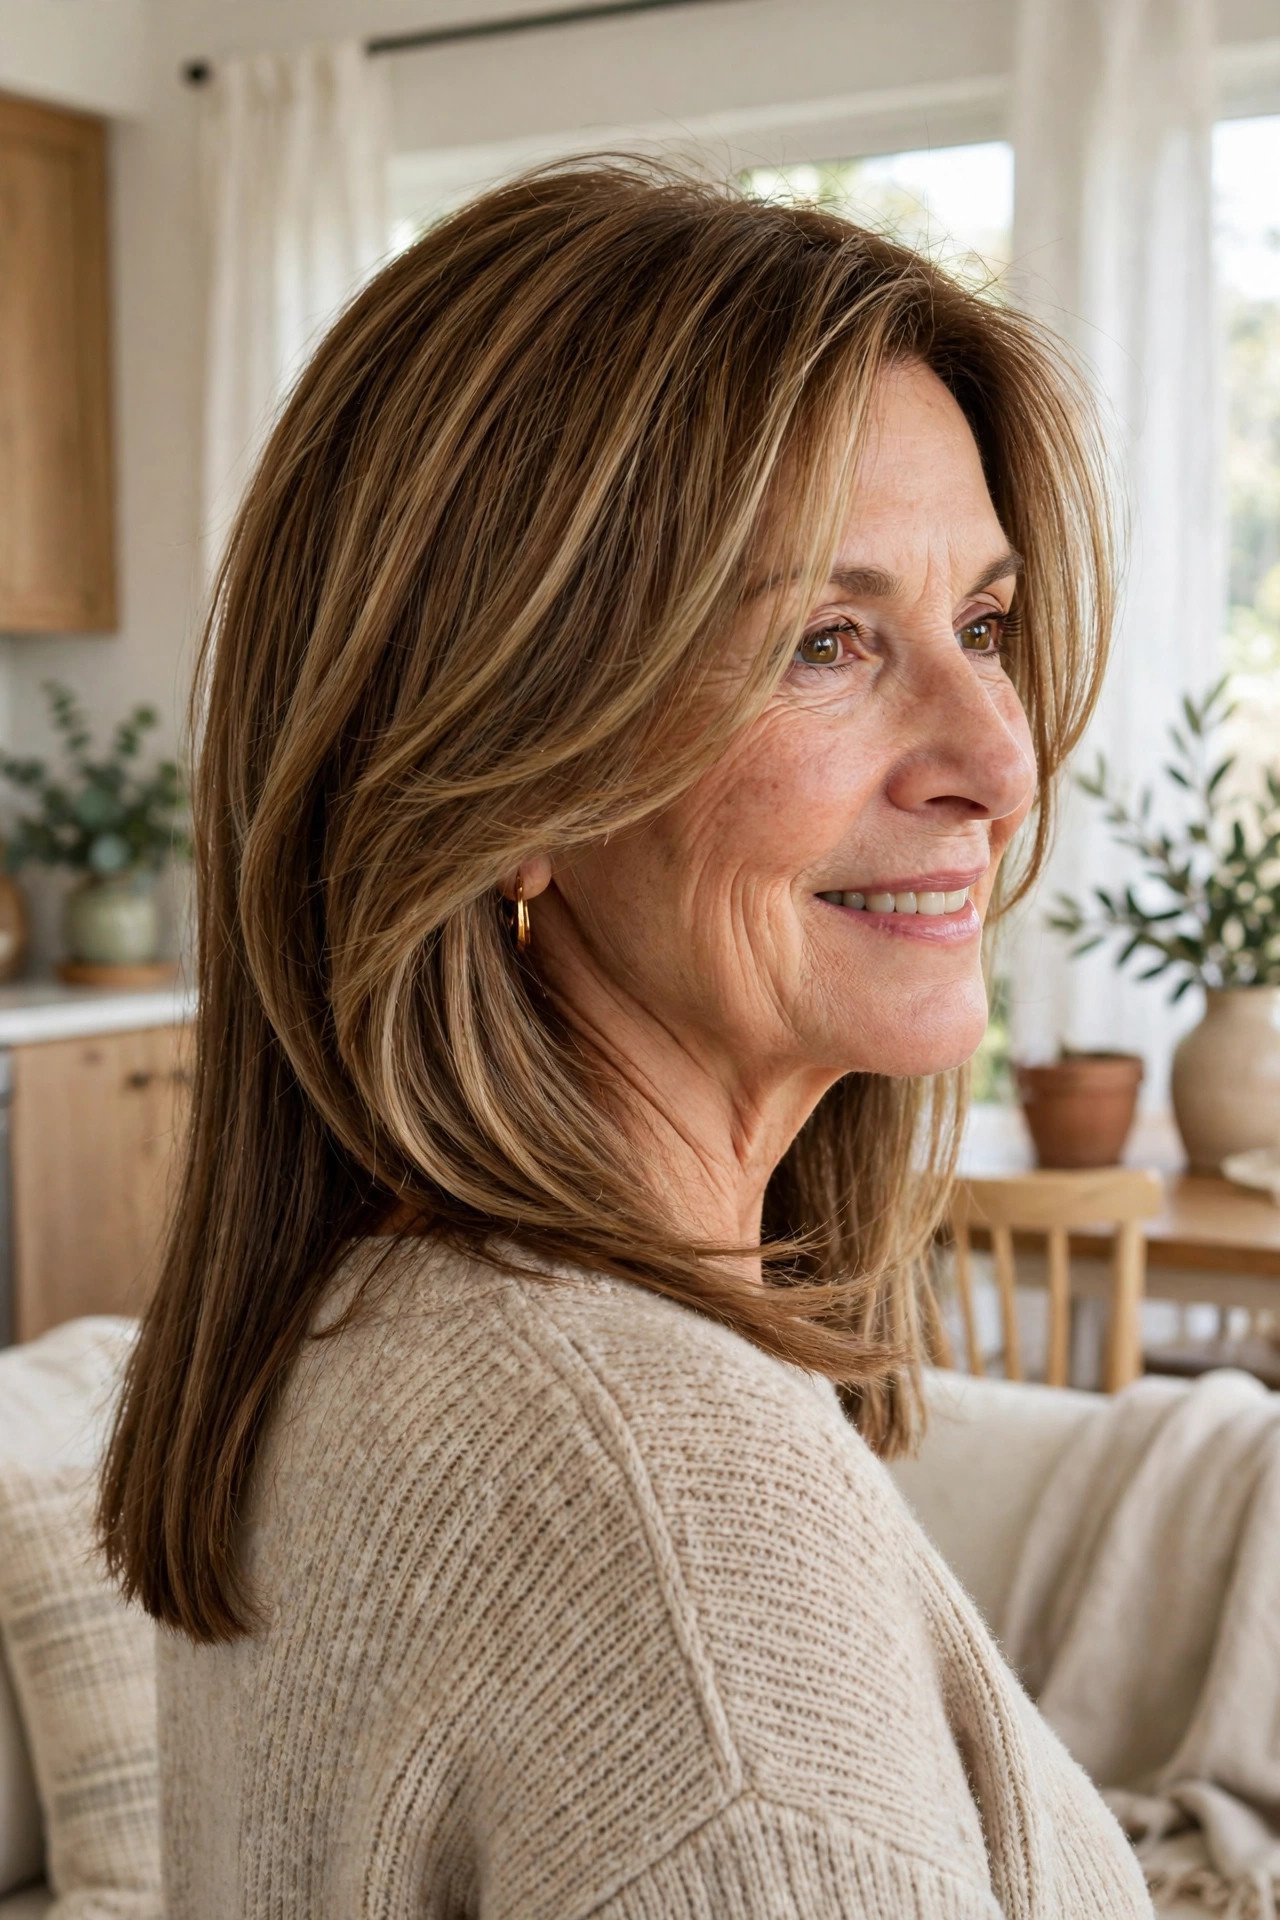
Here is the compromise cut for anyone who likes layers but cannot afford them everywhere.
Short layers are cut only around the face, from the cheekbones down, where they add movement and soften the front. The back stays one solid length. That split decision matters: the front gets the life and swing people associate with layers, while the back keeps the full blunt edge that makes fine hair look thick from behind.
It grows out kindly, too, since the layered part is only a small section of your hair.
Layer only the front, starting at the cheekbones.
Keep the back one length and blunt.
Layers carried all the way through the back.
Feathering the back ends down to points.
16. The Asymmetric Bob That Pulls the Eye Sideways
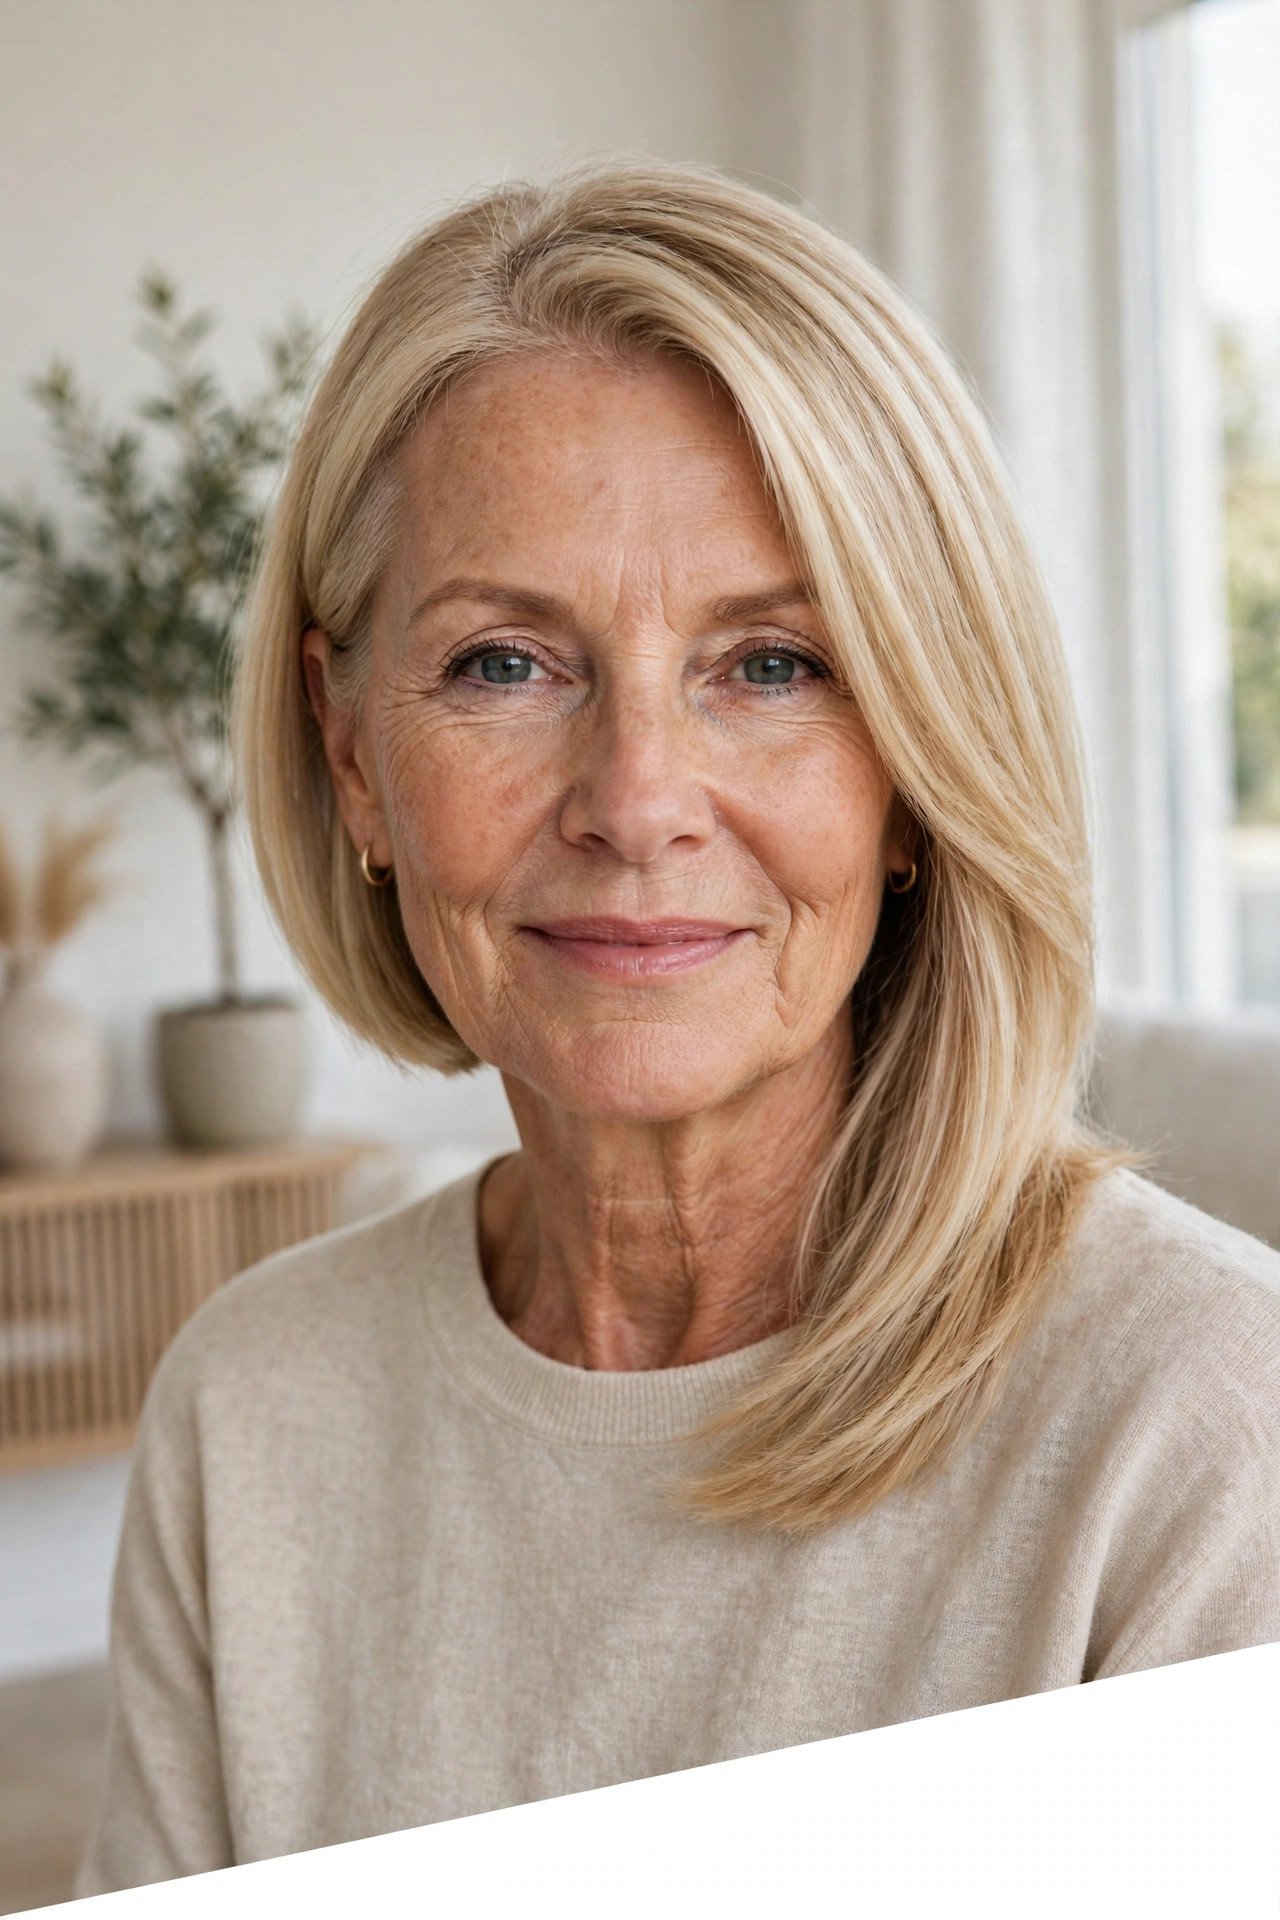
Symmetry invites inspection. A diagonal line does not.
In an asymmetric bob, one side is left an inch or two longer than the other, so the bottom edge runs on a slant. The eye follows that slant across the shape instead of resting on any one spot. Tuck the shorter side behind your ear and the longer side swings forward, which also gives the front a fuller looking sweep of hair.
- Works best on straight or smoothed hair
- Worn with a clear side part
- Lengths between the chin and the shoulders
The slant does need regular trims to stay sharp. A grown out slant just looks uneven.
A slanted edge keeps the eye travelling across the shape, so it never settles long enough to judge the density.
17. The Round Brush Blow Dry That Lifts Roots First
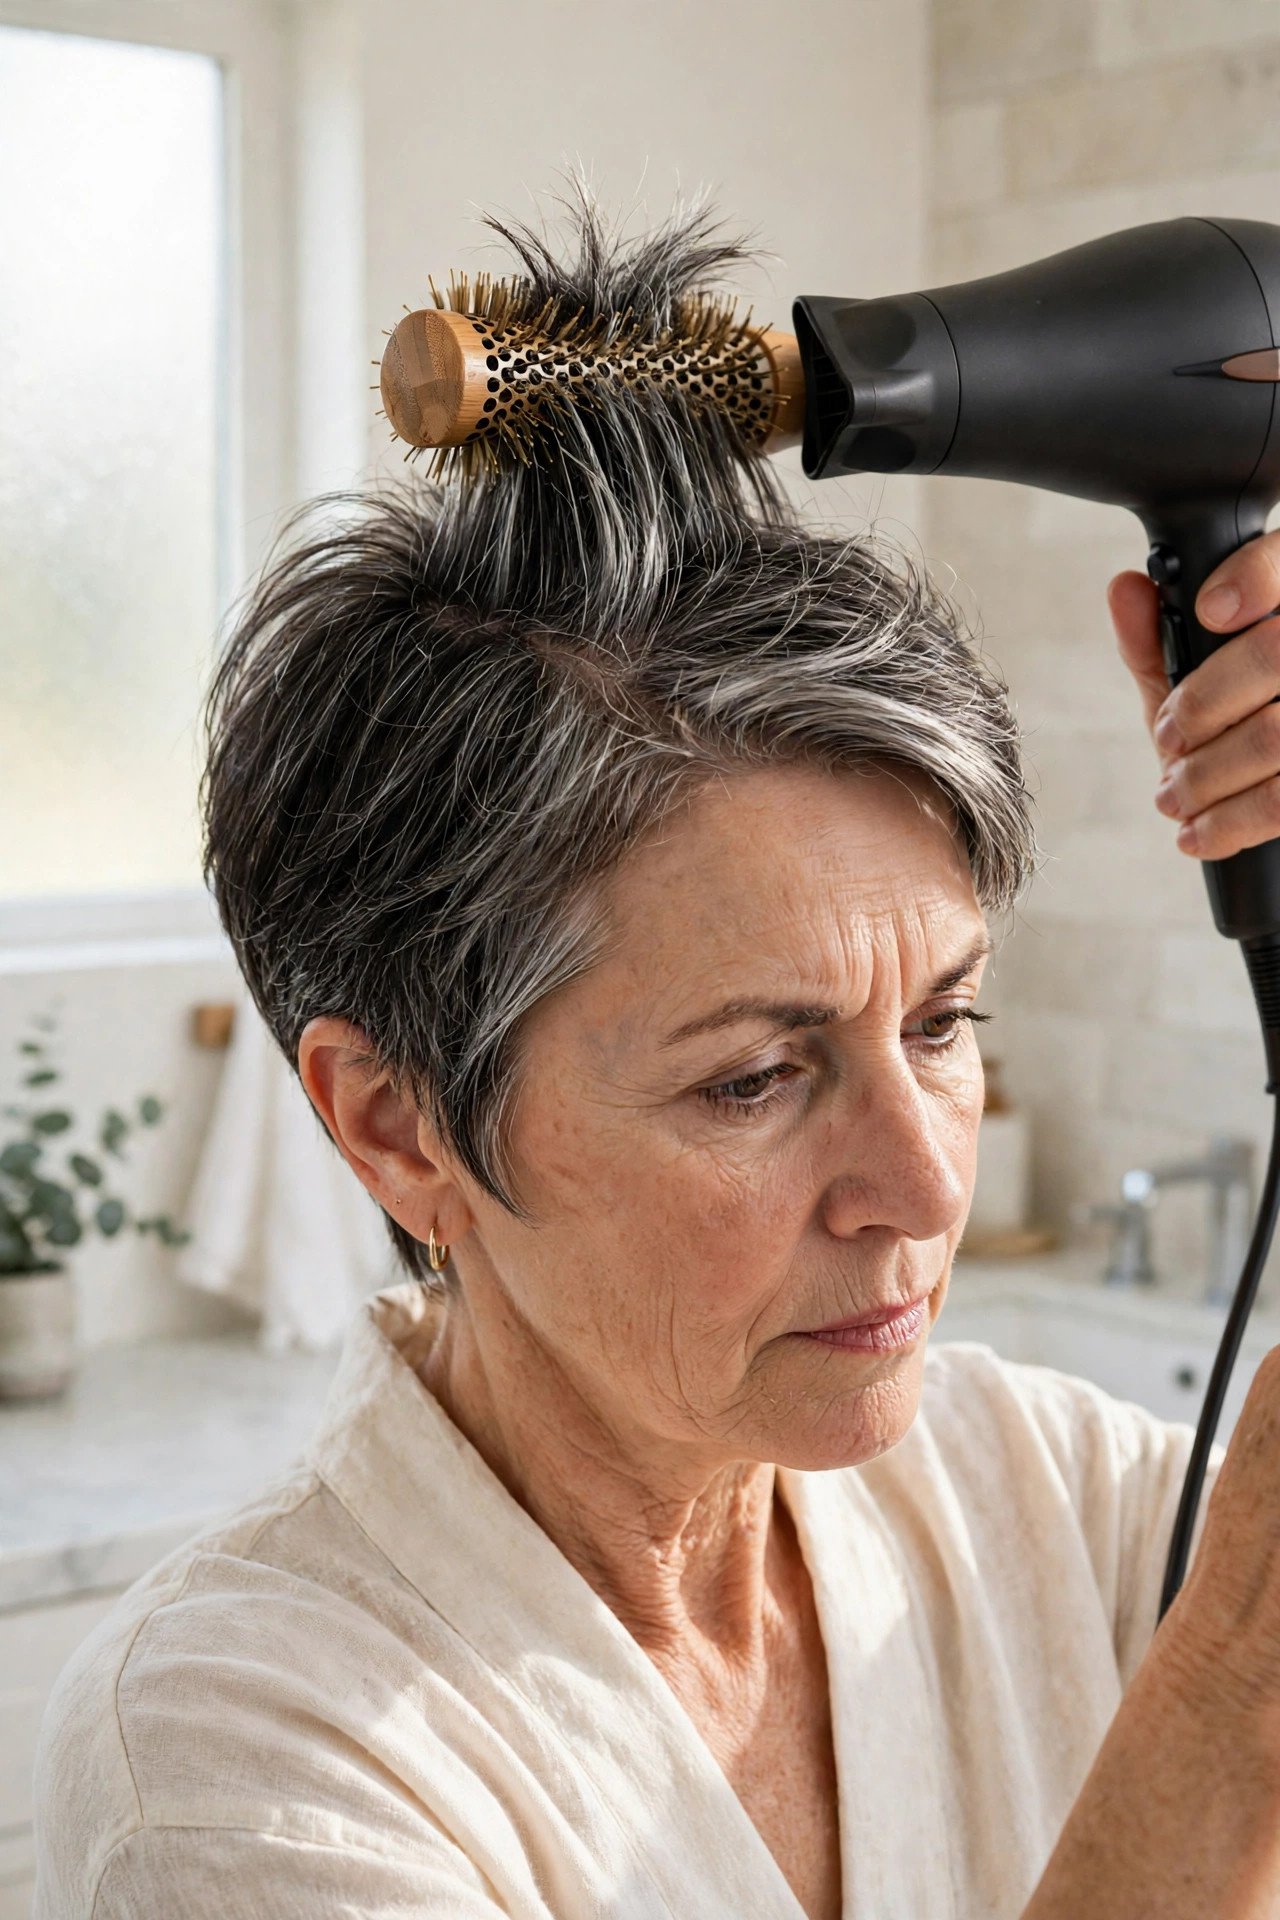
Most people dry the lengths and hope the roots follow. It works the other way round.
Roots decide the shape. Dry them first, pushing the hair at the crown in the opposite direction to the way it will fall, and the lift is built in before the lengths are even touched. A medium round brush at the crown, rolled up and away, gives fine hair a curve it cannot get from a paddle brush. Finish each section with cool air before you move on. Heat shapes hair, but cool air is what sets the shape.
Dry the roots first, pushing crown hair in the opposite direction to how it falls.
Roll a medium round brush up and away at the crown.
Set each section with cool air before moving on to the next.
Tip your head forward for one last blast at the roots.
18. The Tapered Crop That Keeps Its Height on Top
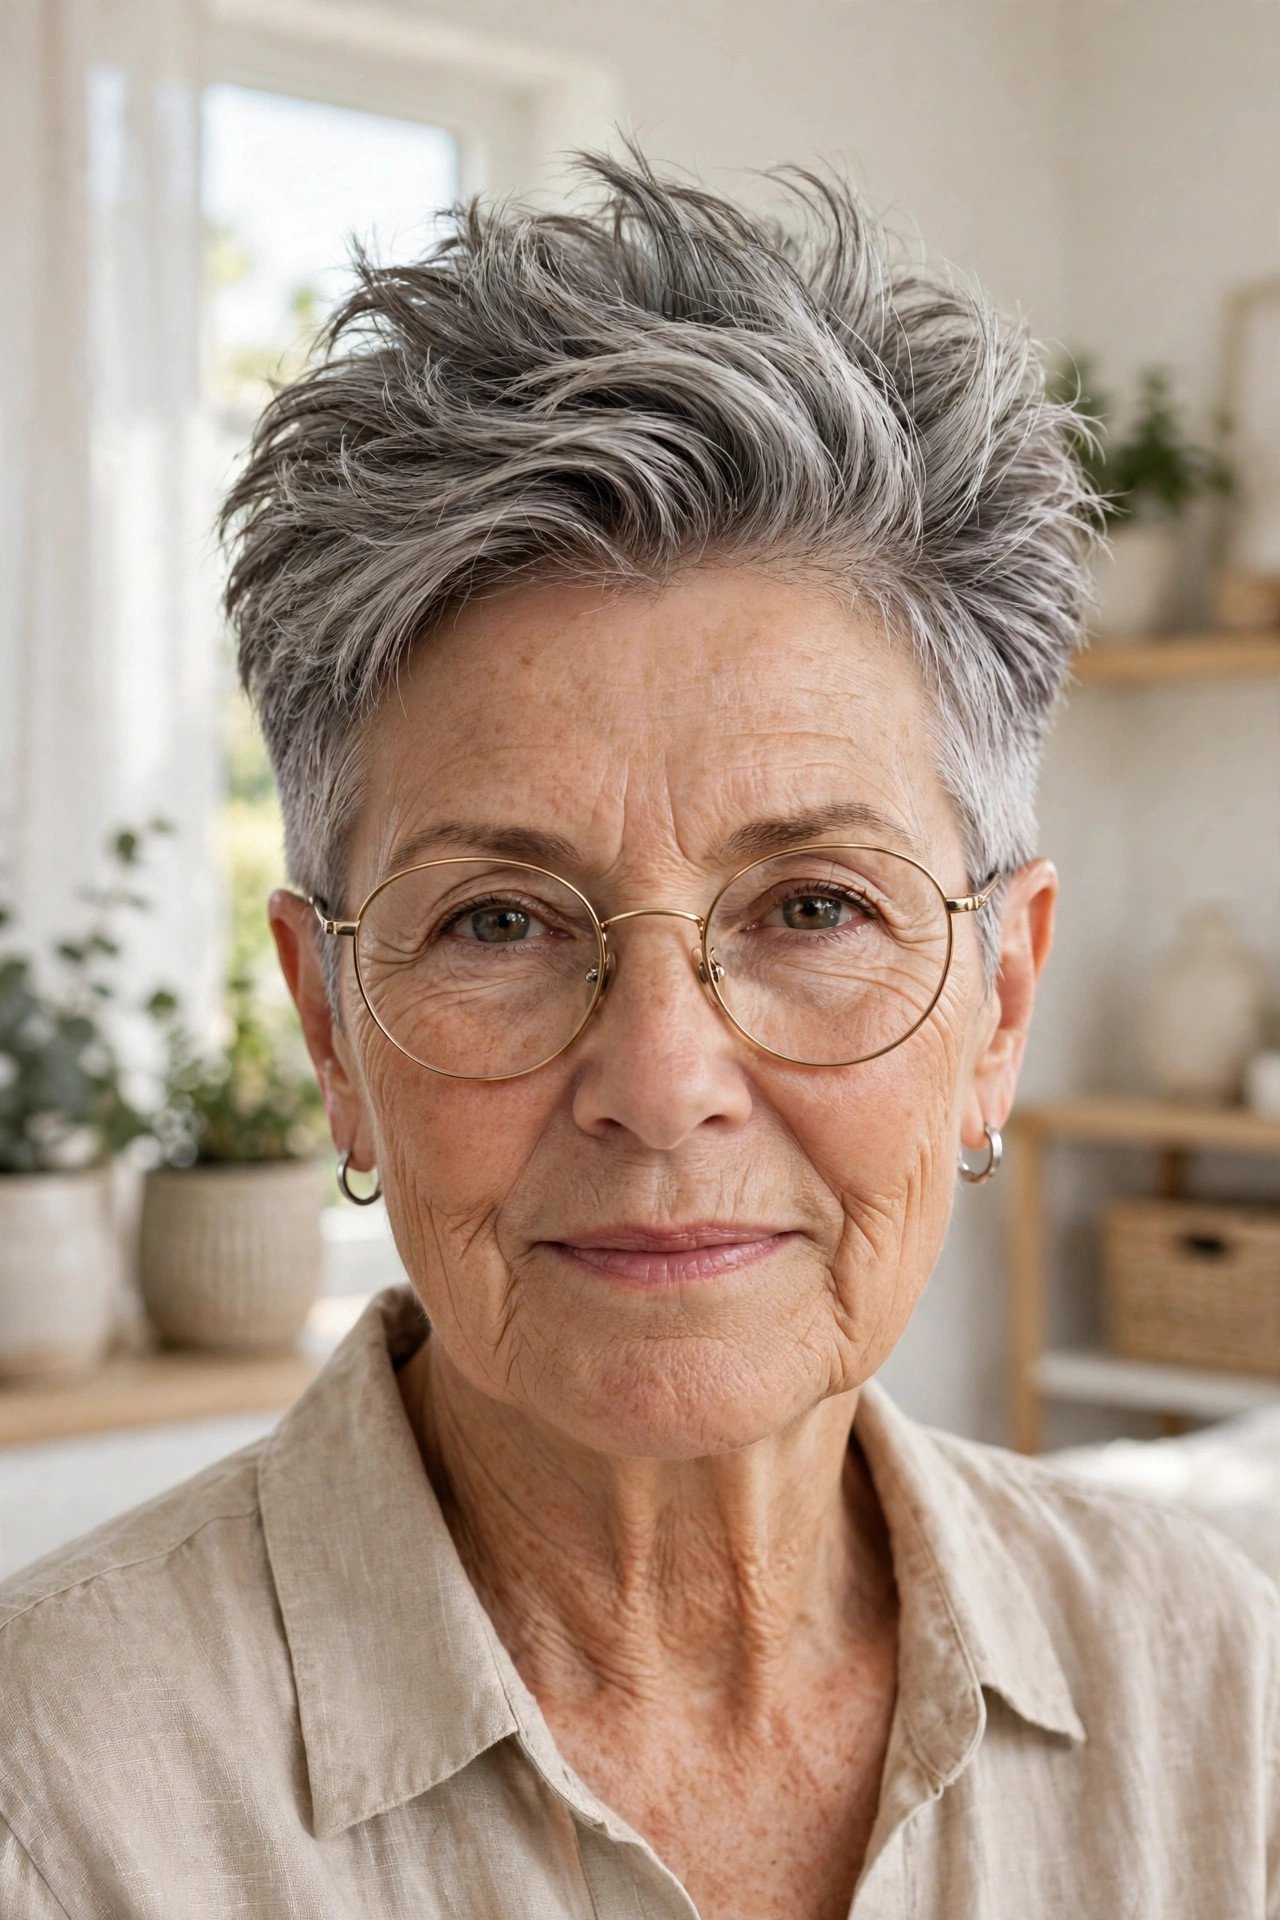
This cut spends all its fullness in one place: the top, where eyes land first.
The sides and back are tapered in close and neat, following the head shape. The top is left longer and textured, worn brushed up or forward with some height at the front. Because the sides carry so little hair, the top looks abundant by contrast, and the whole cut reads tidy and deliberate rather than thin.
- Women who wear glasses and want a clean frame line
- Strong features that suit a neat outline
- Anyone who wants a wash and go morning
Ask for the taper soft, not shaved. A gentle blend looks far more flattering after fifty.
19. Second Day Grit for Roots That Fall Flat by Noon
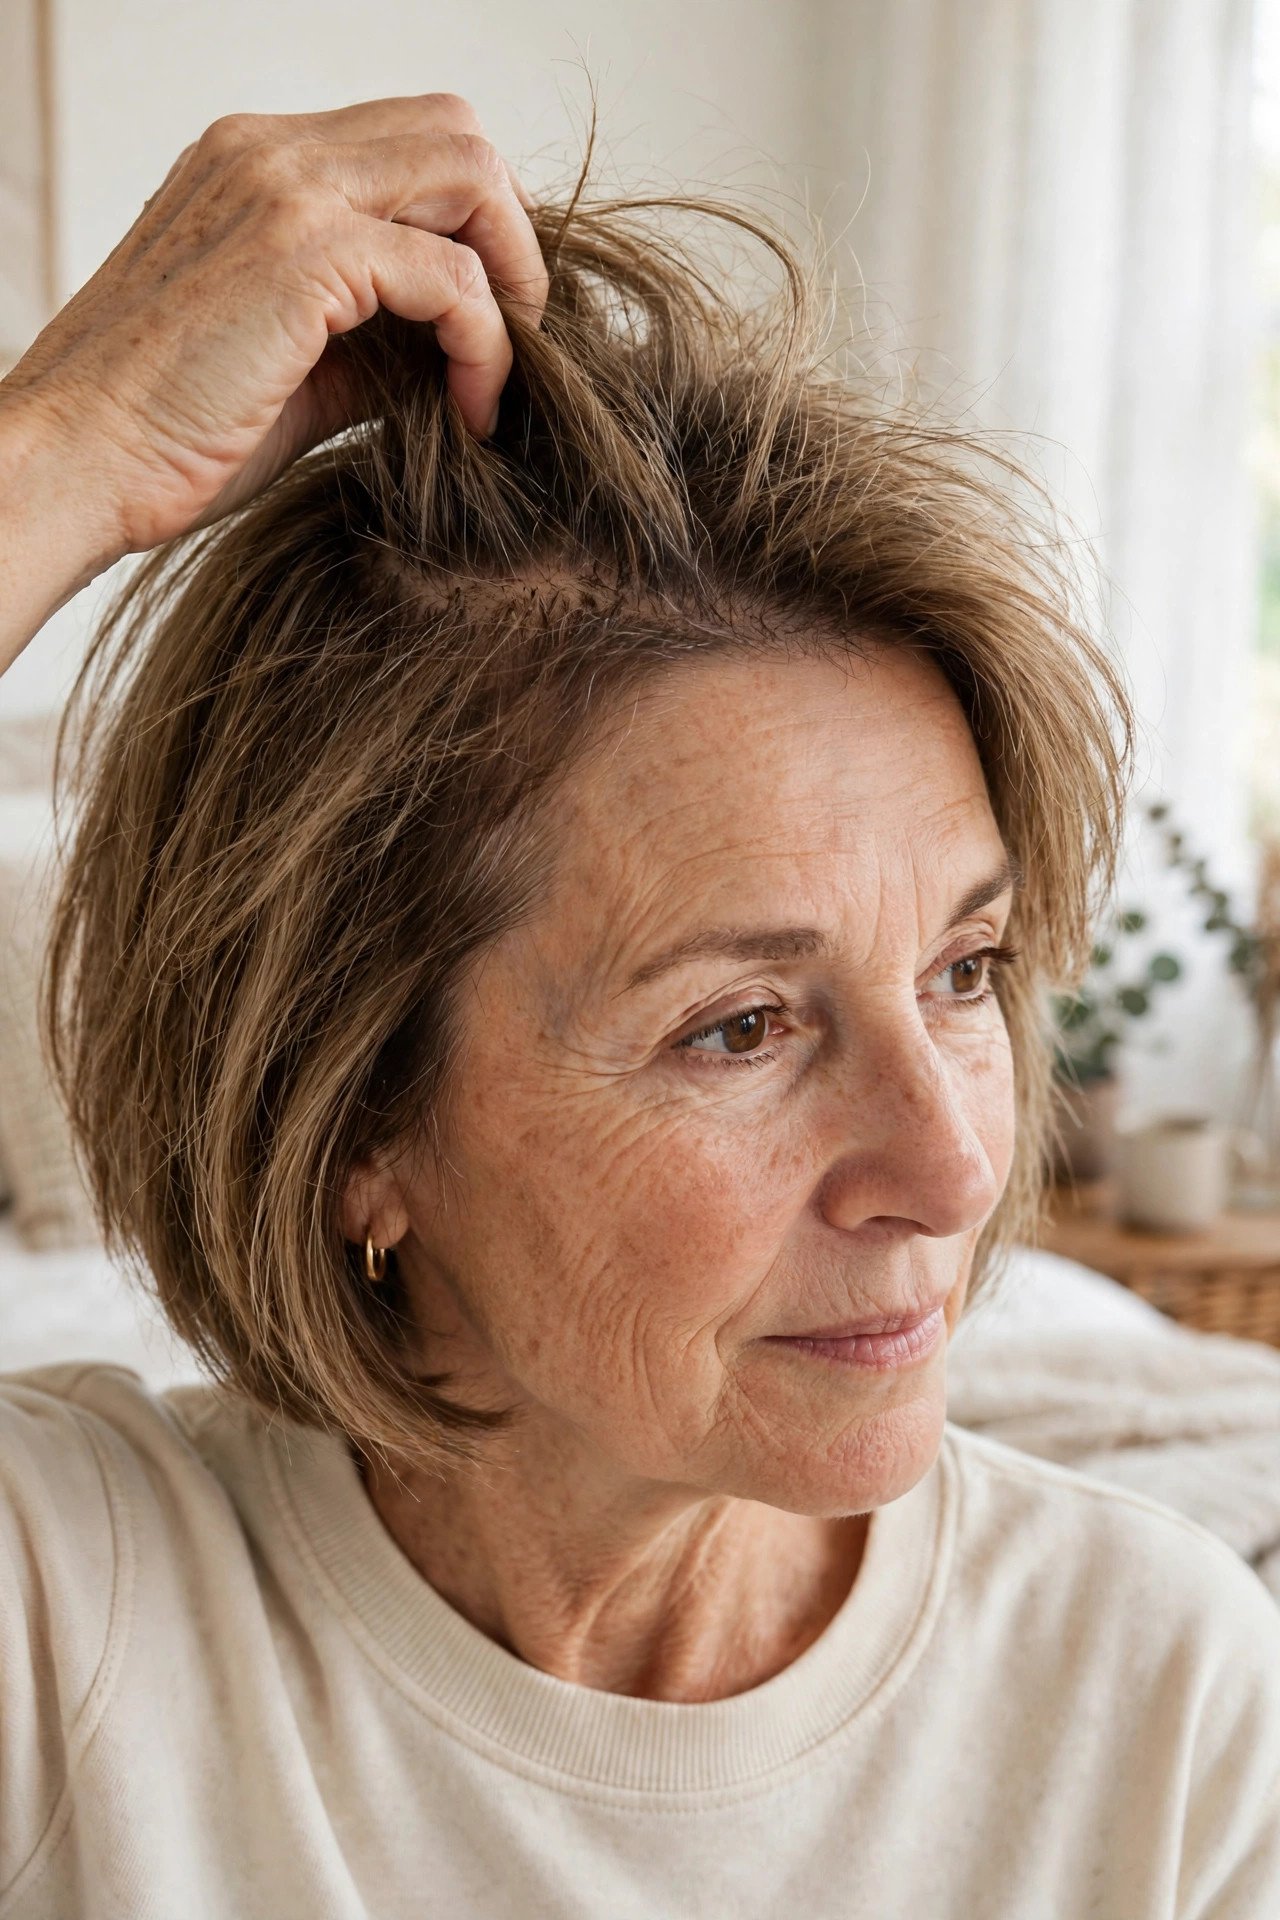
Freshly washed fine hair is at its flattest. It is almost too clean.
Clean strands are slippery, and slippery strands slide down and lie flat against the scalp. A light dusting of dry shampoo or texture powder at the roots on day two gives those strands grip. They catch on each other instead of sliding, the roots stand a little, and the parting stops looking glued open. Some women apply it the night before, so it absorbs while they sleep and there is no pale cast by morning.
Spray or sprinkle at the roots only. Lengths coated in powder clump together and look finer, not fuller.
⚠️ Watch Out
Texture products belong at the roots. Worked through the lengths, they make fine hair clump into strings and show more scalp, not less.
20. Hidden Layers That Add Movement Without Thinning the Ends
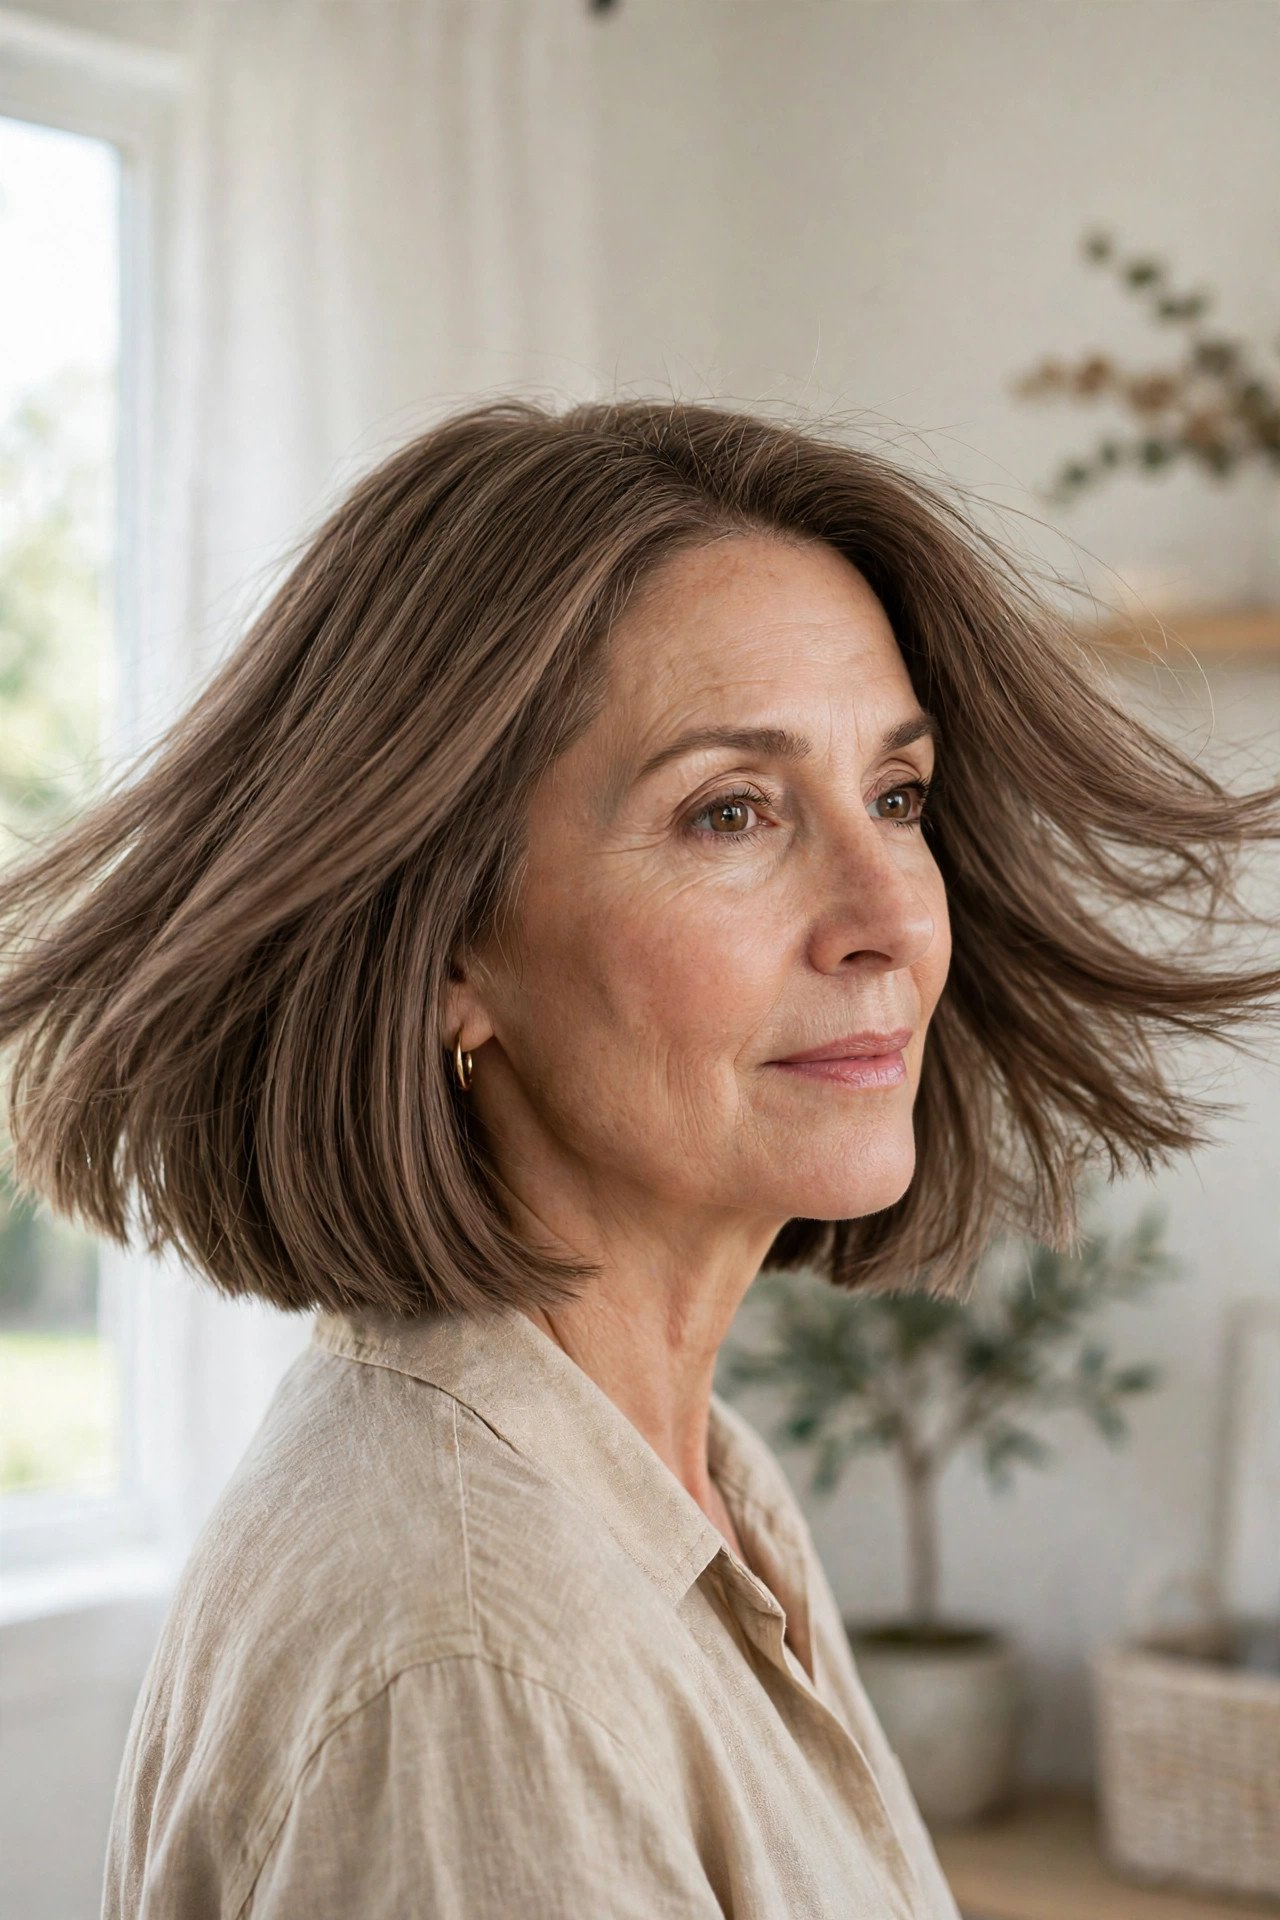
There is a way to layer hair that nobody can see, and it suits fine hair best of all.
Your stylist cuts short layers into the underneath sections, below the surface layer. Those hidden pieces are shorter and springier, and they prop up the hair above them like a cushion. The top layer stays long and unbroken, the ends stay blunt, and yet the whole cut moves and lifts instead of hanging in one flat sheet.
This is a technique to ask for by name. If your stylist only layers the surface, you get the thinning without the lift.
- ▸Short layers hide underneath the surface
- ▸The top layer stays long and unbroken
- ▸Ends keep their blunt, full looking edge
21. A Soft Full Fringe for a Thinning Hairline
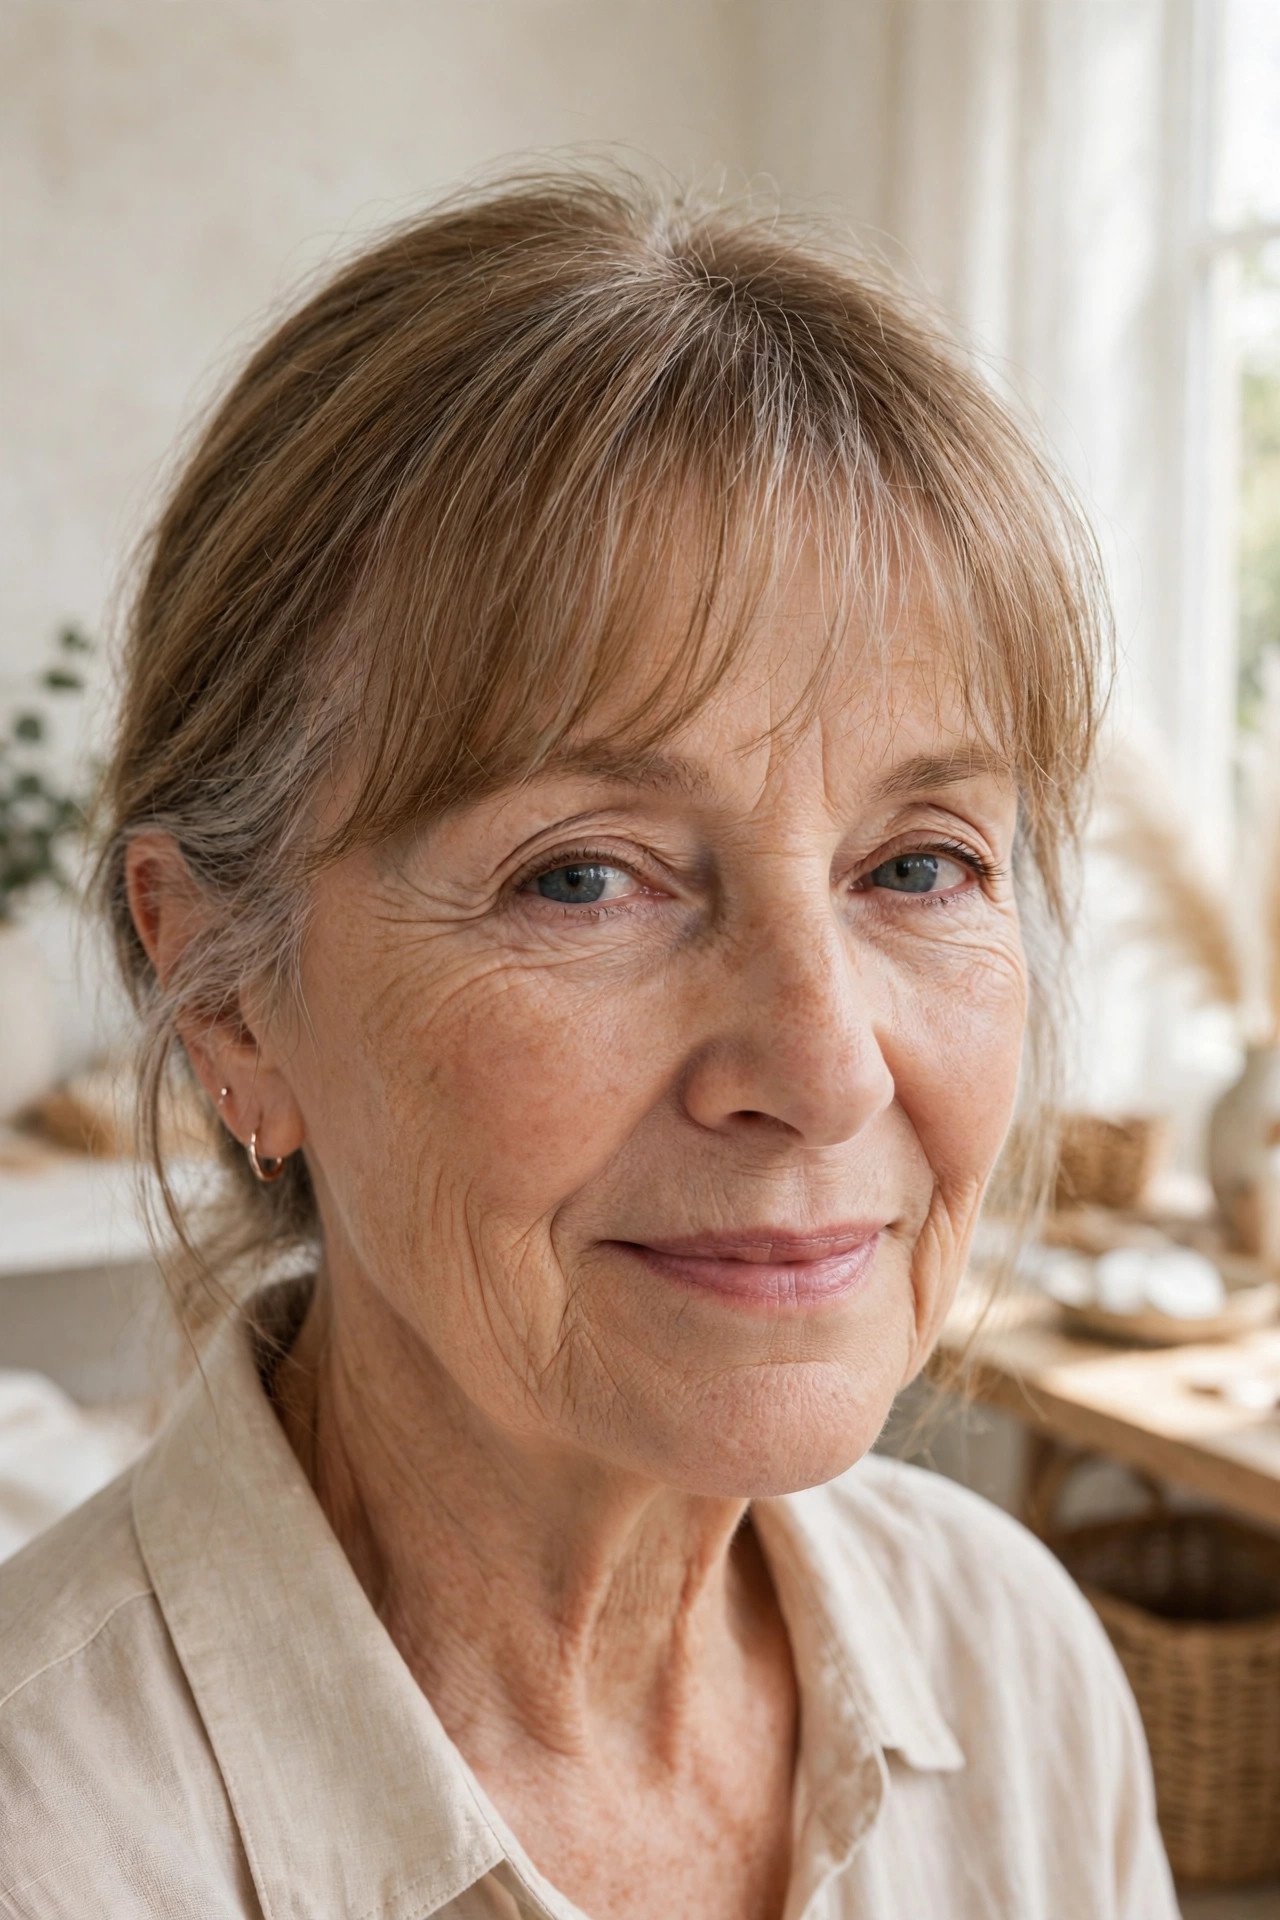
A sparse hairline is hard to style around, so cover it with the hair itself.
A soft full fringe, cut from a section that starts further back on the crown, brings more hair forward over the hairline. The thin spots at the temples and the front edge sit underneath that fall of hair instead of on show. Keep the fringe wispy at the very ends and slightly see through in the middle, so it looks light and modern rather than like a heavy shelf.
Side pieces left a little longer blend the fringe into the rest of the cut and soften the whole front.
22. The Half Up Twist That Covers a Thin Crown
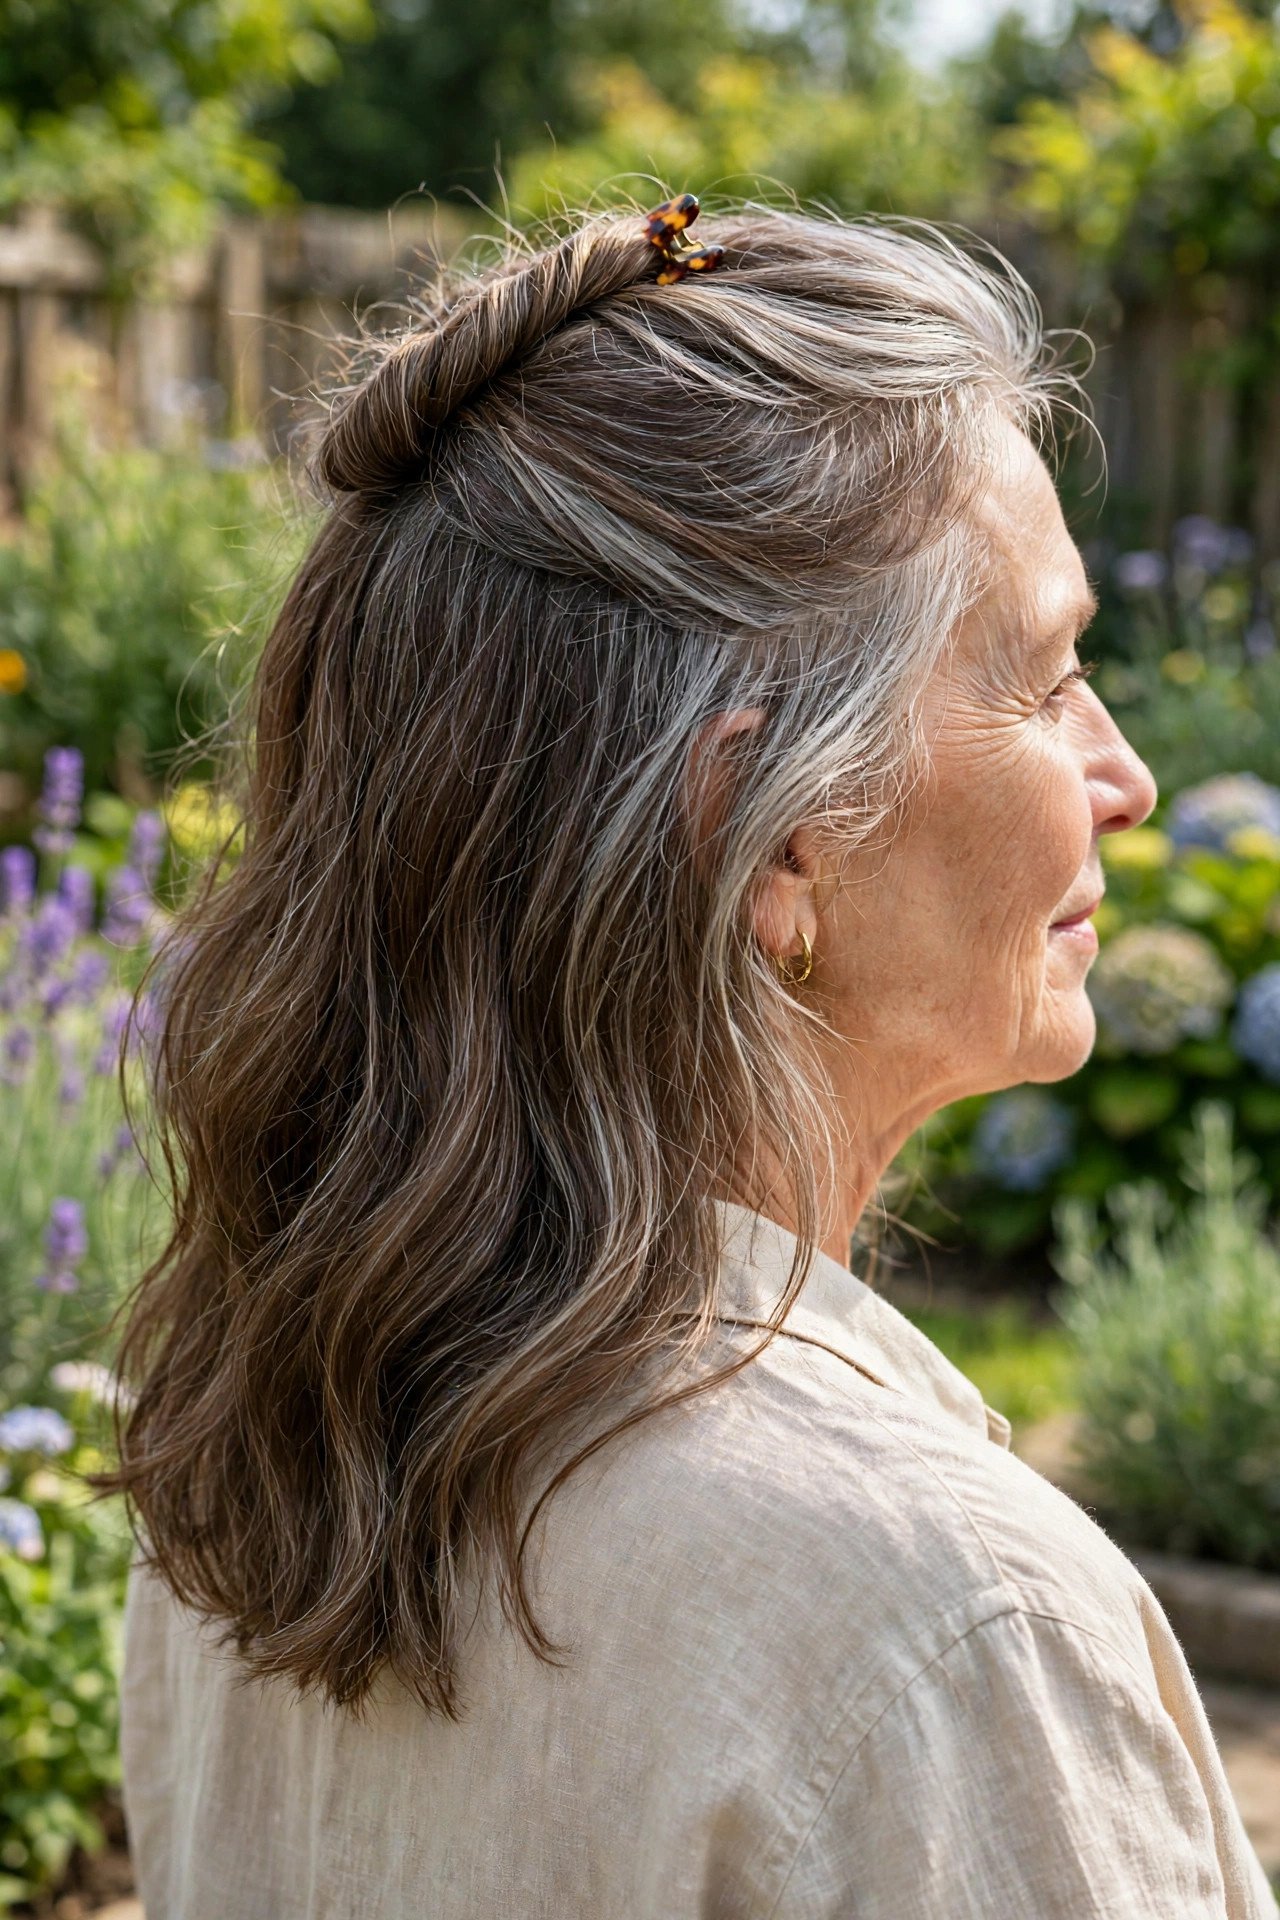
When the crown is the thinnest area, style hair over it, not away from it.
Take the top section of hair, temple to temple, tease it very gently at the roots for a little padding of your own, then twist it once as you draw it back and pin it at the crown. The twist sits exactly where the scalp tends to show, and the hair below it hangs loose and full looking. It takes two minutes and works on any length from a bob down.
Check the back in a second mirror before you leave. One loose pin at the twist is the only fiddly part.
What you need
23. Tinted Powder Along the Parting for a Denser Finish
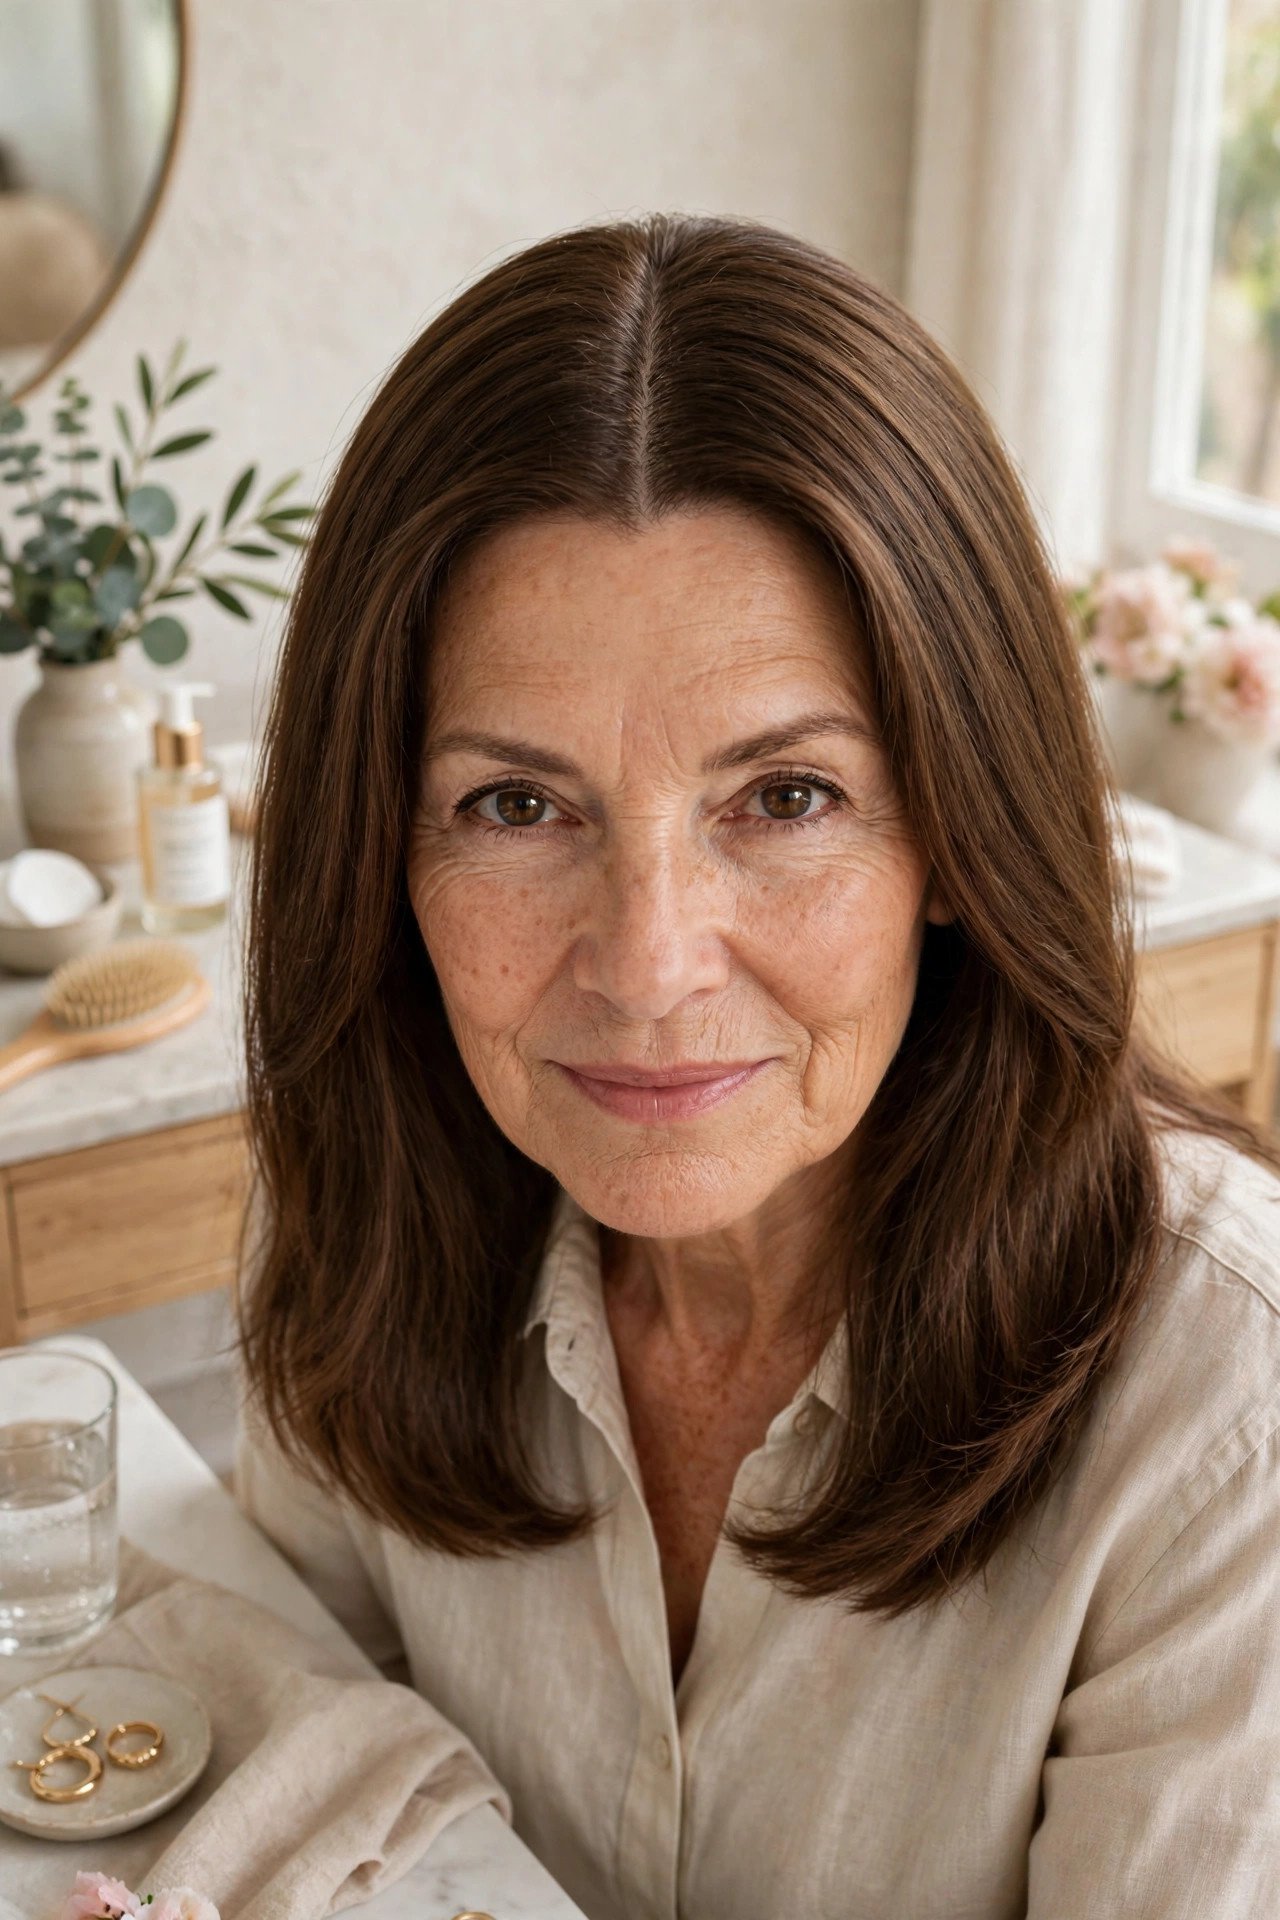
The last trick is pure camouflage, and there is no shame in it. Stylists use it on photo shoots all the time.
A tinted hair powder, or even a matte eyeshadow close to your hair colour, dabbed along the parting and the front hairline tones down the pale scalp underneath. With less contrast showing through, the hair reads denser at exactly the spots people look first. Use a small brush, tap off the excess, and keep the colour on the skin of the parting, not smeared across the hair.
It washes out in one shampoo, so save it for photos, parties, and days when you want the extra confidence.
Dab colour where the scalp shows through, and the parting reads as hair instead of skin. It washes out the same night.
Fuller looking hair rarely comes from one big change. It comes from a blunt edge here, a flipped part there, a little shadow at the roots, and ends that all land together. Pick the two or three ideas that fit your length and your routine, and let those do the work.
If you are still choosing between cuts, these hairstyles for thin hair over 50 give you a solid shortlist to take to your stylist. Save this list to your hair board so it is handy at your next appointment, and send it to a friend who keeps saying her hair has gone flat.


