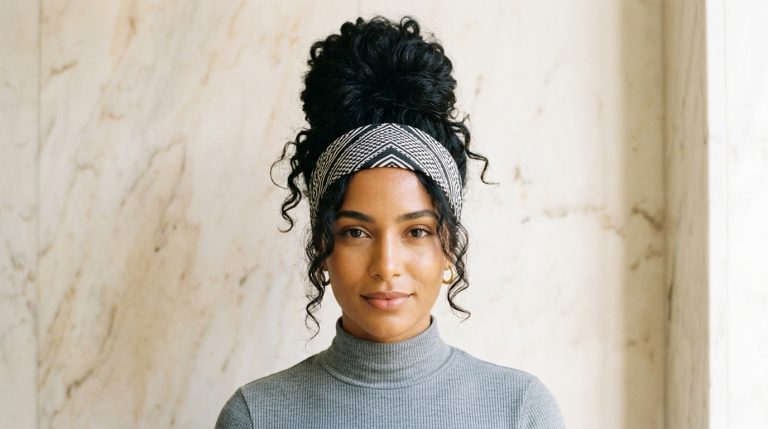
25 Long Hairstyles Over 40 That Look Modern, Not Tired
Long hair reaches a point where it stops feeling like a style and starts feeling like a habit. It hangs the same way it did ten years ago, it takes forever to dry, and the ends do their own thing no matter what you try. The length is not the problem. The shape is.
The good news is that long hair after 40 does not need a dramatic chop to look current. It needs movement in the right places, ends that look deliberate, and a finish that reads polished rather than heavy. Small changes do most of the work: layers that start higher, a parting that lifts the roots, a fringe that softens the front.
This list pulls together 25 long hairstyles over 40 that look modern because each one has a clear idea behind it. Some are cut changes, some are styling changes you can try this week, and a few ask almost nothing of you at all. Read through, save the ones that match your hair type, and take the photos to your next appointment.
1. Long Layers With a Feathered Front
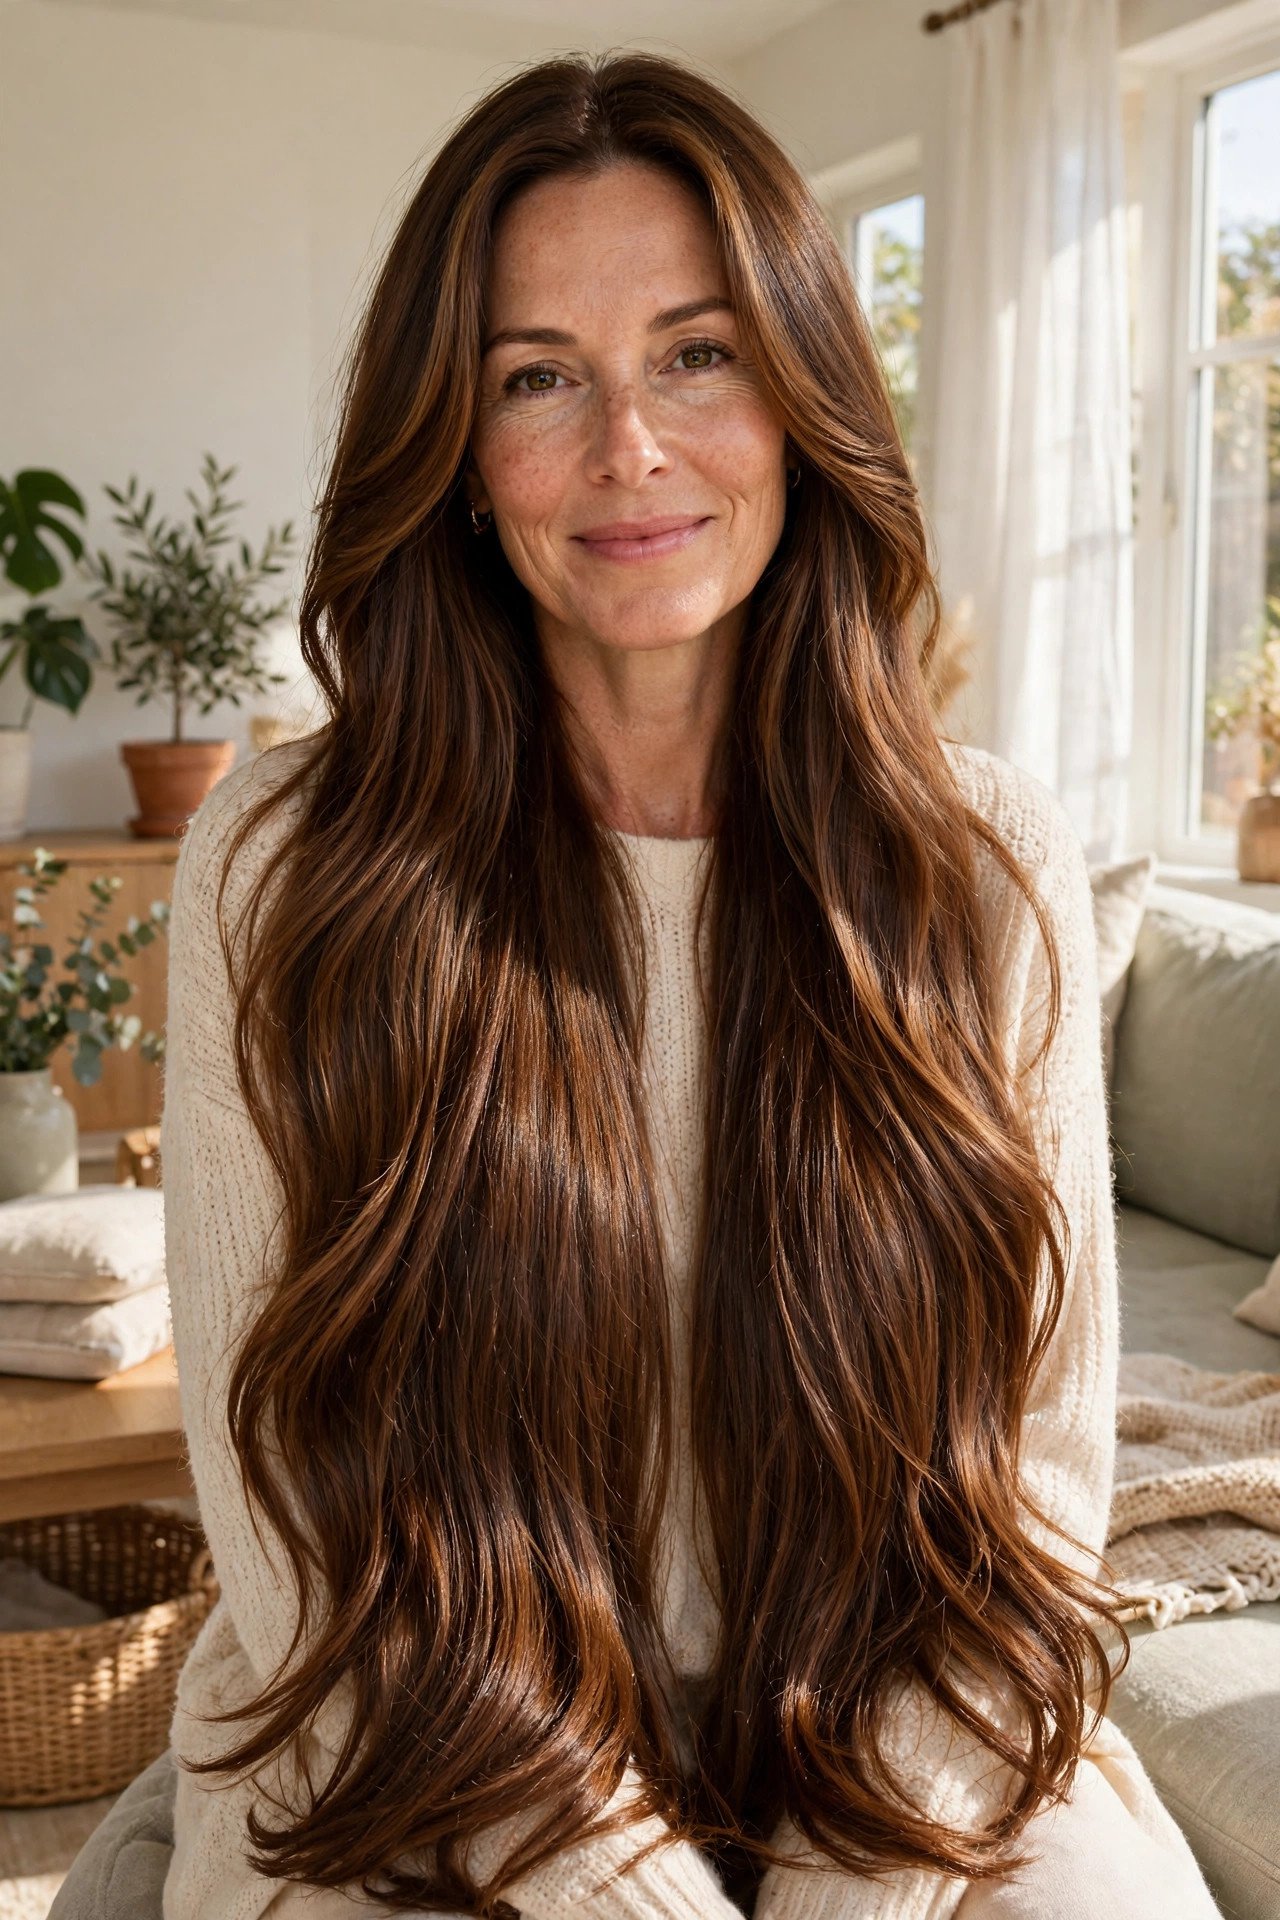
Feathered layers at the front change long hair more than any other single cut. The shortest pieces start around the cheekbones and melt into the length, so the hair moves when you do instead of hanging in two straight curtains.
Ask for:
- Layers that begin at cheekbone level, not at the chin
- Feathering through the front only, with the back left fuller
- Ends thinned lightly, never shredded
The back keeps its weight, which stops the cut looking stringy by week three. It suits straight, wavy, and lightly curly hair, and it grows out softly because no hard line forms to outgrow.
2. Soft Waves Past the Shoulders
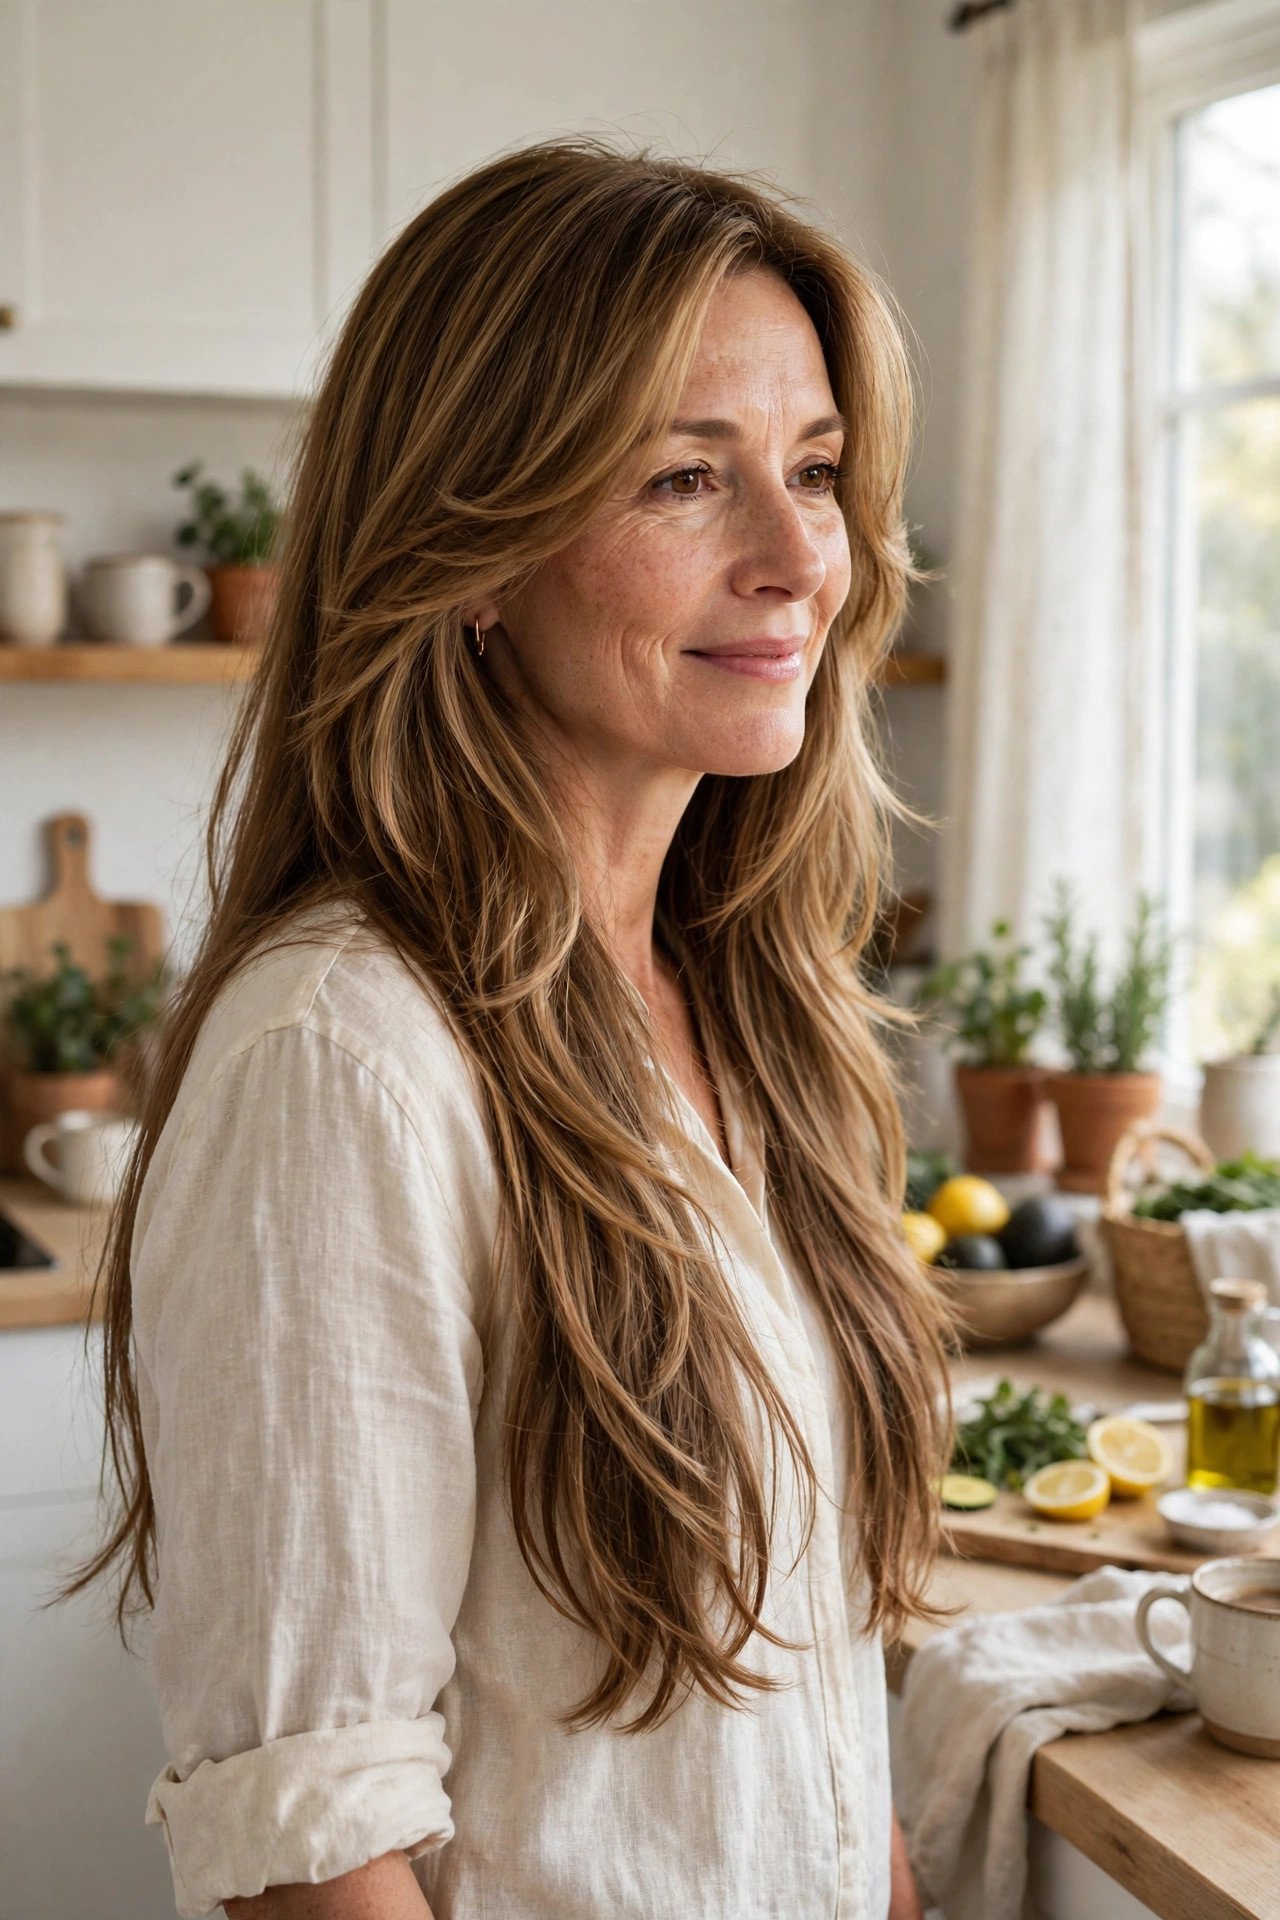
Soft waves forgive almost everything, including a rushed morning and hair that was washed yesterday.
On long hair, that ease reads modern far more than a stiff, sprayed finish. The trick is keeping the wave loose and a little uneven. Uniform curls can date long hair fast, while waves that start below the ears and vary in size look current.
- Braid damp hair overnight for heat free waves
- Or twist two low buns before bed and shake out in the morning
- Leave the last two inches out of any curling iron for a softer end
💡 Quick Tip
Brush waves out with your fingers, not a brush. A brush pulls the wave apart into frizz, while fingers keep the bends smooth and separated.
3. Sleek Straight With Face-Framing Pieces
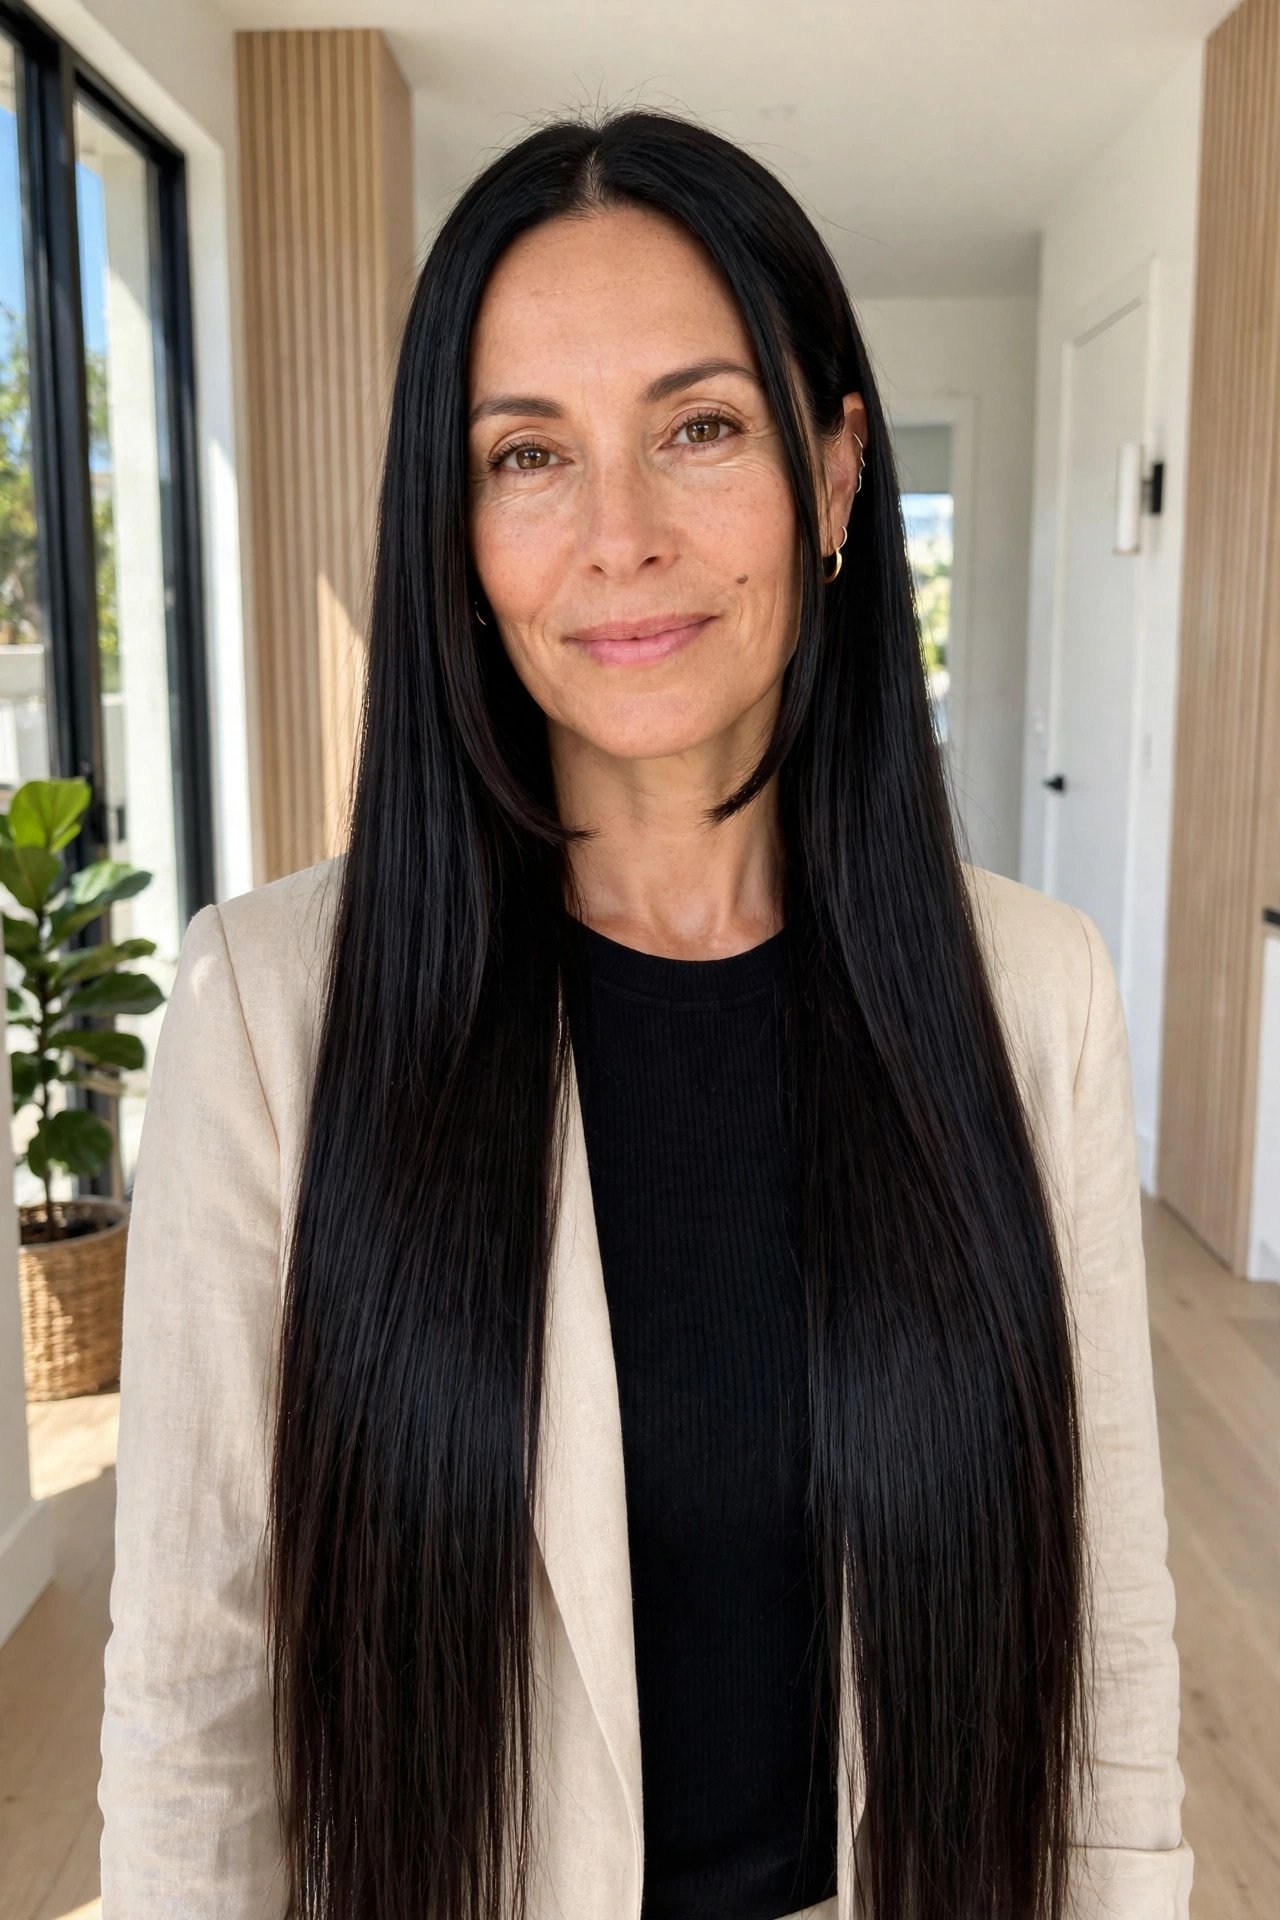
Look at the front first. Two shorter pieces, cut to skim the jaw, do all the work in this style. The rest of the hair stays long and straight, but those front pieces stop it reading flat or severe.
It works best on hair that is naturally straight or slightly wavy. Ask your stylist to cut the framing pieces dry, with your parting in its usual place, so the length lands exactly where you wear it. On fine hair, keep the pieces slim. On thick hair, they can carry a little more weight and still swing when you turn your head.
One style, two lengths, and the front does the talking.
4. The Modern Long Shag
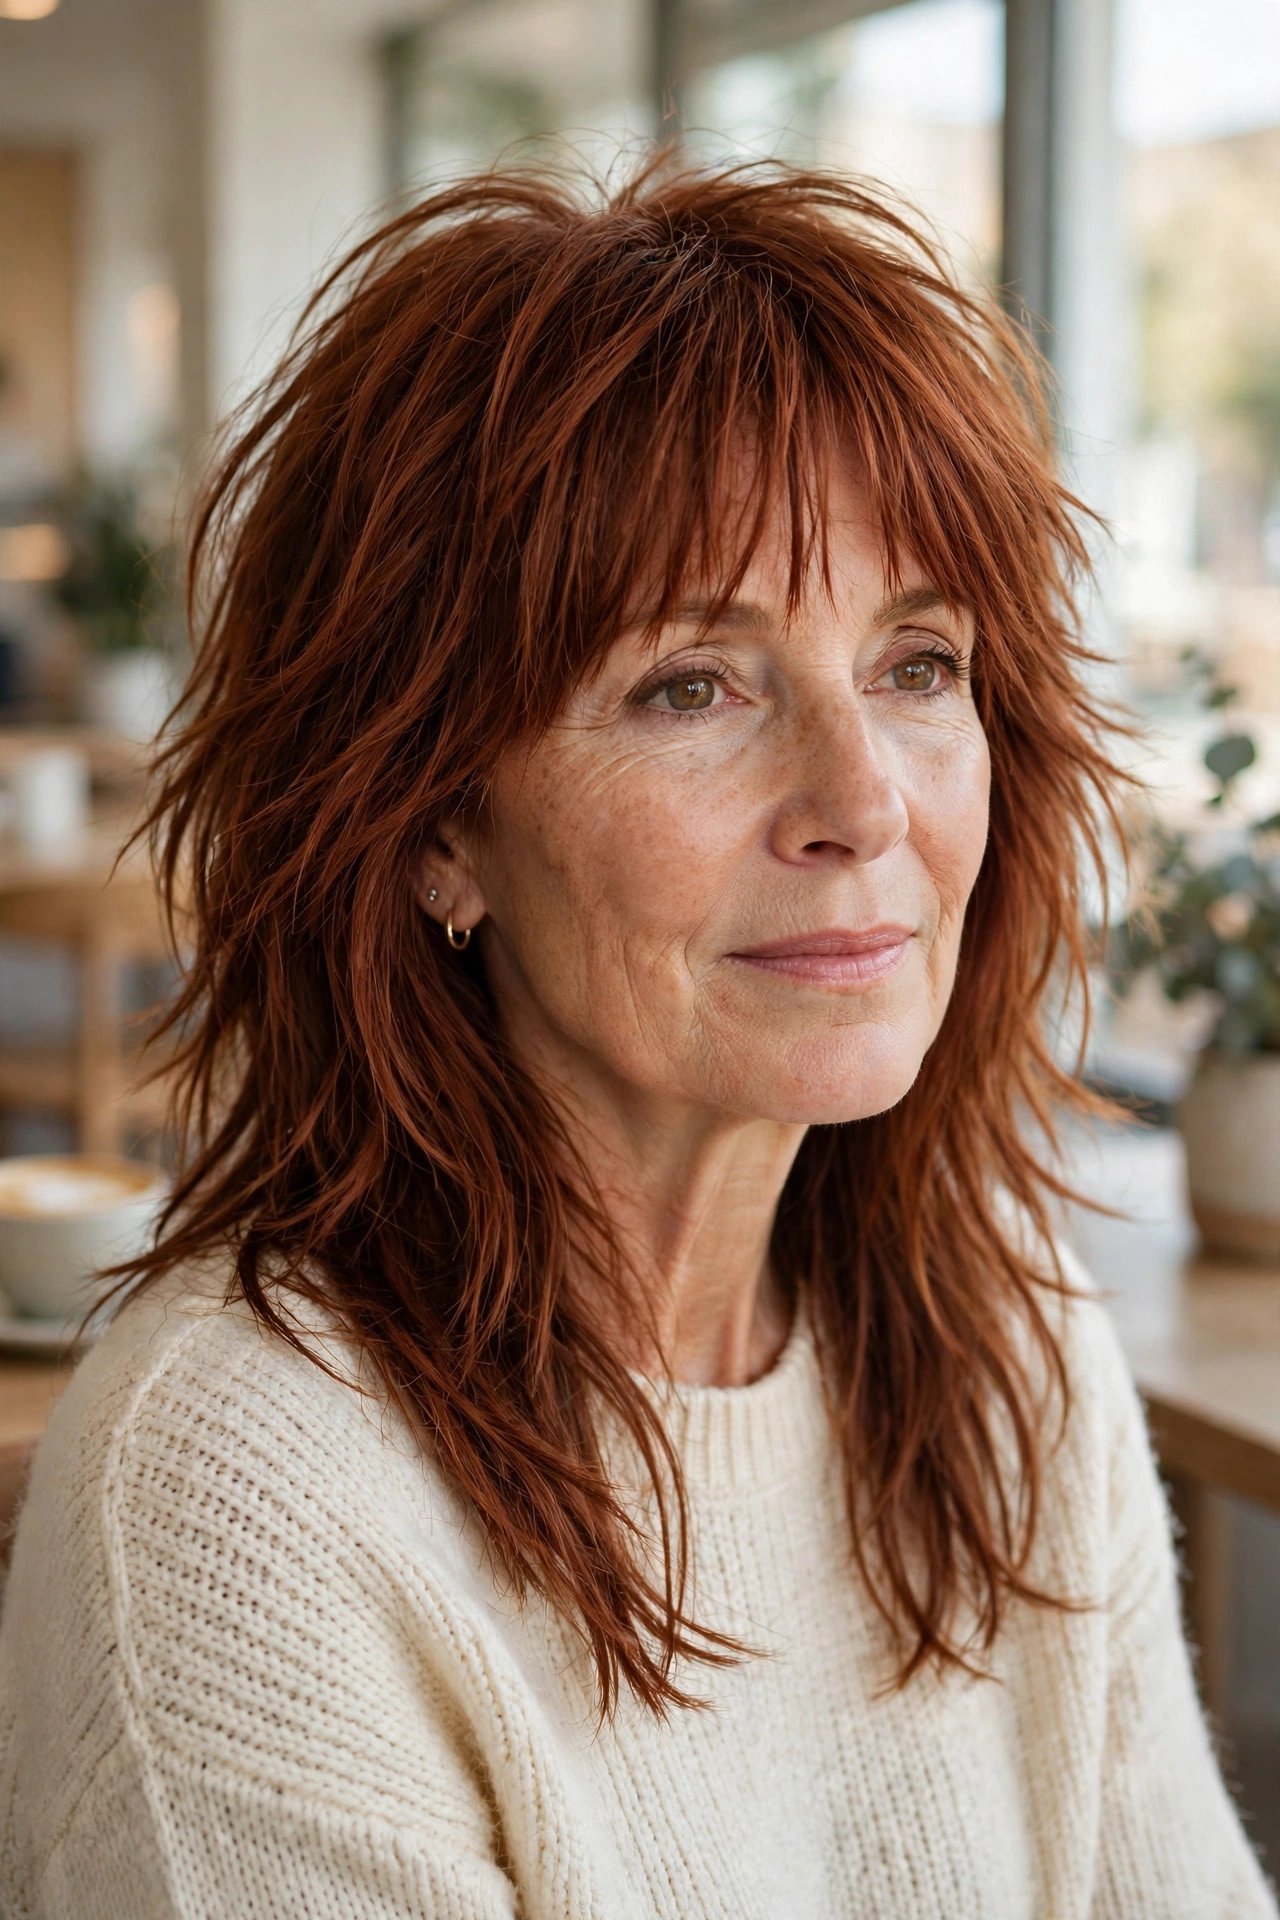
Plenty of women rule out the shag because they remember the 1970s version, all frizz and feathering. The modern long shag is a different cut. Layers sit through the top and mid lengths, ends stay soft, and the fringe is wispy rather than blunt.
What to ask for at the salon:
- Layers starting higher at the crown for lift
- Choppy, point cut ends instead of a straight hem
- A wispy fringe or curtain front, nothing heavy
- Your natural texture left in, not blow dried out of the picture
It is the strongest option here for fine or flat hair, because the layers build volume that styling alone cannot fake.
Before you book
5. Deep Side Part With Lifted Roots
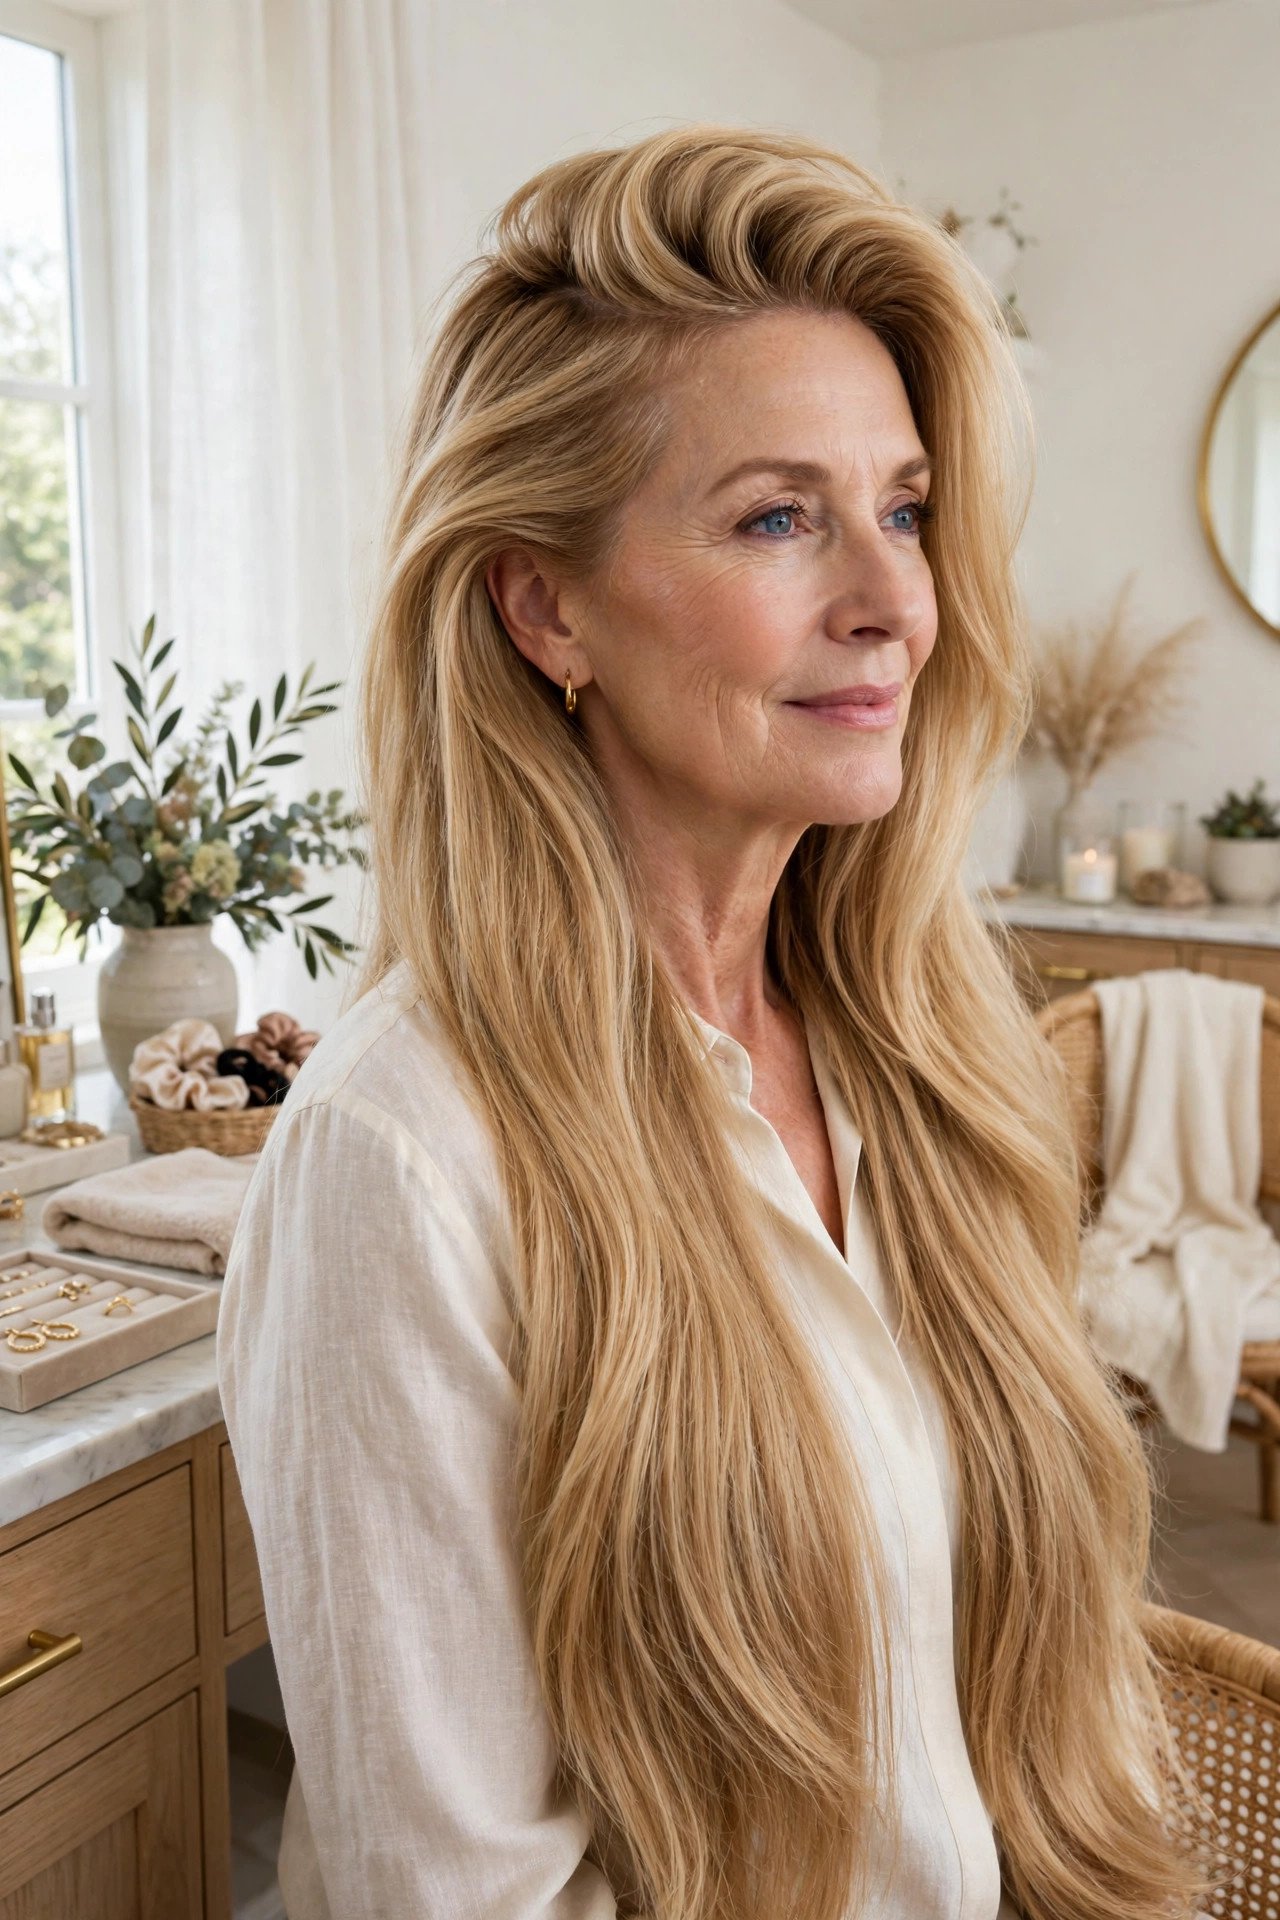
One rule: if your parting has sat in the same place for years, move it. A deep side part is the fastest change on this whole list, and it costs nothing.
Flip your parting to the opposite side and the roots stand up on their own, because the hair has been trained flat in the other direction. The sweep across the forehead also softens the hairline and adds width at the top, which balances long lengths below. It holds best on freshly washed hair. On day two, a little dry shampoo at the new parting line keeps the lift from dropping by lunch.
A new parting lifts roots for free. Flip it before you spend money on volume products.
6. Curtain Bangs With Long Glossy Lengths
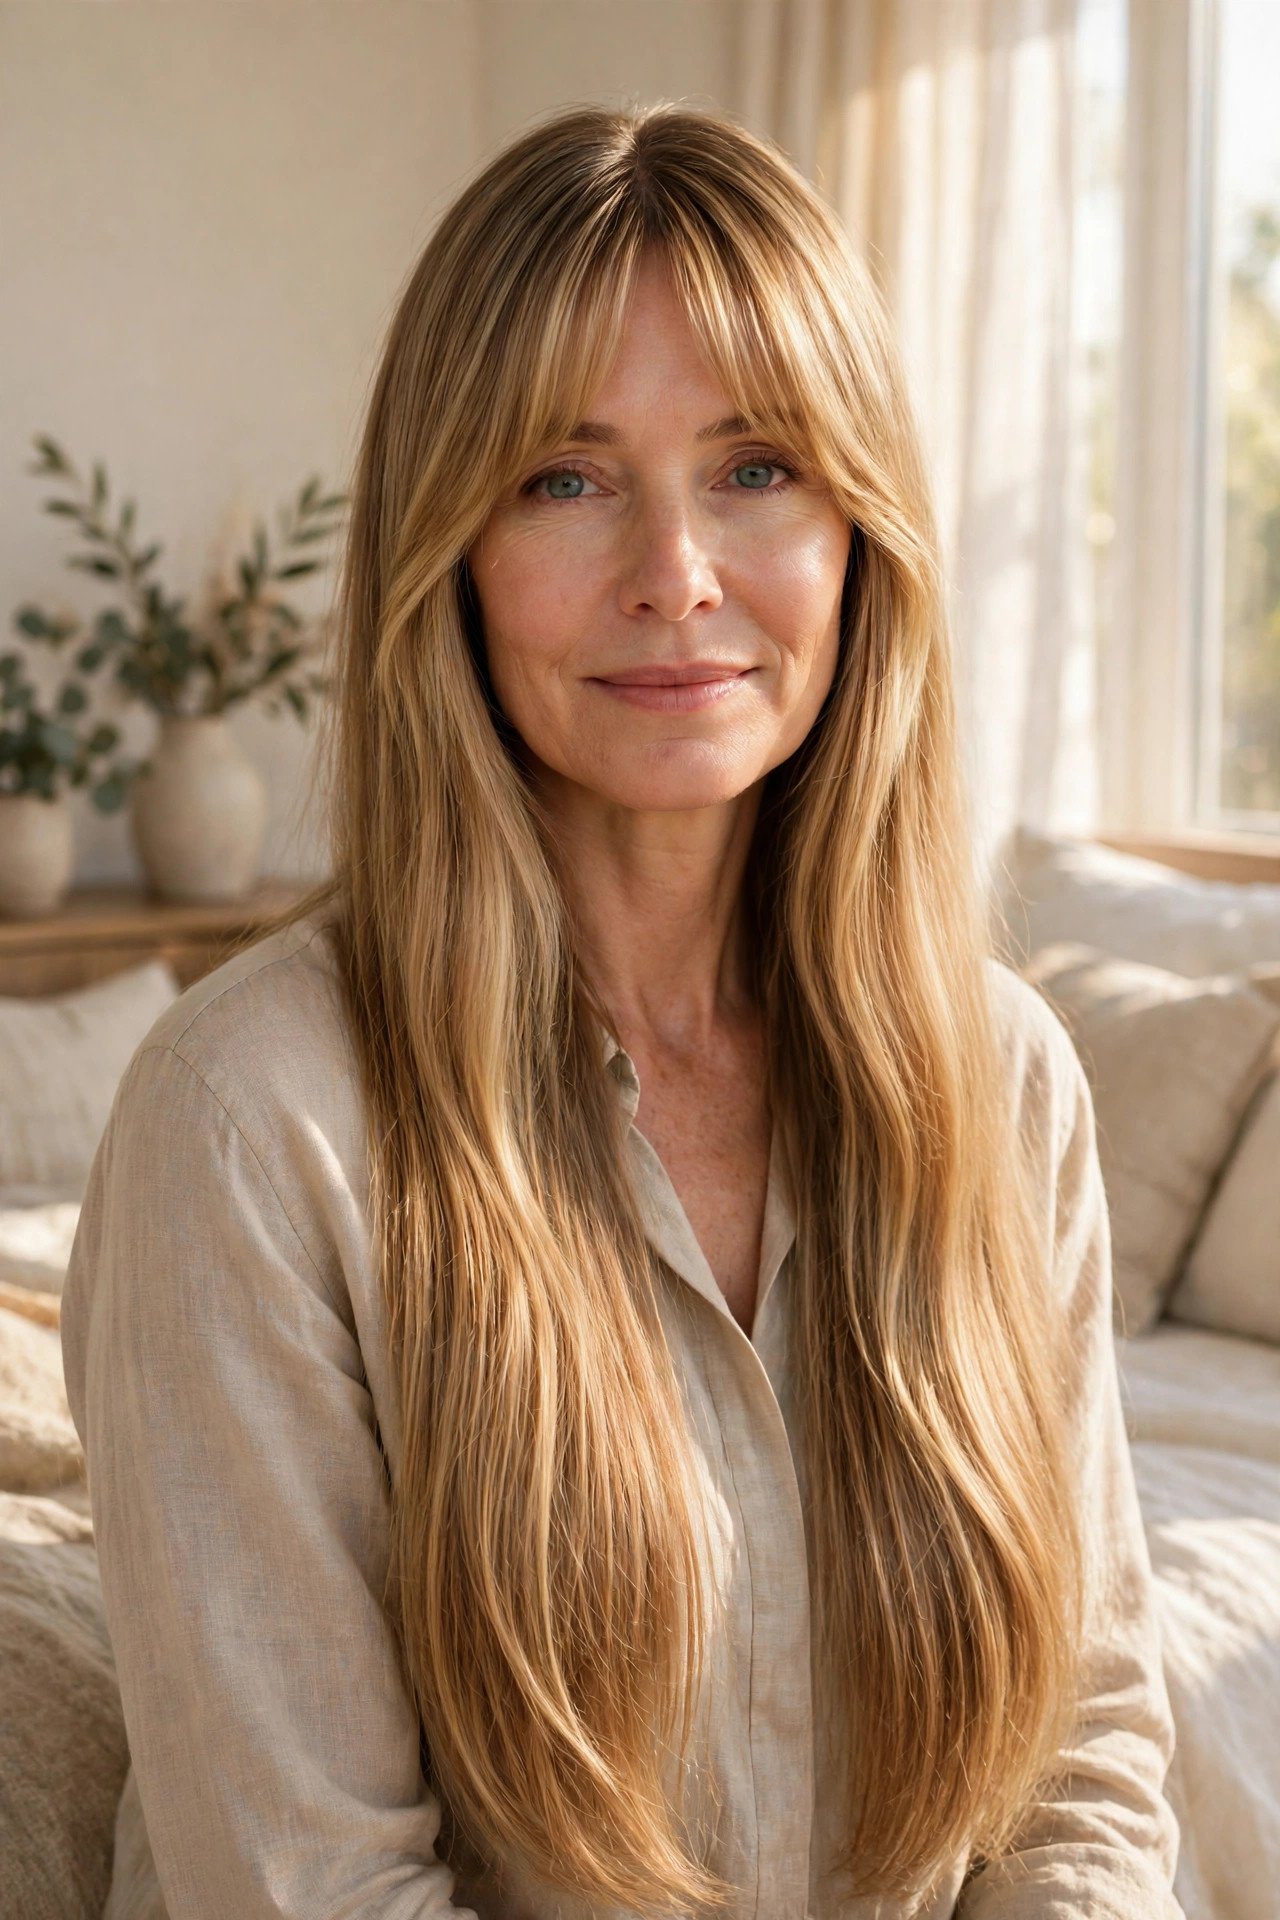
Full fringes can feel like a lot after 40. They need trims every few weeks, they misbehave in humidity, and they can close the face down. Curtain bangs split the difference. They part in the middle, sweep to both sides, and blend into long lengths, so you get softness at the front with none of the upkeep of a blunt fringe.
Style them in three moves:
- Blow dry the fringe forward first, while the rest of the hair is still damp
- Then sweep each side away from the face with a round brush
- Let the lengths fall glossy and loose, with the ends polished last
📌 Good To Know
Curtain bangs grow out into face framing layers. A fringe you go off in spring becomes the blended style in section 17 by autumn, with no awkward stage in between.
7. Half-Up Twist With Loose Waves
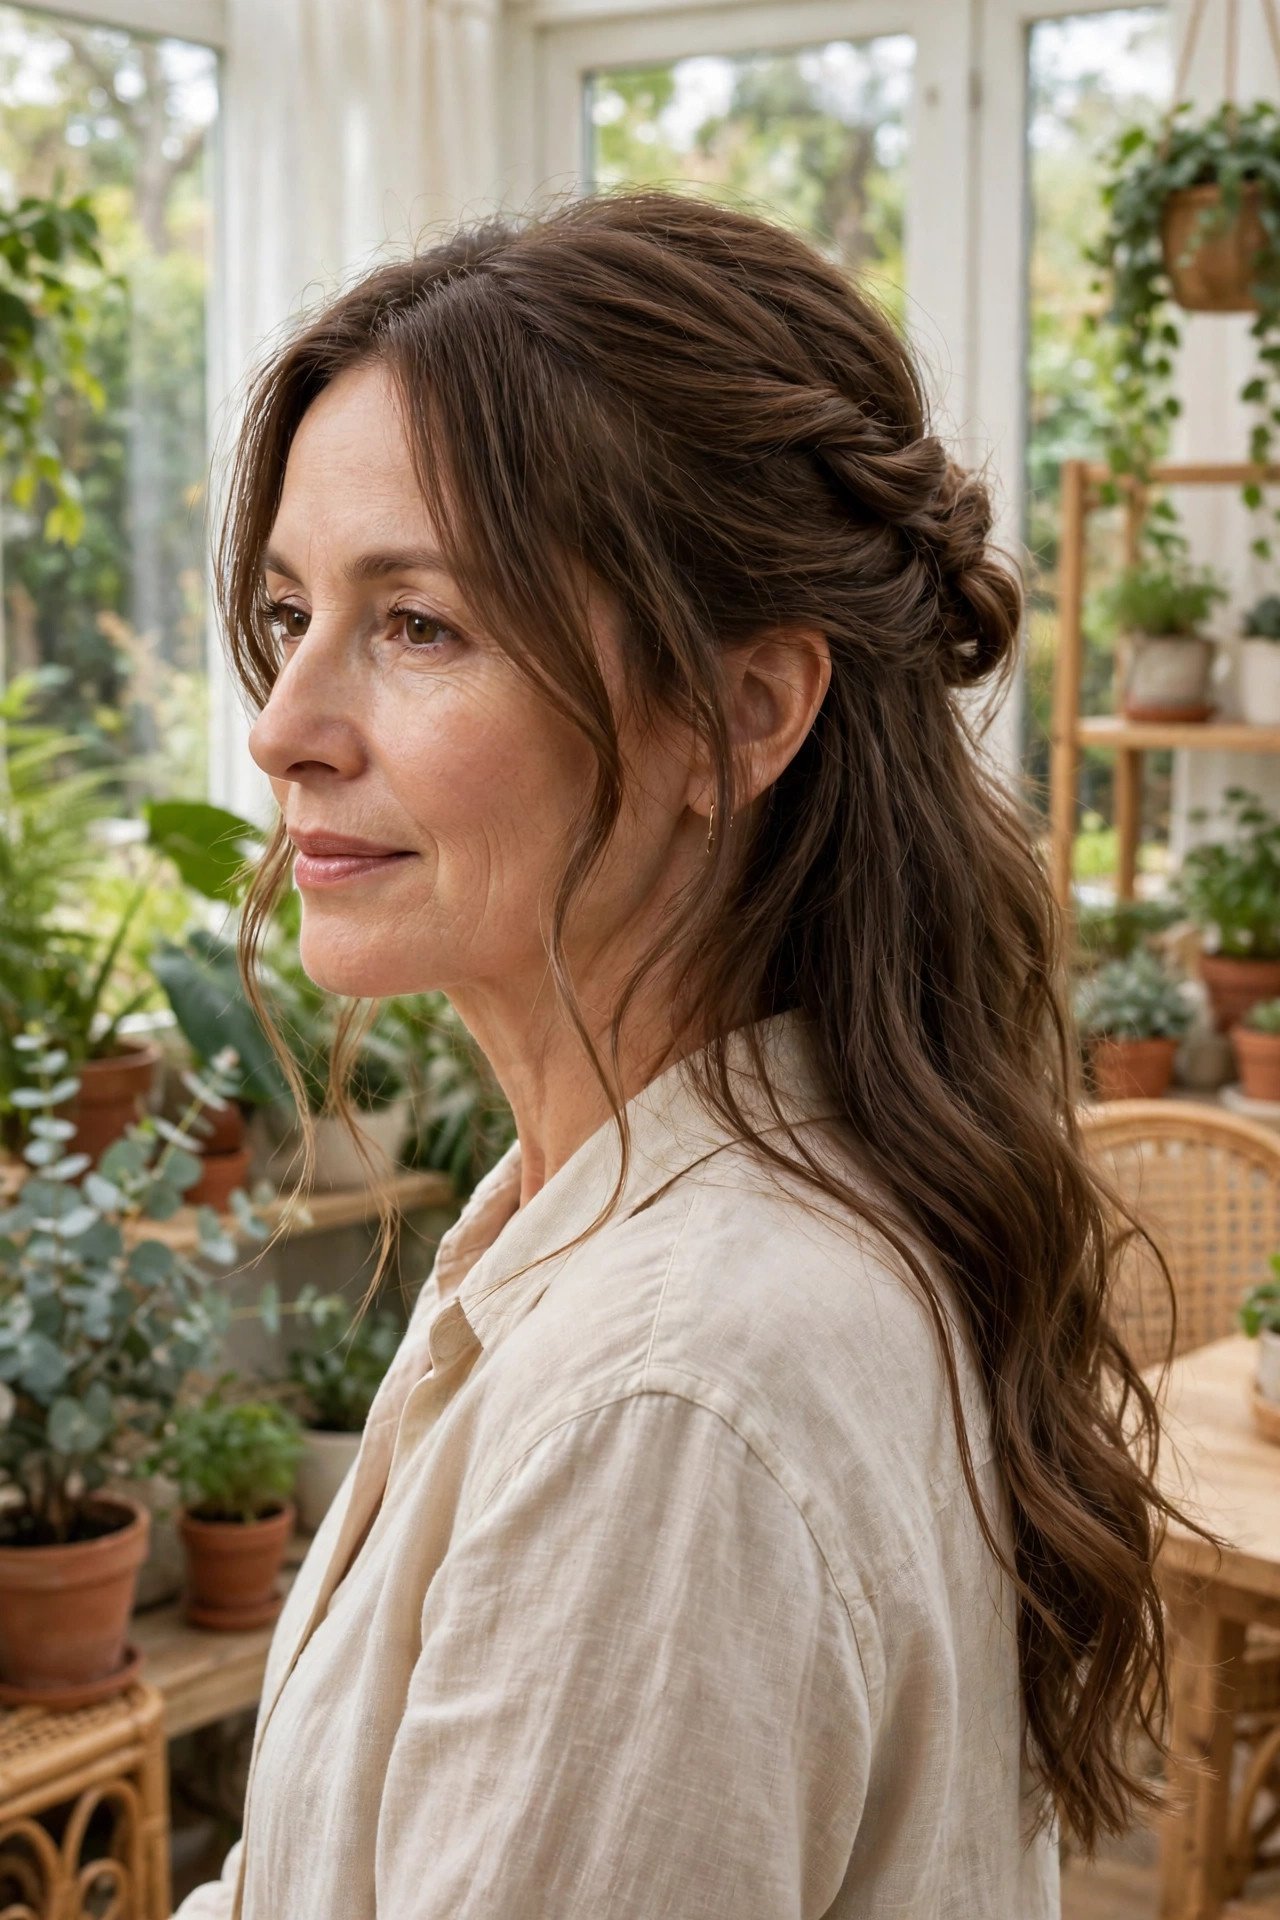
Take the top section of hair, from temple to temple, twist it loosely at the back, and pin it. That is the whole style. The twist lifts the front away from your face while the rest of your length stays down and wavy, so you get the polish of an updo without giving up the long hair you grew.
Keep the twist soft, not tight. A tight twist pulls the front flat and reads formal, while a loose one with a few strands left out around the face looks current. It works for lunches, weddings, and the days when your roots need washing but your ends still look good.
Hair worn down and flat at the front, falling into the face by midday and hiding the length in a curtain.
Top section twisted and pinned, face clear, and the full length still down in loose waves behind.
8. The Polished Low Ponytail

Most ponytails fail at the crown, not the tail. The tail can be long and glossy, but if the top looks scraped back, the whole style reads rushed. The polished version keeps a little height at the crown and a smooth, low tail that sits at the nape.
Small details carry it:
- A soft centre or side part, never pulled straight back
- Hair smoothed over the ears, not tucked behind them
- A strand wrapped around the band to hide it
- The tail brushed through so it falls as one piece
Worn this way, a ponytail holds its own next to any blowout on this list.
- ▸Pairs well with a collared shirt, a blazer, or a plain knit, since the line of the style is clean.
- ▸Sleek straight lengths or softly waved ends both work, so use whichever your hair wants to do.
- ▸A low tail sits clear of coat collars and scarves, which keeps the ends from tangling in winter.
9. Loose Side Braid Over One Shoulder
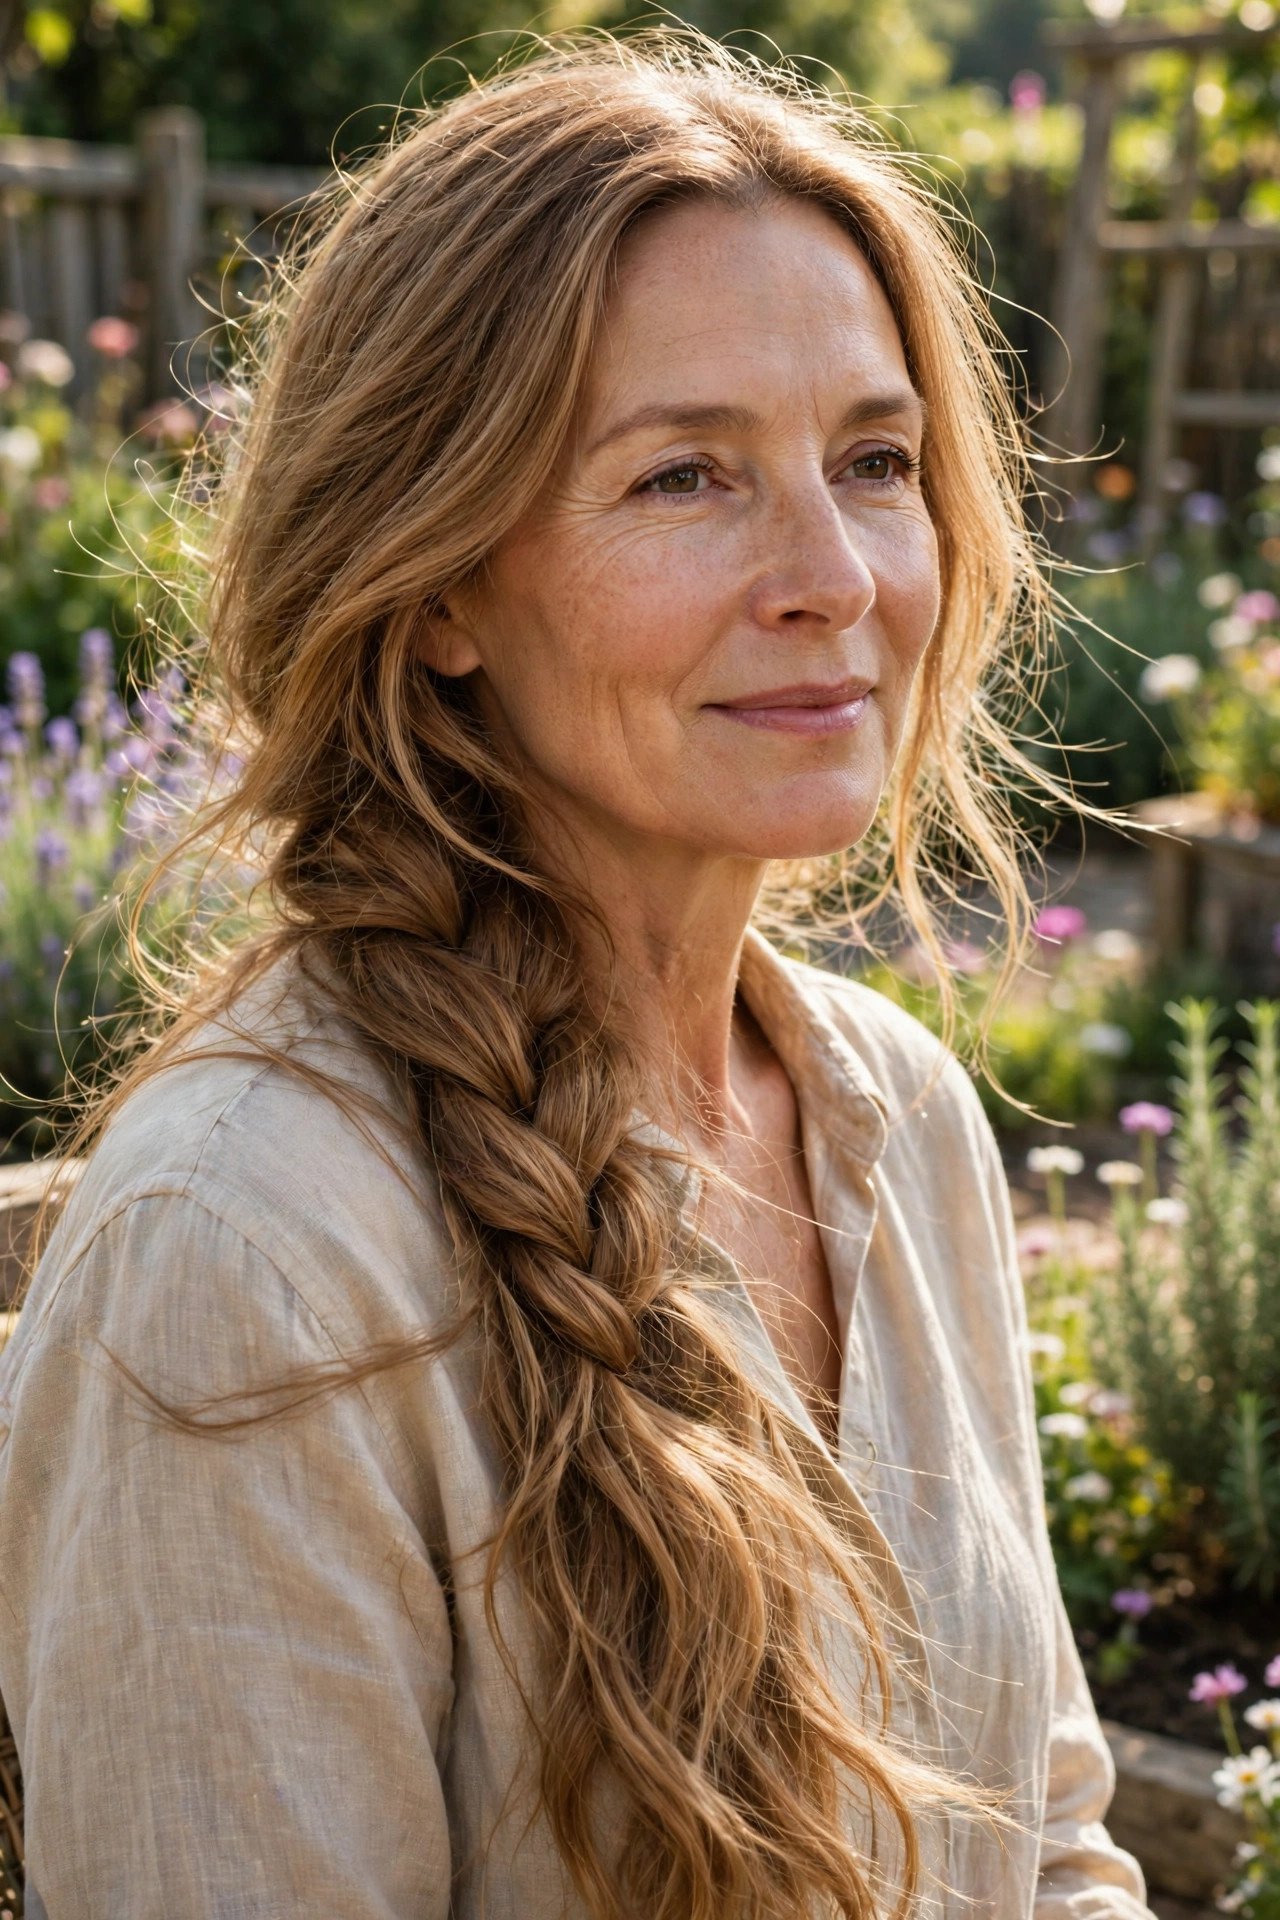
A side braid shows off length better than almost anything else you can do with long hair. All of it sits over one shoulder where people can actually see it, and the braid keeps it tidy through wind, scarves, and long days.
Start the braid low, behind the ear, and keep your fingers loose as you work down. A braid that is pulled tight looks severe and shows every thin spot. Once it is secured, tug the edges of each section gently outward. That one move doubles the width of the braid and makes fine hair look twice as thick.
Start low behind the ear so the braid drapes softly over the shoulder.
Pancake the edges of each section to widen the braid once it is tied off.
Braiding tight from the crown, which reads harsh and shows thin spots.
A stiff, sprayed finish that stops the braid moving at all.
10. Bouncy Blowout Layers
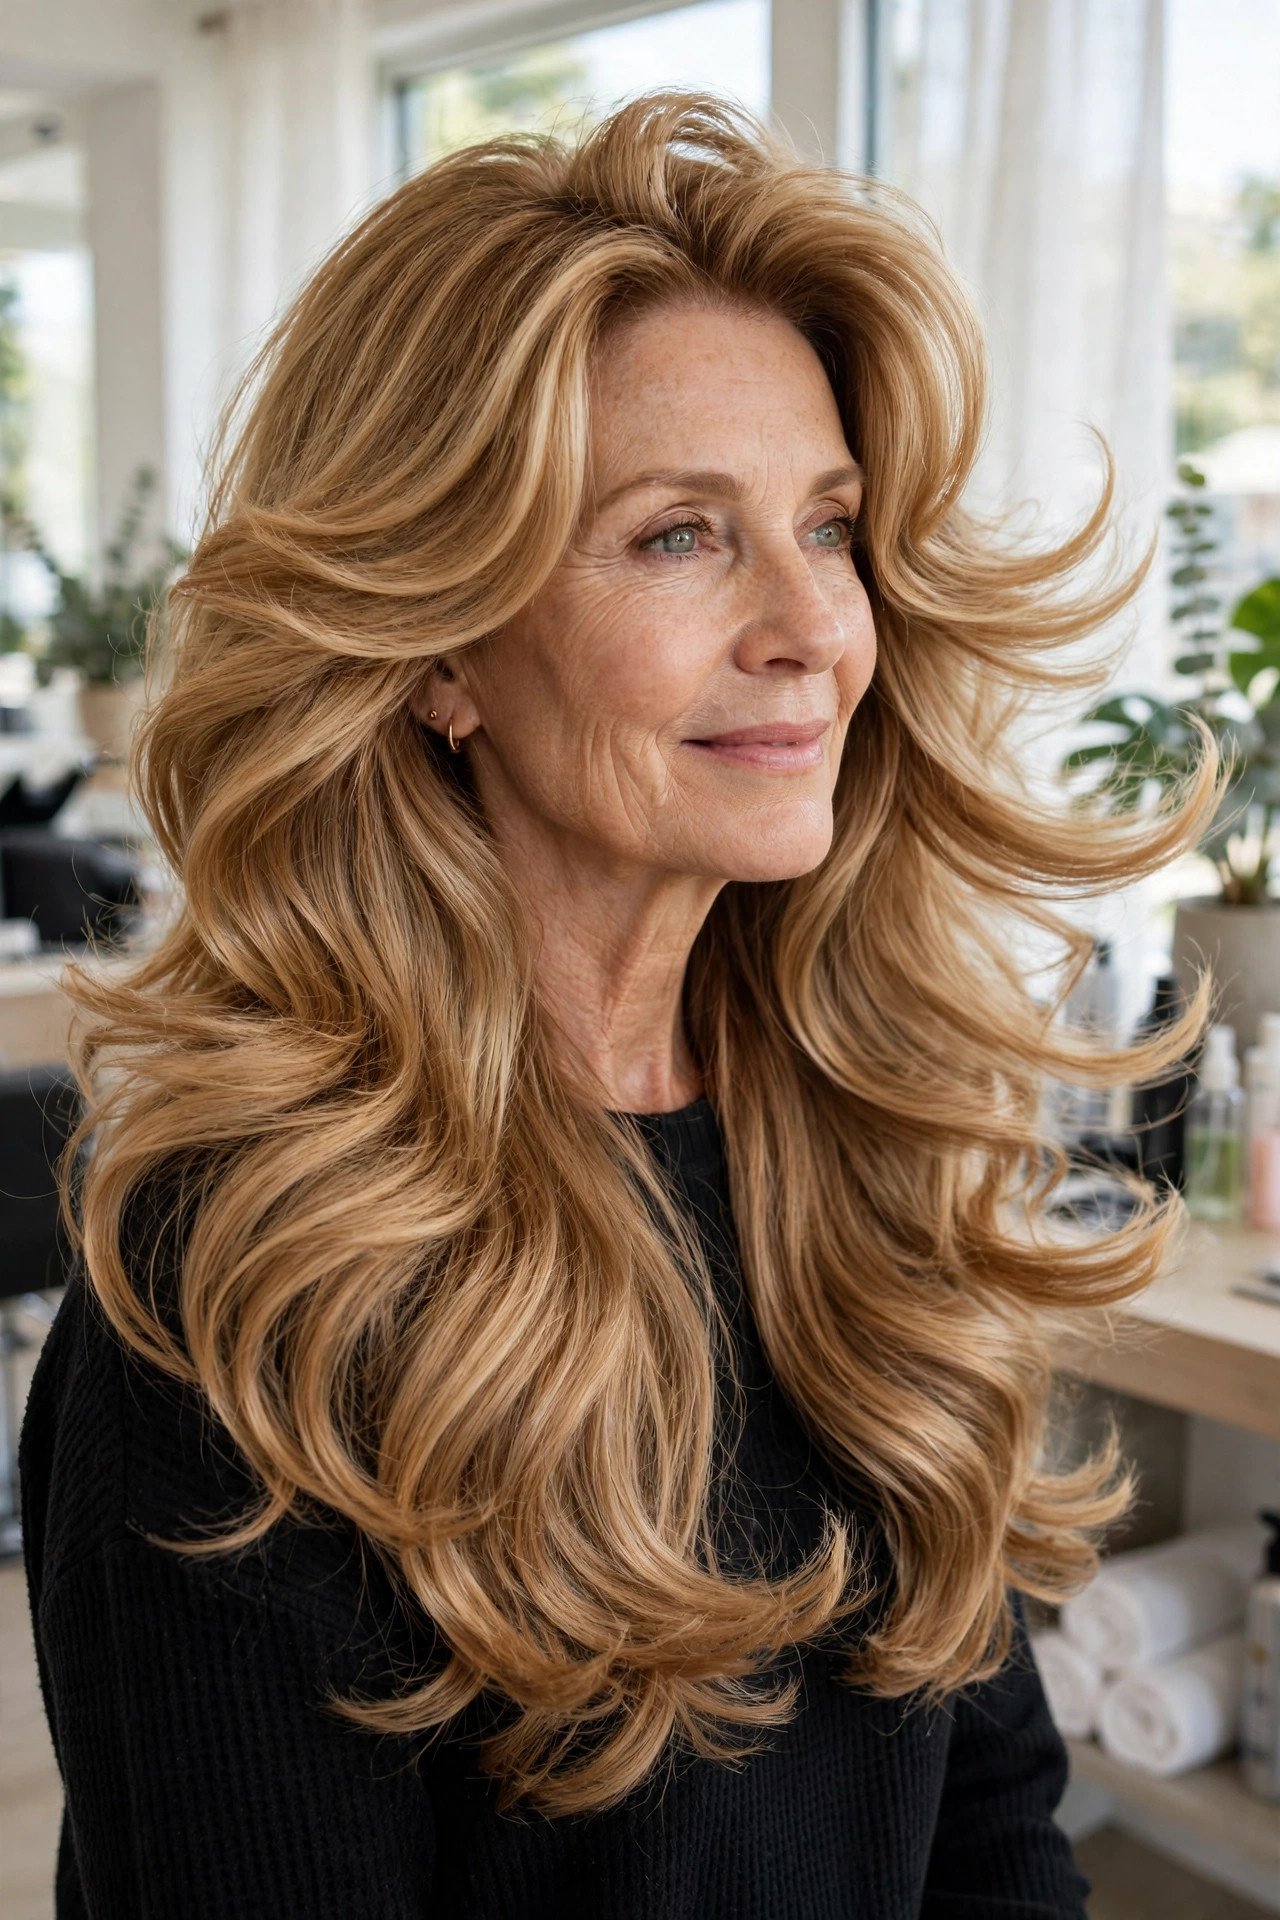
The mistake is blow drying long layers straight down. It feels like the safe option, and it leaves the hair flat at the roots with a flick at the ends, which is exactly the tired look most women are trying to leave behind.
A bouncy blowout dries the hair away from the face and lifts it at the root. Work in sections, roll the brush under at the ends, and let each section cool before you touch it. The layers do the rest. They are cut to stack and spring, so the movement lasts well into the next day with nothing more than a shake and a flip.
⚠️ Watch Out
Heat on the highest setting every day will thin long ends faster than anything else. Drop one heat level and let the cool shot set each section instead.
11. Wispy Fringe With Long Flowing Hair
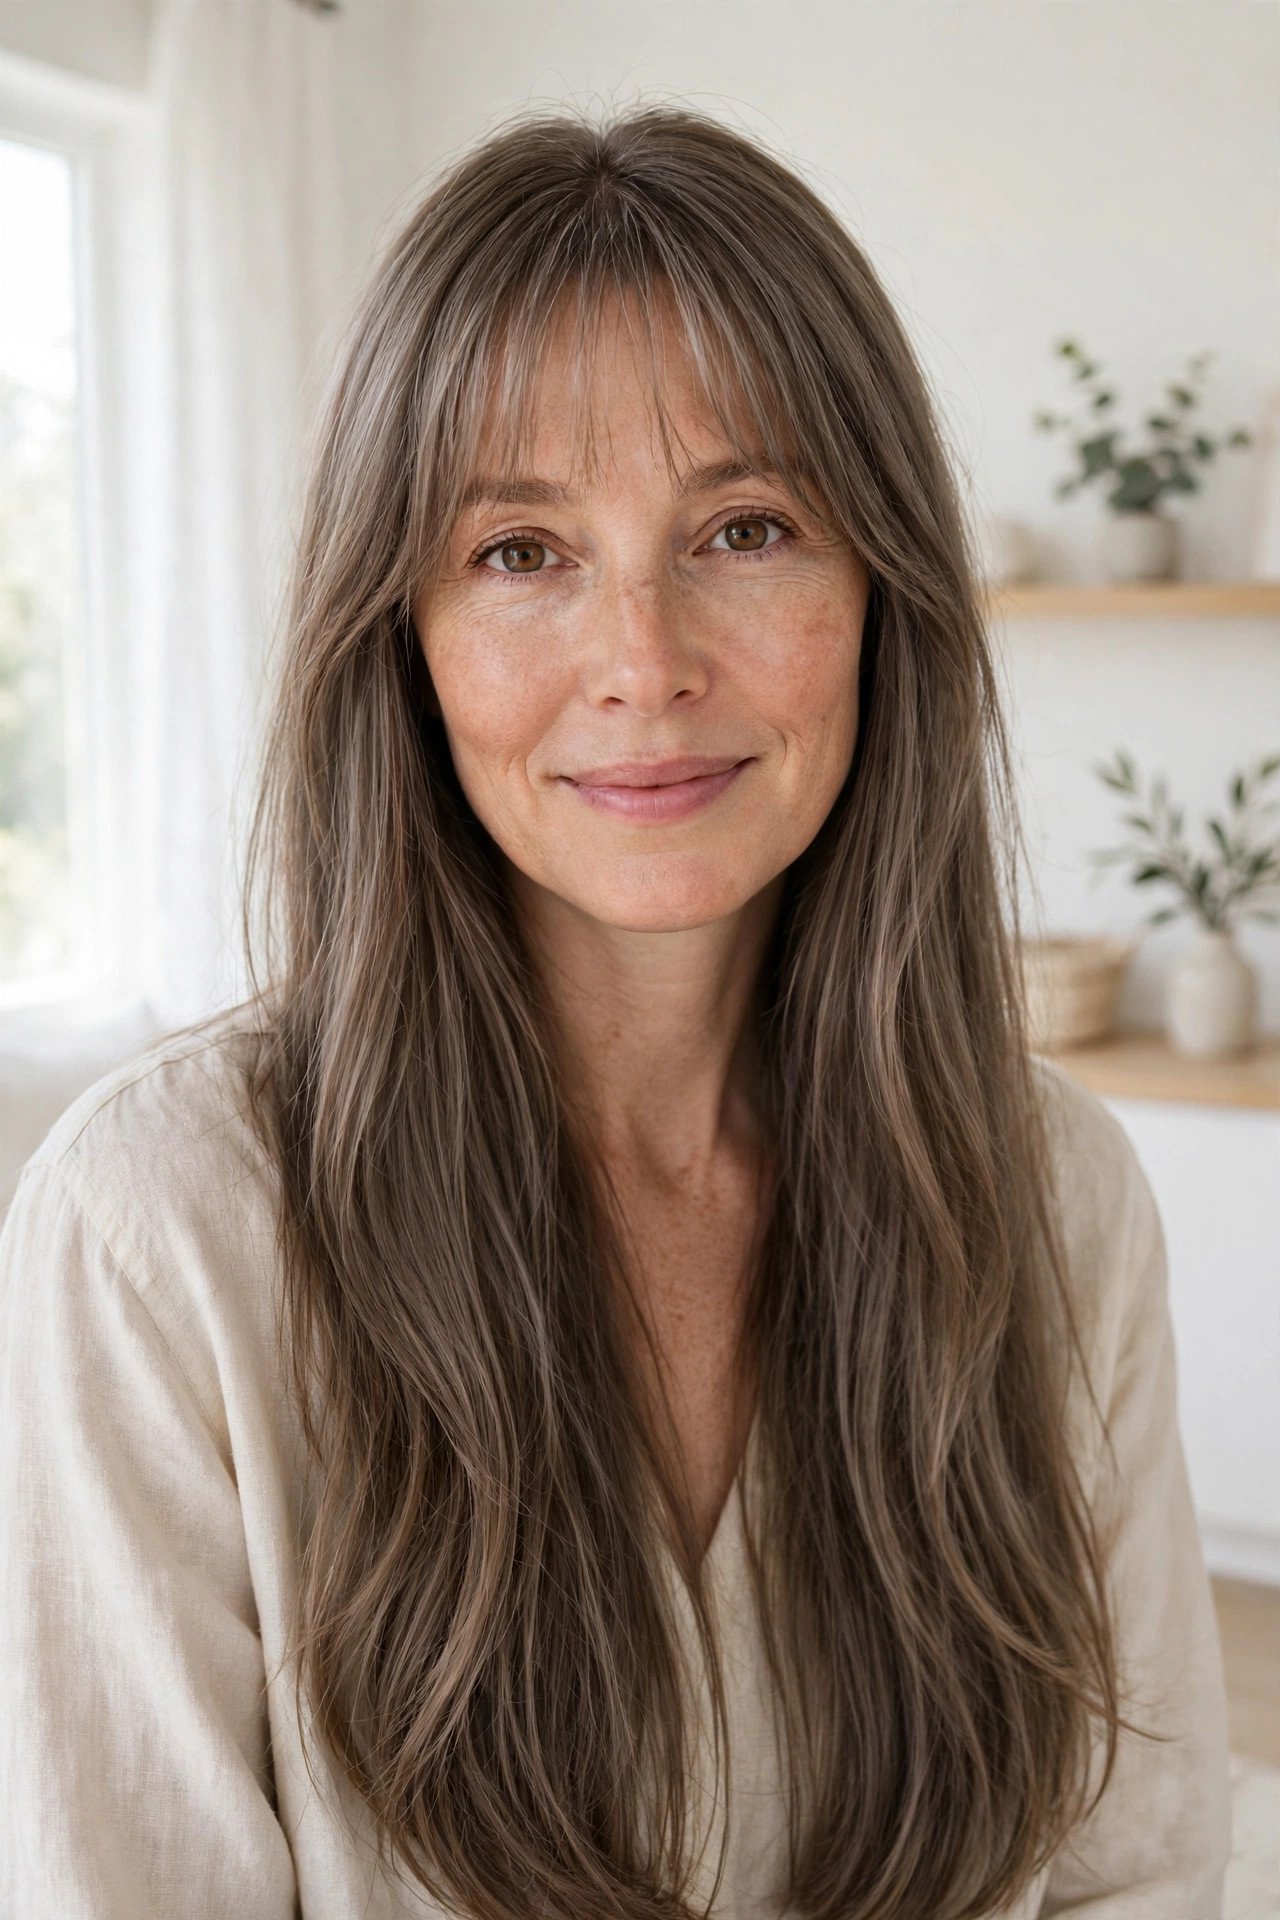
A full fringe is a commitment. A wispy fringe is a trial run. The strands are cut fine and see through, so your forehead still shows and the effect is soft rather than solid. Paired with long flowing lengths, it takes the weight off the front of the style without changing the length at all.
It suits women who are fringe curious but not fringe certain. The upkeep is gentle, a trim every four to six weeks, and if you change your mind it blends back into the front layers within a couple of months. Grow out pain, minimal. Style change, real.
12. Centre Part With a Smooth Glass Finish
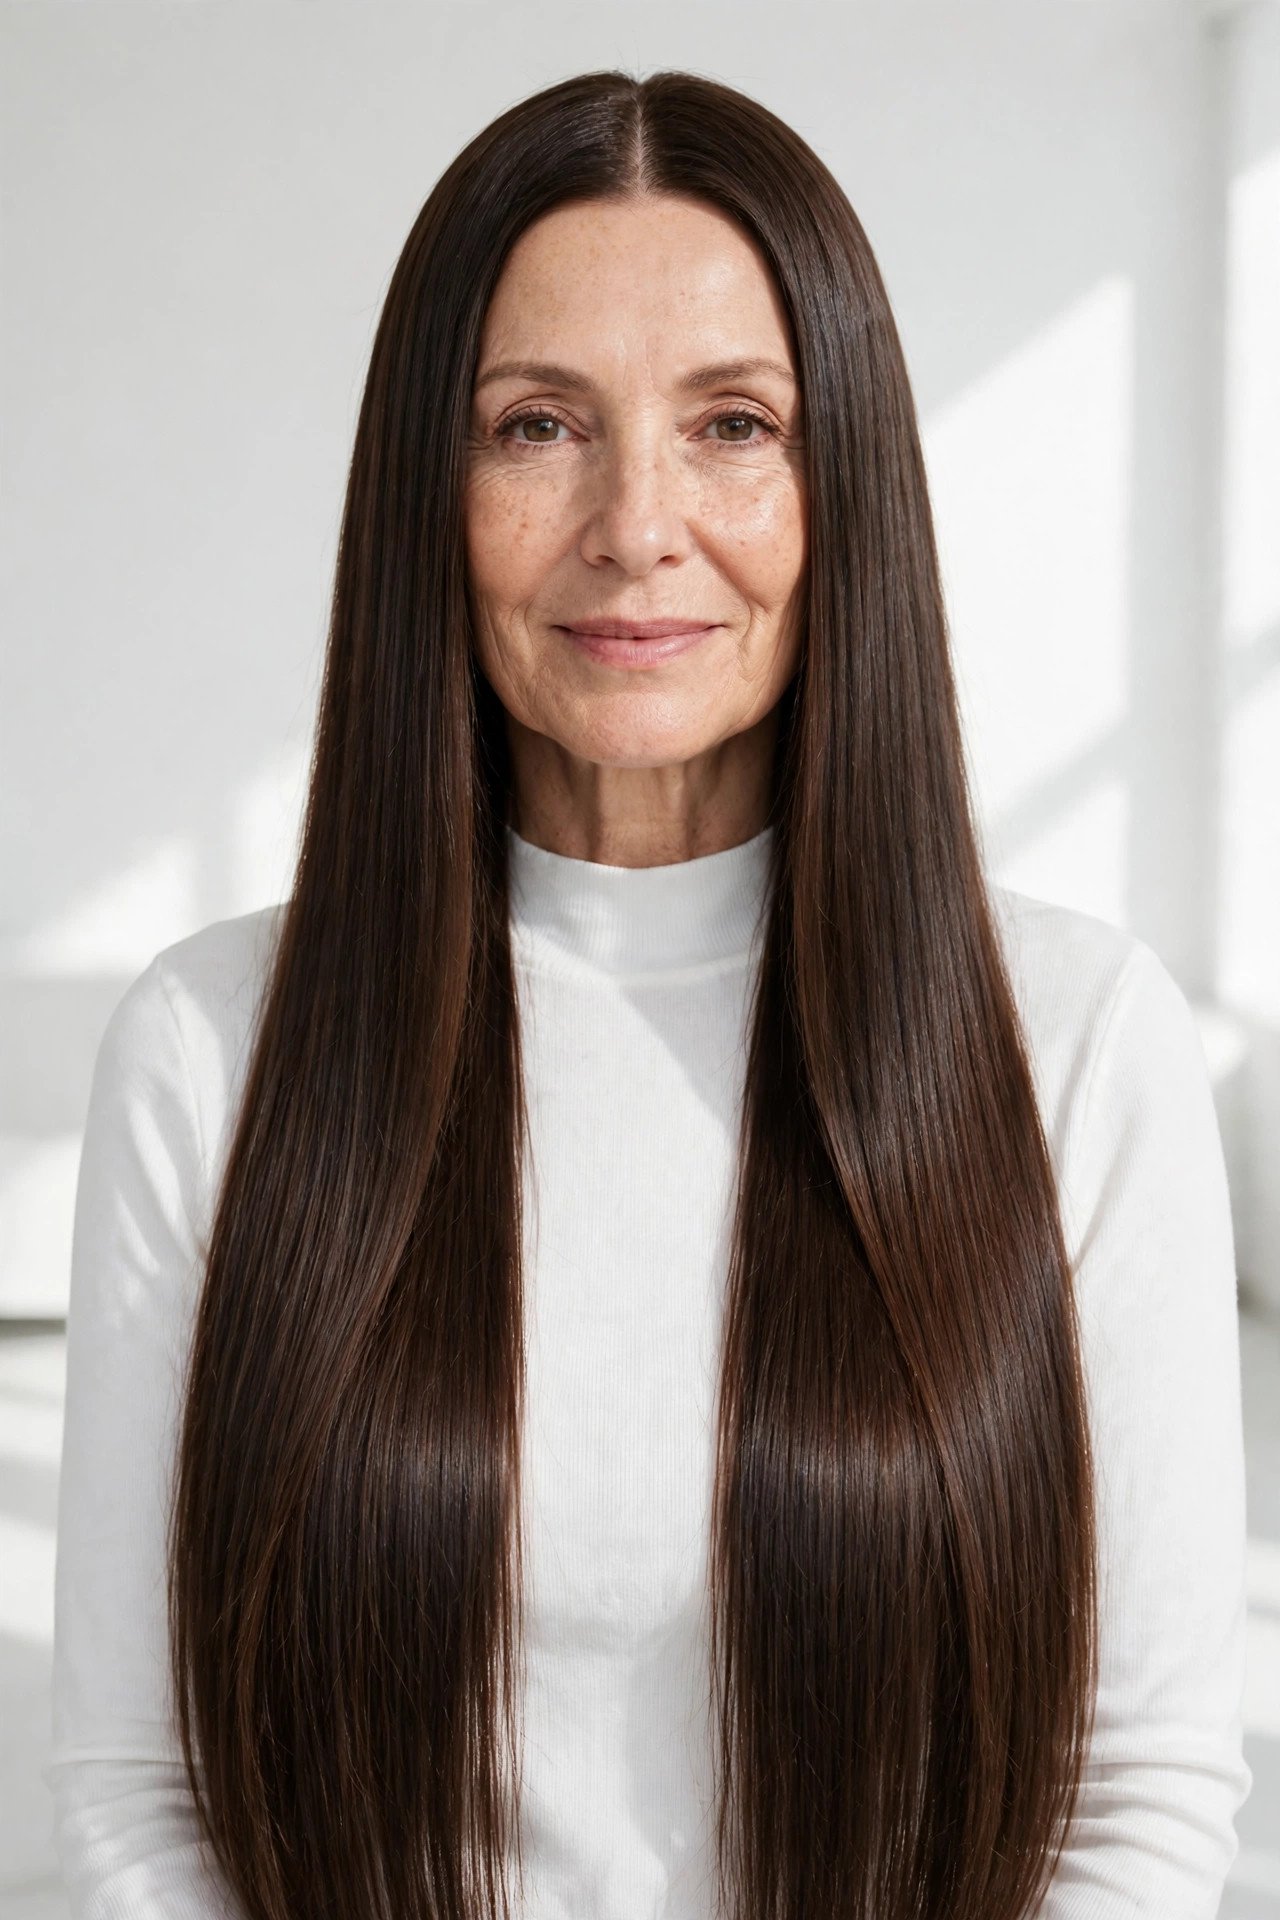
Shine is the whole point here. Hair parted in the centre and smoothed until it reflects light looks expensive in the plainest clothes, and the symmetry of a centre part gives long hair a deliberate, styled feel at the grocery store.
Two routes get you there, and they suit different hair types. Fine hair does better with the blow dry route, since irons can leave it limp by evening. Thick or wavy hair often needs the iron to get a sealed finish. The last pass matters most. Cool air or a cool plate locks the surface down and keeps the shine from turning to frizz later.
Finish with:
- A cool final pass over the whole length
- Hands off once it is smooth, since touching breaks the seal
| Blow dry smooth | Flat iron finish |
|---|---|
| Best for fine to medium hair that goes limp easily. | Best for thick or wavy hair that needs sealing. |
| Lift at the root stays in, with a softer surface. | Sleeker and flatter at the root, with the strongest shine. |
| Lasts the day, then softens by evening. | Lasts two days with care and a silk pillowcase. |
13. Defined Mermaid Waves
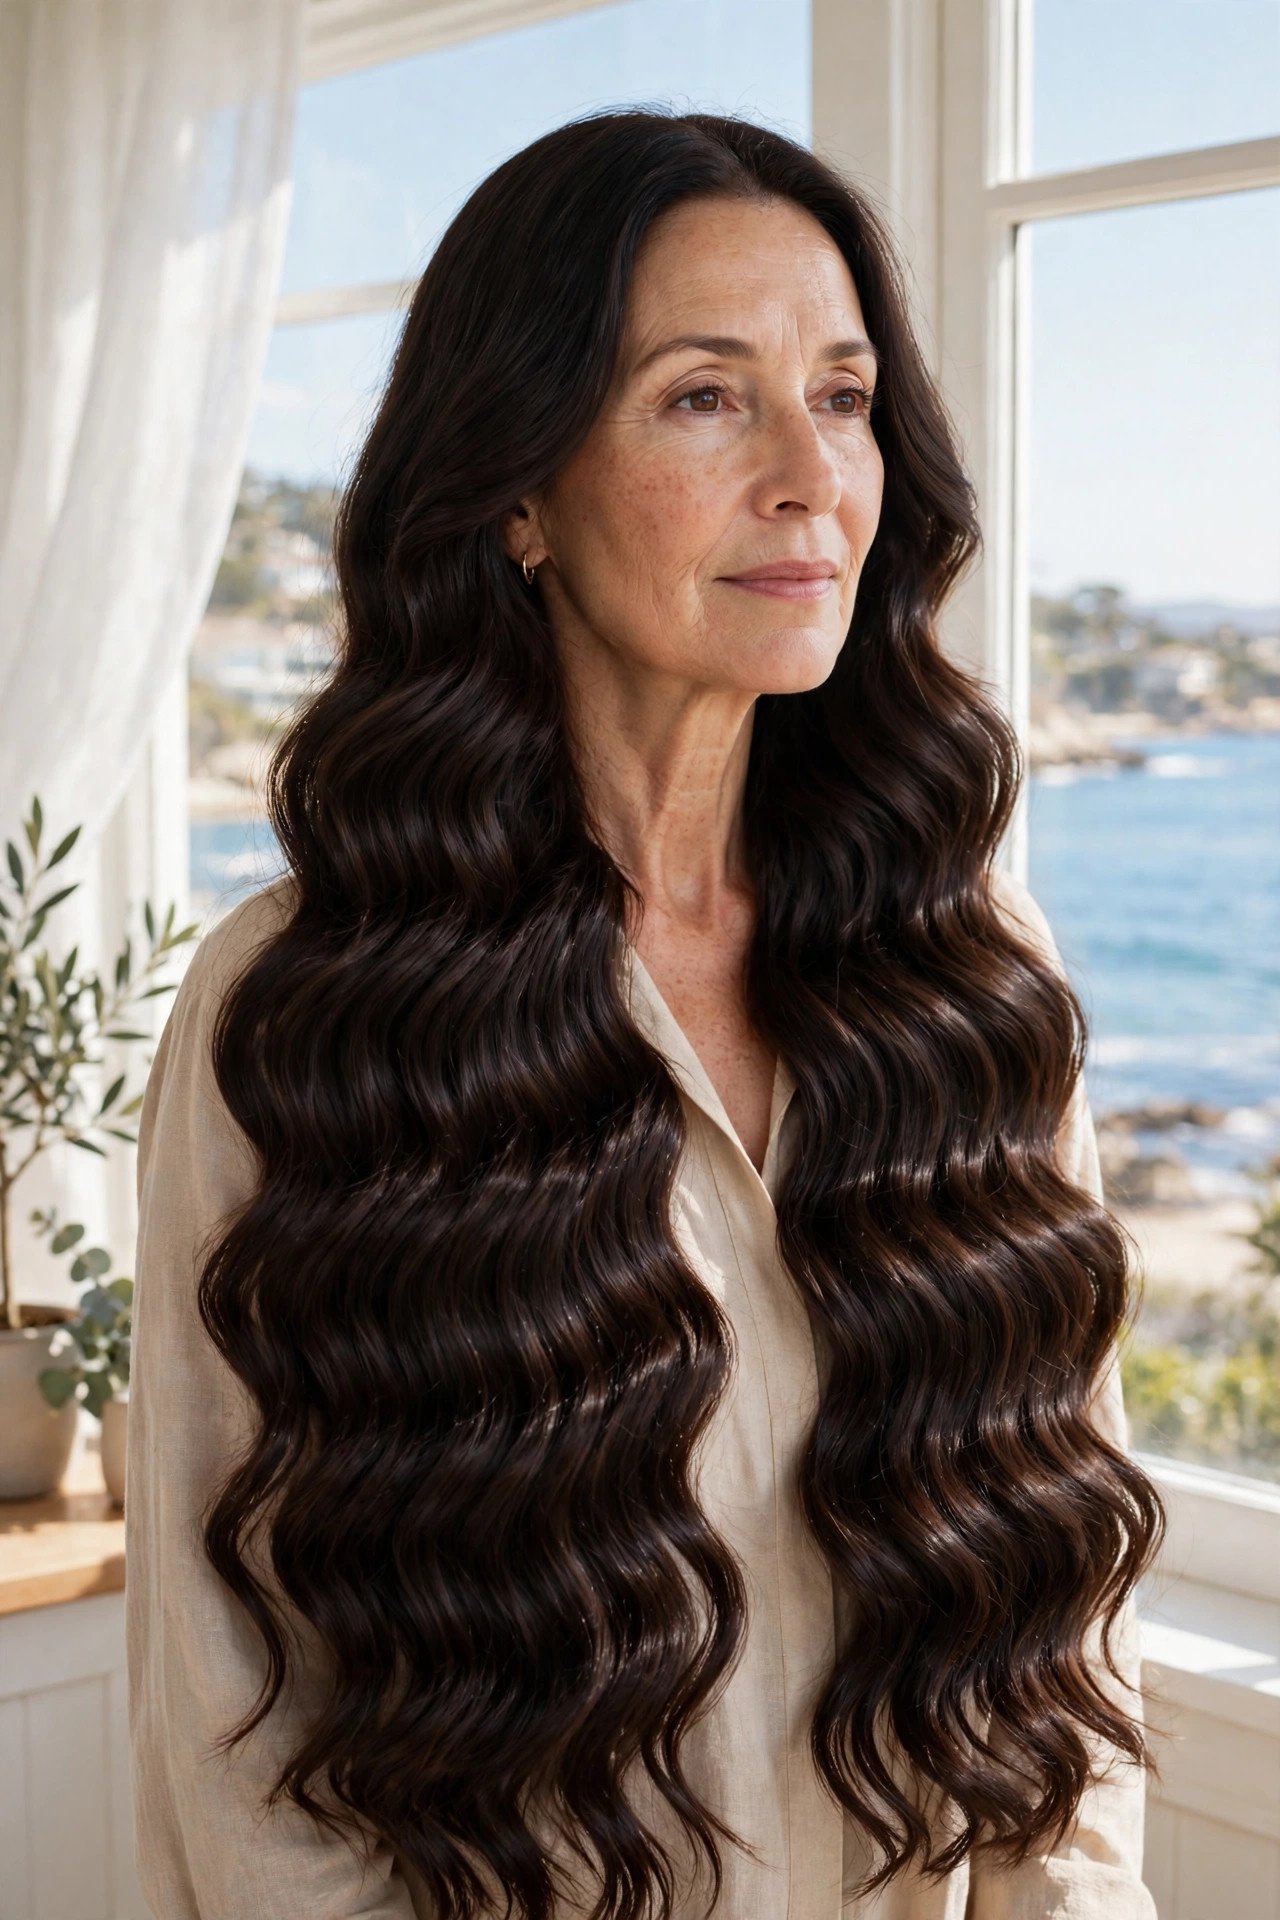
Mermaid waves are the uniform ones, deep, even ripples that run from mid length to the ends like the hair was pressed in a pattern. On very long hair they look striking because the pattern has room to repeat.
Three tools can build them:
- A triple barrel waver, the fastest route on thick hair
- Two braids on damp hair, left overnight for a softer version
- A wide curling wand, used in flat sections and brushed into waves
Keep the top six inches smooth. Waves that start at the root read as a perm, while waves that start lower read as styling, and that gap is what keeps the look modern.
14. Long Layers With Soft Colour Dimension
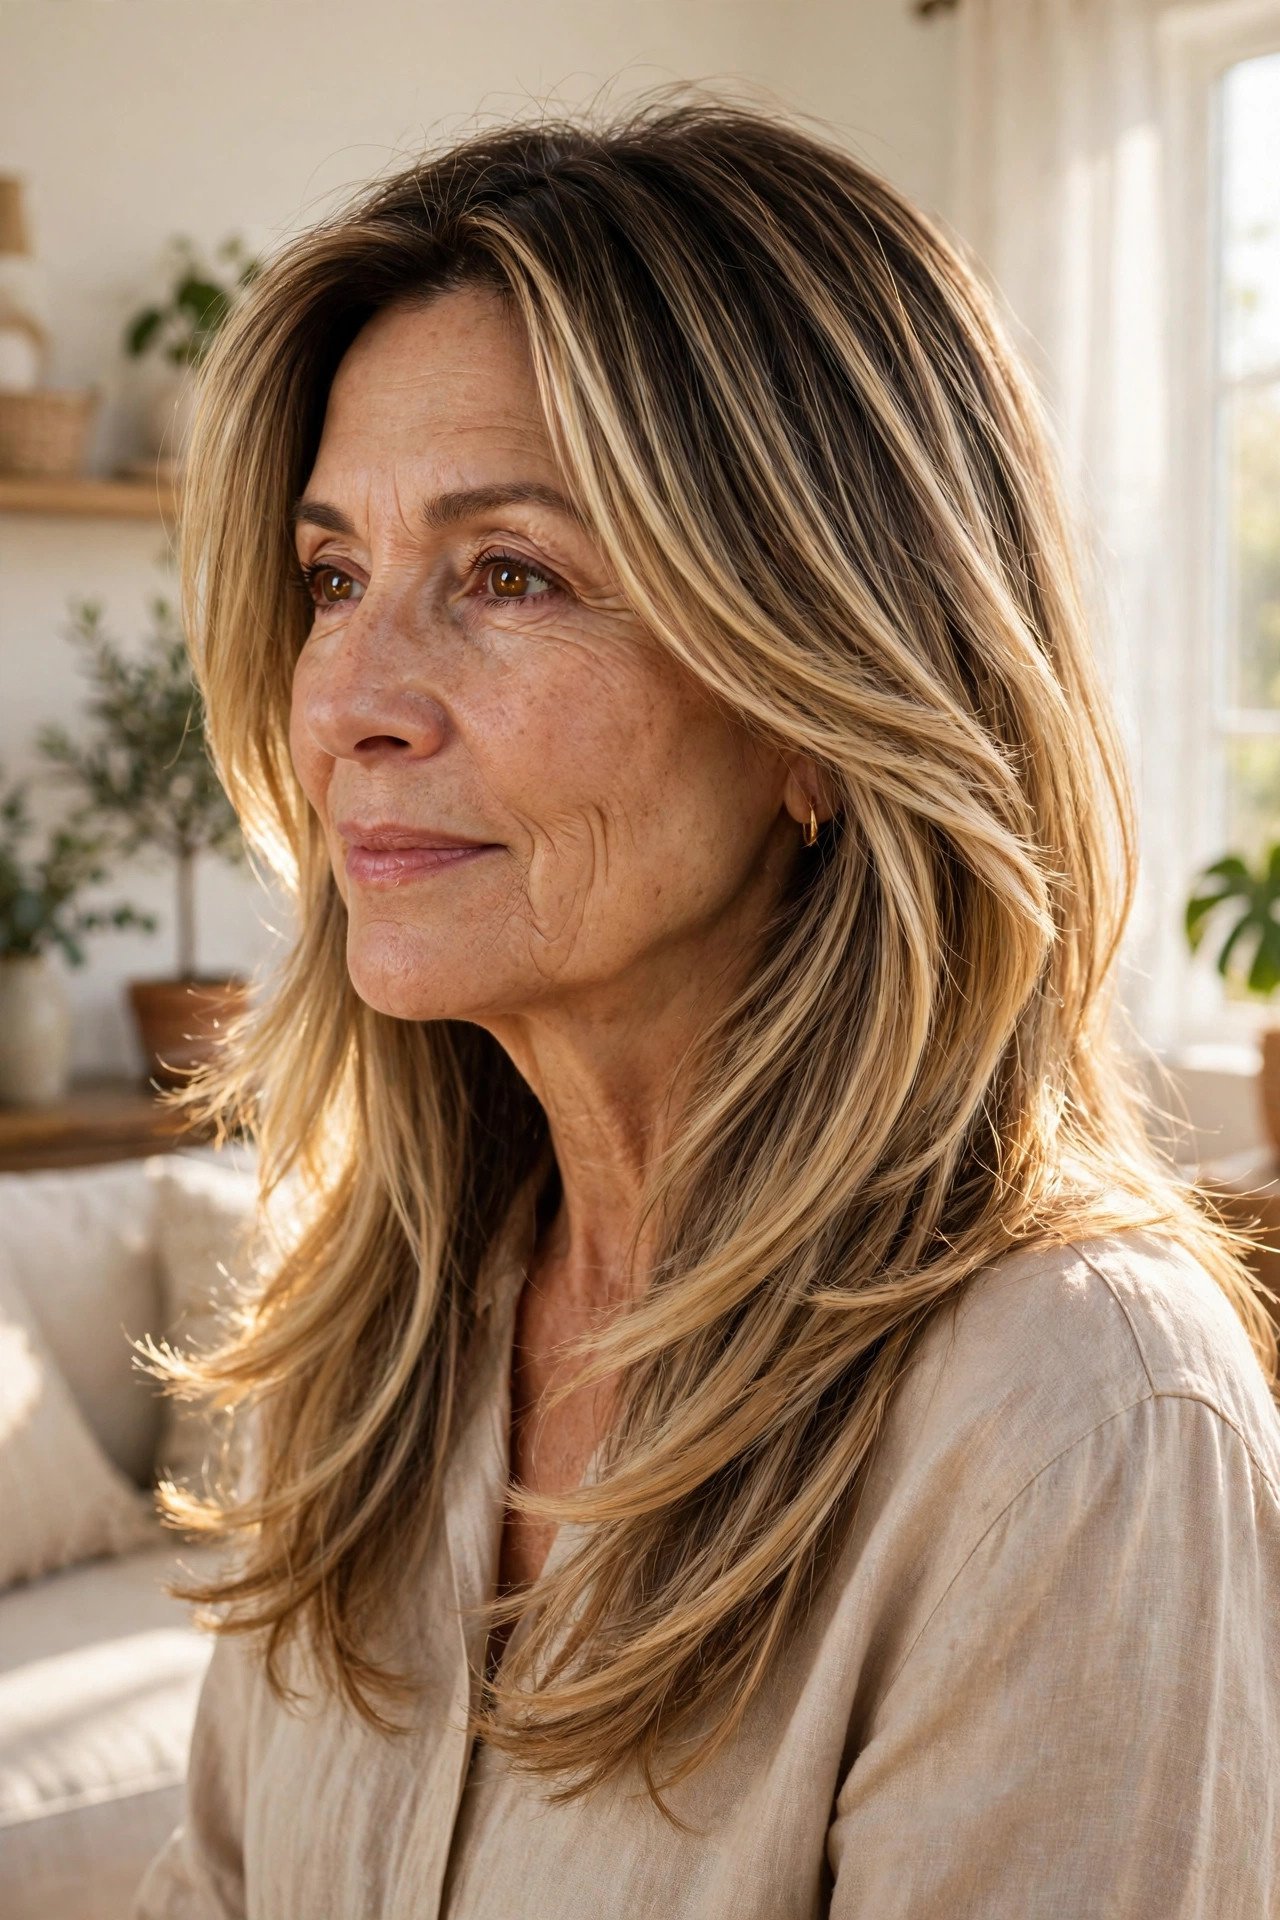
One flat colour along the whole length can make long hair look heavier than it is. The length is fine, but with no light or shade in it, the eye reads one solid curtain and the style feels stuck.
Soft dimension fixes that without a big change. Lighter pieces sit around the face and through the ends, while the roots stay close to your natural shade, so no hard line shows as it grows. Bring these points to your colour appointment:
- Brightness around the face, not all over
- Ends one to two shades lighter than the roots
- A grow out plan you can stretch to three or four months
At the salon, check
15. High Ponytail With a Wrapped Base
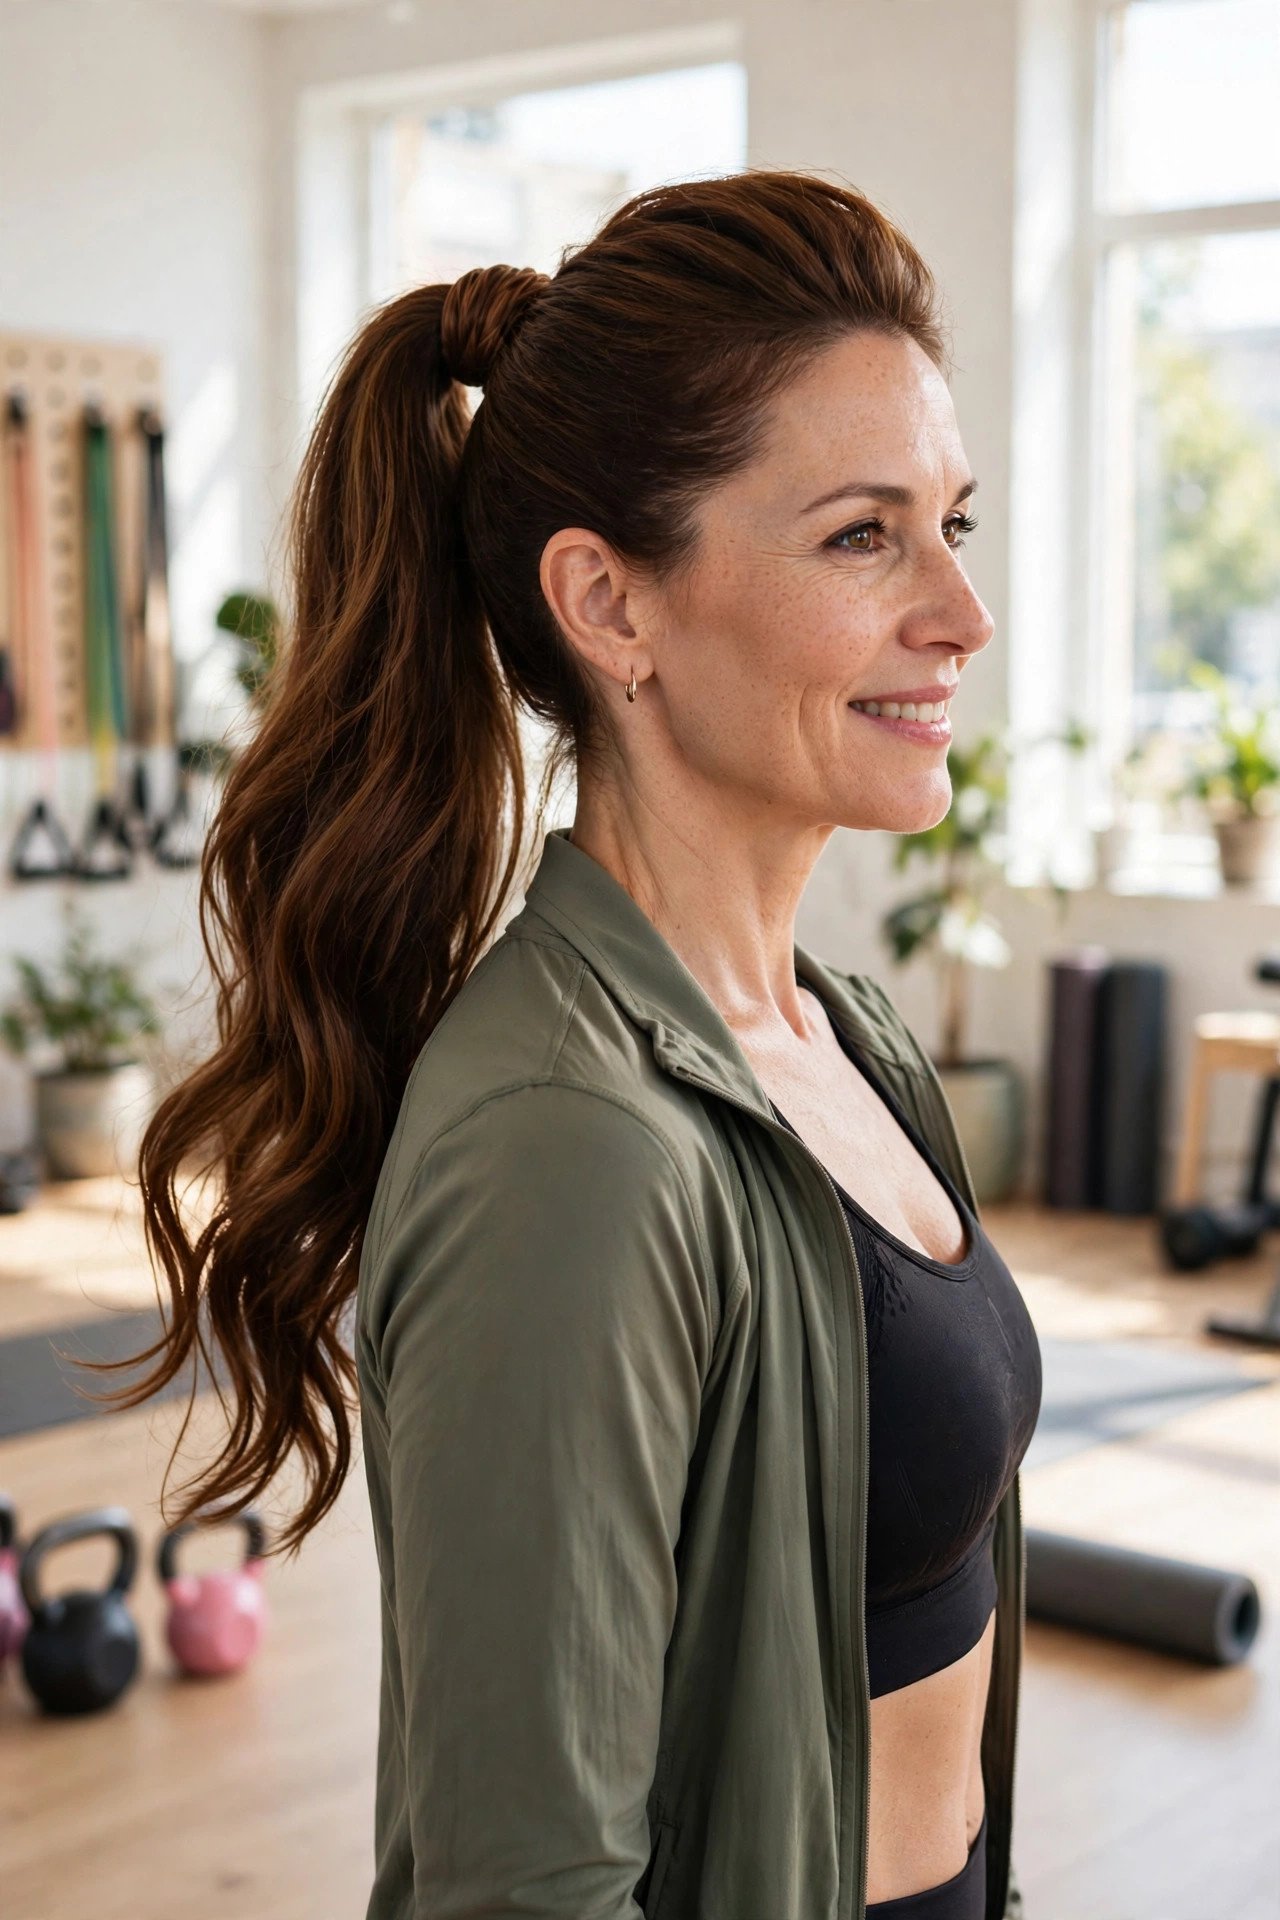
Rule of thumb: the higher the ponytail, the smoother the crown needs to be. A high tail on long hair is cheerful and youthful, but every bump at the top shows, so the prep matters more than the tail itself.
Brush the hair up in stages, from the nape first and then the sides, and secure it at the crown. Take a thin strand from the tail, wrap it around the band, and pin the end underneath. That wrapped base is the detail that separates a gym ponytail from a styled one, and it takes under a minute. The tail itself can stay wavy, straight, or somewhere between.
Wrap a strand around the band. It hides the elastic and makes a simple ponytail look deliberate.
16. Curls That Start at Mid-Length
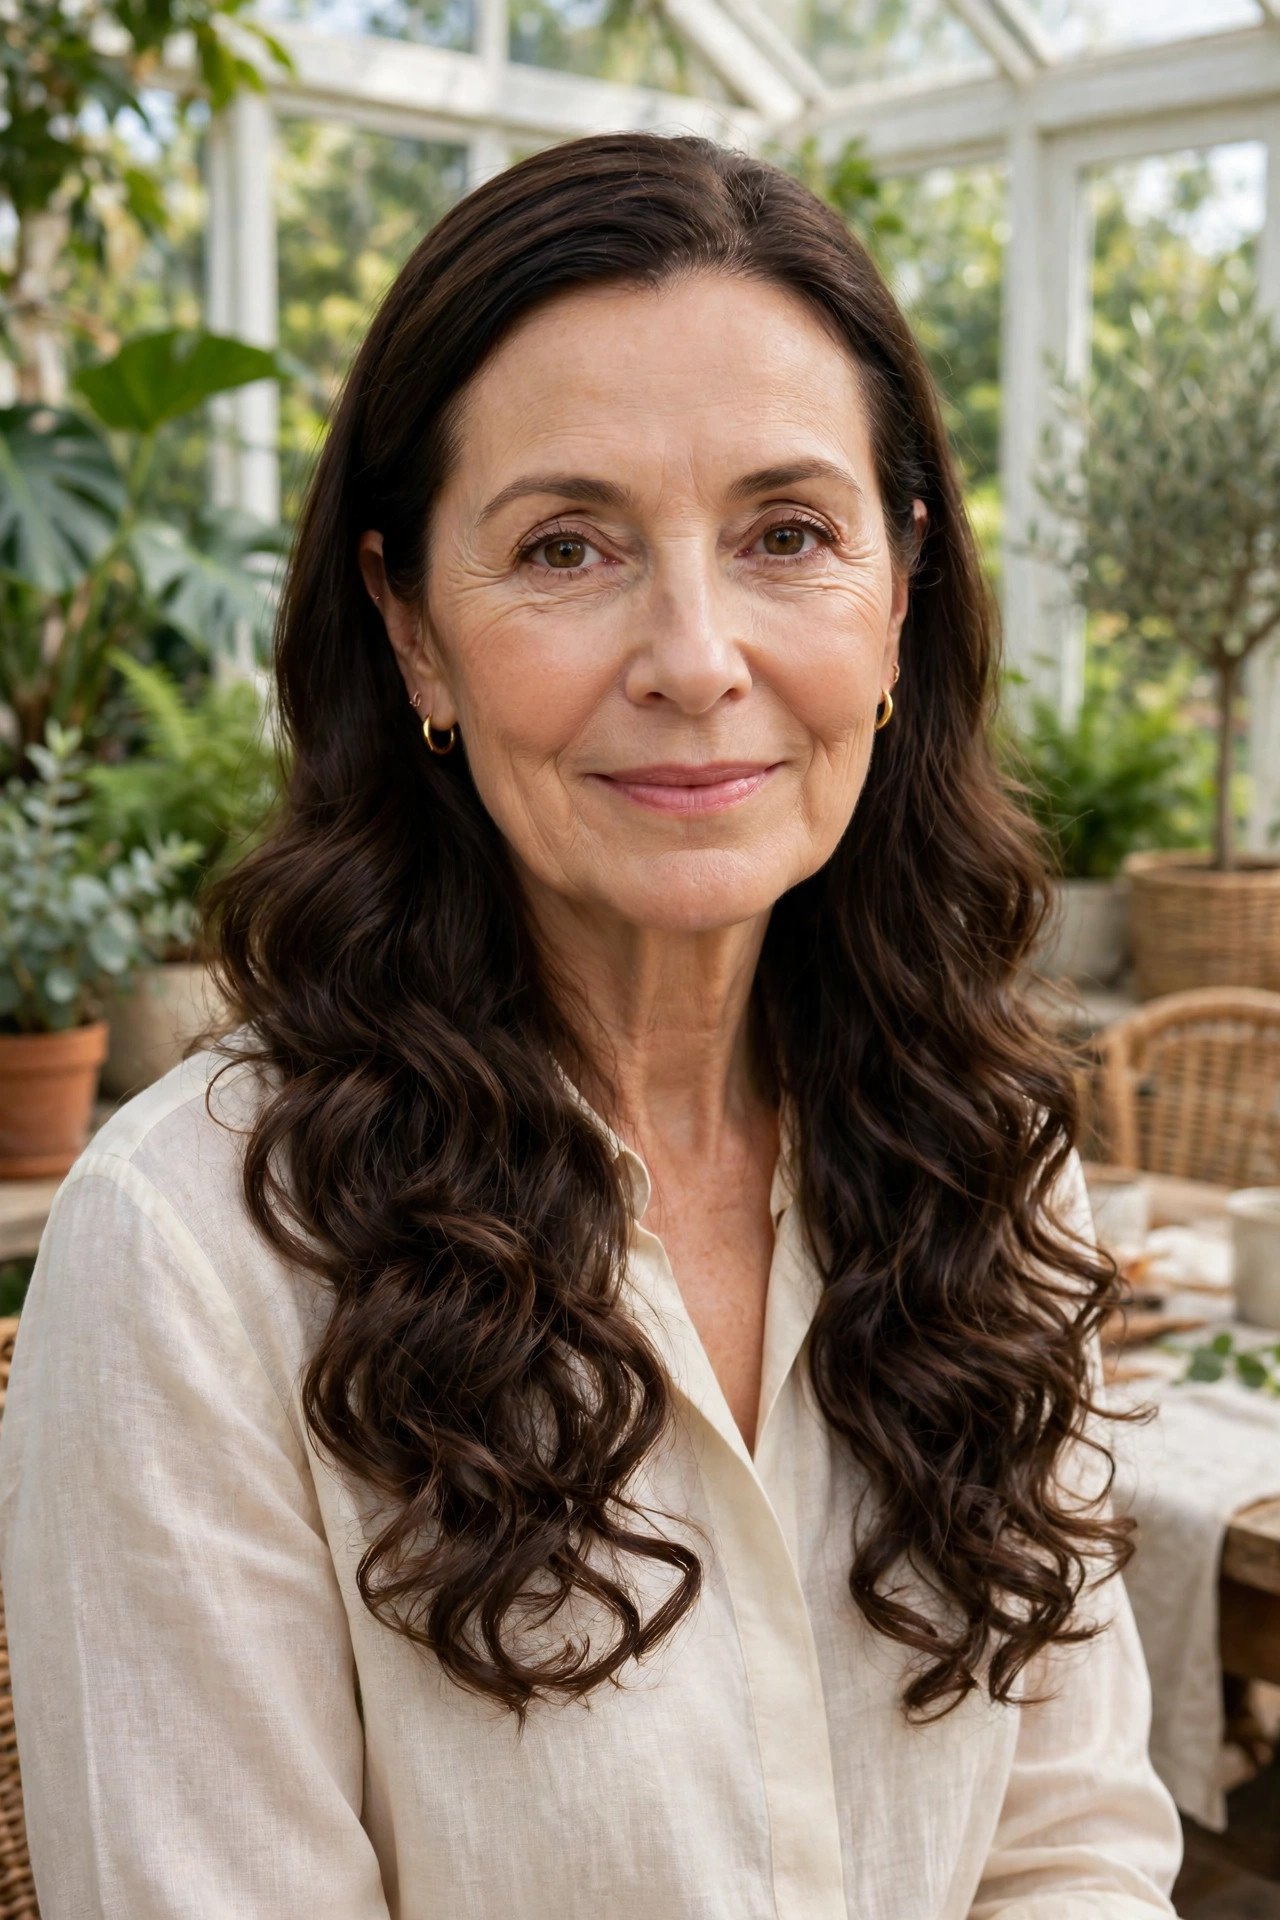
Smooth on top, curls below. That split is the whole idea.
Keeping the top half smooth and letting the curls begin at mid length solves two problems at once. The crown stays calm and close to the head, which suits longer faces, and the curls get the lower half of the hair, where long lengths can look plain when left straight.
It is also kinder to fine hair. Curls through the whole head can separate and look thin by the end of the day, while curls that start lower keep the top layer intact as a smooth cover. Set them on large rollers or a wide wand, brush once, and leave them alone. Every extra touch pulls the shape apart.
Smooth and dry the top half first, with the roots directed back from the face.
Curl only from the ears down, working in large sections so the curls stay soft.
Brush through once when cool, then stop touching it for the rest of the day.
17. Grown-Out Fringe Blended Into Layers
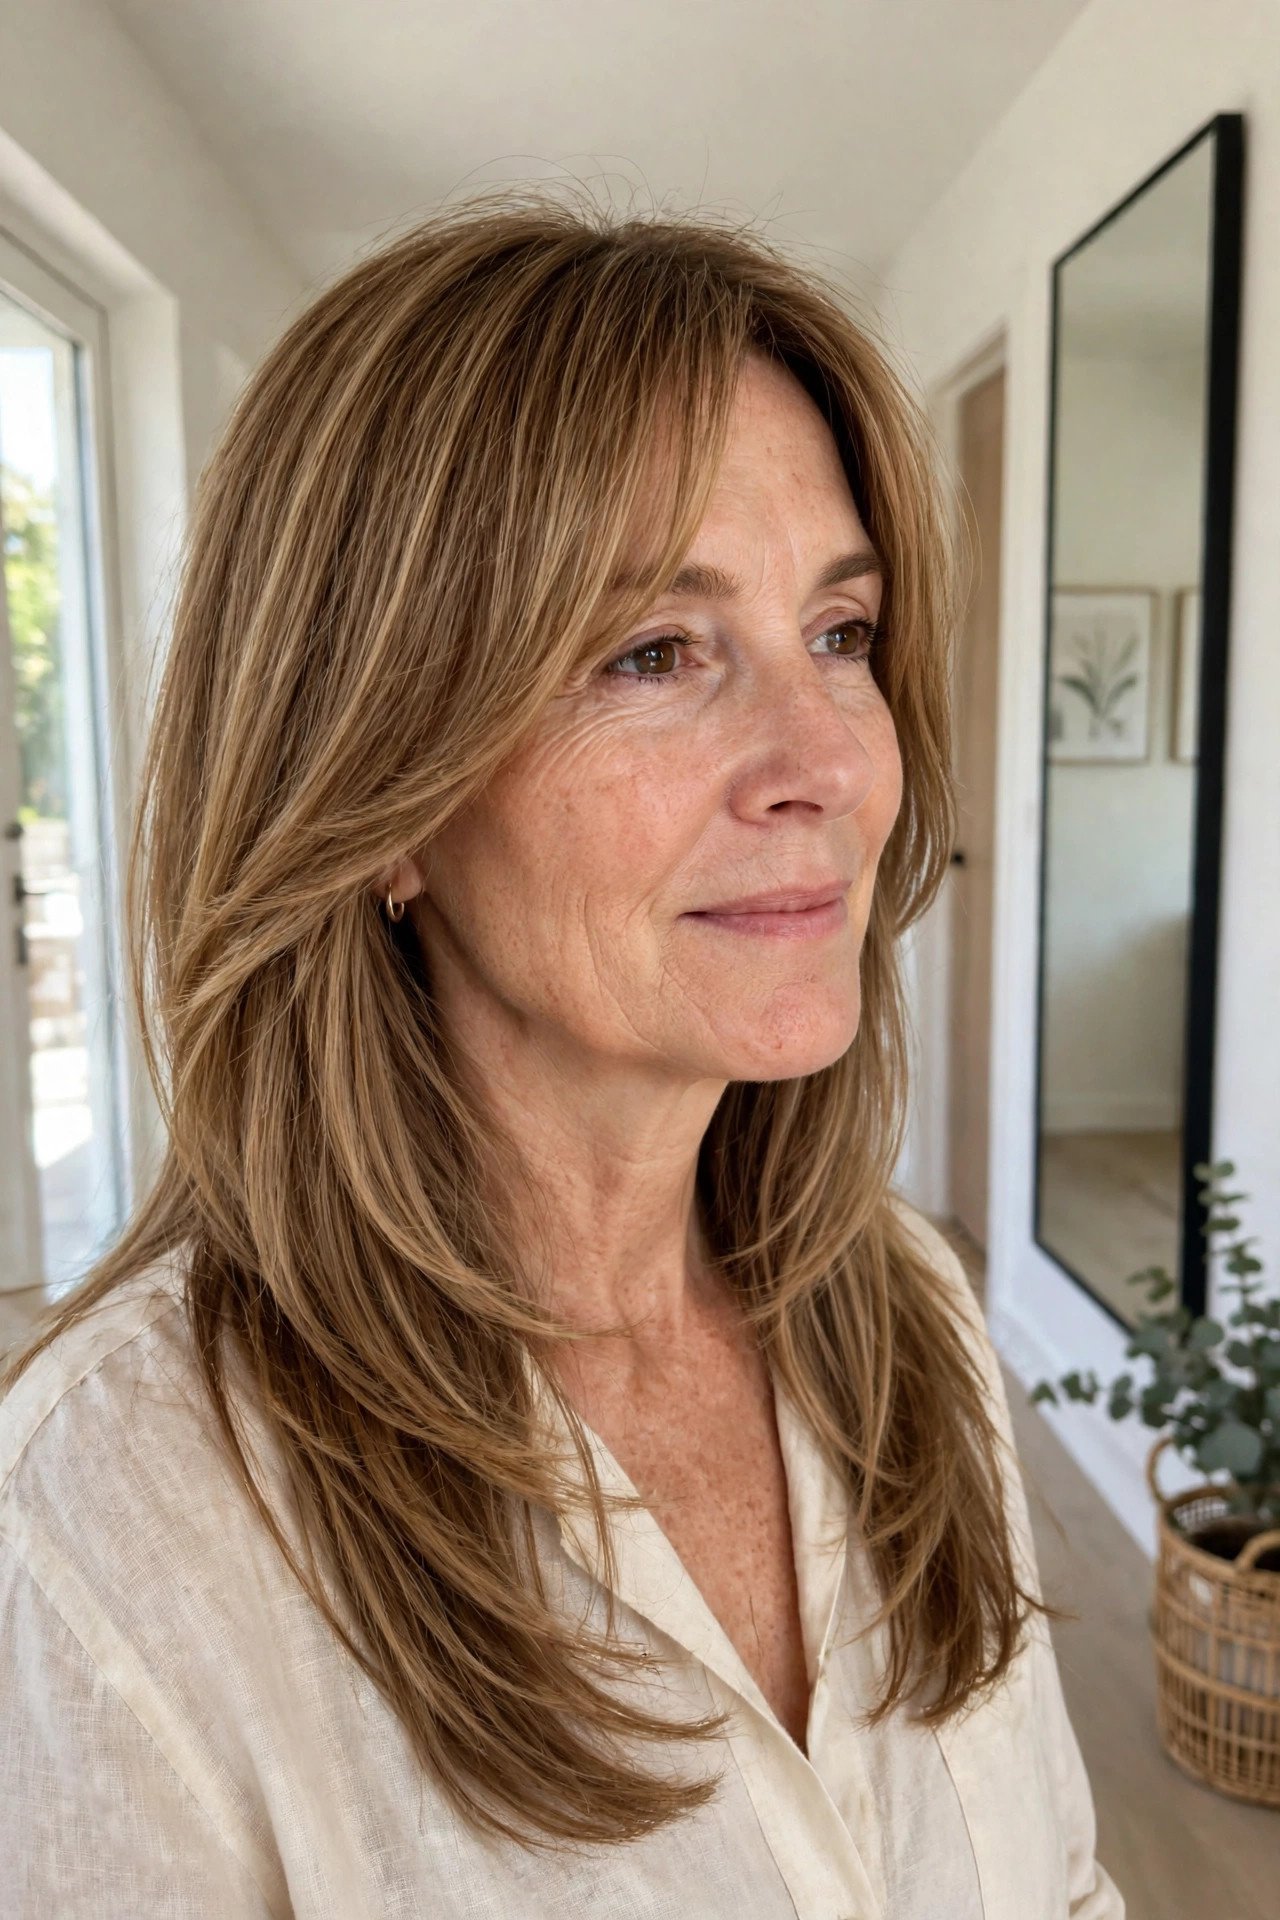
Somewhere around month three, a fringe stops being a fringe. It reaches the cheekbones, it will not sit where it used to, and most women assume the only fix is cutting it back or growing it out in misery. A third option exists. Your stylist can blend the grown out fringe into long face framing layers, cutting a soft diagonal line from the fringe into the lengths.
What changes:
- The awkward in between stage ends in one appointment
- The front gains the feathered shape from section 1 of this list
- No length comes off the back at all
It turns a waiting game into a style you would have chosen on purpose.
A fringe at cheekbone length that splits in the middle, sticks out at the sides, and fights the rest of the style.
The same hair blended into face framing layers, one smooth line running from the front into the full length.
18. Feathered Retro Layers With a Smooth Finish
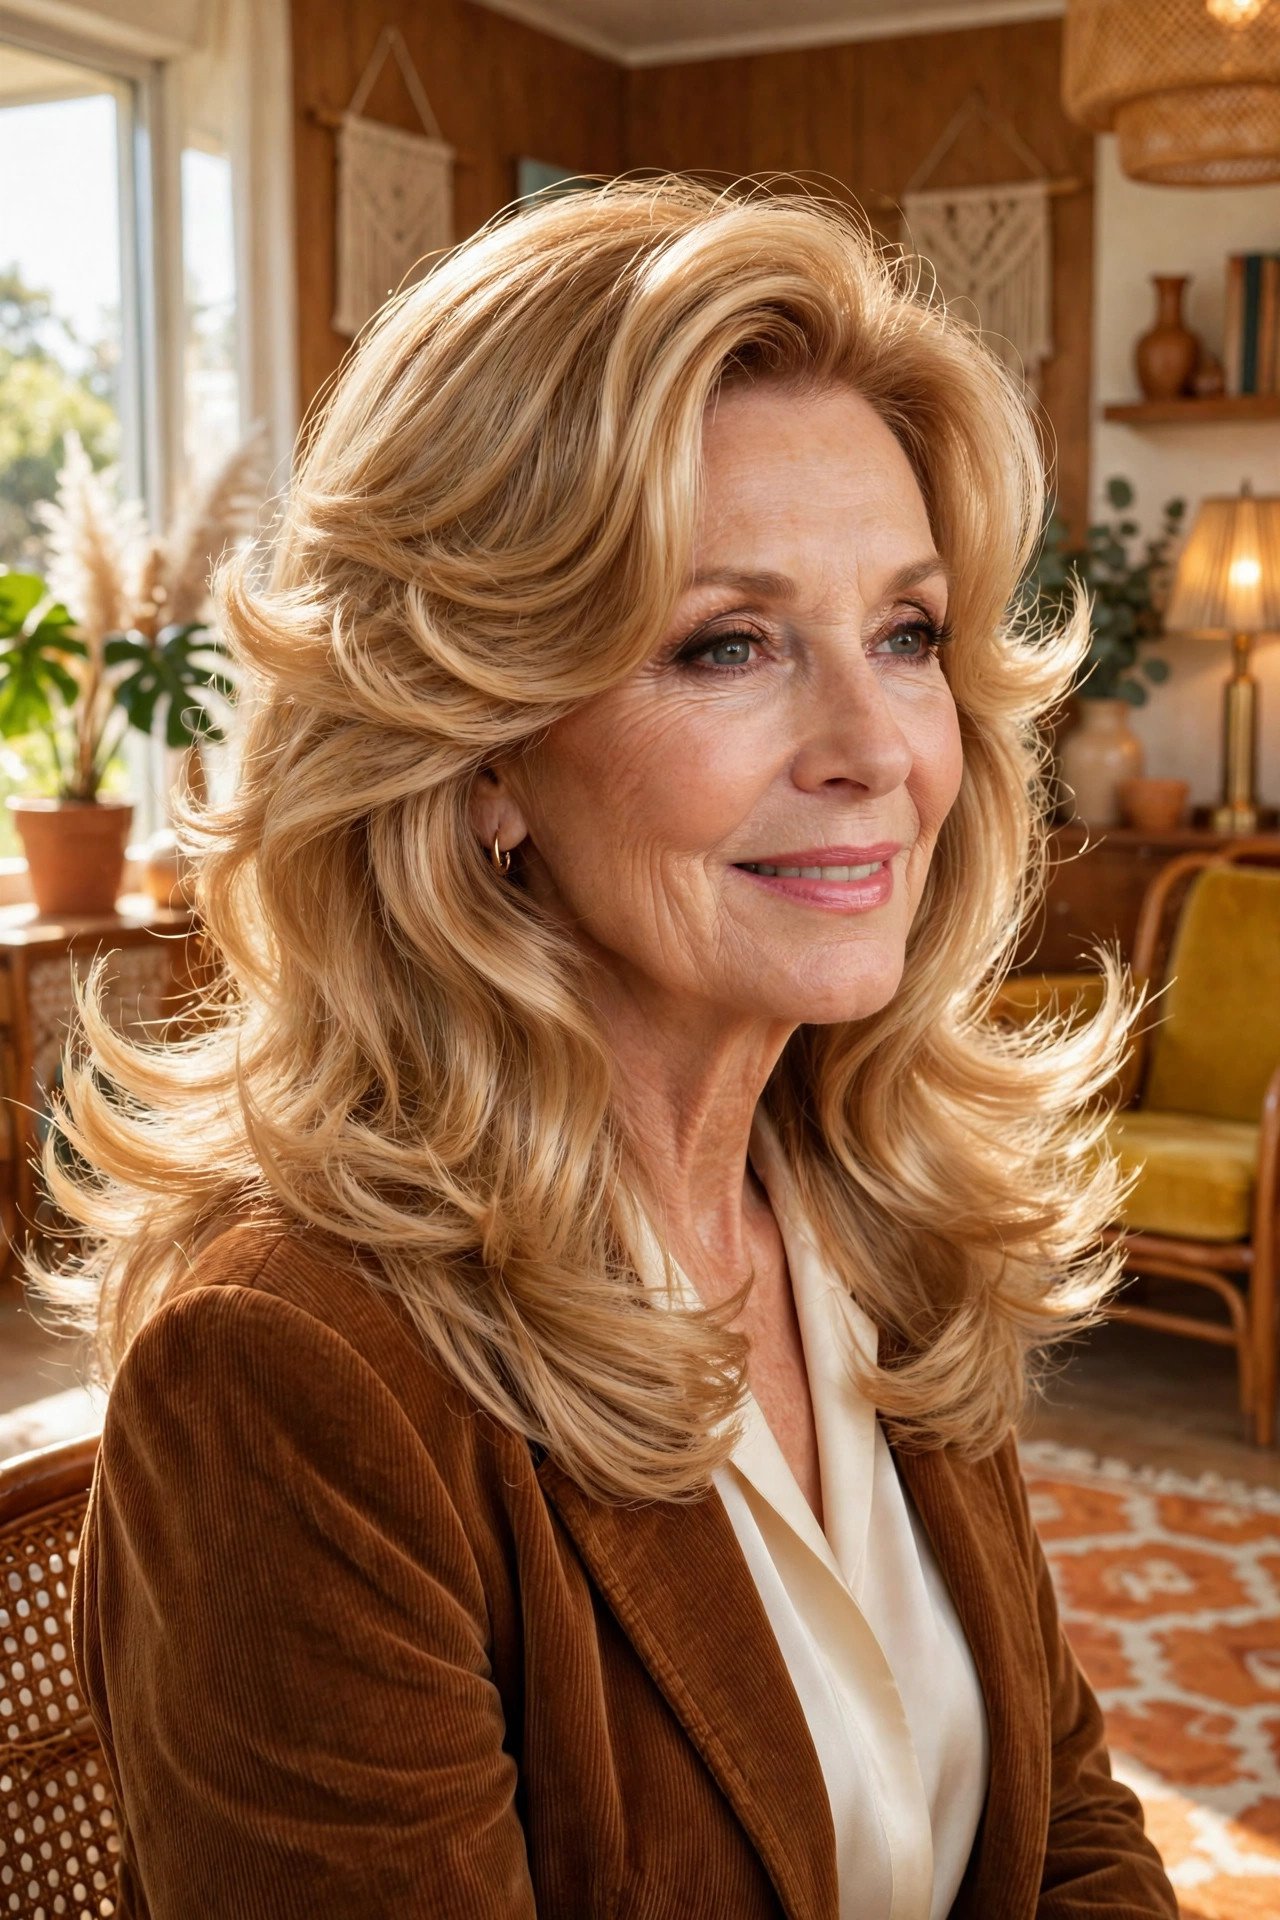
Feathered hair has a dated reputation, mostly thanks to old photos where the flicks were stiff and the fringe was huge. The shape itself is sound. Layers cut to sweep back from the face give long hair lift at the sides, which is exactly where long styles tend to fall flat.
The modern version keeps the flicks soft and the finish smooth. Ask for feathering through the mid lengths and ends, then style with a round brush so the layers curve rather than spike. Worn with jeans or a blazer, it reads as a choice, not a throwback. The difference sits in the finish, every time.
Keep it current:
- Flicks soft, never stiff or spiked
- Fringe light, or none at all
📌 Good To Know
Feathering suits hair with natural body. On very fine, straight hair it can thin the ends, so ask for feathering through the mid lengths only.
19. Silver Streaks Worn Long and Loose
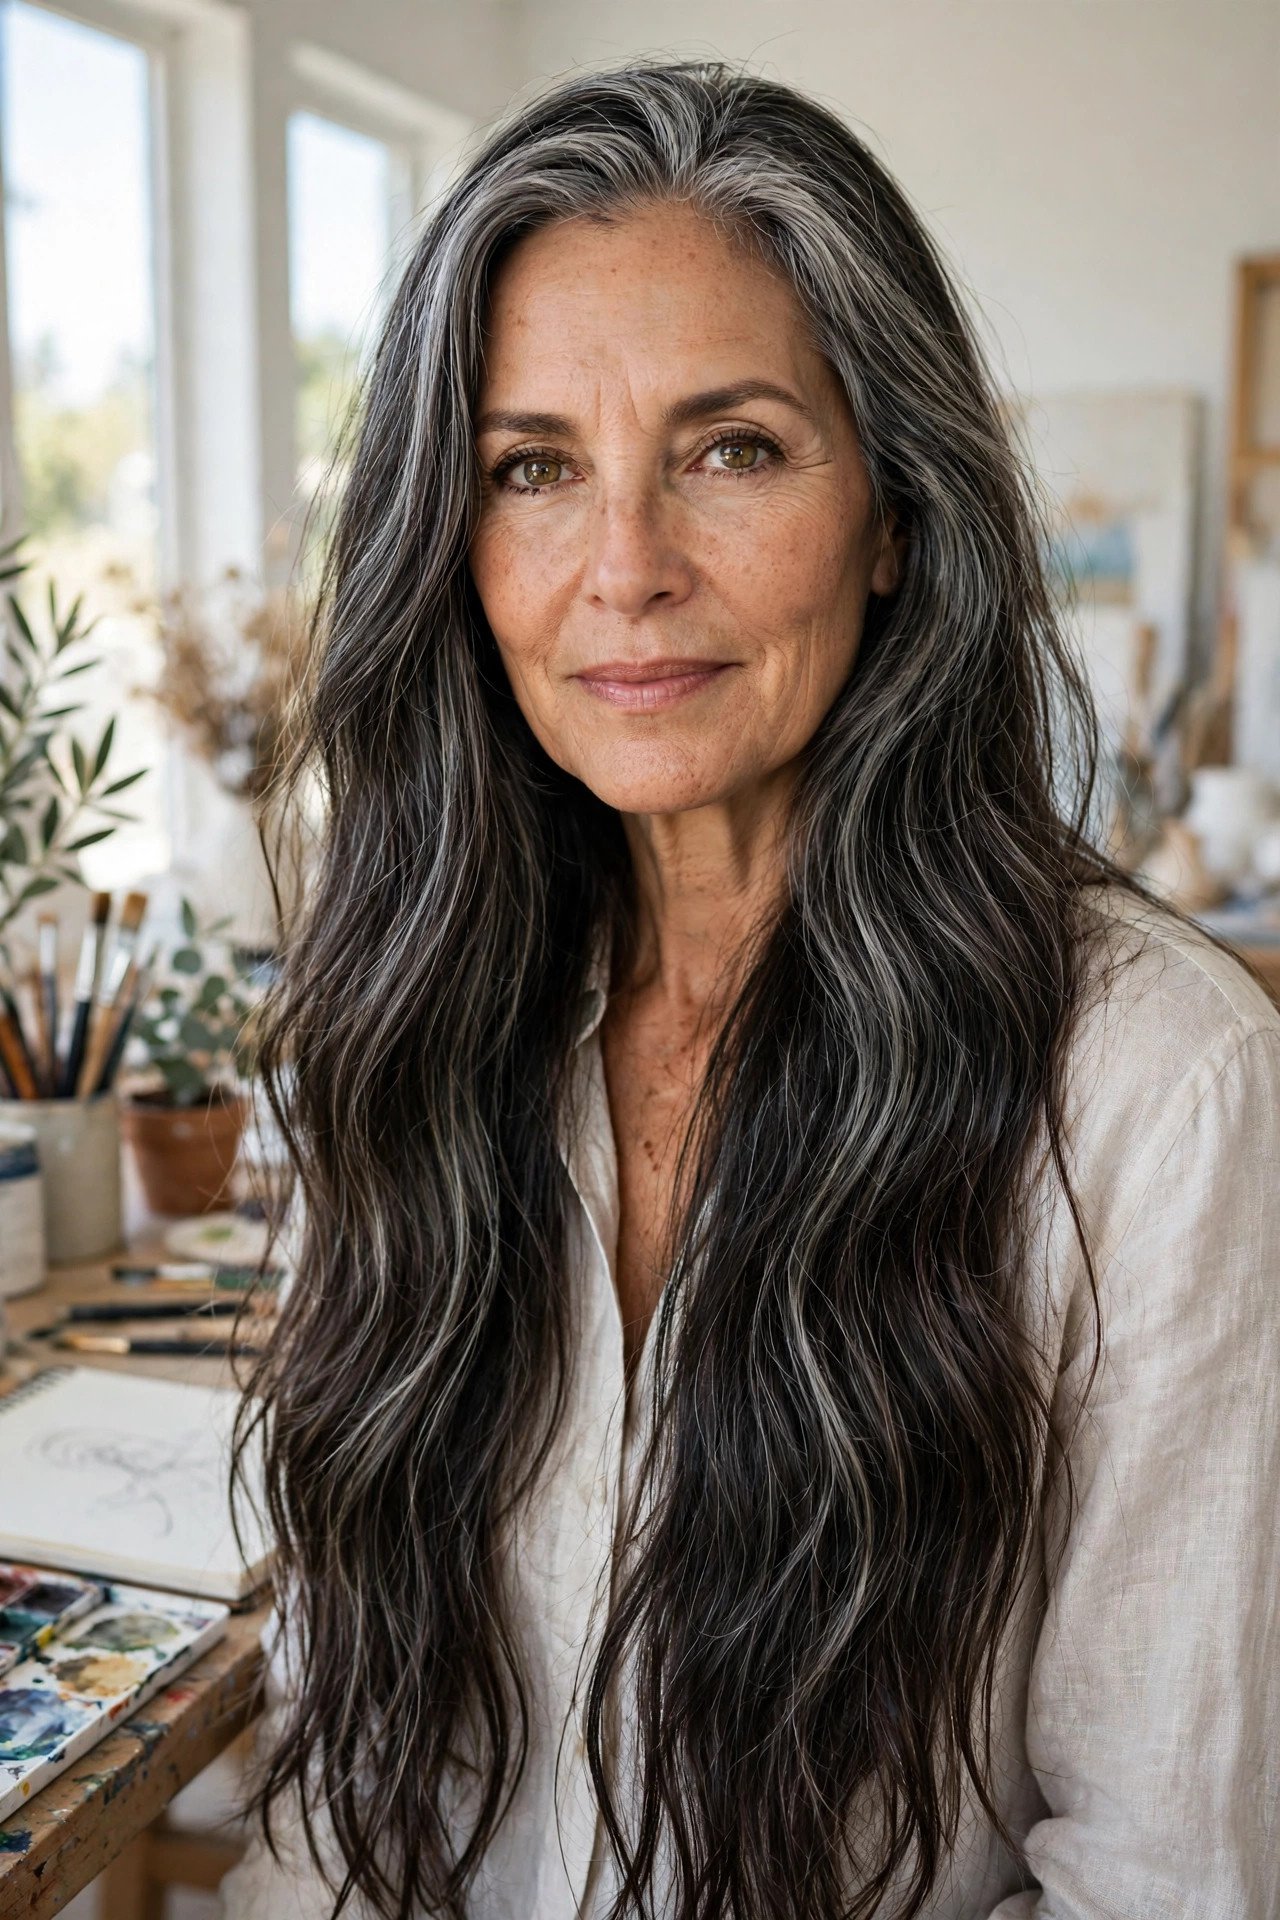
The silver is the style. When grey grows through dark hair in streaks, it does what salon highlights try to copy, placing light exactly where it catches the eye. Worn long and loose, those streaks run the full length like ribbons, and cutting the hair short would throw most of that effect away.
Length helps in another way too. The longer the hair, the softer the line where silver meets dark, so the grow out never shows a hard edge at the roots. Keep the lengths conditioned and glossy, since dry ends make silver look wiry, and let the streaks fall where they naturally grow. They already know where they look best.
Condition the lengths well, since silver shows dryness faster than pigmented hair.
Wear it loose so the streaks run their full length and catch the light.
Dyeing over the streaks to match the dark, since the regrowth line comes back harsh.
Cutting it short out of habit, since the streak effect goes with the length.
20. Half-Up Top Knot With Cascading Length
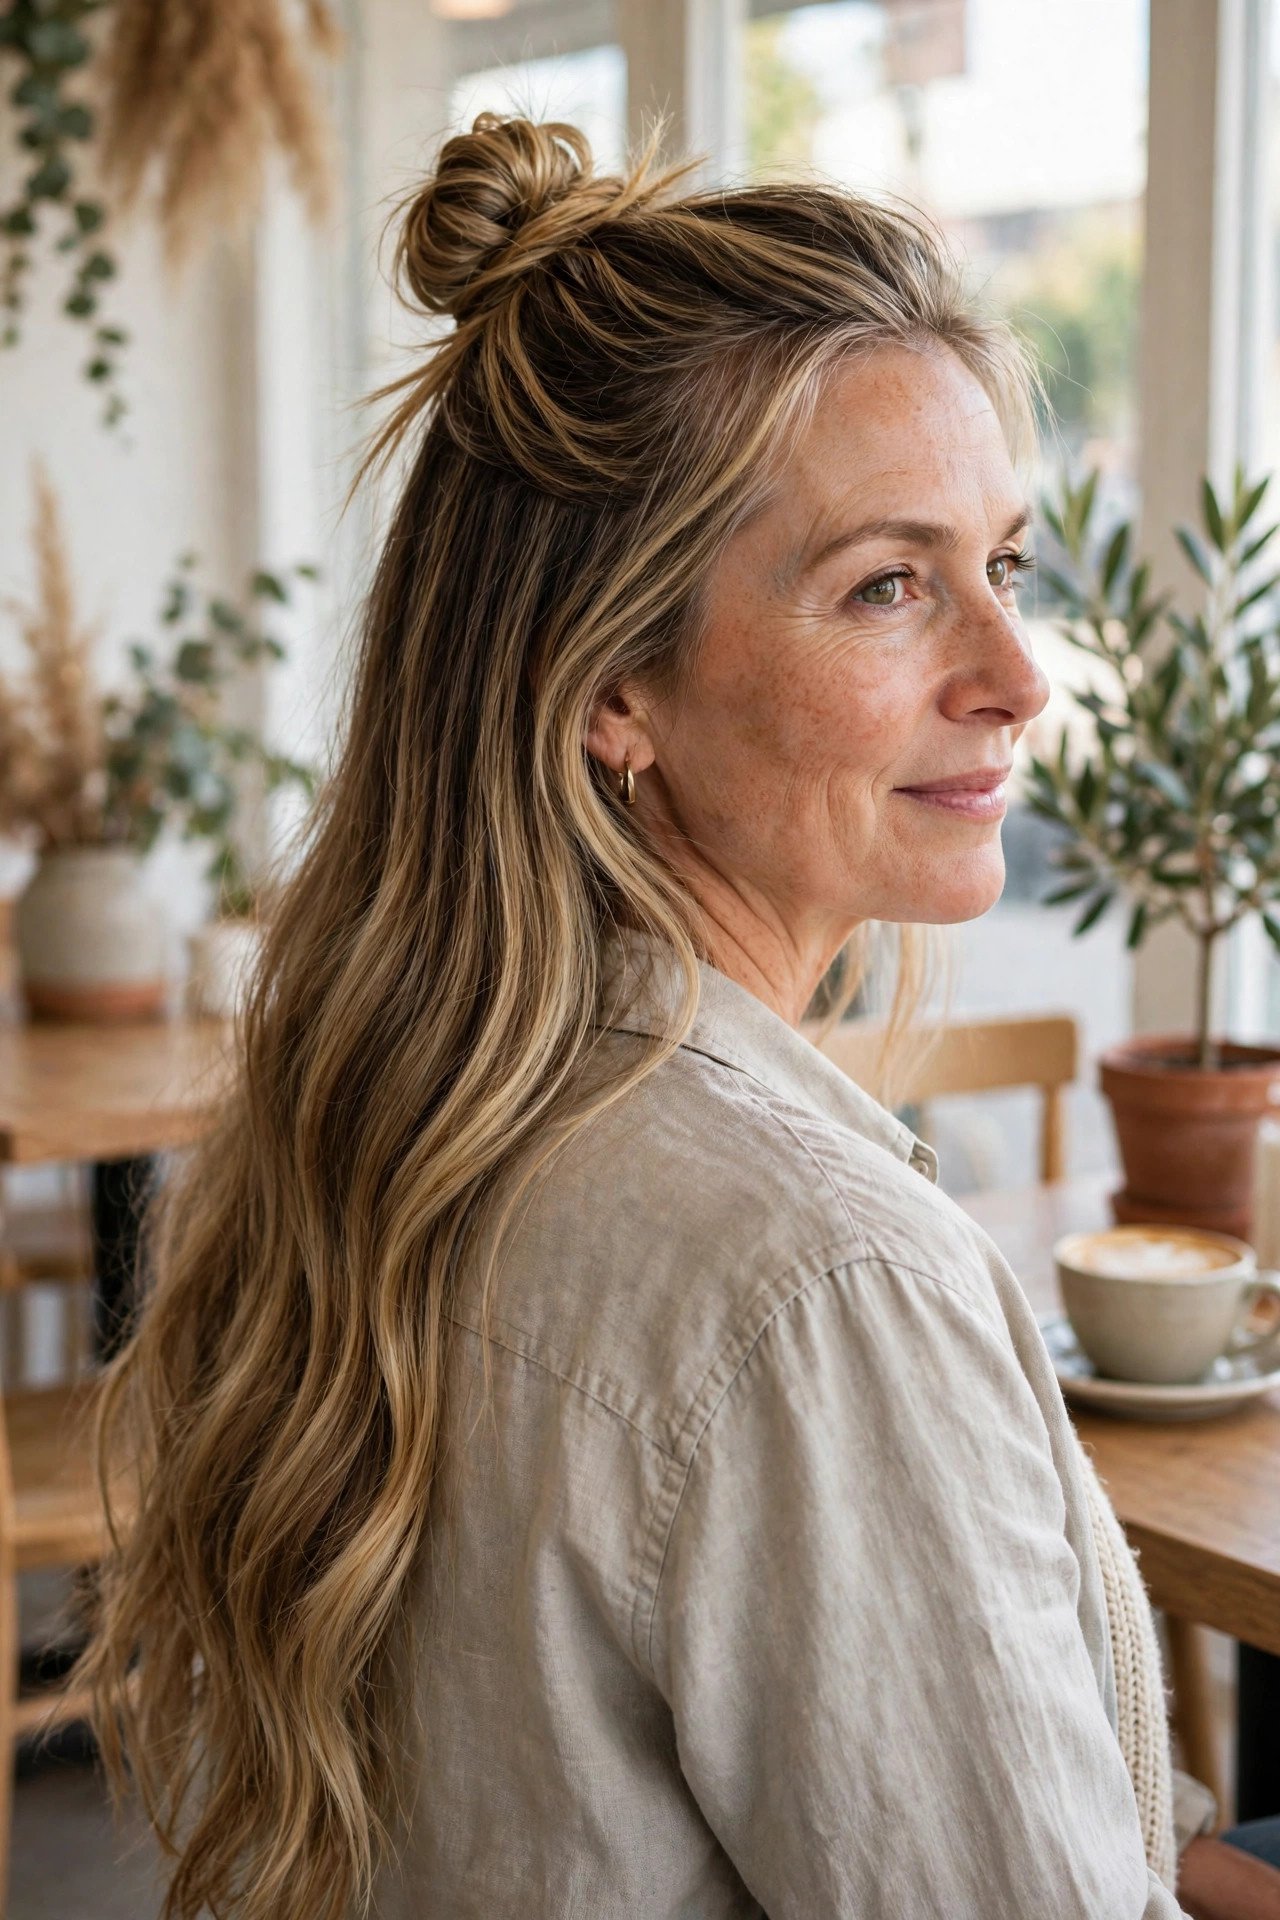
Gather the top third of your hair, twist it into a small knot at the crown, and pin or band it. Leave everything else down. The knot gives you height and a clear face, while the cascading length below keeps the whole point of having long hair in the first place.
Position is what makes it work:
- Too far back and it disappears from the front
- Right at the crown and it lifts the whole style
- Slightly loose beats tightly wound, every time
It suits thick hair best, since the knot needs some bulk, and it takes long hair off your neck on warm days without a full updo.
- ▸Best on thick or medium hair with real length to spare below the knot.
- ▸Keep the knot small, since a fistful of hair is plenty for the height you need.
- ▸Smooth the lengths below, or add loose waves, and both finishes sit well under the knot.
21. Blunt Ends on Long Straight Hair
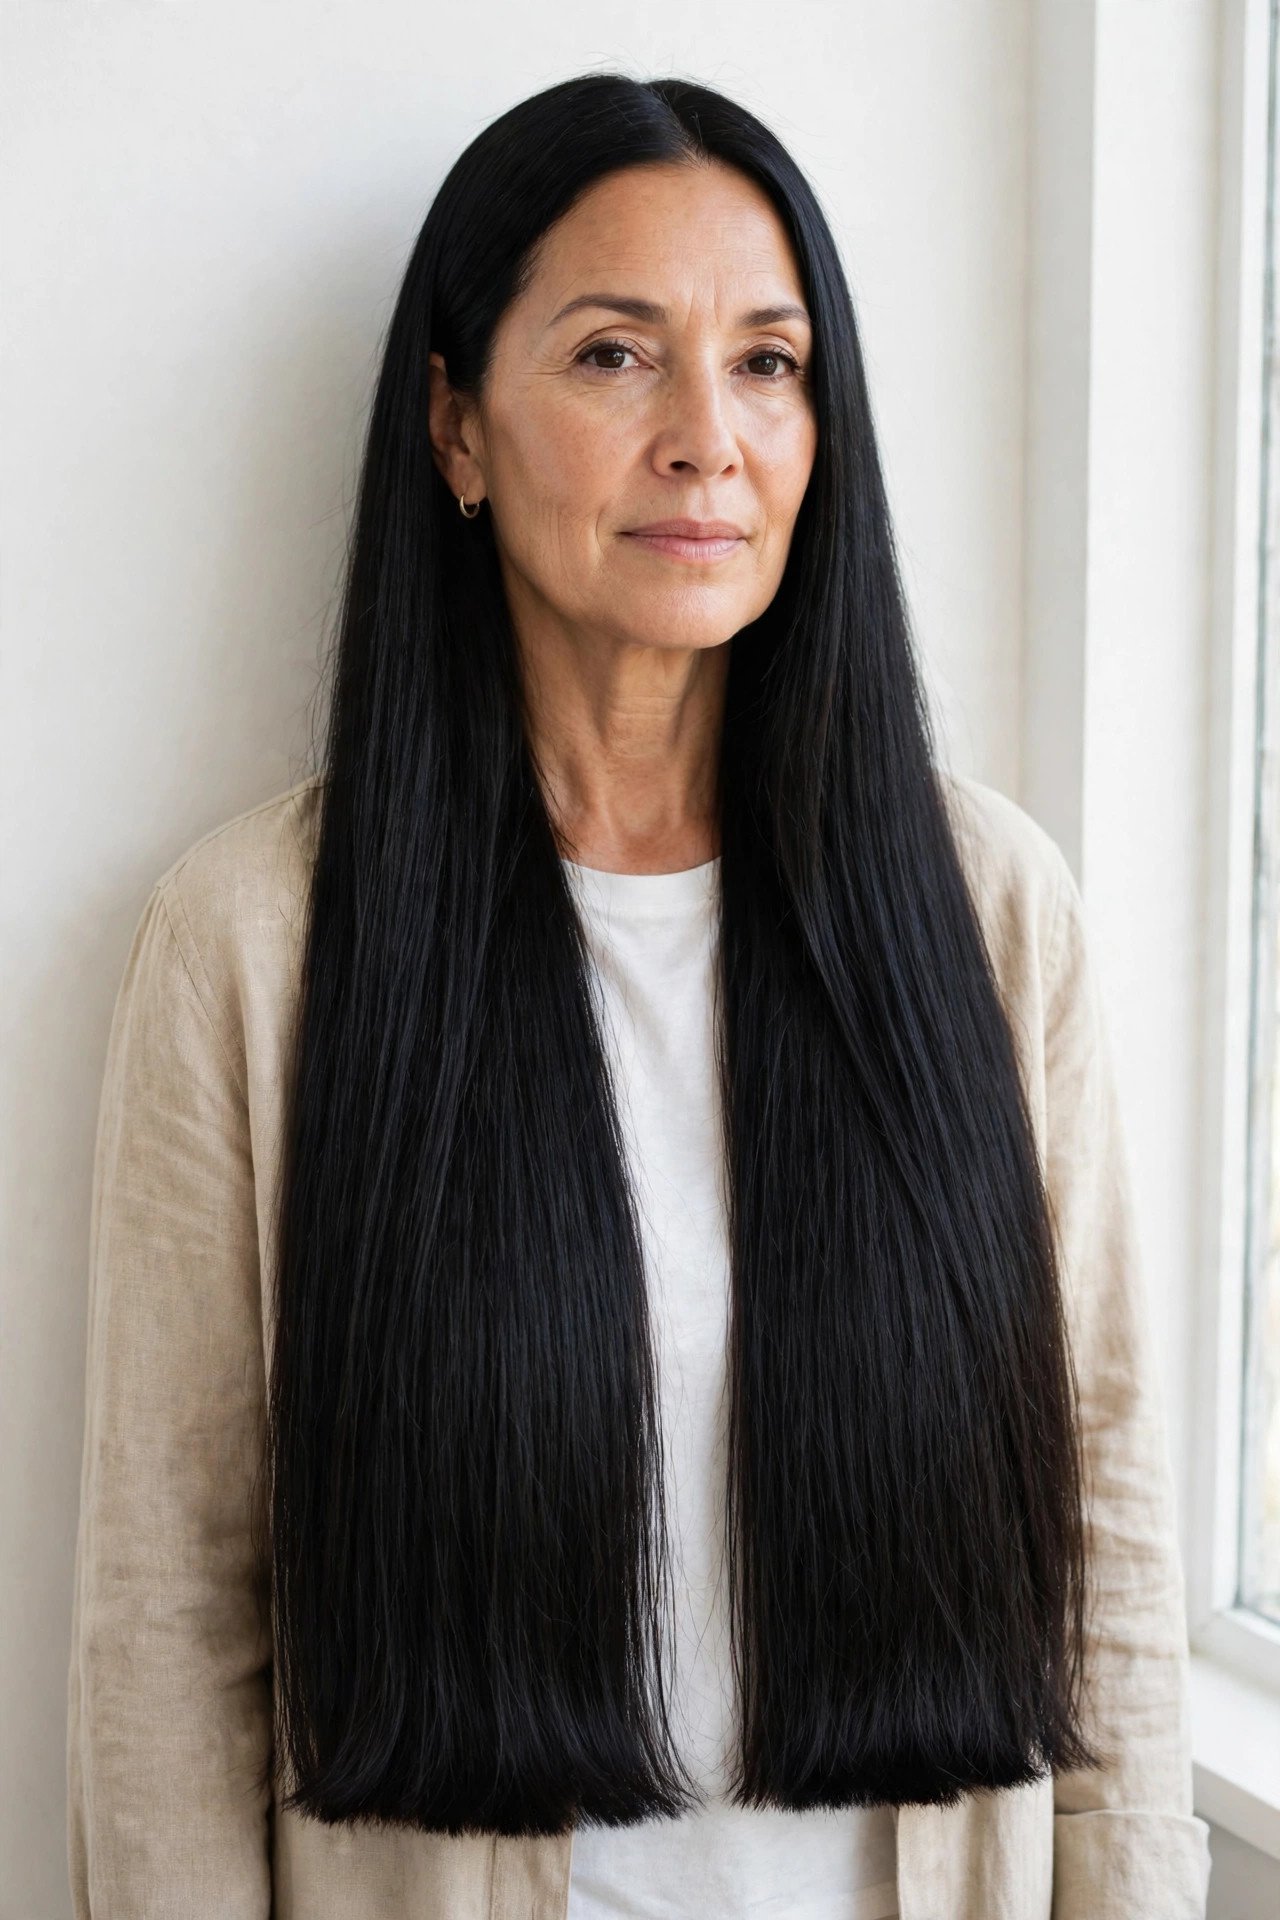
Most long styles make a trade: layers give movement, blunt ends give weight. If your hair is fine and the ends have started to look see through, a blunt cut is the stronger choice. One solid line at the bottom makes the whole head of hair look thicker, and straight lengths show that line off best.
Keep the rest simple:
- One length all over, or the faintest layer at the very front
- Trims little and often, so the line never frays
- A centre or side part, since both sit well on a blunt cut
The style asks for healthy ends above all, so the trim schedule is not optional.
22. Side-Swept Glamour Waves
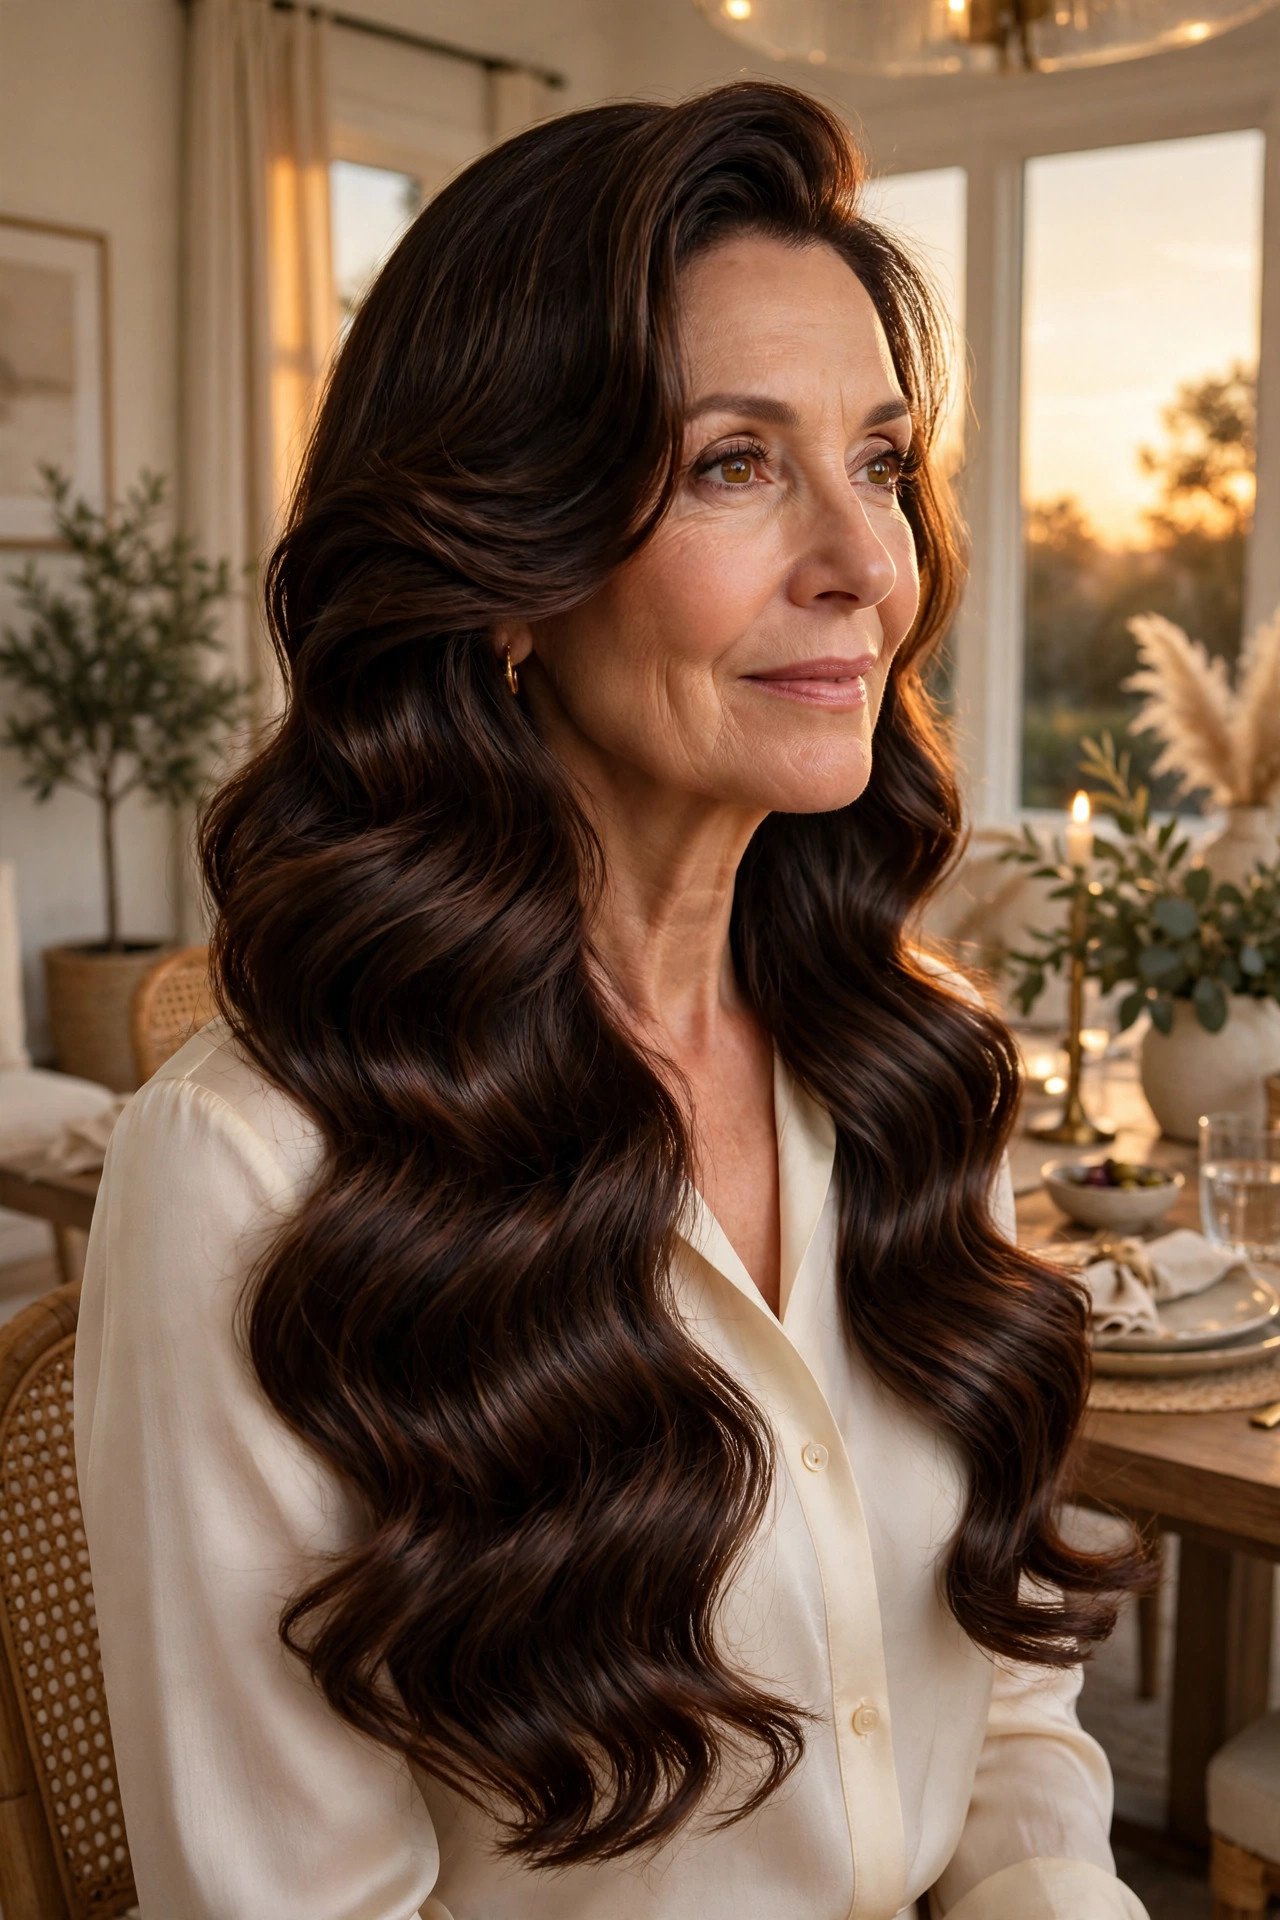
Dinner out, good lighting, and hair that moves as one glossy sheet. Side swept waves are the dressed up end of long hair, the style that makes a plain black dress look like an occasion.
Brush all the hair to one side, set large waves through the lengths, and let them fall over one shoulder. The deep sweep on the other side shows the neck and earrings, which is half the effect. It photographs well from every angle, and it holds for an evening with very little help once the waves have cooled and set. Daytime versions just use a bigger, looser wave and skip the gloss spray.
Save this one for evenings when the outfit needs backup.
| Evening version | Day version |
|---|---|
| Waves set smaller and glossier, brushed into one sheet. | Waves bigger and looser, brushed out soft. |
| Hair swept fully to one side, neck and earrings on show. | A softer sweep, with some hair left behind the shoulder. |
| Works with bare shoulders, evening tops, and dresses. | Works with knits, collars, and everyday clothes. |
23. Hidden Underlayers for a Lighter Feel
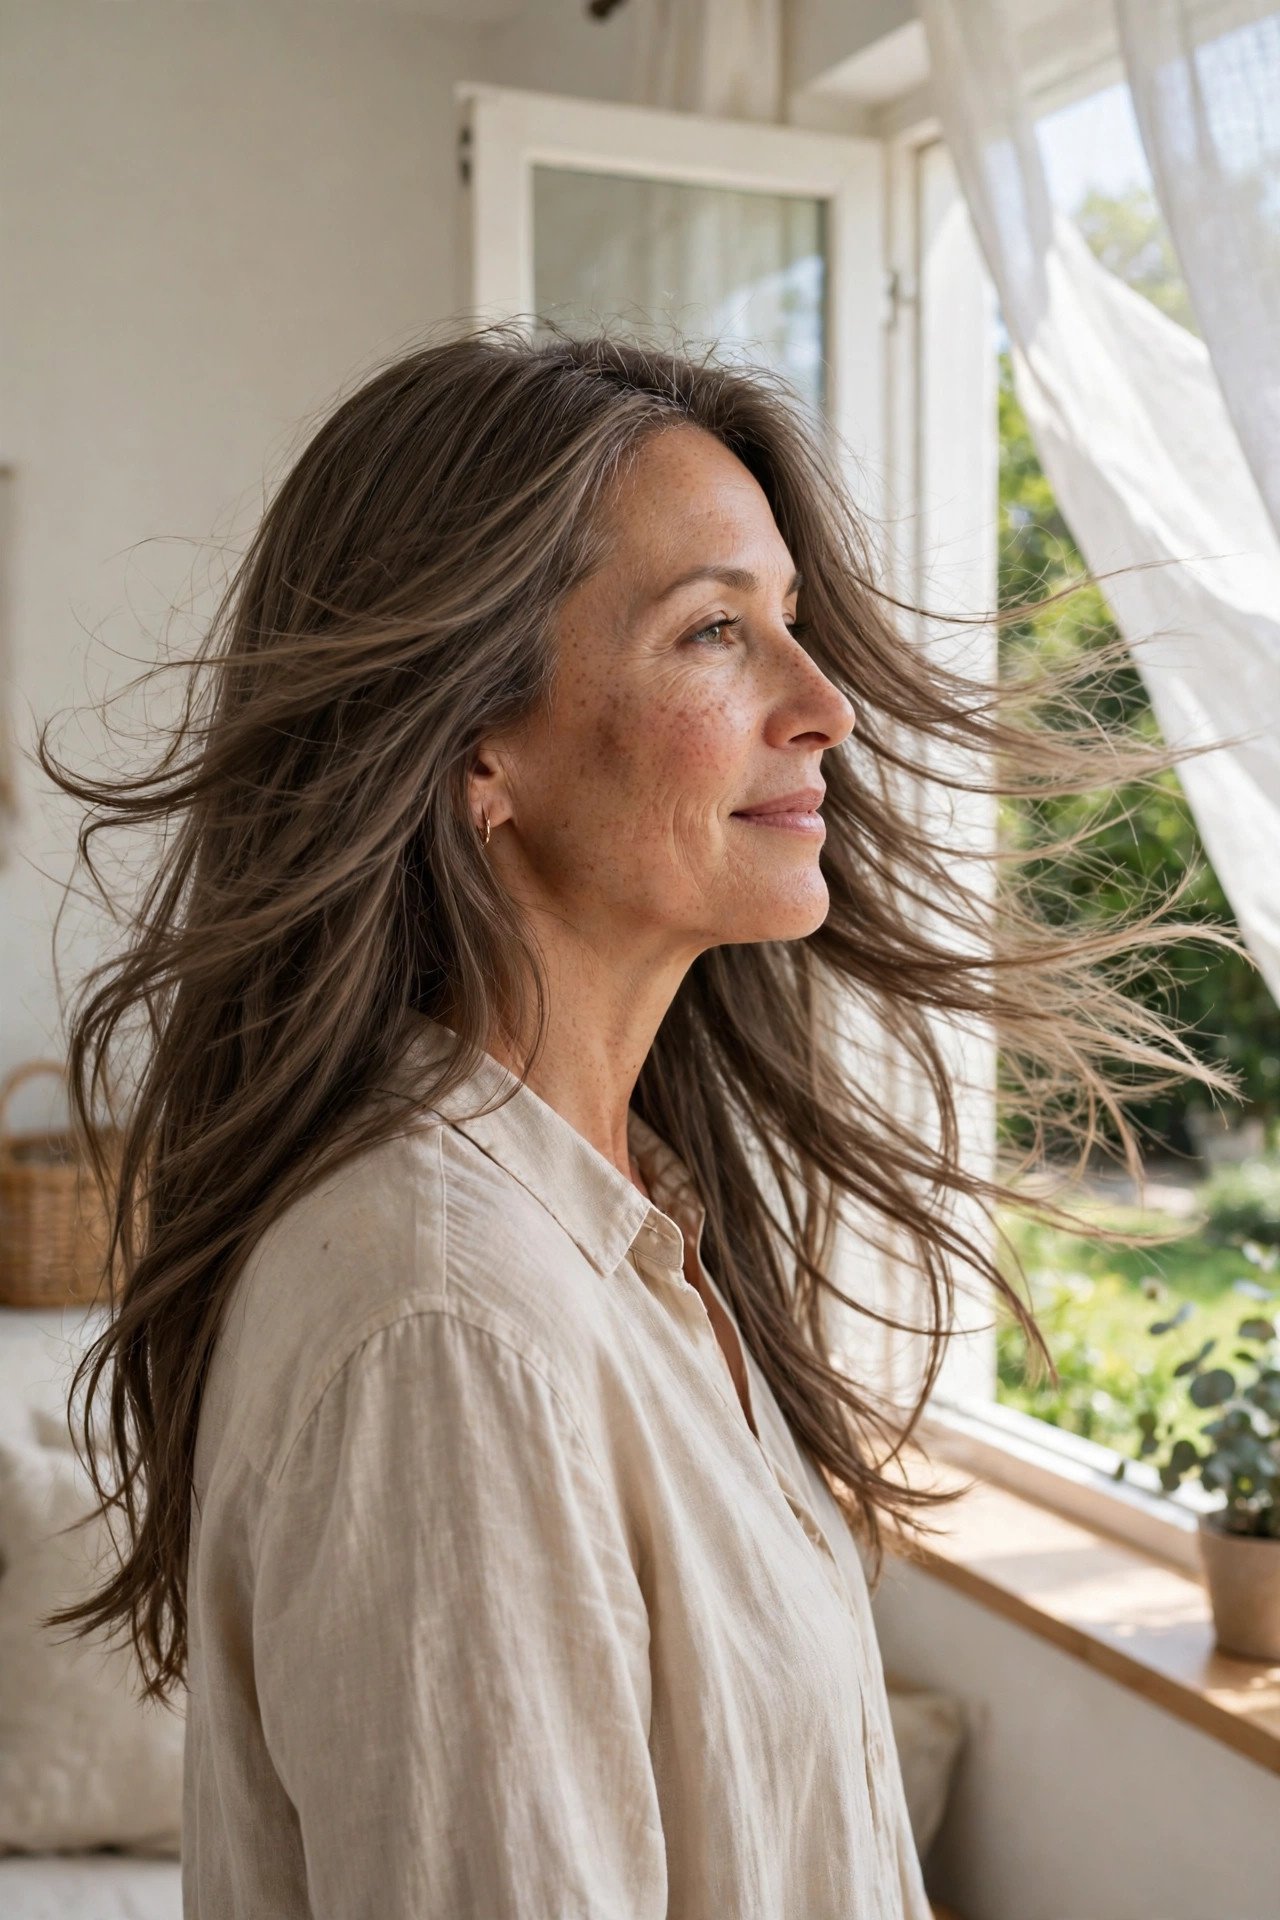
Same hair, less weight.
Very long hair has a weight problem nobody mentions. It pulls flat at the roots, it is hot on the neck by July, and it can drag the whole style down even when the top layer looks healthy. Hidden underlayers answer that. Your stylist removes bulk from the underneath sections only, leaving the top layer full length and untouched.
From the outside, nothing changes. The hair still falls in one long sheet, but it swings more, dries faster, and lifts at the root because less weight is holding it down. Ask for the underlayers to stop a few inches above the ends, so the hemline still looks thick.
24. Braided Crown With Loose Length
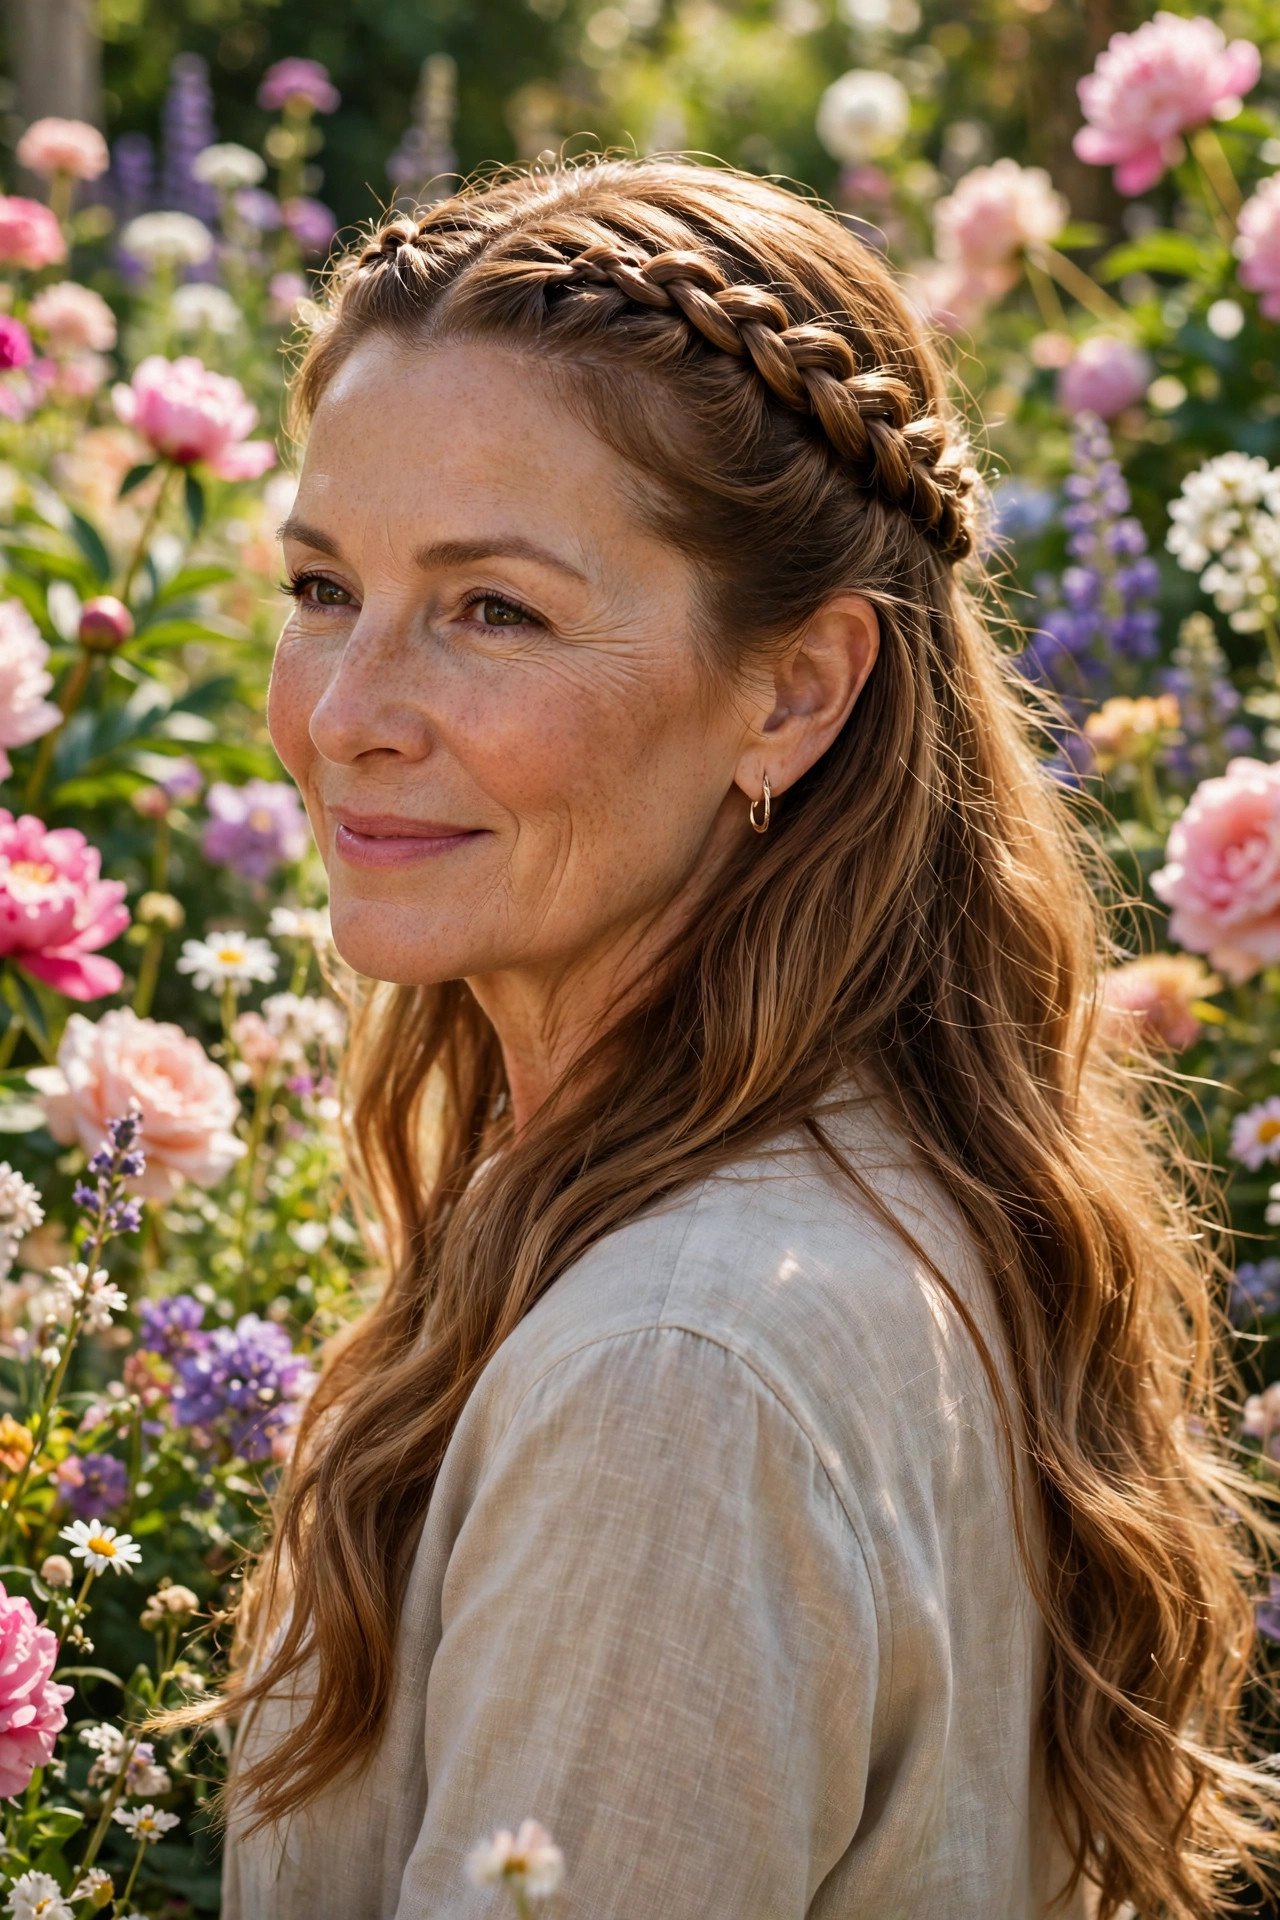
A braided crown does two jobs. It keeps hair off your face on busy days, and it leaves your length loose down your back, so you still feel like yourself. Braid along the hairline from one ear, over the top, and down to the other side, then tuck the end behind the ear and pin it flat.
Start with day old hair if you can. Freshly washed hair is slippery, and the braid will slide loose within the hour, while hair with a day on it grips and holds. Keep the braid close to the hairline at the front so it reads as a crown, not a headband sitting on top.
Before you start
25. Ribbon Curls With a Glossy Finish
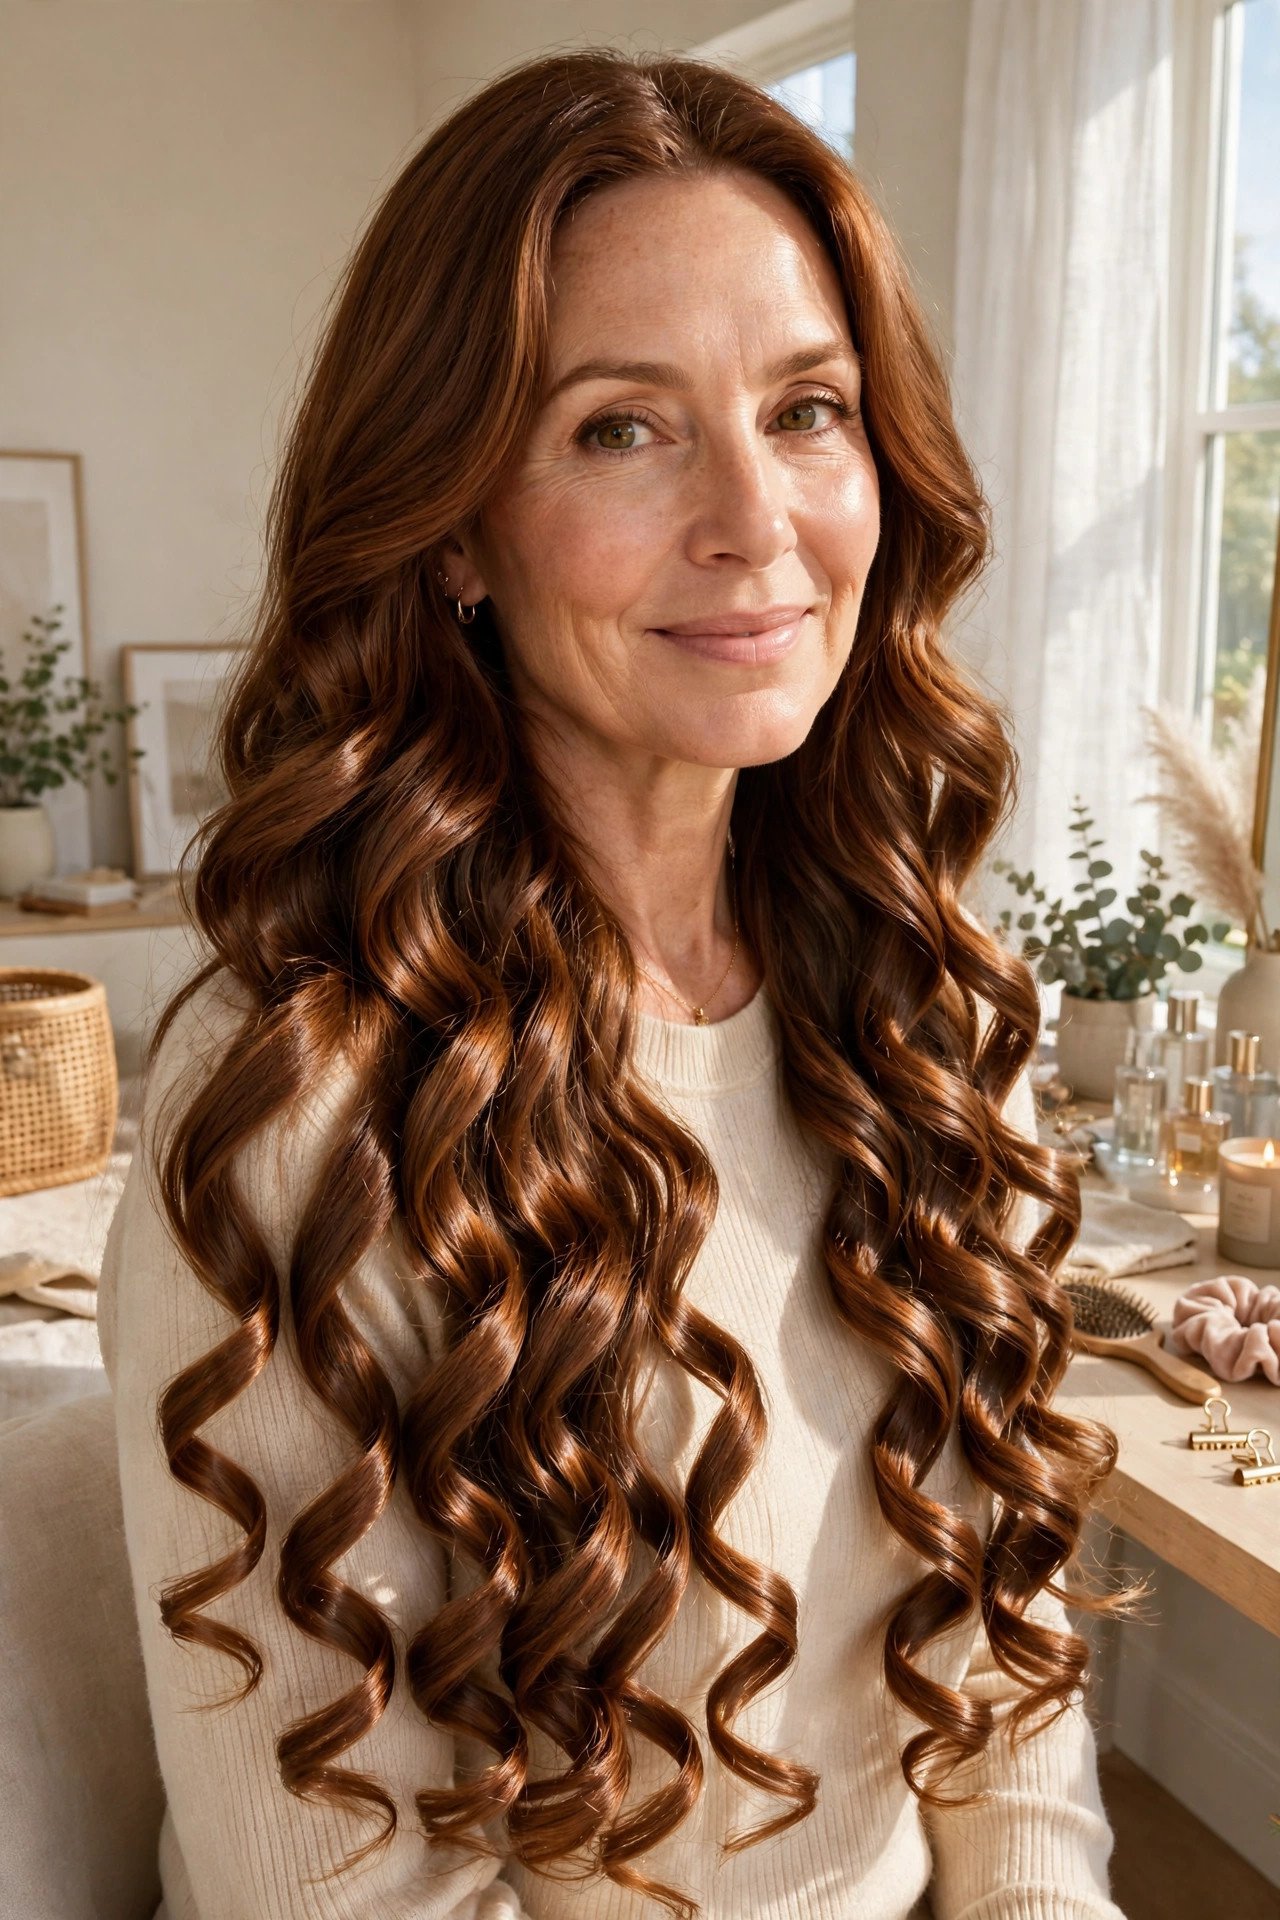
Ribbon curls are the polished cousins of everyday curls. Each section is curled flat against the wand so it sets in a smooth spiral, like ribbon candy, and the finished hair catches the light along every twist. On long hair the effect is rich and deliberate, the one to pick when the occasion calls for finished rather than undone.
Work in small sections and let every curl cool in your palm before you let it drop. That cooling minute is what sets the spiral. Once all the curls are in, separate them with your fingers only, never a brush, and leave them glossy. Brushing turns ribbon curls into ordinary waves, and ordinary was not the plan.
Let every curl cool before it drops. A warm curl lets go, while a cooled curl holds its spiral.
Long hair in your forties and beyond works when the cut has a plan. A bit of layering for movement, a front that frames instead of dragging, ends that get trimmed before they thin out. None of the styles above ask you to fight your hair type, and most of them grow out kindly between appointments.
Pick two or three favourites, save this list to your hair board on Pinterest, and show your stylist the photos at your next visit. A clear picture beats a long explanation every time, and your length gets to stay right where you like it.