22 Red Makeup Eyeshadow Looks That Look Stunning On Anyone
Red eyeshadow scares people for one reason: it sits close to the colour of tired eyes, so a sloppy blend can read all wrong. Done well, it is the warmest, richest shade in the drawer. This list of red makeup eyeshadow looks covers the full range, and every entry is built from a real close-up photo, so you can see exactly how the colour is placed, how far it is blended, and where the shine sits. There are full drama looks here, deep smoky lids, glitter packed edge to edge, sharp graphic shapes. There are also quiet ones, a soft wash you could wear to work and a brick tone that behaves like a neutral. Each entry points out the one detail that makes the look work, plus the small choices that keep red looking like makeup rather than a late night. Read the photos closely before you copy a look. The difference between bold and messy is usually just the edge of the blend.
1. Red Smoky Eye With A Sparkly Inner Corner
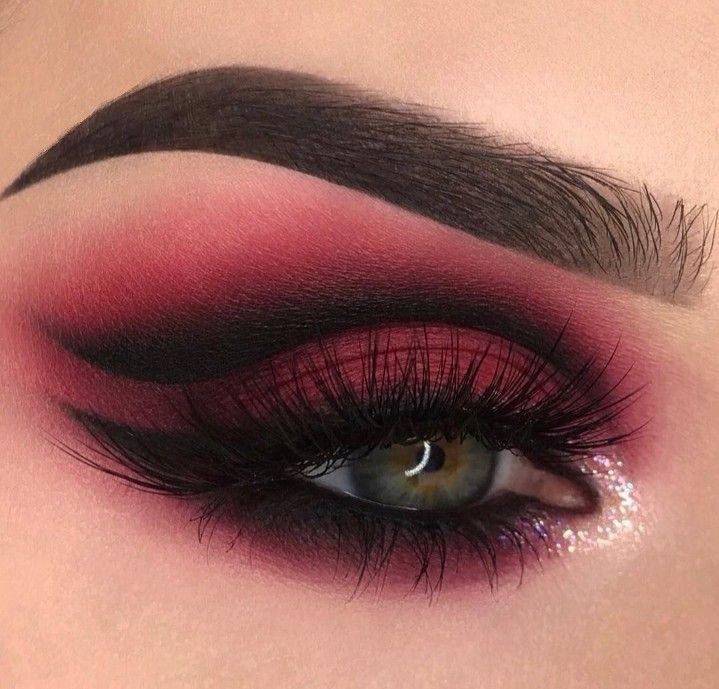
Deep red is packed across the whole lid and smoked upward until it fades just under the brow, while black shadow hugs the outer corner and pulls the shape into a soft wing. The blend has no hard line anywhere, which is what keeps such a strong colour wearable. A pinch of fine sparkle at the inner corner stops the look from going flat, and the long, separated lashes hold their own against the dark tones.
- Colour placement: brightest red sits centre lid, deepest tones at the outer third
- Edge control: the crease is buffed with a clean brush so the red melts into skin
- Balance: skin around the eye stays clean and matte, so the eye carries the whole look
Copy the order and the look gets easier: dark shades first, blend second, sparkle last, pressed on with a fingertip so it stays put.
2. Red Halo Eye With A Gold Glitter Spotlight Centre
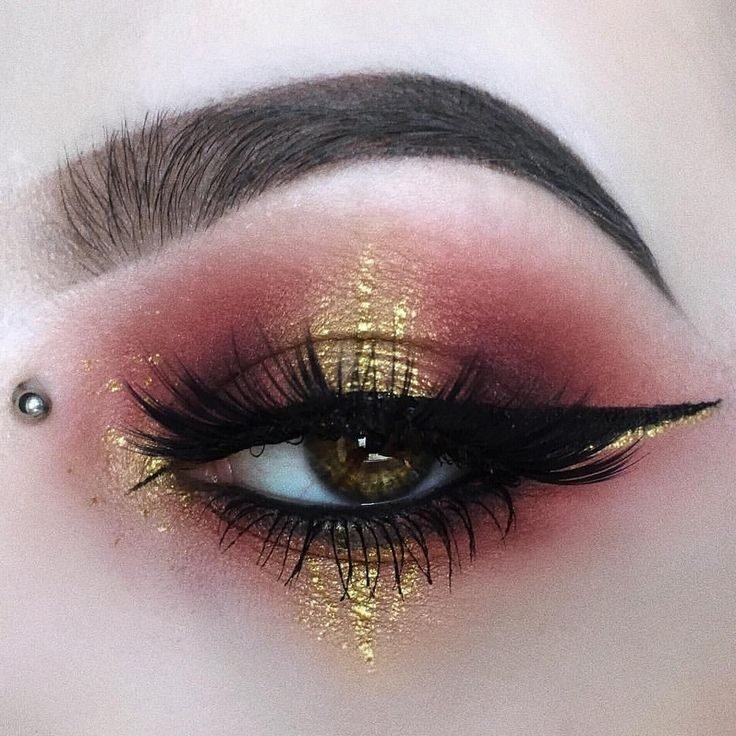
Look at where the light lands: right in the middle of the lid. Deep rose red is packed onto the inner and outer thirds, and a stripe of gold glitter sits in the centre where the two sides leave a gap. That contrast is the halo effect, and it makes the eye look rounder because the brightest point pulls forward while the darker corners recede. A thick black wing stretches from the lash line, and gold flecks dust the inner corner and the skin under the lower lashes.
Pack deep rose red onto the inner and outer thirds of the lid, leaving the centre bare.
Press gold glitter onto the bare centre with a flat brush or fingertip, keeping it in a neat stripe.
Soften the two joins with a small blending brush, then add the black wing and a touch of glitter at the inner corner.
Keep the glitter in the centre stripe only. Spread across the whole lid, it stops reading as a halo and turns into a plain glitter lid.
3. Red Cut Crease With A White Graphic Line
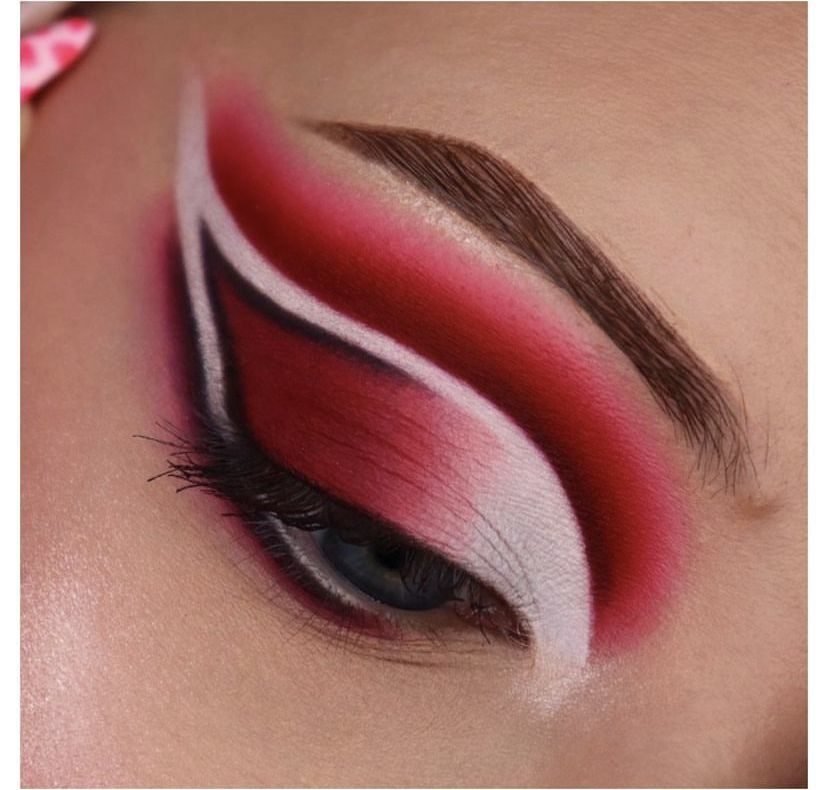
Sharp enough to stop a scroll, this one carves the crease with a clean white line that sweeps out into a long flick. Above the line, red is blended from deep at the outer corner to pale pink near the nose. Below it, the lid stays a flat, bold red. The eye is closed in the photo, and the line sits exactly in the socket.
Two things make it work. The white line is one confident stroke with no patchy gaps, and the red gradient runs darkest at the top outer edge. Recreate it with a concealer cut on a closed eye, set with pale shadow, then build the red around it. Wobbly lines show fast, so rest your elbow on the table and work in short strokes.
Cut the crease on a closed eye so the line lands in the real socket.
Set the concealer line before adding red.
Skip blending over the white line; one pass turns it grey and muddy.
Skip thick liner; it fights the graphic shape.
4. Red Shimmer Lid With A Deep Matte Crease
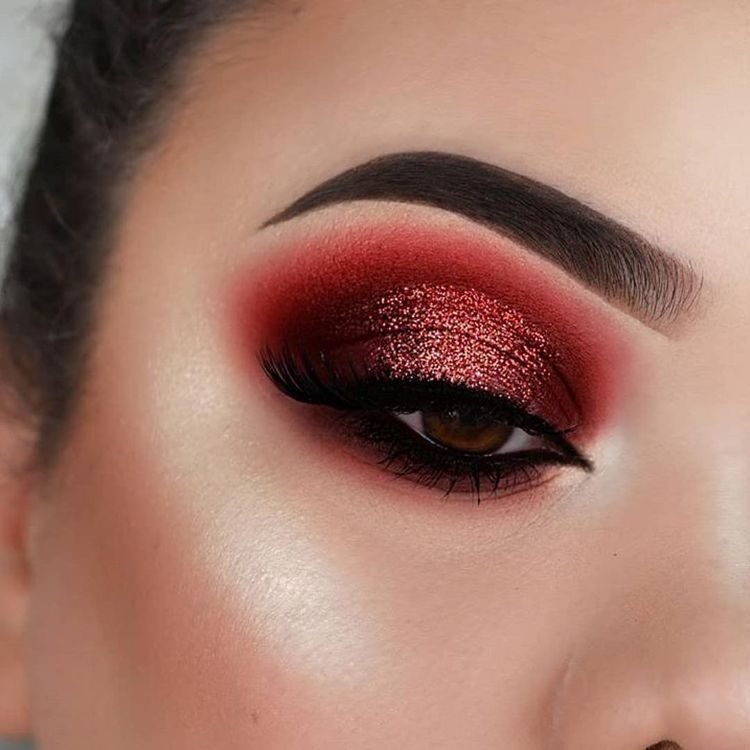
Metallic red covers the lid like foil while a deeper matte red sits in the crease and does the shaping. That split is the whole trick. Shimmer on the lid catches light every time you blink, and the matte around it keeps the eye from looking swollen, which is the usual risk with red shimmer. A neat black wing and groomed brows finish a look that is glam but still tidy.
💡 Quick Tip
Apply the shimmer with a damp flat brush or a fingertip. A dry brush leaves red shimmer dusty and patchy, and fallout shows on the cheeks.
Notice how the shimmer stops at the crease and never climbs higher. Keep yours in the same boundary and the depth stays where it belongs. If your lids are hooded, take the matte crease shade a touch above the fold so the shape still shows when your eyes are open.
5. Red Matte Blend With A Dark Lash Line
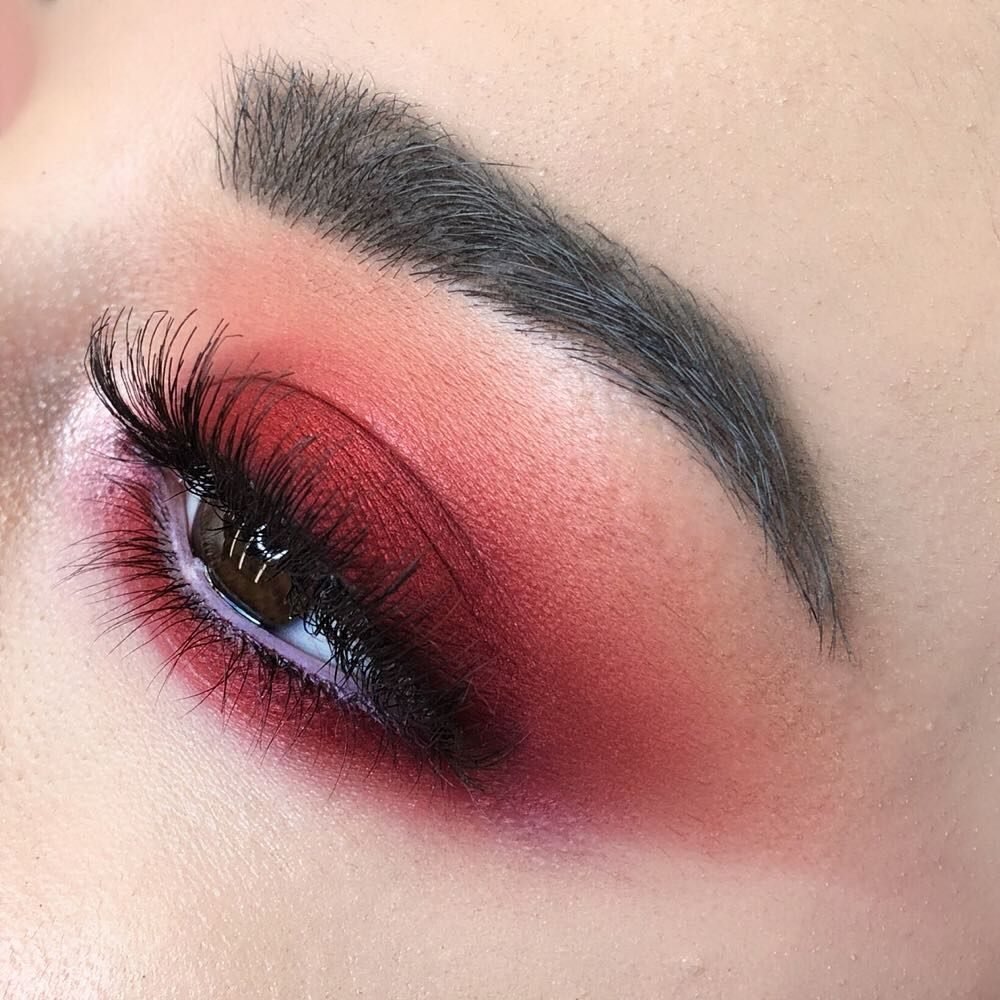
No shimmer anywhere here, just matte red blended wide through the crease and socket, with the darkest tone pressed along the lash line to give the lashes a thick base. Matte red can look flat in photos, but this blend avoids it by using three depths of the same colour: bright red in the middle, a softer wash at the edges, and a near burgundy line at the roots of the lashes.
Big, fluffy lashes carry the glam here, yet the shadow itself stays simple. That makes this a good first red look if you already own one matte red palette.
6. Red Glitter Lid Packed Edge To Edge
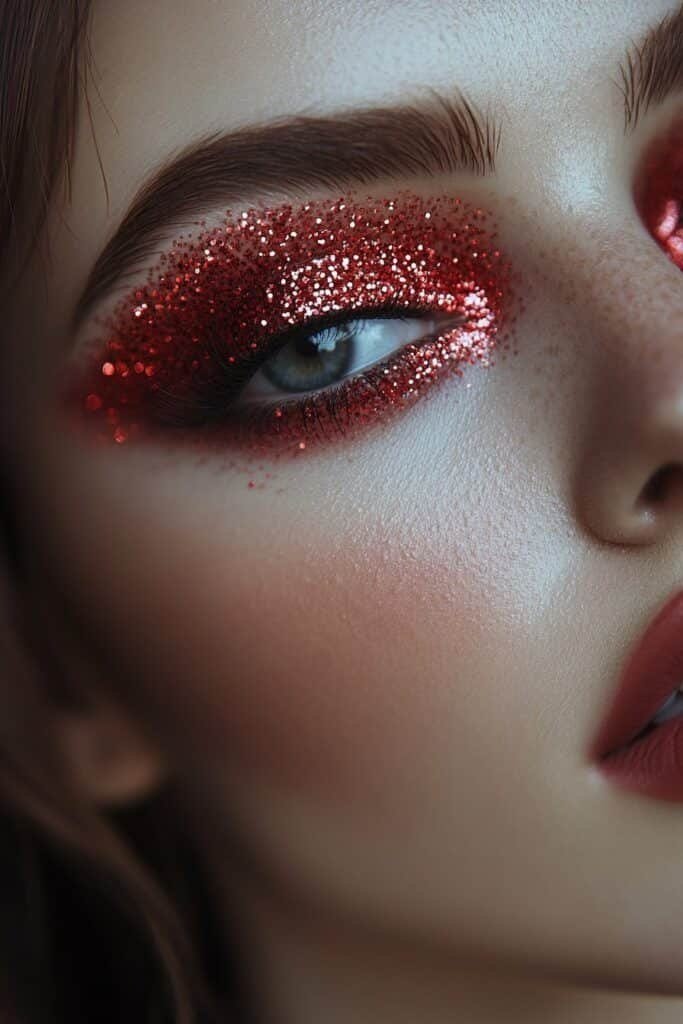
Every millimetre of this lid is red glitter, packed densely enough that you cannot see skin through it. The glitter runs into the crease and stops in a clean, rounded shape, with soft skin and a plain matte lip around it for contrast. Faces in this style are usually kept quiet, and this photo follows the rule: blush is soft, brows are natural, nothing competes with the lid.
✔️ Before you copy it
Removal matters as much as application. Soak a cotton pad, hold it on the closed lid for twenty seconds, and slide the glitter downward instead of rubbing it across the eye.
7. Red Ombre Fade From Soft Pink To Deep Red
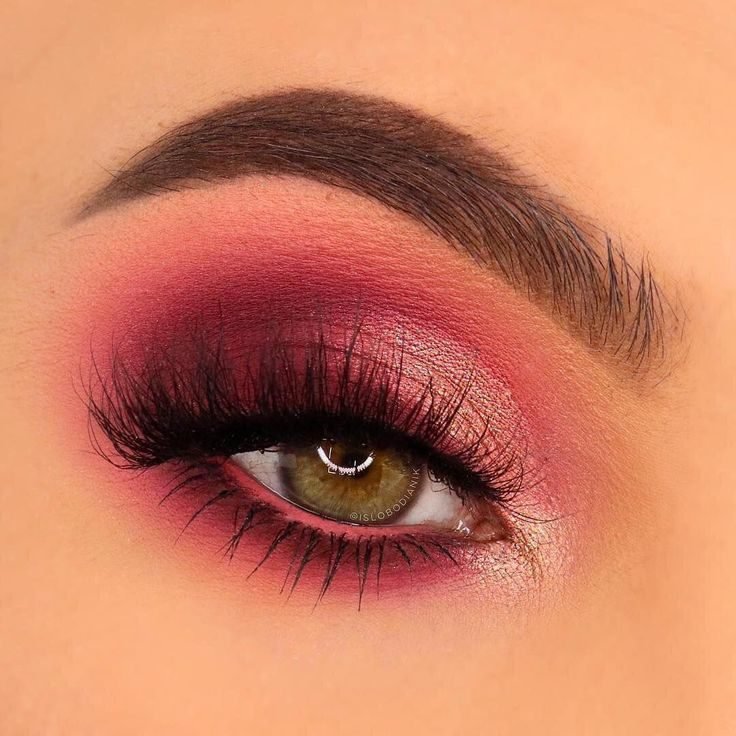
Gradient work lives or dies on the middle shade, and this fade gets it right. Pale pink starts at the inner corner, warms through rose across the lid, and lands in a deep red at the outer corner and crease. No banding, no stripes: each tone melts into the next. The lower lash line mirrors the same fade in miniature, lightest near the nose and deepest at the outer edge.
Order matters if you copy it. Lay the deepest red first at the outer corner so you control how far it travels, then the rose, then the pale pink, and blend each join with the brush that carried the lighter colour. Work with tiny amounts and build up. It is far easier to deepen a fade than to rescue one that started too dark.
The takeaway: a good fade is three shades and patience. If two neighbouring tones look the same in the pan, they will band on the eye.
8. Red Winged Shadow With A Metallic Lid
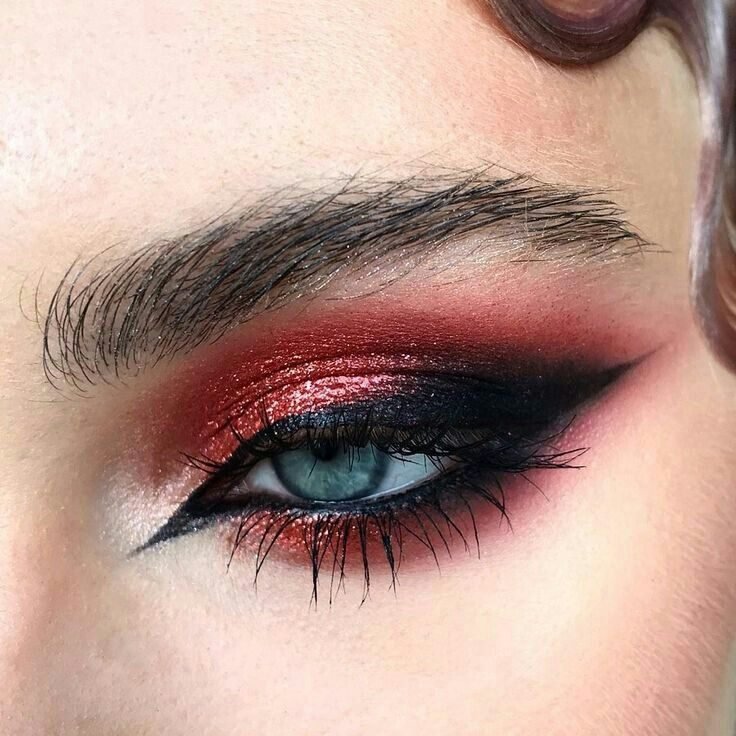
Instead of ending at the outer corner, the shadow itself keeps going. Metallic red covers the lid and is dragged outward into a long, sharp point, while a black liner wing sits inside the shape and sharpens it further. The red also wraps the lower lash line and meets the wing, so the whole eye reads as one pointed shape.
| Detail | Shadow wing | Liner wing |
|---|---|---|
| Edge | soft but pointed, made with tape or a card | razor sharp, drawn in one stroke |
| Forgiveness | easy to clean up with a cotton bud | mistakes show at once |
| Best use | colour impact and drama | definition along the lashes |
This look uses both, which is why it reads so bold. Try the shadow wing alone first; it gives most of the drama with half the stress.
9. Burgundy Depth Smoky With A Fine Sparkle Finish
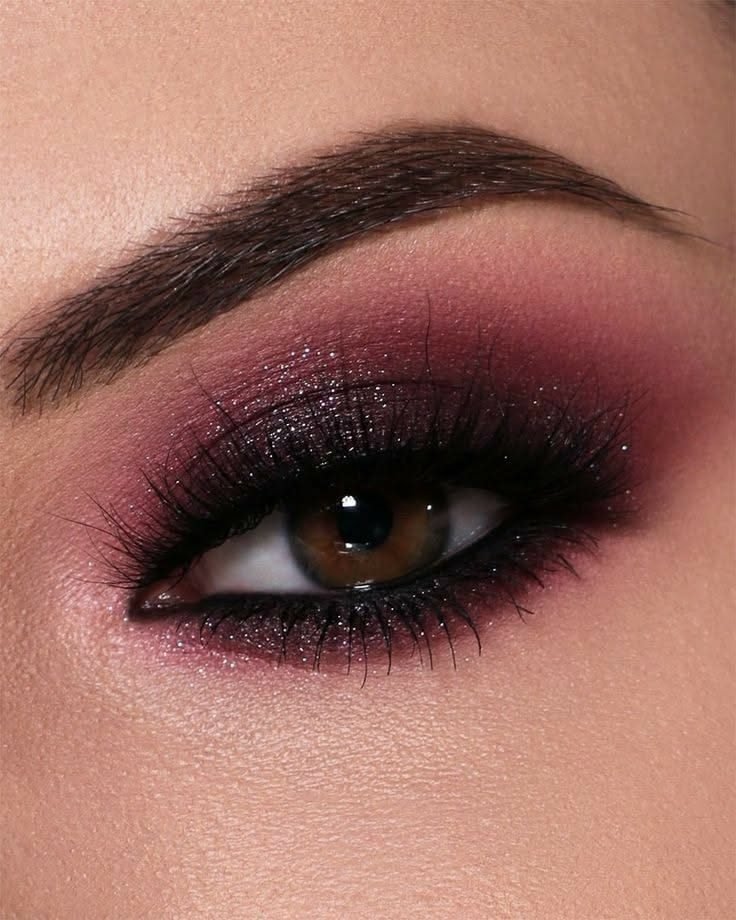
Burgundy is red with the lights turned down, and this smoky eye leans into the mood. The deepest wine tone is packed at the lash line and outer corner, then diffused into a plum red haze that reaches the brow bone. A scatter of fine sparkle sits across the lid, visible when the light hits it, which keeps the depth from looking heavy.
Flat burgundy shadow on its own can read bruised, especially on fair skin, and it gives the eye no shape.
Add the deepest tone at the lash roots and a whisper of sparkle on the lid, and the same colour turns rich and deliberate.
Black mascara on the lower lashes matters here. Without it, a dark lower blend can drag the eye down; with it, the smokiness looks finished.
10. Red And Gold Duo With A Glitter Centre
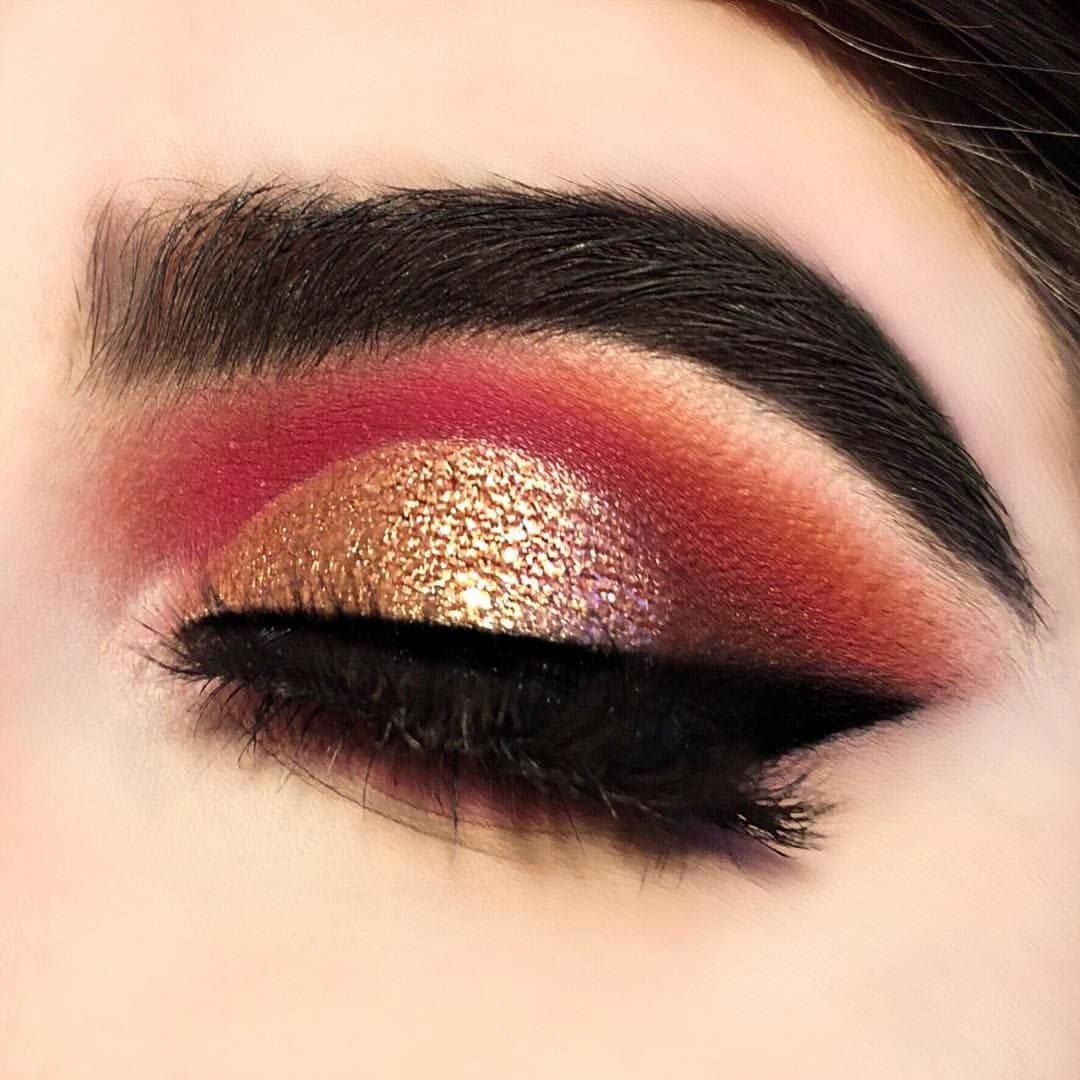
Gold takes the centre of the lid and red does everything around it: crease, outer corner, and the blend up toward the brow. The eye is closed in this photo, which shows the layout clearly. Gold glitter is chunky at the very middle and thins as it meets the red, so the two colours melt instead of stopping at a border.
✨ What makes the duo work
Warm meets warm: both shades sit on the warm side, so nothing clashes.
Gold stays central: it never reaches the outer corner, where it would fight the red.
Thick black lash line: the dark band separates the two metallics and keeps the eye defined.
Holiday parties are the obvious home for this pairing, but the same layout works with the glitter swapped for a plain gold shimmer when you want it calmer.
11. Soft Red Smoky Eye With A Red Lower Lash Line
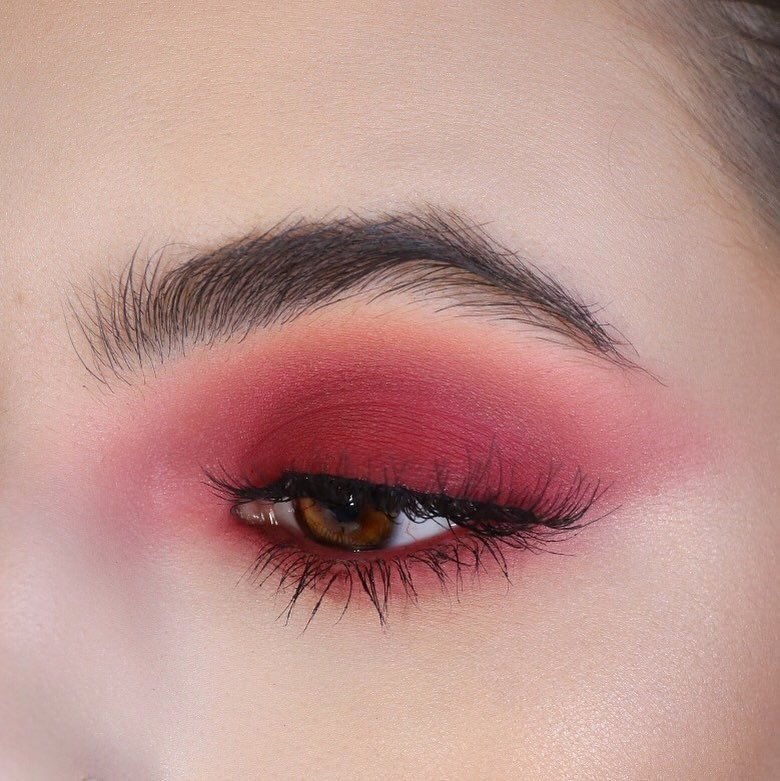
Plenty of people stop at the top lid, and the result often looks unfinished. Here the red is smoked under the lower lashes with the same care as the top, and that single choice ties the whole eye together. The top lid is a soft, diffused red with no liner wing at all, so the lower line becomes the detail you notice.
Keep the lower blend narrow, about the width of a cotton bud, and hug it close to the lashes. A wide lower blend is what tips red into tired territory. Waterproof mascara on the bottom lashes is worth it too, since shadow under the eye plus smudged mascara is a fast route to panda eyes by lunchtime. If your eyes water easily, set the lower shadow with a matching matte shade and skip liner on the waterline entirely.
12. Red Metallic Foil Fading To Black
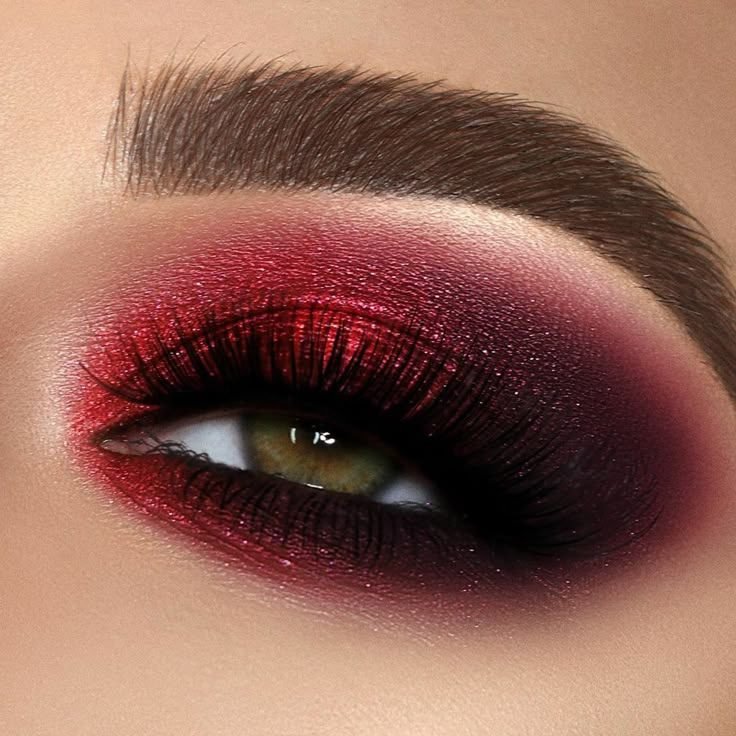
Foil finishes sit on the lid like metal leaf, and this one runs molten red at the inner two thirds before dissolving into black at the outer corner. The shine is mirror bright at the centre and dies gradually, so the fade looks smoked rather than striped. Skin around the eye is warm and softly lit, which makes the cool gleam of the foil stand out even more.
✔️ Foil checklist
Foil creases faster than regular shimmer, so keep the layer thin and set the crease area with a matching matte before you start.
13. Soft Red Wash With A Satin Lid
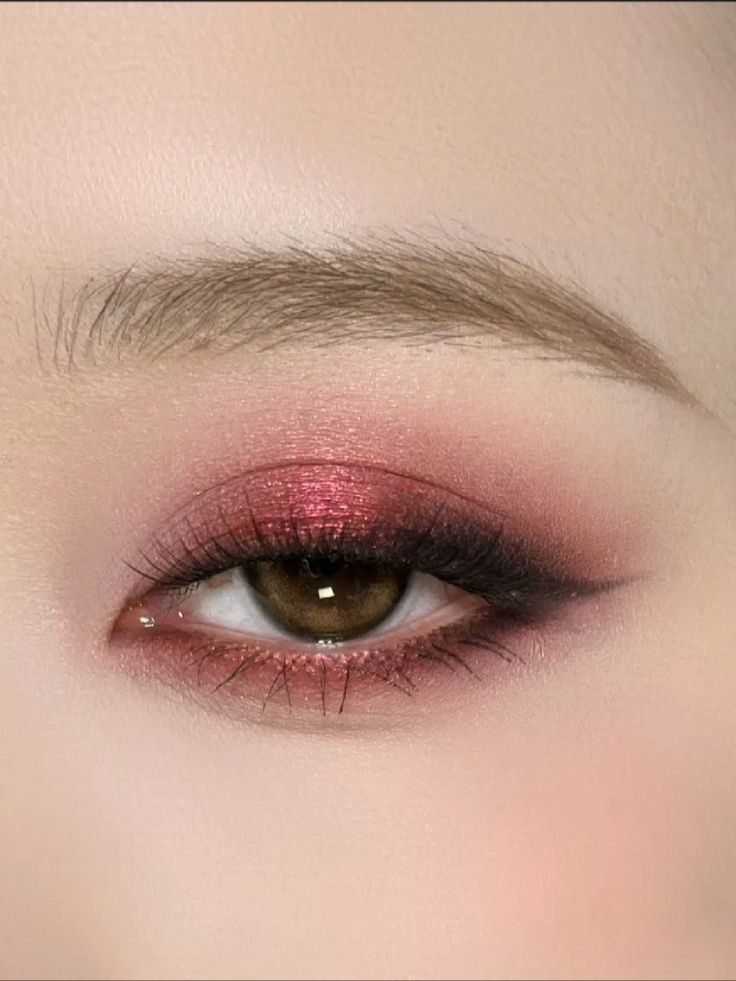
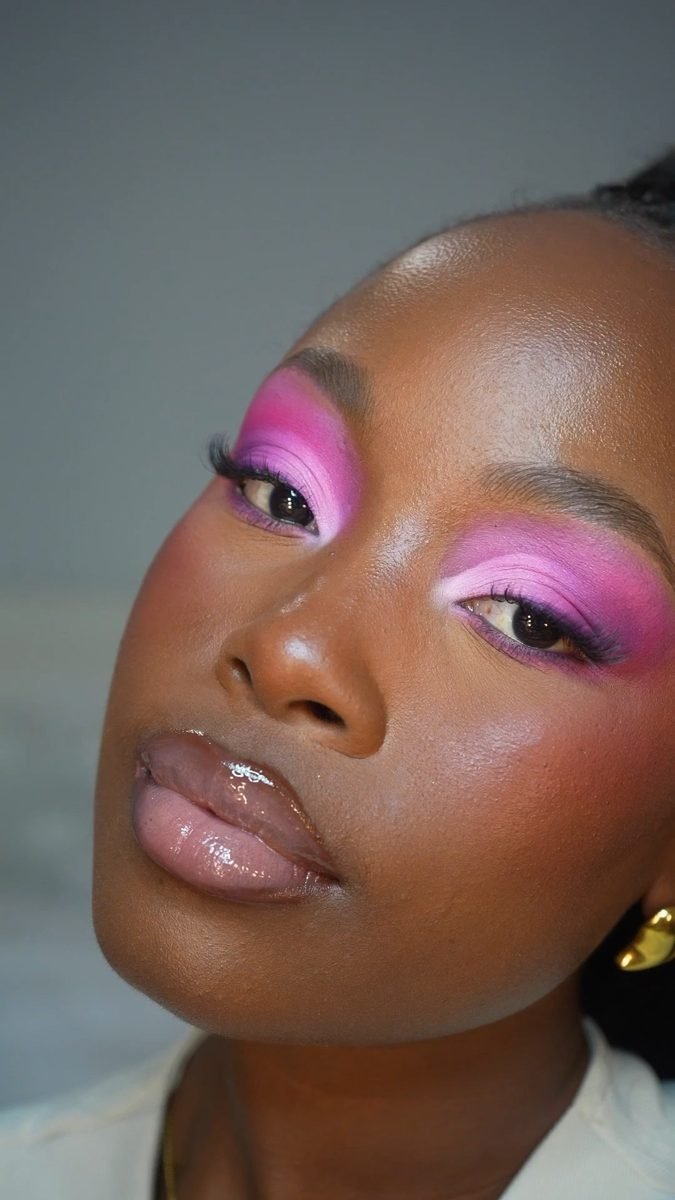
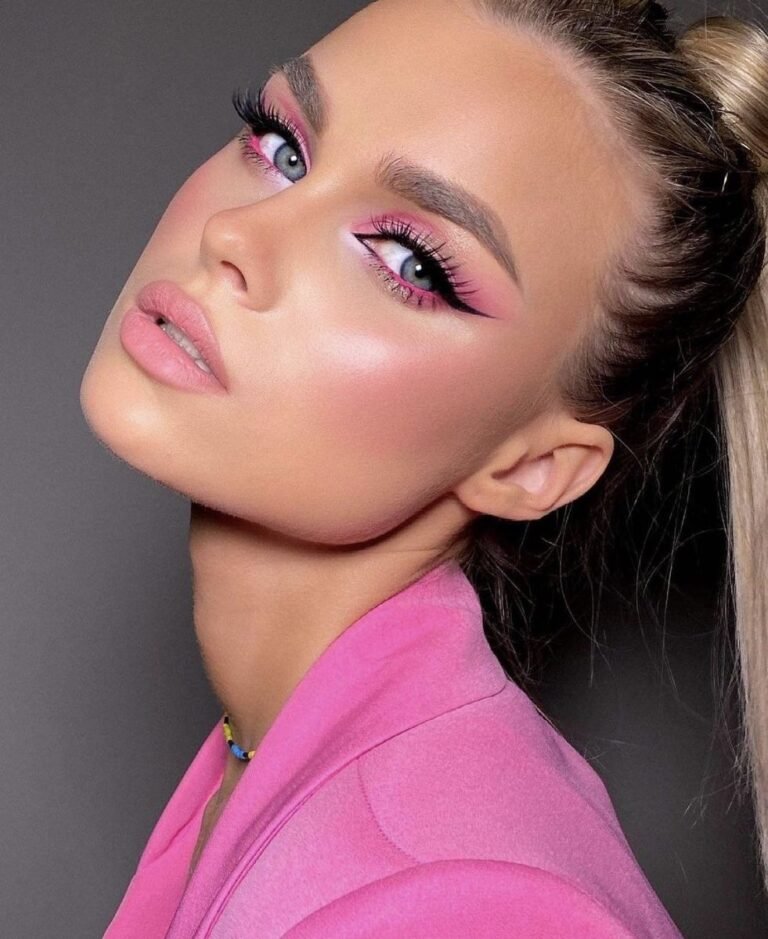
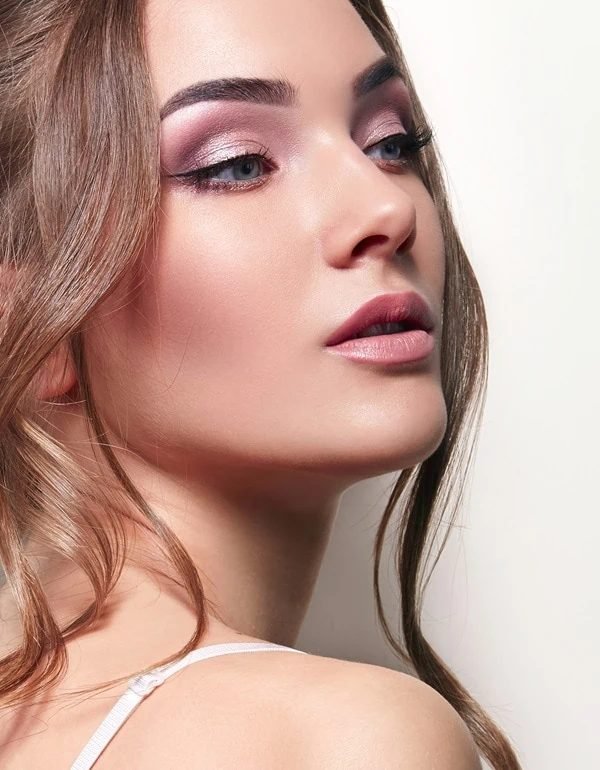
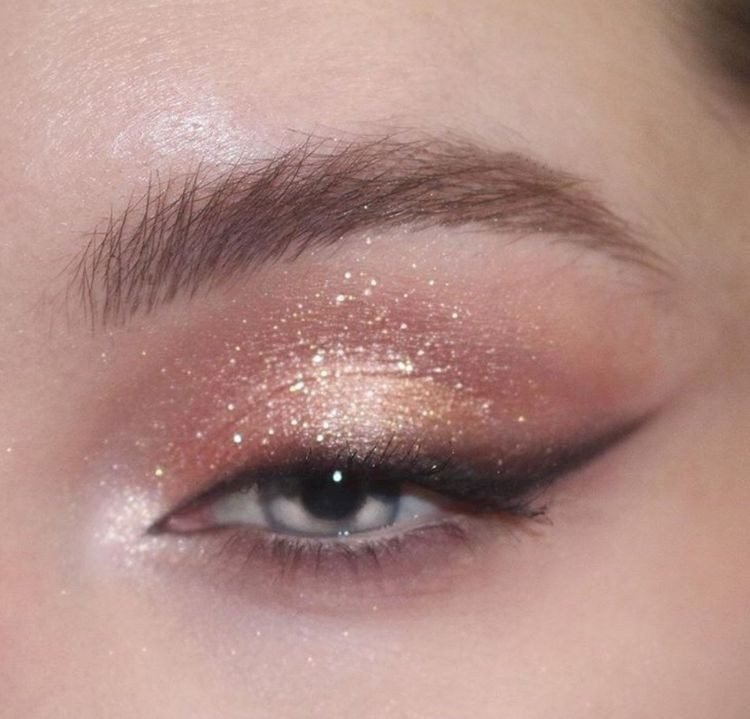
Proof that red can be gentle: a sheer wash of rose red is diffused over the lid and crease, the lid itself has a quiet satin sheen, and a soft brownish wing gives just enough shape. Nothing is packed on, nothing is sharp. The colour sits strongest near the lashes and fades to almost nothing at the edges.
Washes reward a light hand and punish a heavy one. Load the brush, tap most of the product off, and sweep in wide arcs. Two sheer passes will always look softer than one strong one. The satin lid here comes from a shimmer applied only on the flat of the lid, kept away from the crease so the eye keeps its natural shadow.
Build the wash in two sheer passes with most product tapped off the brush.
Keep shimmer on the flat of the lid so the crease keeps its natural shadow.
Skip packing colour at the inner corner; it closes the eye down.
Skip a hard liner line; it cancels the softness the wash creates.
14. Red Graphic Shape With A Floating Loop
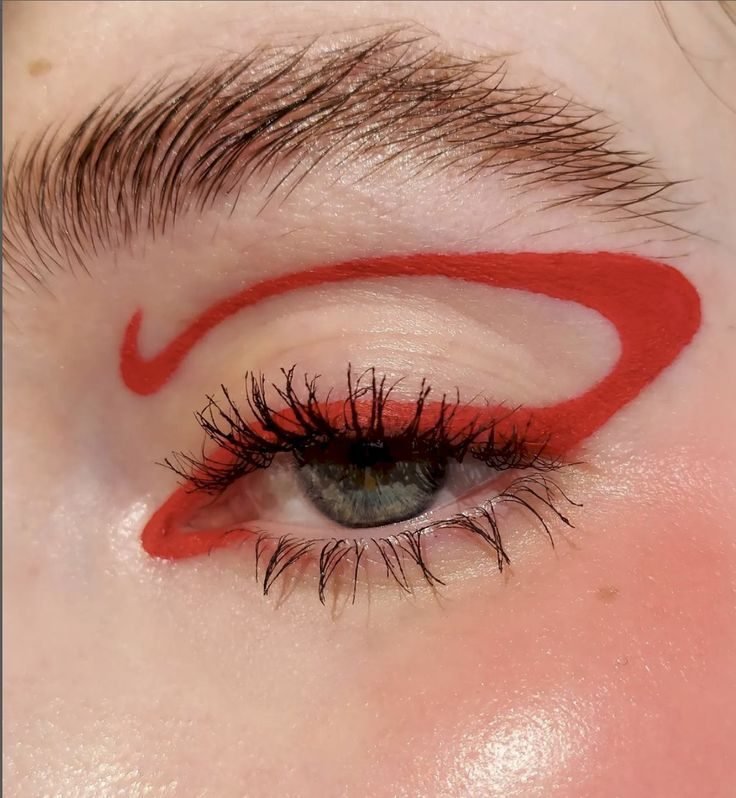
A single ribbon of red loops above the eye, curving from the inner corner up over the crease and back down to a point at the outer edge, with bare skin inside the loop. The lid itself carries only a soft red tint along the lashes. Graphic work like this is basically drawing, so precision is the whole game: the line keeps one even thickness all the way around.
Sketch the loop lightly with a pale pencil while the eye is open, checking it sits above the crease.
Trace over the sketch with red liner or gel shadow, working in short strokes and resting your elbow.
Clean the edges with a pointed cotton bud and micellar water, then add mascara last.
Symmetry between the two eyes is the hard part. Draw both loops before you commit to full colour on either.
15. Cranberry Blend With A Berry Shimmer Lid
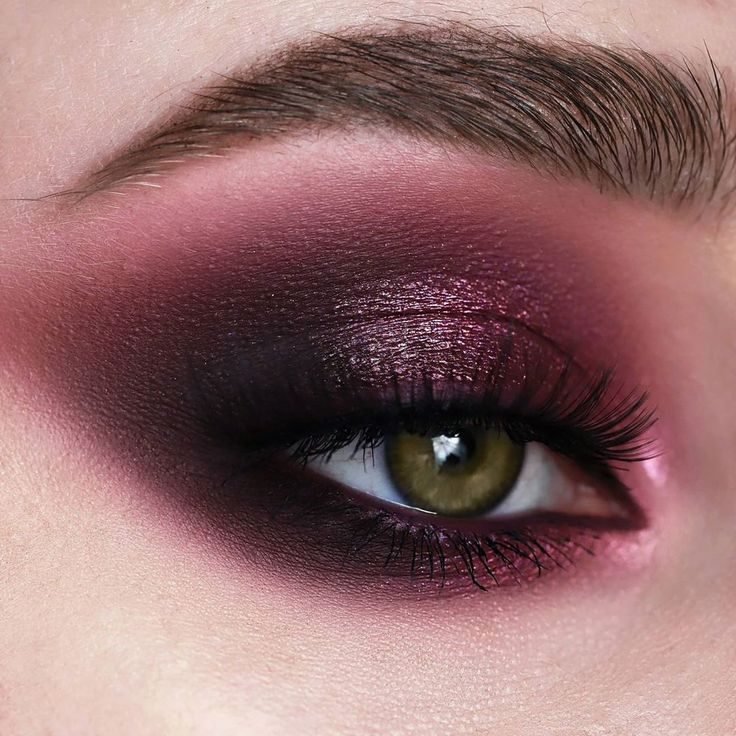
Cranberry sits between red and plum, and this blend uses that in-between quality well. The crease and outer corner are a deep berry matte, the lid carries a matching shimmer, and the whole thing is diffused wide so the colour reads like a haze rather than blocks. Green and hazel eyes get the biggest payoff from this family, since berry tones sit opposite them on the colour wheel.
One caution from the photo: the blend stops short of the inner corner, leaving a small clean gap. That gap keeps berry tones from making the eyes look sore.
16. Bronze Lid Framed By Soft Red
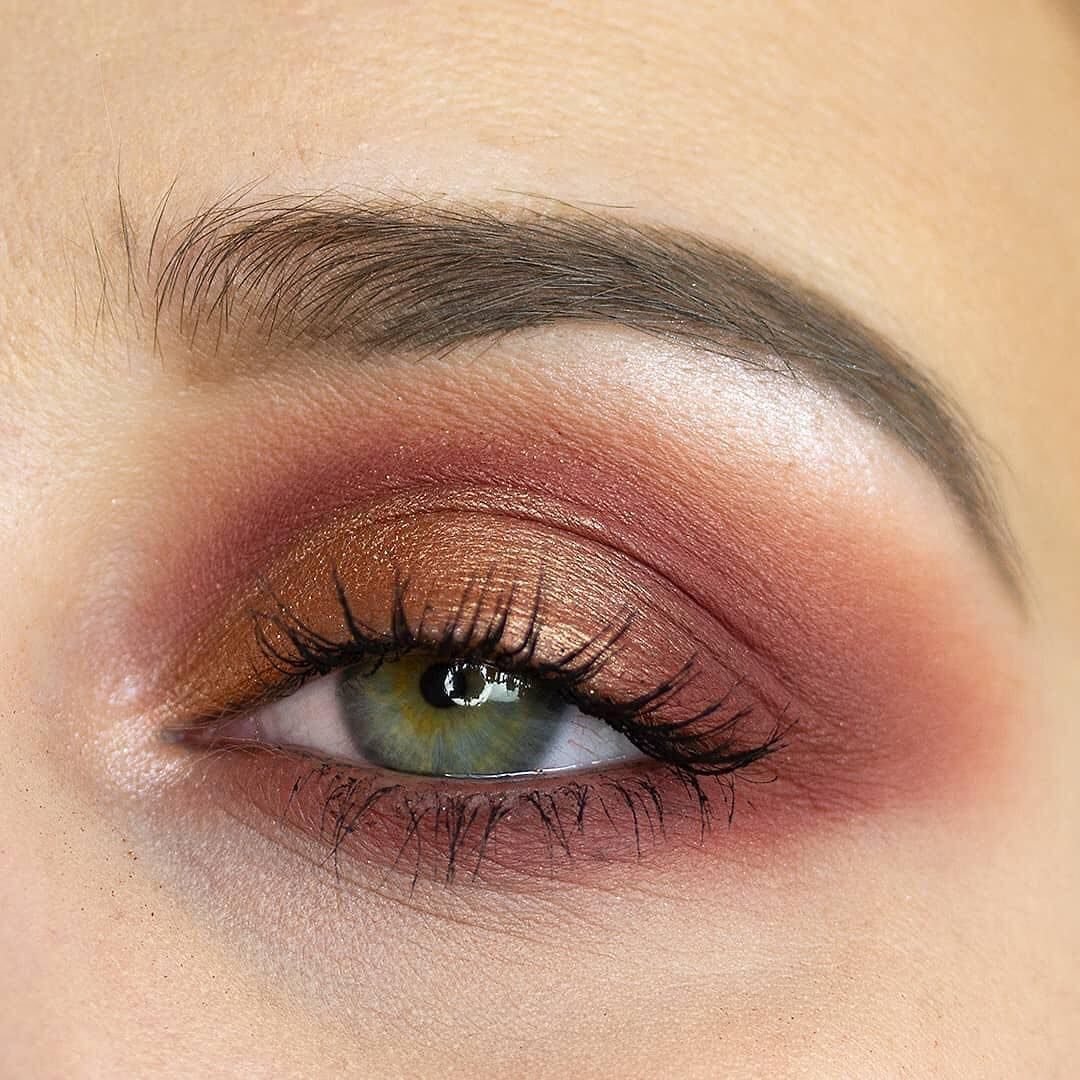
Bronze does the shining here while red plays the supporting role, washed softly through the crease, the outer corner, and under the lower lashes. The pairing is clever because bronze can look plain on its own, and the red frame gives it warmth and shape without stealing the light. Up close you can see the bronze is a smooth metallic, not glitter, so the finish stays grown up.
⚠️ Watch Out
Match the warmth. A cool, silvery bronze will fight the red frame and turn it muddy, so test the two shades side by side on your hand first.
Lower lashes get a sweep of the same red, which is what stops the bronze lid from floating. Keep that lower line thin and the balance holds.
17. Dark Red Outer V With A Rose Lid
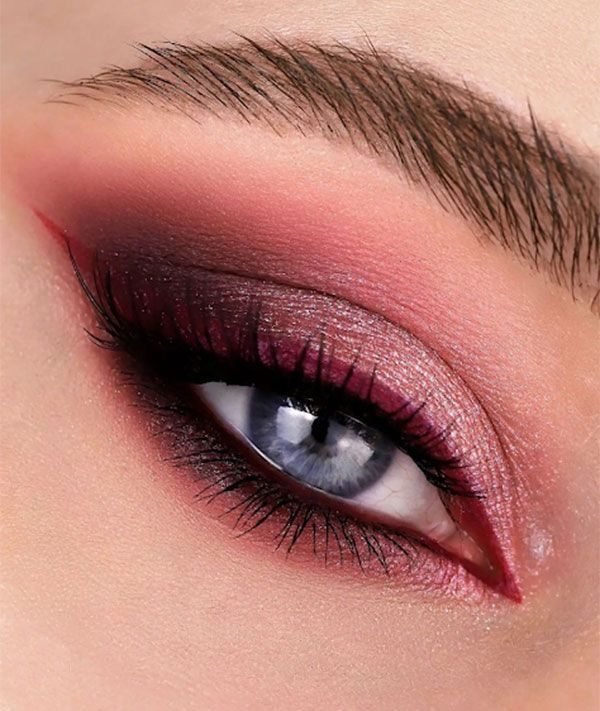
The outer V is the oldest trick in eye makeup, and this version shows why it lasts. A rose shimmer covers the lid, then the deepest red is stamped into the outer corner in a clear V shape and blended inward just enough to lose the hard edge. The effect is instant structure: the eye looks longer, the corner looks lifted, and the light lid stays bright.
The takeaway: place the V with your eye open. A shape drawn on a closed lid often lands in the wrong spot once you look up.
Use a small, dense brush for the V and a fluffy one only for the final soften. If the V spreads too far inward, the lid loses its light and the look turns into a general smoky eye. A piece of tape from the outer corner toward the brow tail keeps the lower edge of the V clean while you learn the shape.
18. Red Sparkle Topper Over A Burgundy Base
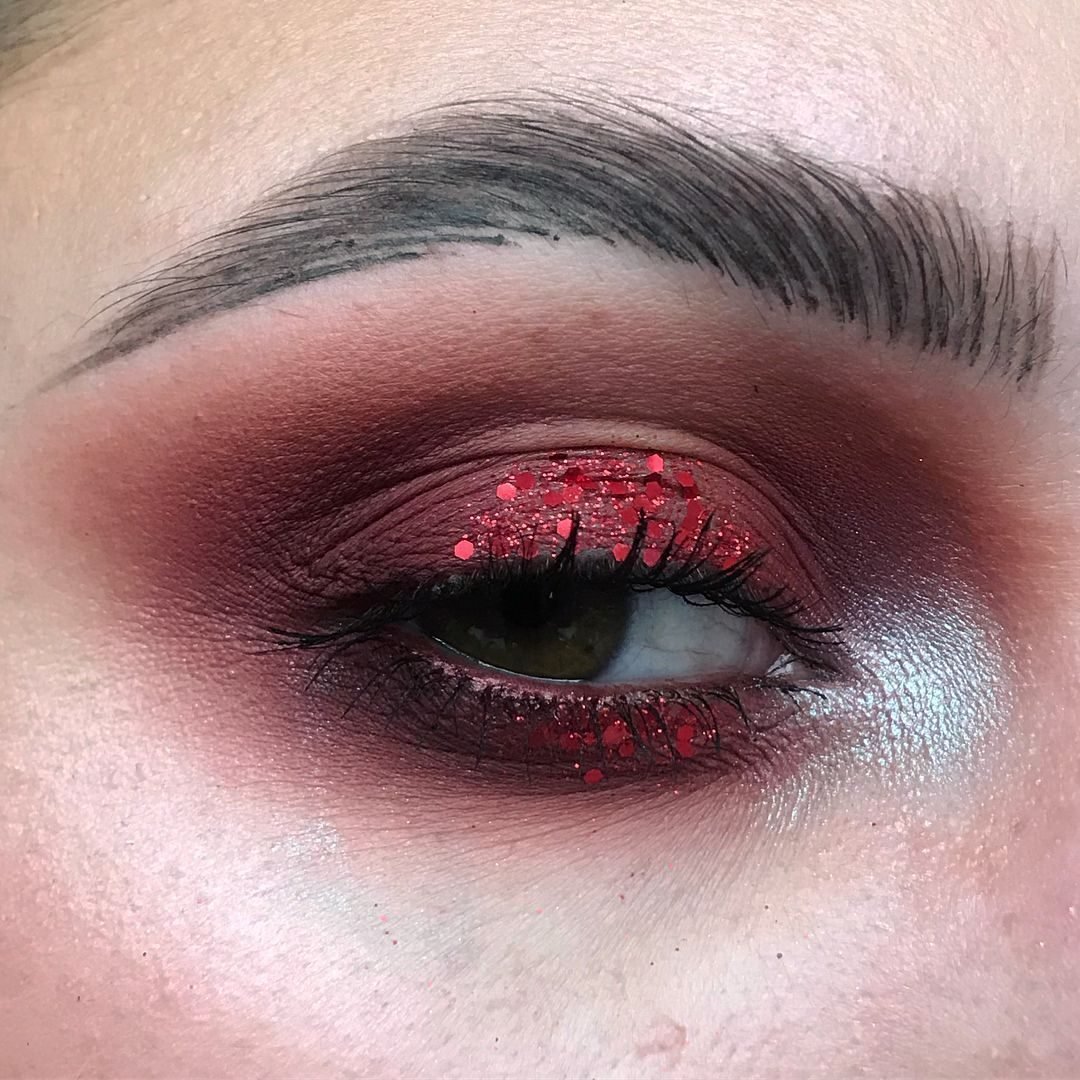
A topper is a finishing layer, and this photo shows the idea cleanly. Underneath sits a finished burgundy smoky eye, soft silver at the inner corner included. Over the centre of the lid, chunky red glitter has been pressed on top, catching light in big, separate sparks. Because the base is already complete, the glitter reads as decoration rather than the main event.
| Detail | Sparkle topper | Full glitter lid |
|---|---|---|
| Coverage | centre of the lid only | the whole lid, edge to edge |
| Base needed | a finished shadow look underneath | glitter glue on bare or primed skin |
| Mood | a lift for a look you already like | full party drama |
The topper route is the forgiving one. If the glitter lands unevenly, the base still looks good, and a fingertip press fixes most gaps.
19. Brick Red Everyday Eye In A Matte Wash
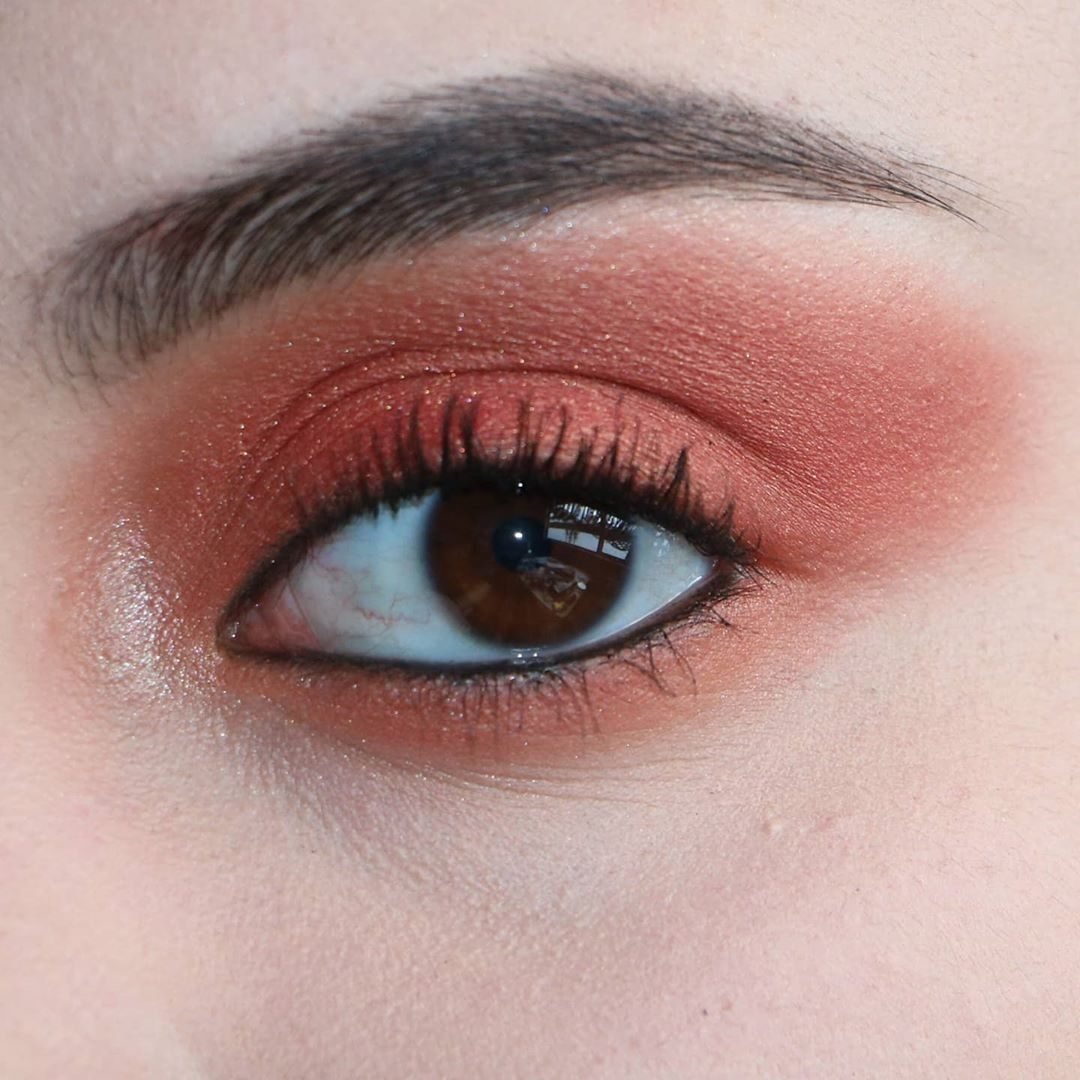
Brick is red that has been to work before: muted, earthy, and matte. This wash is swept over the lid and through the crease in one soft layer, deepened slightly at the outer corner, and finished with natural lashes and no liner at all. Nothing about it shouts, which is the point. On the skin it behaves like a warm neutral with more personality.
A plain brown or taupe wash is safe, but on warm skin it can disappear entirely by midday.
The same one-wash routine in brick red keeps the ease and adds colour that still reads on the eye.
Everyday red lives or dies on the edges, so spend your blending time at the outer border and keep the centre simple. One shade, one fluffy brush, two minutes.
20. Red Monochrome Lid With A Winged Liner Flick
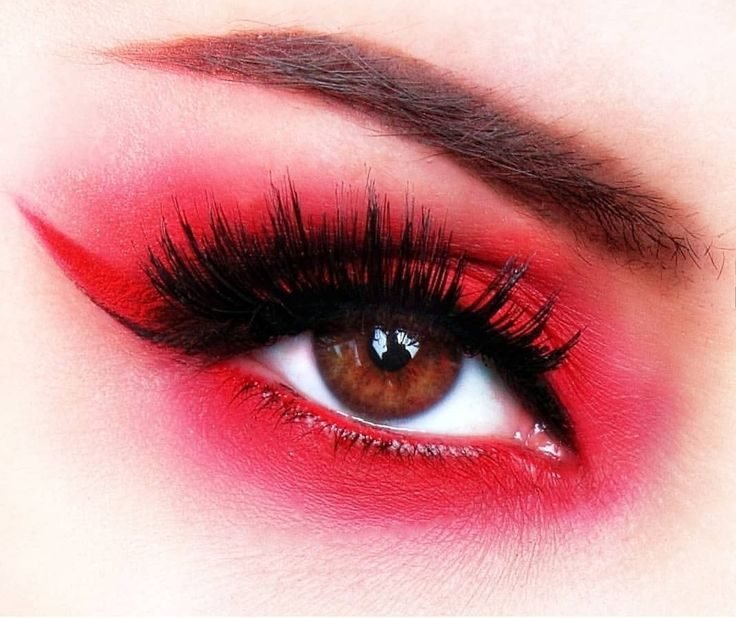
One shade of red does everything here: lid, crease, lower lash line, and the base of a wing that flicks out at the corner. Monochrome looks live on texture and edge control, since there is no second colour to hide behind. The red is matte and fully opaque, the lash line is deepened with black, and the wing is drawn with the same red pulled into a point.
✨ Why one shade works
Depth from pressure: press harder at the lash line and lighter at the edges, and one shade gives you three tones.
The wing extends the eye: drawing it in the same red keeps the look graphic but soft.
Black stays at the roots: tightlining the upper waterline gives lashes a base without adding a second colour story.
Skin elsewhere stays fresh and simple in this style. A bold lip on top of a monochrome red eye is a lot of red in one face.
21. Cherry Cola Eye In Deep Cherry And Brown
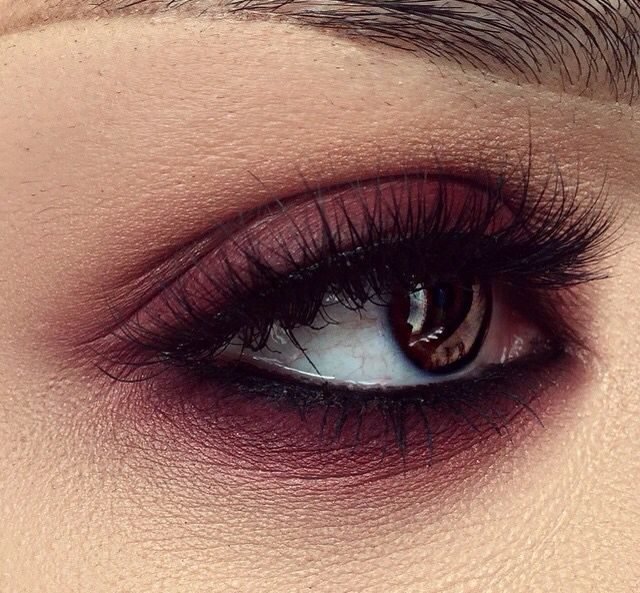
Cherry cola tones mix dark cherry with cola brown, and this matte smoky eye is built on exactly that blend. The brown keeps the red grounded and slightly smoky, while the cherry keeps the brown from going dull. Colour is packed around the whole eye, top and bottom, with the deepest mix at the outer corner and lash roots.
Matte is a smart finish choice for this colour story, because gloss would push it toward a lip colour look. On the eyes, the flat finish reads expensive and a little moody. Blending is generous but controlled: the haze reaches high on the lid yet never touches the brow, and the lower line stays close to the lashes. Brown mascara would soften it further, but black, as worn here, keeps the cherry visible.
22. Red Satin Evening Eye With A Winged Edge
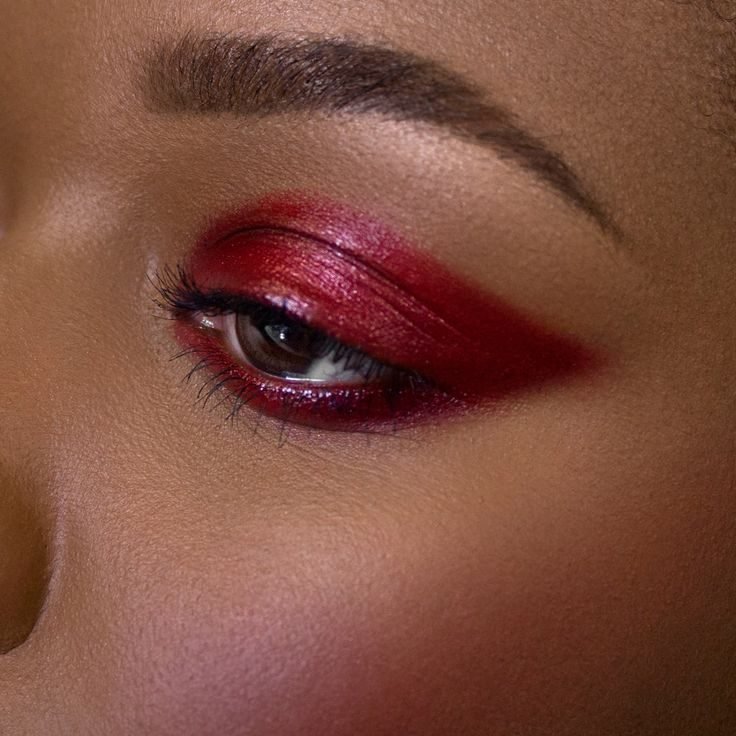
The list closes on the polished end of red: a satin lid with a smooth, low sheen, blended into a deeper red at the outer corner and pulled into a clean winged edge. Satin is the diplomatic finish, shinier than matte and calmer than foil, and on this deeper skin tone the red looks rich rather than bright. Lashes are full but feathery, and the lower lash line carries a matching wash of red.
✔️ Evening polish checklist
If you try one look from this list for a dinner or a wedding, make it this one. It photographs well and survives a long evening.
Twenty two looks later, the pattern is clear: red works when the blend is honest and the finish is chosen on purpose. Soft washes and brick tones handle the daytime, satin and foil handle the evening, and the graphic shapes are there for the days you want your eyes to do the talking. Save the red makeup eyeshadow looks you keep coming back to, start with the softest one, and build your confidence from there. Your red palette has been waiting long enough.