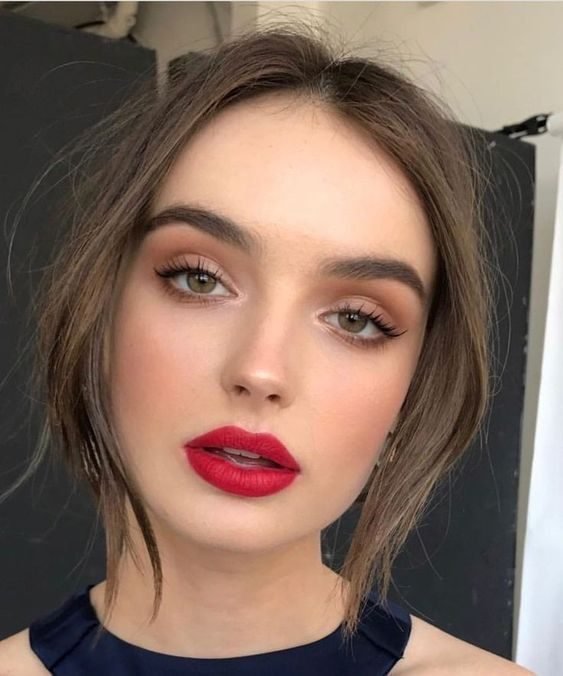
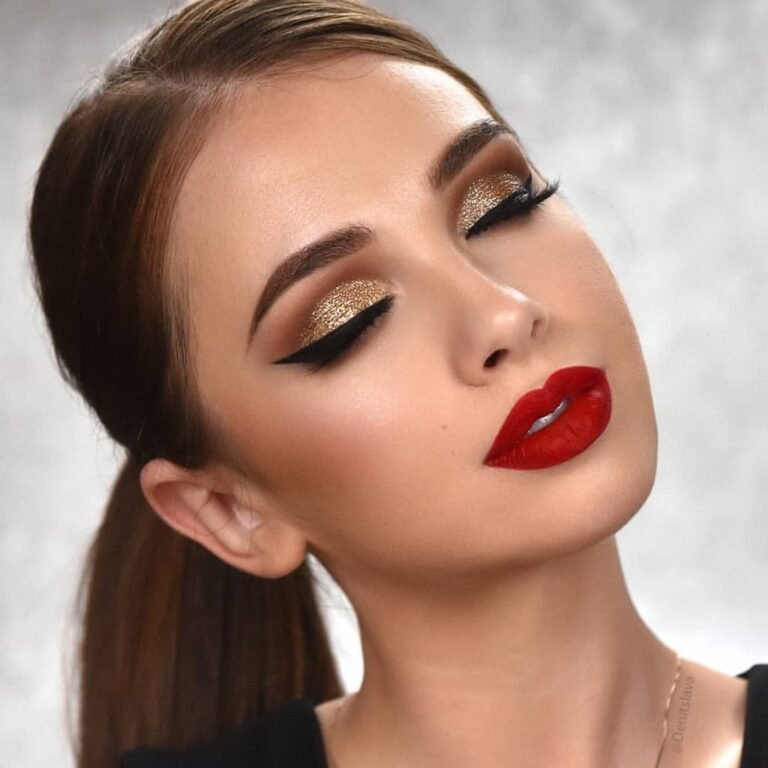
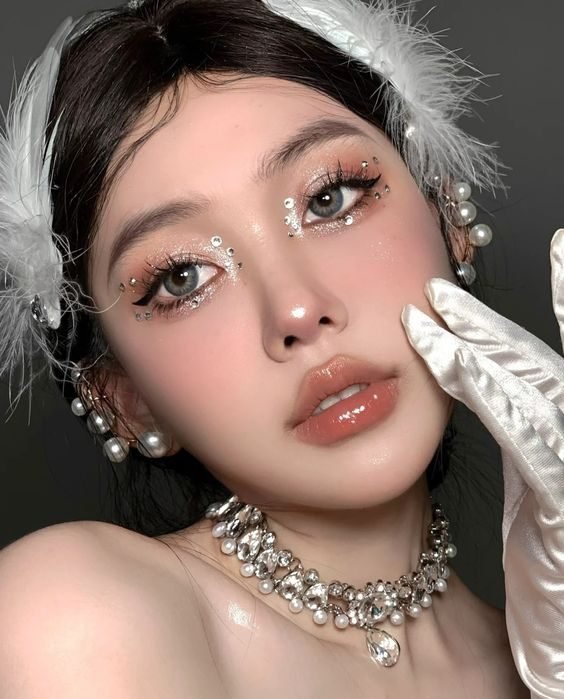
16 Red Makeup Mistakes To Avoid That Actually Work
Red makeup rarely fails because red is too bold. It fails in small, fixable ways. The undertone fights your skin. The blush sits a fraction too low. The lip edge feathers because liner felt like an extra step. This list walks through the sixteen red makeup mistakes to avoid, and every entry pairs the slip with a photo of the fix done well, so you can see the target instead of guessing at it. Some fixes take ten seconds, like cleaning a lip edge with concealer. Some are about choosing once and choosing right, like matching a red top with a red in the same family. A few are about order rather than effort, such as doing glitter eyes before foundation so the fallout has somewhere to go. Work through the ones that sound familiar, and be honest about which ones you do on autopilot. Most readers only need three or four of these. Fix those, and the red you already own starts working.
1. Mistake: Picking A Red That Fights Your Skin Tone
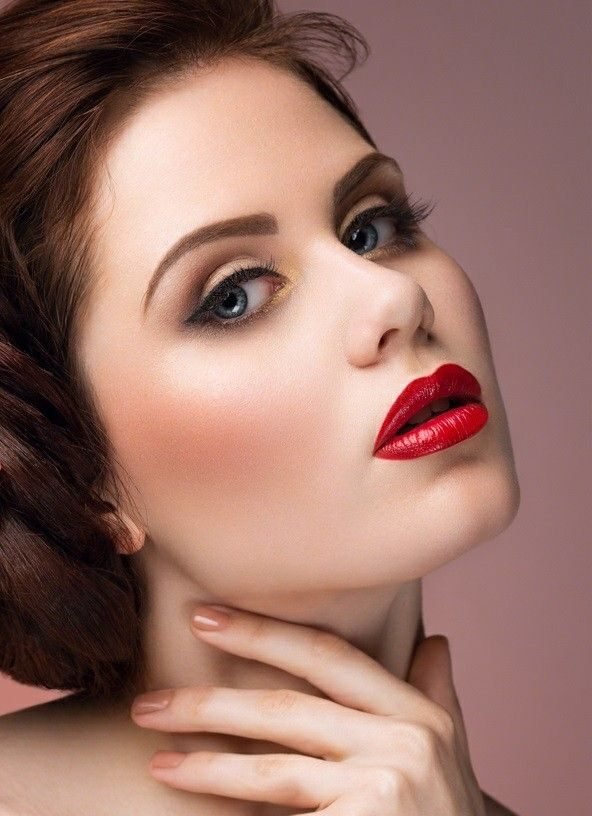
Warm skin under a blue toned red can look grey by midday, and cool skin under an orange red can look sallow. The fix sits in this portrait. Her skin is warm and golden, and the lip is a warm, rich red that leans the same way, so the colour reads as part of her face rather than paint sitting on top of it.
- The lip red is warm, matching the warm gold in her skin
- Eye makeup stays soft brown, so nothing competes with the mouth
- Blush is warm and light, swept where the sun would land
Test a new red on your jaw in daylight, not on your hand under shop lights. If your skin looks brighter next to it, the undertone is right.
Match the red family to your skin family, warm with warm, cool with cool.
Check the swatch on your jaw in daylight before you buy.
Buying the red that looked great on a friend with different skin.
Judging the shade under warm bathroom bulbs at night.
2. Mistake: Laying Red Shadow Down With No Transition Shade
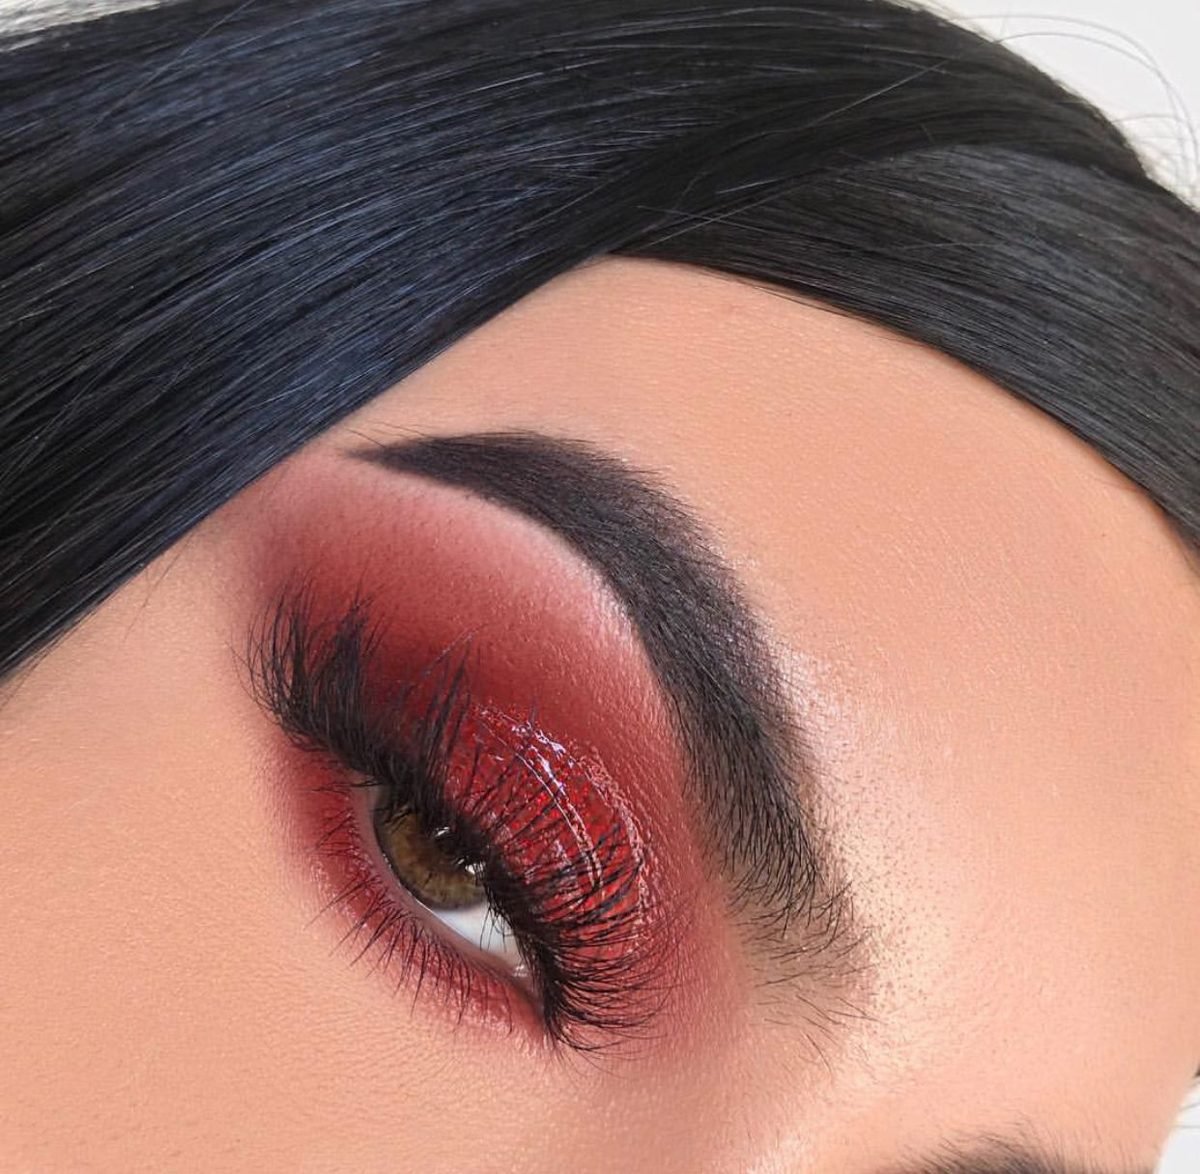
Red shadow packed straight onto bare skin ends in a hard ring, and hard rings read as bruising. A transition shade solves it. Look at the edges in this close up. The deep red sits low on the lid, then a softer brown red melts it upward, and the darkest tone holds the outer corner, so the colour fades into skin instead of stopping.
The transition shade does not need to be fancy. A matte brown, a dusty rose, or even the bronzer already in your bag can do the job, as long as it sits between your skin tone and the red in depth. Lay it wider than the red will go, above the crease and past the outer corner, so the red always has a soft landing strip around it.
Build it in this order:
Lay a soft matte brown or dusty rose through the crease first, wider than you think.
Pack the true red onto the lid only, keeping it below the crease.
Blend the seam with a clean fluffy brush until no line shows.
The gradient is the whole look. The red itself is the easy part.
3. Mistake: Placing Red Blush Too Low On The Cheek
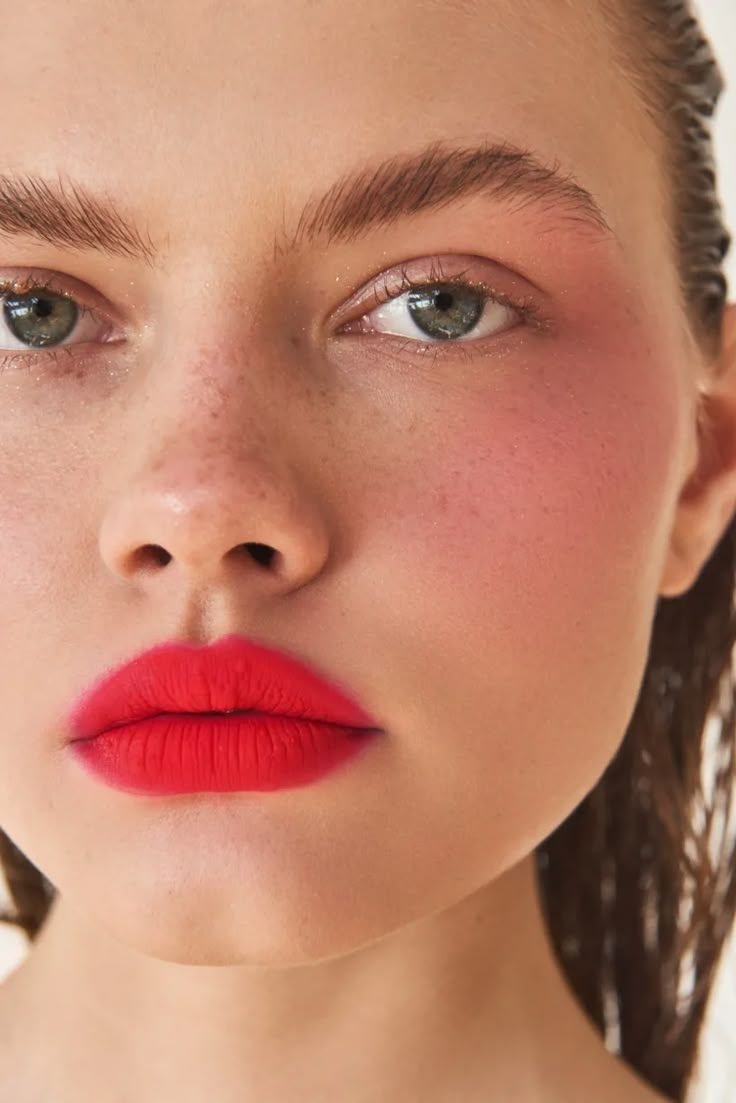
Photo: @ONLO_beauty via Pinterest
Blush that lands on the apple and drifts down pulls the whole face down with it. Lift the placement and the face lifts too. In this photo the red pink blush sits high on the cheekbone and sweeps up and back toward the temple, strongest at the outer cheek and fading as it climbs. Her bone structure reads sharper for it, and the colour looks like blood under skin rather than a stripe painted on.
A simple guide helps while the habit forms. Keep the blush above an imaginary line running from the bottom of your nose to the top of your ear, and start the colour at the outer half of the cheek rather than the centre. Colour placed there pulls the eye upward and outward. Colour placed low and central does the opposite, and on a longer face it can add visible heaviness.
Smile less when you apply. Smiling lifts the cheek, and the blush drops when your face relaxes.
4. Mistake: Skipping Lip Liner So The Edges Bleed
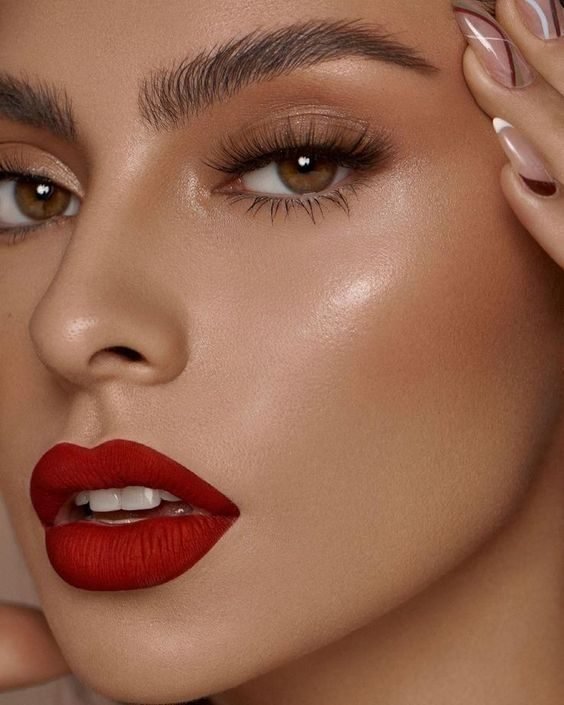
Red is the least forgiving colour at the lip edge. Without liner, it creeps into fine lines within the hour and the shape goes soft. This lip shows the lined result: a matte red with a border so clean you can trace it, corners tucked in, cupid’s bow sharp. The liner does the holding, the lipstick just fills.
Technique matters as much as the pencil itself. Start at the corners and work toward the centre in short strokes, then connect the cupid’s bow with two small crosses. Resting your elbow on the table steadies the hand more than any product trick. If the natural lip line is uneven, follow the stronger side and mirror it, rather than tracing both sides as they are.
💡 Quick Tip
Line the whole lip, not only the outline, then fill over the top. The colour lasts longer and fades evenly instead of leaving a ring.
Match the liner to the lipstick, not to your natural lip. A darker liner under a bright red shows through as a hard rim.
5. Mistake: Wearing Red On Eyes, Lips And Cheeks All At Once
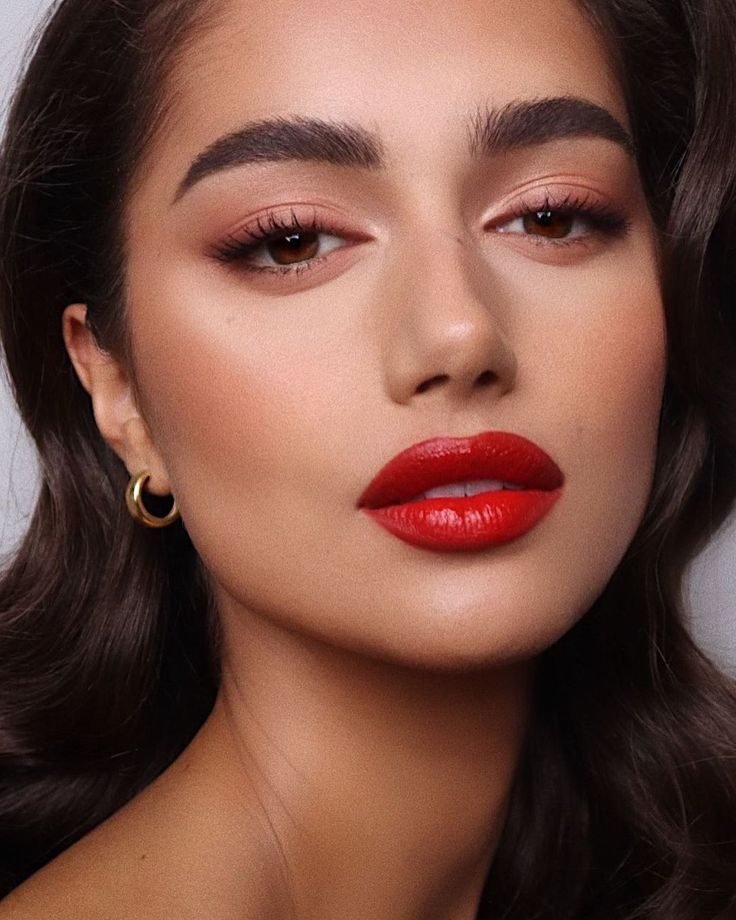
Three red features at full strength cancel each other out. The face reads as one loud block and no single feature lands. Pick one lead. Here the lip carries the whole look in a bright, clean red, while the eyes stay in soft warm neutrals with neat lashes and the cheeks hold only a gentle warmth. Nothing is missing. The restraint is what makes the red look expensive.
What stays quiet in this photo:
- Eyeshadow in warm beige and soft brown, no red at all
- Blush present but light, more warmth than colour
- Brows tidy and natural, not carved or darkened
- Skin even and softly lit, no heavy contour lines
If you want red eyes instead, run the same rule in reverse and take the lip down to a stain.
One red feature at full volume reads bolder than three reds turned up together.
6. Mistake: Letting Red Shadow Make Eyes Look Tired
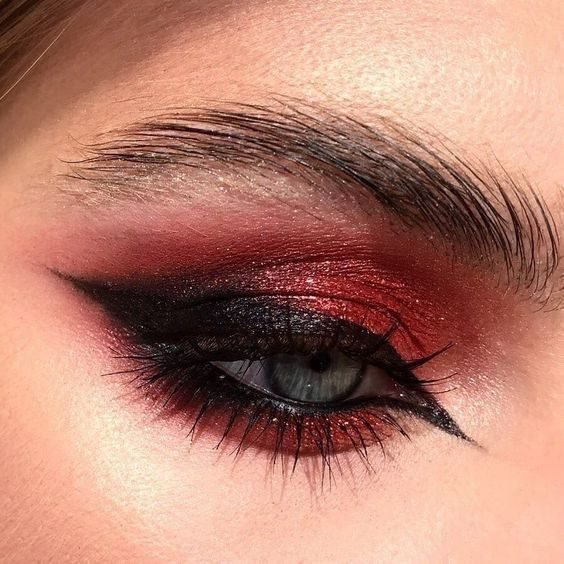
Bare red shadow sitting against skin can mimic soreness, which is why so many people try it once and quit. The rescue is contrast. This eye pairs the red with a firm black liner along the lash line and full, dark lashes, and that black frame tells the brain the red is makeup on purpose. The white of the eye reads clear, and the look turns sharp instead of sleepy.
The tired effect has a simple cause. Red around an eye echoes the colour of irritation, so the brain reads it as a symptom before it reads it as style. Anything that separates the red from the eye itself breaks the echo. A dark lash line, a clean waterline and a bright inner corner all draw a border between the colour and the eye, and the reading flips.
Frame the red like this
Keep red off the lower waterline area unless liner frames that too. Unframed red under the eye is the tired look itself.
7. Mistake: Skipping The Concealer Cleanup Around A Red Lip
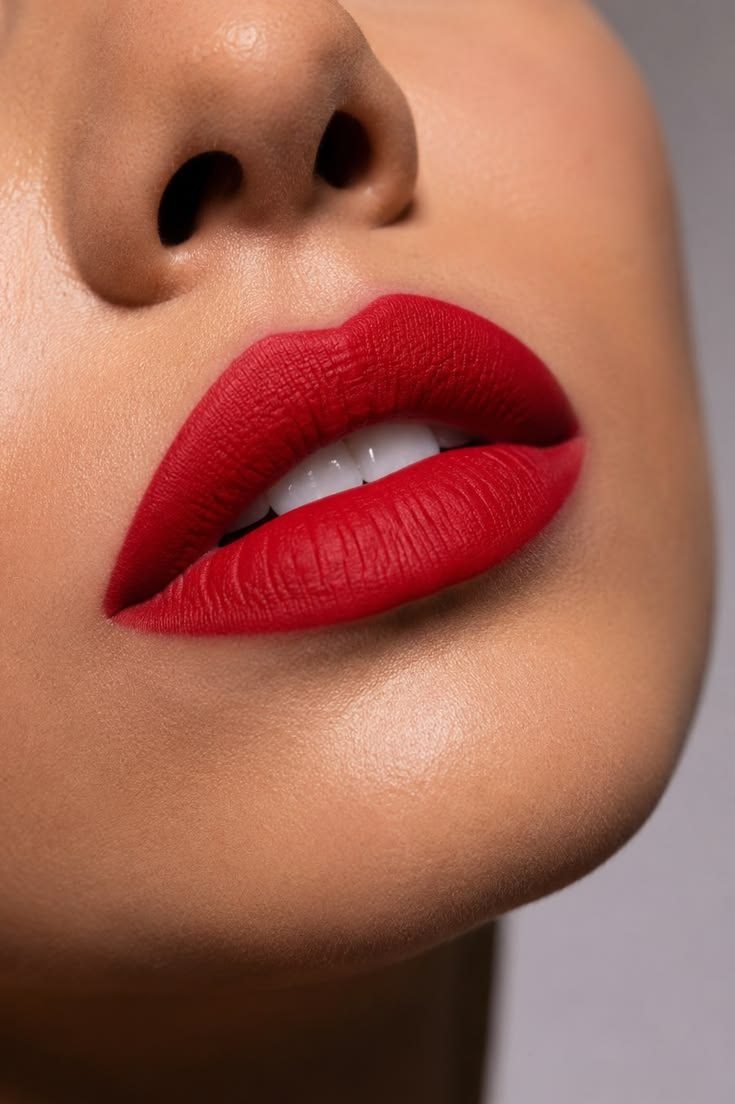
Even a careful hand leaves tiny wobbles at the lip border, and red shows every one. Ninety seconds with a flat brush and concealer turns a good lip into this one: edges like they were cut, corners exact, no smudge drifting past the line. The skin around the mouth is clean and even, so the red shape reads graphic and deliberate.
Order counts here. Do the cleanup after the lipstick is fully on and blotted, not before, because fresh lipstick can still shift while you work around it. Trace just outside the colour with the brush held flat, using the edge of the lip as your guide rail. Work in small sections, corners first, then the lower line, then the bow, wiping the brush between sections so you never drag red across clean skin.
Use a concealer that matches your foundation, and blend outward away from the lip so no pale halo rings the mouth.
8. Mistake: Choosing A Red That Fights Your Outfit
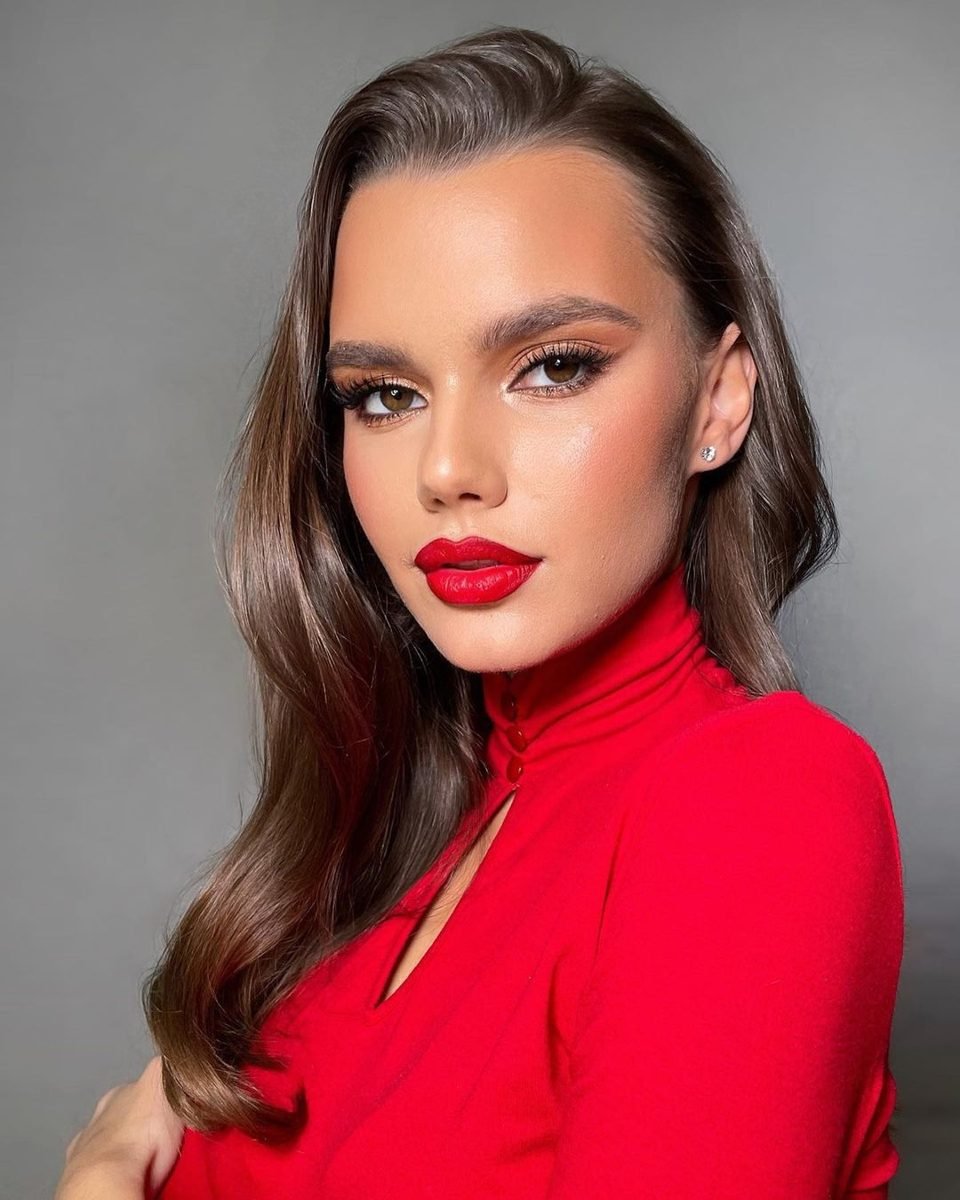
A pink based red against a rust orange top, or an orange red against a fuchsia dress, sets up a quiet clash all evening. Matching families ends it. Her high neck top is a true, clean red and the lip sits in the same family, a touch deeper, so outfit and makeup read as one decision. The eye makeup stays bronze and soft, giving the two reds room.
Neutrals give you freedom. Black, white, navy, denim and grey sit happily beside almost any red, which is why the classic red lip and black dress pairing never dates. Colour on colour is where care is needed. The rule is family, not exact match: the lip and the outfit should lean the same warm or cool way, even when the shades differ in depth.
| Outfit colour | Red that sits well with it |
|---|---|
| True red top or dress | Same family red lip, one step deeper |
| Black, white, navy, grey | Almost any red, pick by skin tone |
| Pink, purple, fuchsia | Blue based red, kept away from orange |
| Orange, rust, warm prints | Warm brick or tomato red |
Hold the lipstick tube against the fabric before you start. If the two reds argue in your hand, they will argue on your face.
9. Mistake: Leaving Glitter Fallout Under The Eyes
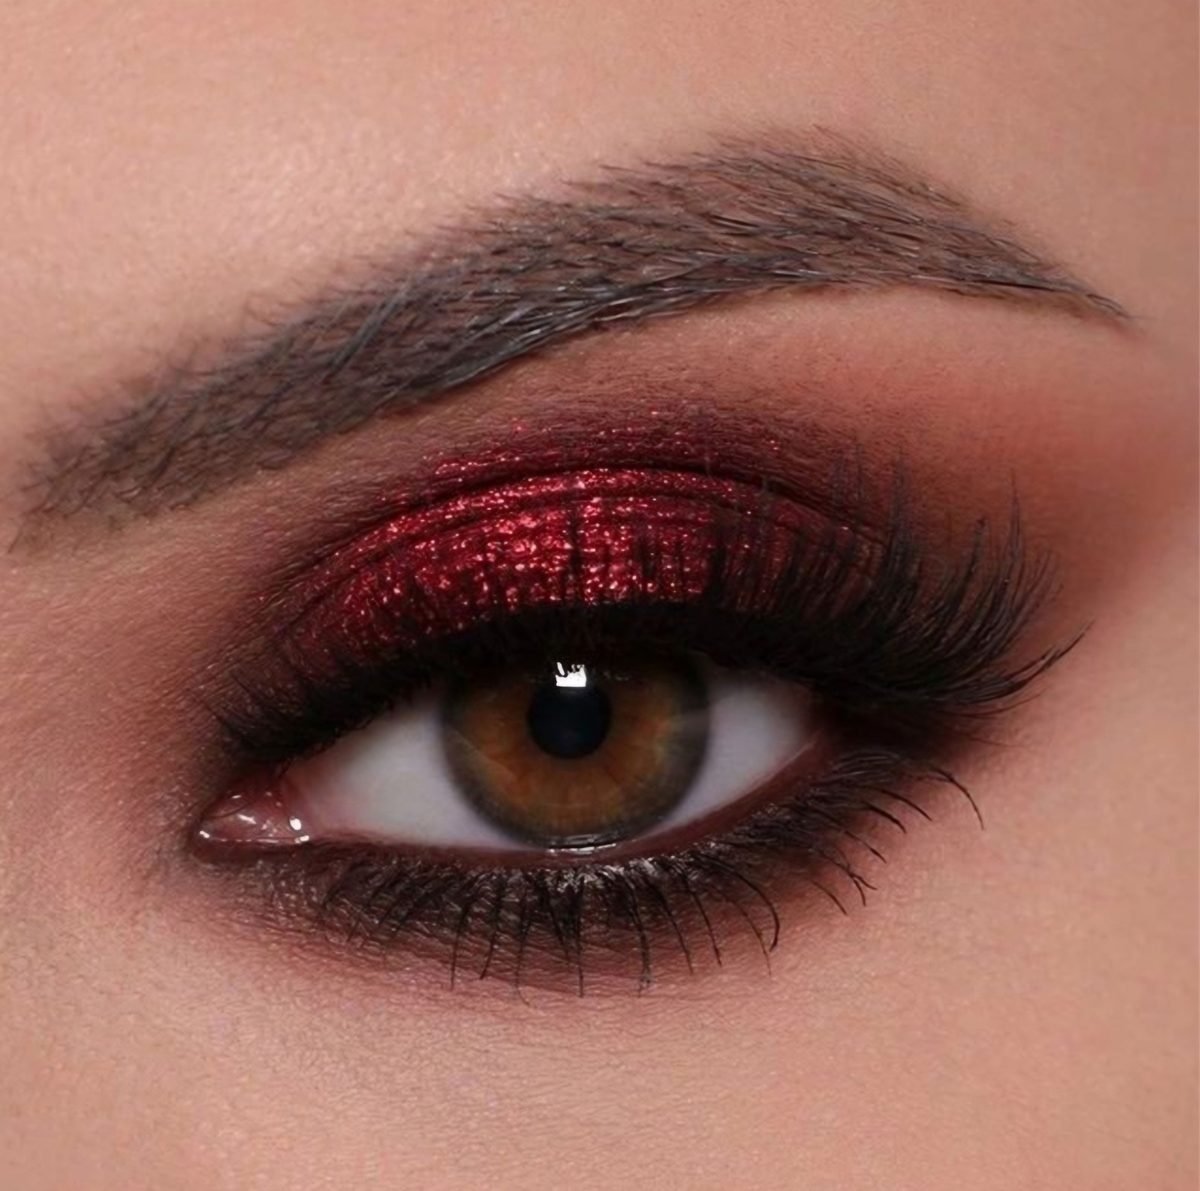
Photo: @brendviana via Pinterest
Glitter looks rich on the lid and cheap on the cheekbone. Loose flecks that drop during application catch light under the eye and read as mess from across the room. Now check the skin below this eye. The red glitter sits dense and even across the whole lid, deeper at the outer corner, and the skin underneath is completely clean and smooth. Not one stray fleck shows. That clean surround is planned, not luck.
The base under the glitter decides how much drops. Loose glitter over bare skin or powder shadow has nothing to hold it, so half of it migrates south during application and the rest follows over the next hour. A sticky glitter primer, or a thin layer of cream shadow in a matching red, gives the flecks something to grip. Pressed glitter shadows drop far less than loose pots, if you are buying new.
Do the eyes before foundation, then wipe the fallout away.
Press glitter on with a fingertip over a sticky base so it grips.
Sweeping glitter on with a fluffy brush, which throws flecks everywhere.
Brushing fallout off dry skin, which smears it into a grey trail.
A strip of tape pressed lightly under the eye lifts stray flecks without disturbing the base.
10. Mistake: Putting Red Lipstick On Dry, Flaky Lips
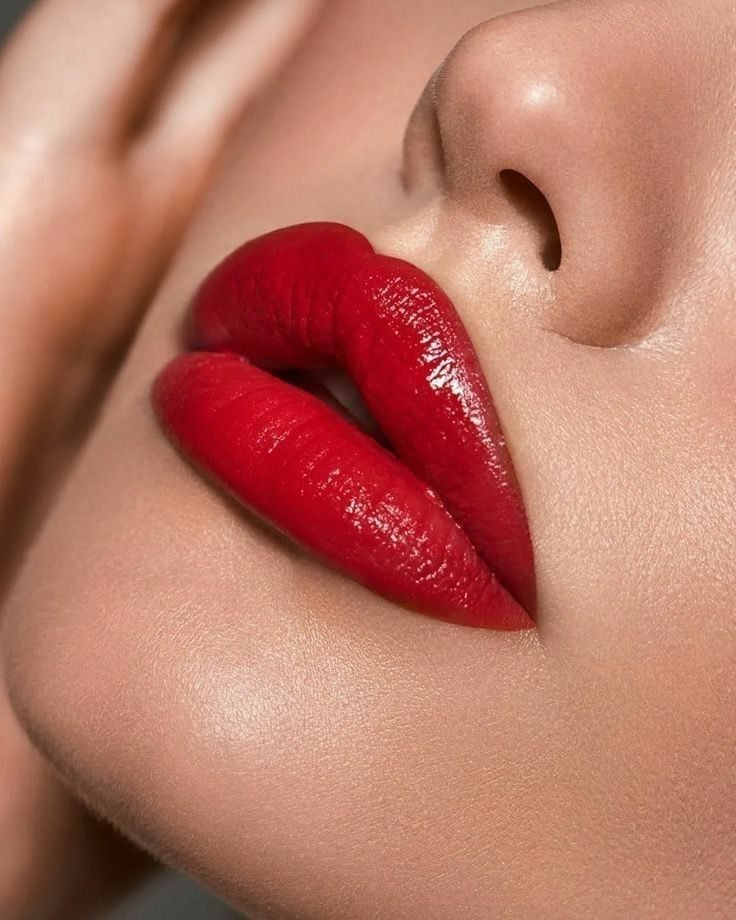
Red pigment grabs every dry patch and turns it darker, so rough lips look patchy within minutes no matter how good the lipstick is. Smooth prep changes the result completely. These lips are even, plump and glossy from edge to edge, with the colour sitting on the surface like glass. No flakes, no dark spots, no colour pooling in the lines.
Prep is short work. A soft sugar scrub or a warm damp cloth lifts loose flakes in under a minute. Follow with balm and give it ten minutes to sink in while you do the rest of your face. Lips that are smooth but not greasy take colour evenly, hold it longer, and need fewer touch ups, because the pigment is sitting on skin rather than on a layer of peeling flakes.
⚠️ Watch Out
Scrubbing hard right before a matte red can leave lips raw and sore. Prep the night before instead, with a gentle scrub and a thick layer of balm overnight.
On the day, blot the balm off fully before lipstick. Colour over slippery balm slides and feathers.
11. Mistake: Blending Red Shadow Until It Turns To Mud
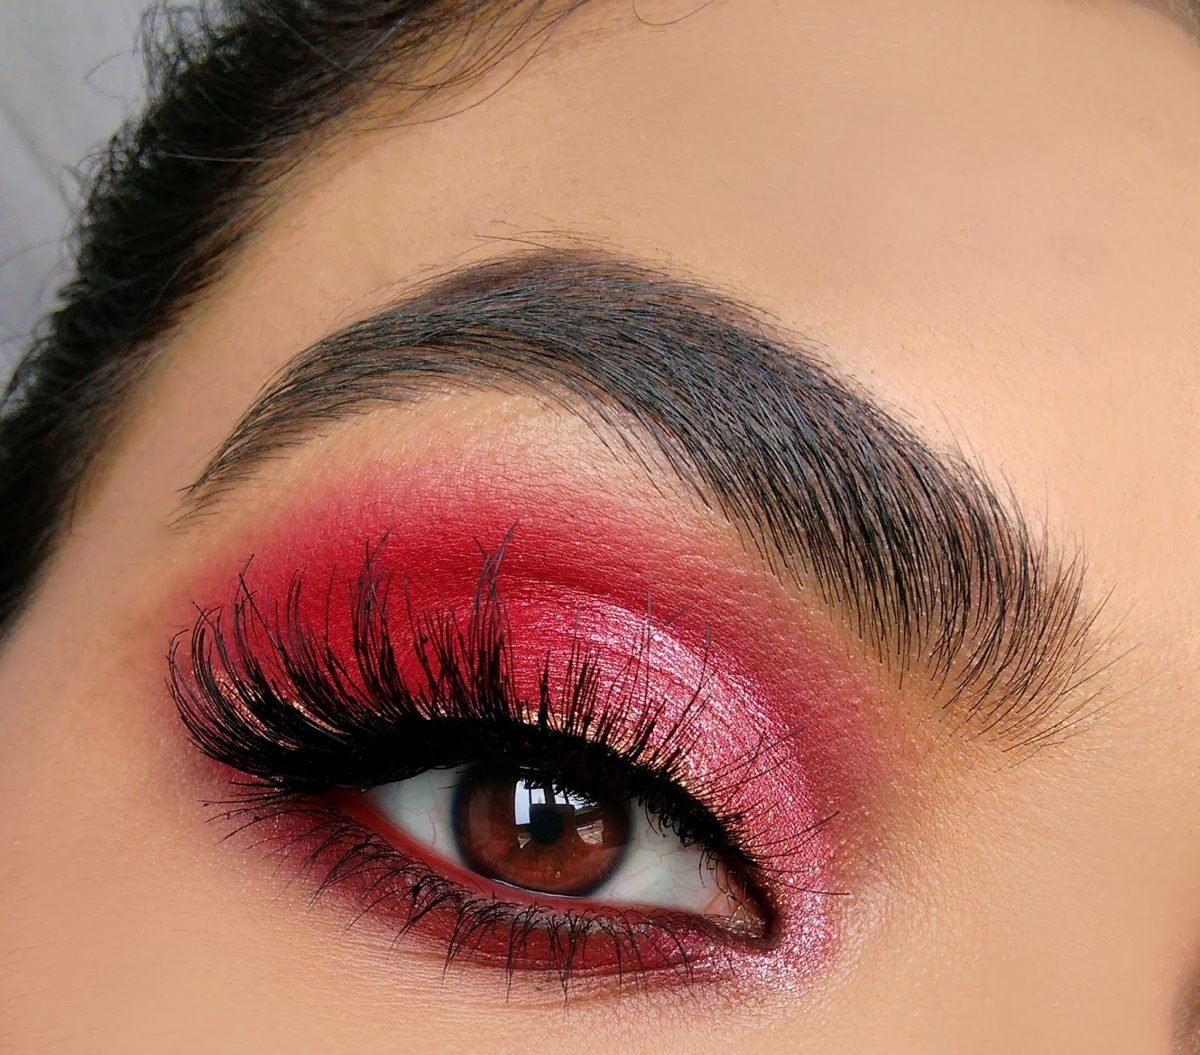
Photo: @theveiledartist via Instagram
Over blending is real. Work red shades back and forth too long and the tones merge into one flat, dull wash with no shape left. Definition is the fix, and this eye keeps plenty of it. The centre of the lid holds a bright pink red shimmer, the outer corner stays deep, and the crease line is carved clean, so each tone keeps its own place.
Brush choice decides a lot of this. A flat packing brush lays colour down and leaves it where it landed. A fluffy brush moves colour around. Mud happens when the fluffy brush does both jobs across the whole lid for minutes at a time. Pack each shade into its zone first, then blend only where two zones meet, with the tip of a clean brush and a light hand.
One flat red wash, edges gone, tones merged into a dull haze with no depth at the corner.
Bright centre, deep outer corner, clean crease. Three tones, each in its place, like the photo.
Blend only the seams between shades, in small strokes. The middle of each shade should stay untouched.
12. Mistake: Packing Red Blush On Too Heavy
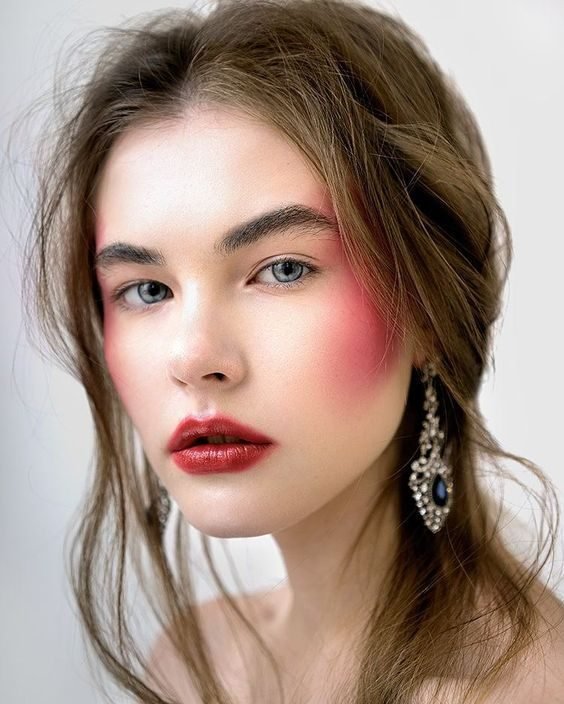
Red blush has more pigment than most people expect, and two eager swipes can land like stage makeup. Sheer layers are the answer. Her blush is a soft red pink wash with no visible edge, stronger at the centre of the cheek and fading out in every direction. It reads as blood under skin, like a real flush after a walk, and it still leaves room for the deep red lip beside it.
- ▸Tap the brush on your wrist first, most of the colour should stay there.
- ▸One light layer, step back, then decide if a second is needed.
- ▸Too much already on? Press foundation over it with a damp sponge to mute it.
Build red blush the way you would add salt. You can always add more.
13. Mistake: Picking An Orange Red That Yellows Your Smile
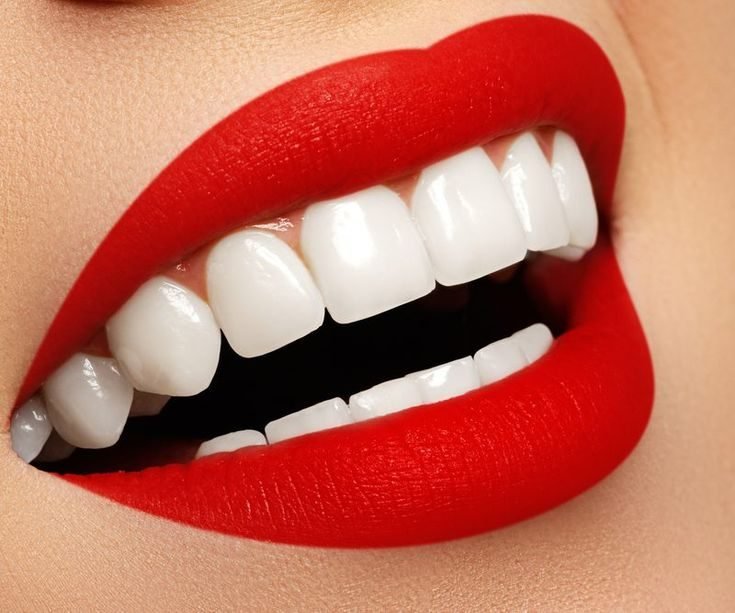
Warm orange reds sit next to teeth and push them toward yellow on the colour wheel. Blue based reds do the opposite. This smile is the proof people look for: a true, cool leaning red on the lips and teeth that read bright white against it. The contrast flatters both, and the matte finish keeps the whole shot clean.
The test takes five seconds in the shop. Swipe the shade on your lip or the back of your hand, hold it beside your teeth in the mirror, and smile. If the teeth look brighter, the undertone is doing the work for you. If they look duller or warmer than they did bare, put that tube back and reach for one with more blue in it.
Cherry, raspberry and classic blue red shades are the safe shelf when a bright smile is the goal.
14. Mistake: Leaving Brows Bare Next To A Red Eye
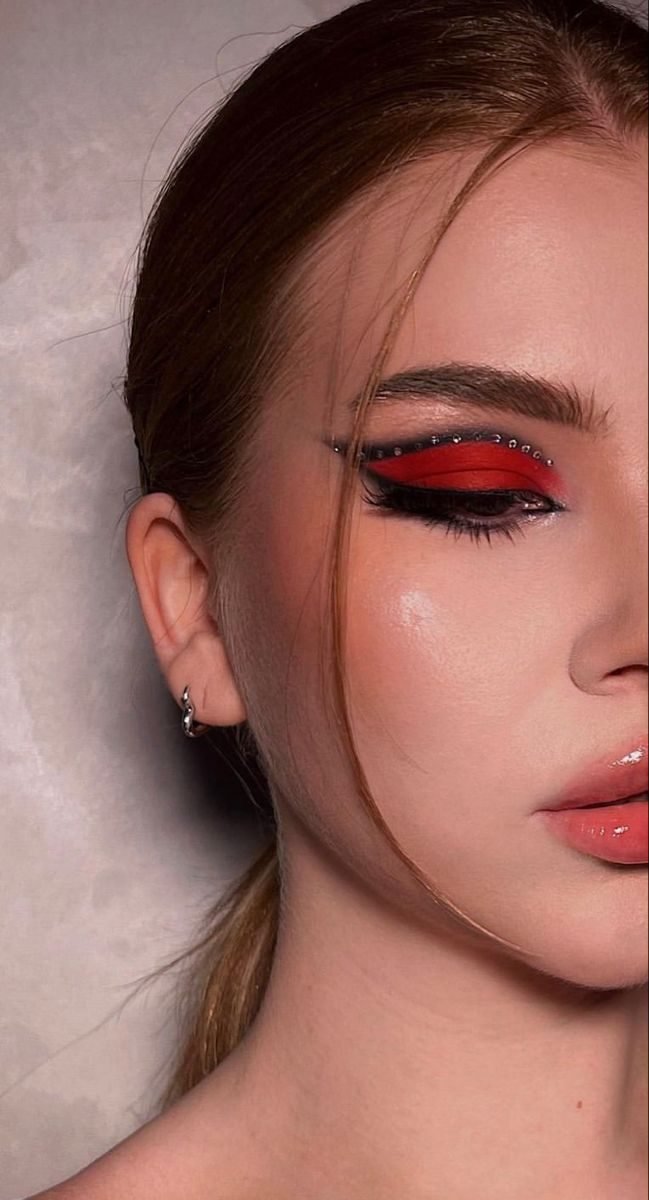
A strong red eye with nothing above it looks unfinished, like a frame missing its top edge. Brows carry more weight than people credit. In this half face shot the brow is brushed up, filled and clearly shaped, and it anchors the bold red liner work below it. The eye reads deliberate and editorial instead of floating loose on the face.
Shade choice is simple. Stay close to your natural brow colour, or one shade deeper if your brows are very fair. Grey brown tones look more natural than warm brown next to red shadow, because warm brow filler plus red shadow can read orange together. The shape matters more than the colour: a clear arch and a tidy tail do most of the framing.
Three small moves get brows up to the job:
Brush the hairs upward and set them with a clear gel.
Fill only the sparse gaps with short strokes, keeping the front soft.
Clean under the arch with a touch of concealer for a crisp line.
Match the effort, not the colour. The brow needs shape and presence, not red.
15. Mistake: Going Flat Matte Everywhere And Ageing The Face
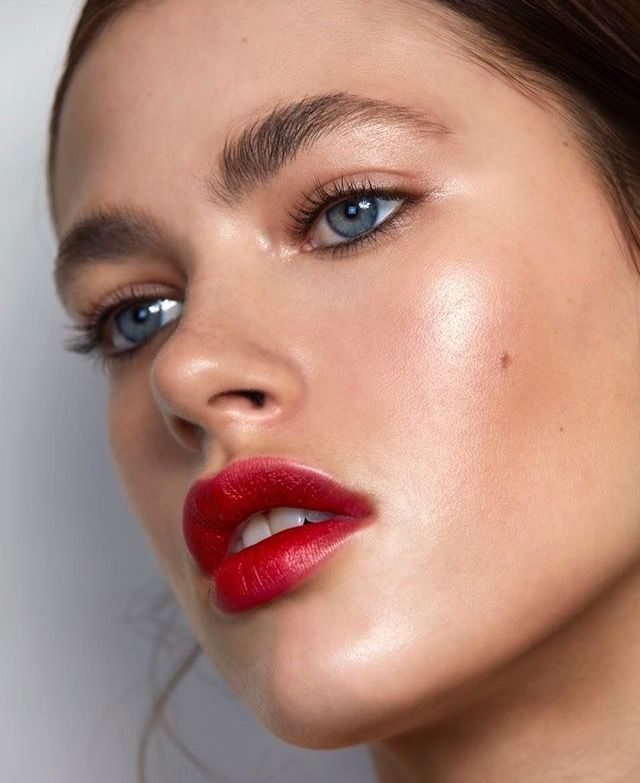
Matte lip, matte skin, matte eyes: the combination drinks the light out of a face and adds years that are not there. One satin or glowing element breaks it up. Her lip is a rich red with a soft satin sheen, and the skin around it glows at the cheekbones and brow, lit and alive. The red still reads bold. It just no longer reads dry.
Where the light sits in this photo matters. The glow is placed high, on the tops of the cheeks and down the centre of the face, while the sides stay calmer. That placement keeps shine from looking like oil.
A satin red over lit skin looks years fresher than the same red over a flat matte base.
16. Mistake: Leaving Cream Reds Unset So They Fade Patchy
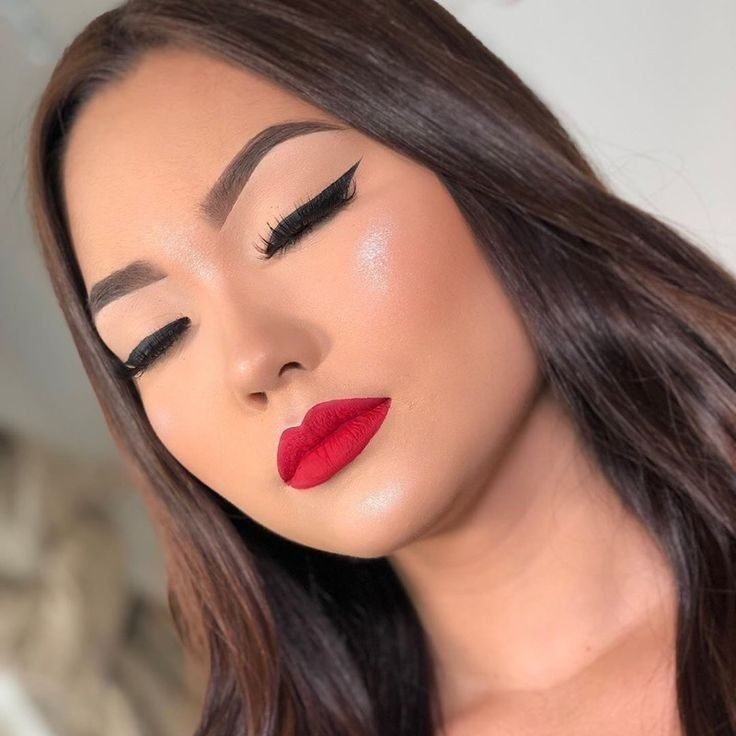
Cream blush and cream lip colour move. On warm skin they slide, gather at the edges and wear away in the centre first, leaving a patchy ring by evening. Setting them locks the finish you applied. This face shows the set result hours in: the red lip is even from corner to corner, the skin looks smooth and finished, and nothing has drifted or faded in patches.
The setting layer does not need to change the colour. A translucent powder carries no pigment of its own, so the red stays true while the surface turns touch dry. On the cheeks, press the powder on with a puff rather than sweeping, so you do not drag the blush out of shape. On the lips, the tissue blot between layers does the same job without dulling the finish.
Set cream reds like this
Thin layers set better than one thick one. Build, blot, set, in that order.
None of these fixes asks for new skills or a new makeup bag. They ask for order and placement: transition before pigment, liner before lipstick, eyes before base on glitter days, powder over cream before you leave the house. Pick the two mistakes you recognise most from your own mirror, fix those first, and red gets easier fast. If you are still unsure which of the red makeup mistakes to avoid matters most for your face, start with undertone and liner. Those two change the result more than everything else on this page. Save this list for your next red lip day.