20 Dolly Makeup Products You Need That Actually Work
A dolly look falls apart fast when the kit is wrong. The eyes can be wide and bright, the blush in the right place, and the whole thing still reads flat because one small product was missing or the texture was off. Most of the work happens in details that look tiny on camera: the soft puff under the lower lashes, lashes separated into clean spikes, colour that fades out at the centre of the lips. None of that needs a drawer full of brands. It needs the right product types, each picked for one clear job, in textures that sit well on skin and hold up through a full day of photos. The dolly makeup products below are the twenty types a complete kit actually uses, from the pencil that draws the aegyo-sal to the berry tint that finishes the lip. For each one you get what it does, the finish to look for, and how it earns its place in the routine, so you can build the kit once and stop guessing.
1. Aegyo-Sal Shadow Pencil For The Soft Puff Under Each Eye
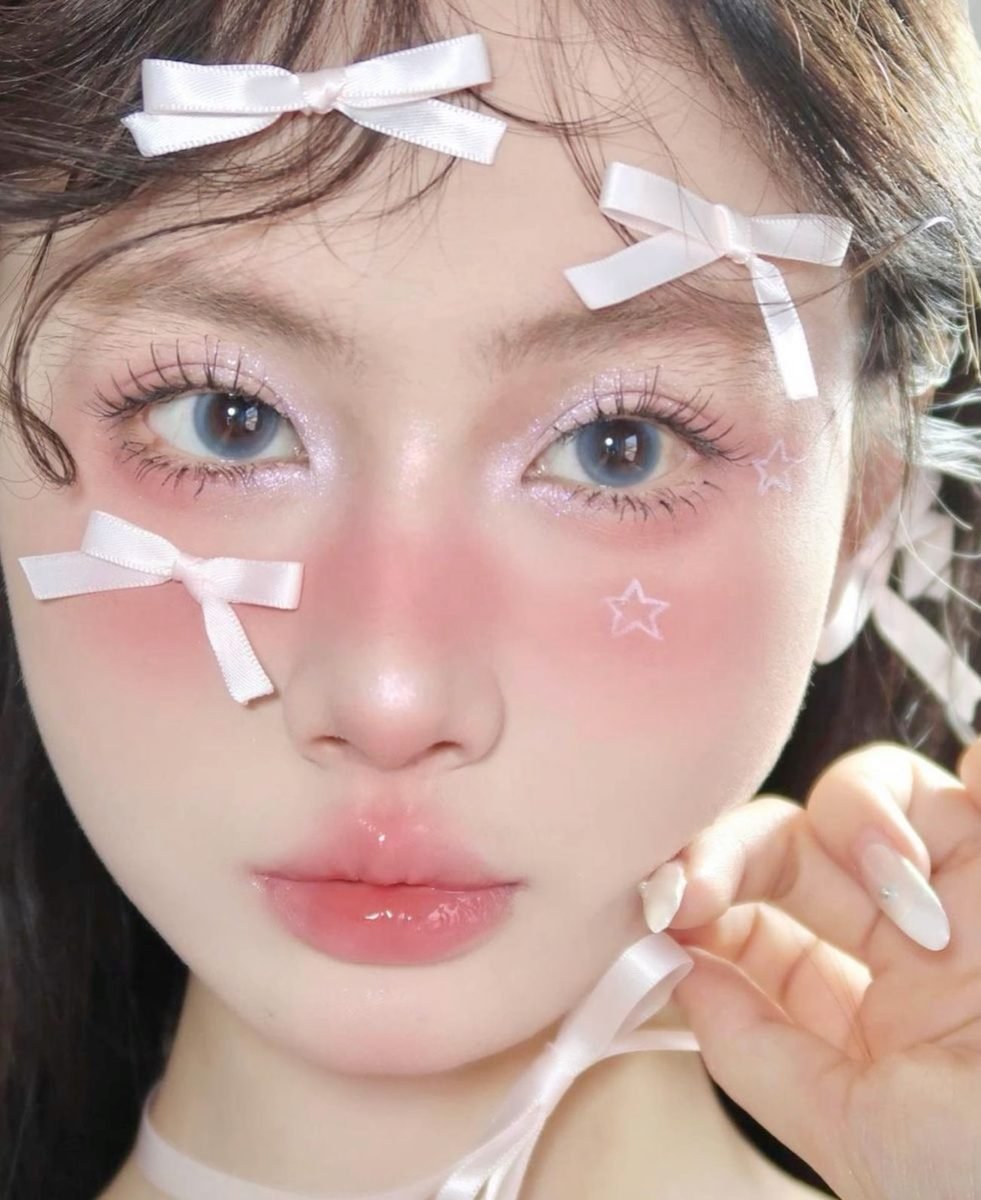
Look at the band of light sitting under each lower lash line in this photo. That little puff is the aegyo-sal, and the pencil is the tool that builds it. One end of the job is shadow: a soft taupe or light brown line drawn just below the puff, following its natural curve. The other end is light: a pale shade pressed on the puff itself so it catches the light first.
- A fine tip matters more than the shade name, because the line has to stay thin and low.
- A matte or soft satin finish keeps the shadow reading as skin, not makeup.
- Blend the lower edge with a fingertip so the line fades instead of stopping.
Draw the line while smiling slightly, since the puff shows itself best then, and keep it shorter than the full width of the eye. Stopping the line a touch early keeps the effect sweet instead of tired.
The puff reads as a real feature when the shadow sits low and soft, and the light shade sits on the puff itself.
2. Liquid Glitter Liner For Sparkle Along The Lower Lash Line
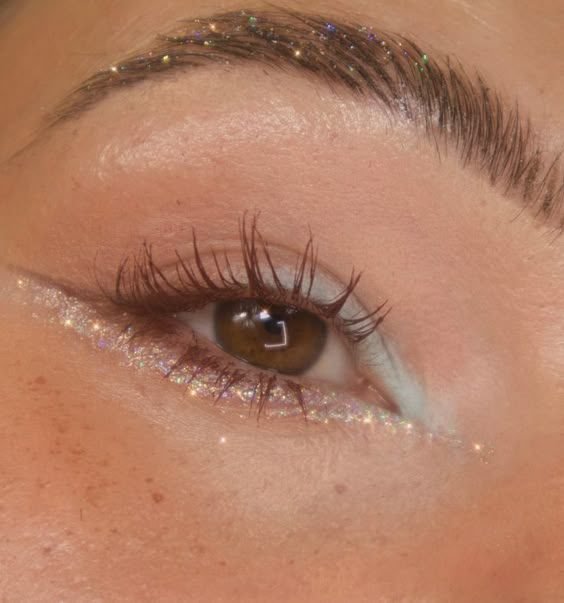
Fine glitter does the talking in this close-up.
The sparkle runs in a neat line under the lower lashes, catching light every time the eye moves. A liquid glitter liner makes that placement easy because the glitter sits in a clear or lightly tinted base and the brush is thin enough to paint a line instead of dusting the whole cheek. Tap it along the lower lash line, or trace it over the aegyo-sal puff for a wetter, brighter effect. Particle size is the whole decision here. Fine glitter reads as sparkle from a normal distance and melts into the look. Chunky pieces read as costume and tend to drop onto the cheeks within the hour. Let each short stroke dry before adding the next, and keep the line on the skin below the lashes rather than in the waterline, where it can irritate and water.
💡 Quick Tip
Apply glitter liner after mascara. Specks that land on finished lashes brush away clean, while mascara over wet glitter clumps fast.
3. Spiky Strip Lashes For The Wide Doll Eye Shape
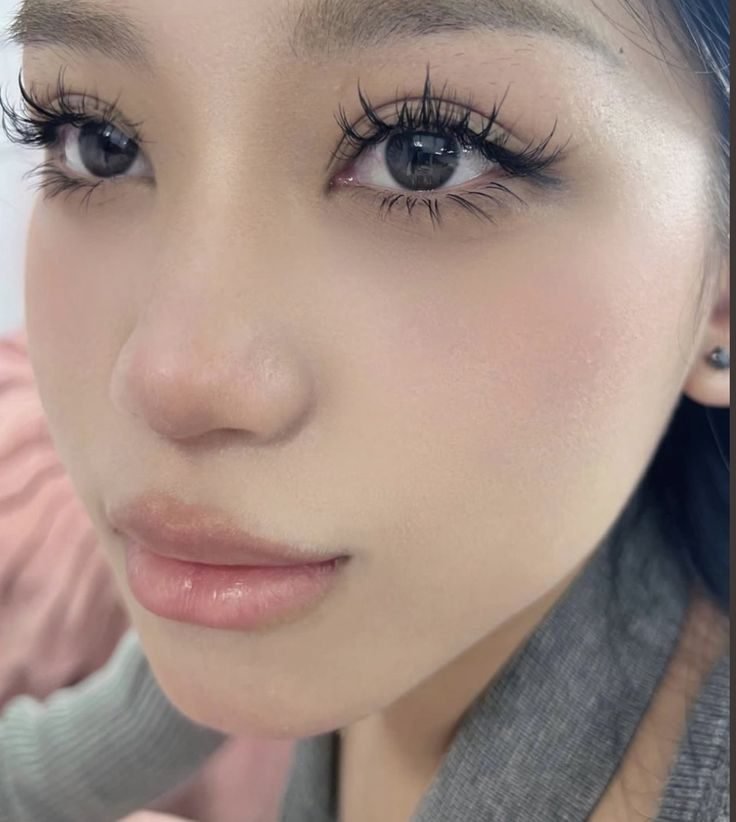
Spiky lashes are the fastest route to the doll eye shape, and this photo shows why they read so clearly on camera.
The spikes. The fibres are grouped into pointed clusters with space between them, so the lash line looks drawn rather than fuzzy. That separation is what makes the eye look bigger in photos.
The band. A thin, flexible band disappears against liner and bends with the curve of the lid. Thick bands lift at the inner corner and give the whole strip away.
The fit. Most strips need the outer end trimmed. Measure against your own lash line first, cut from the outer edge, and keep the longest spikes near the centre of the eye where the round dolly shape needs them. Paired with a few drawn or coated lower lashes, the top spikes frame the eye without a heavy block of black.
4. Wispy Strip Lashes For A Softer, Feathered Doll Look
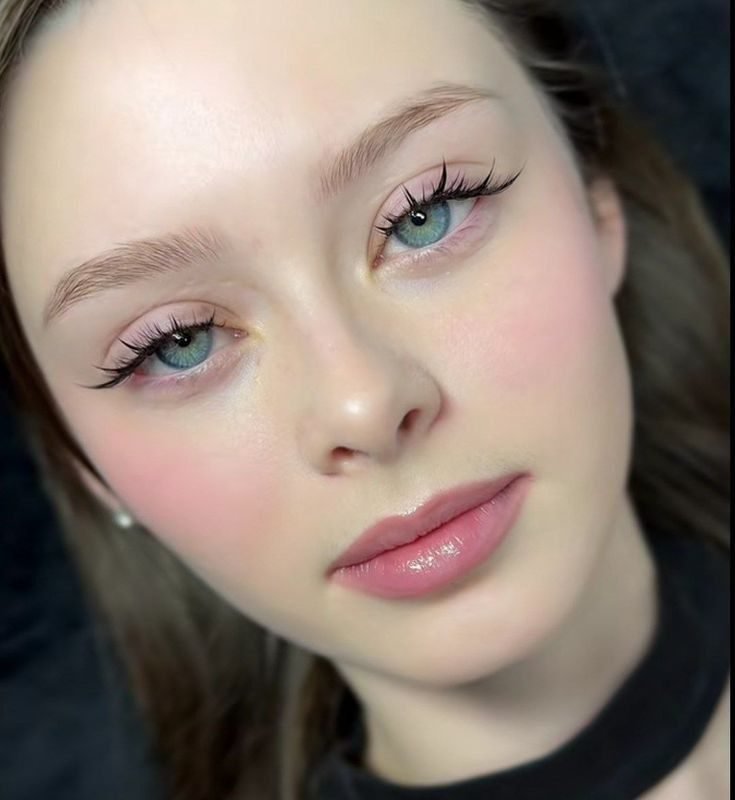
Not every dolly day wants spikes. The lashes in this portrait are light and feathery, with mixed lengths that let the eyelid show through, and the whole face stays soft because of it. Wispy strips trade the drawn doll outline for air. The fibres cross and vary in length, closer to how real lashes grow, so the eye looks open and pretty at conversation distance rather than styled for a close-up. Choose wispy when the rest of the look is gentle: a light pink lid, blush worn high, a glossy lip. The two lash styles split the week cleanly. Spiky strips carry the full doll shape on their own. Wispy strips sit back and let skin, blush and lip colour lead, which suits daytime, first dates and any plan where photos happen from a few steps away.
Recreate this look
5. Lash Curler For The Lift That Opens The Whole Eye
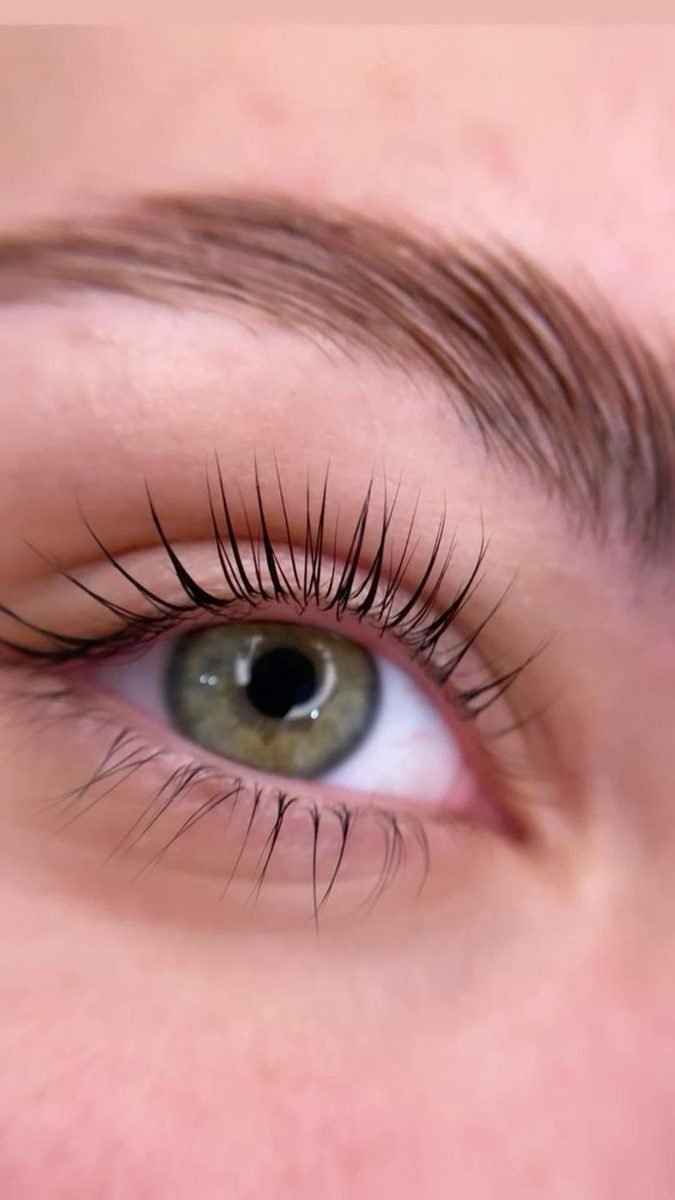
Every lash in this close-up stands up and away from the eye, and that lift started with a curler, before any product touched the lashes. Straight lashes point down and shade the eye, which quietly cancels the wide awake shape the rest of the routine builds. A curler fixes the angle at the root. Use it on clean, dry lashes, always before mascara, since curling coated lashes can snap them. Place the curler at the very base, squeeze gently, then pulse two or three times while walking it halfway out the length. That stepped press gives a curve instead of a sharp crimp. Check the rubber pad often. A split or flattened pad cuts lashes and ruins the curl, and pads are cheap to replace. On stubborn straight lashes, a few seconds of warmth from your hands on the metal frame helps the curl set.
Start on bare, dry lashes and settle the curler right at the root line.
Pulse gently three times, then move halfway out and pulse again for a curve, not a crimp.
Follow with mascara while the lift is fresh, coating from the root upward.
6. Tubing Mascara For Long Lashes That Hold All Day
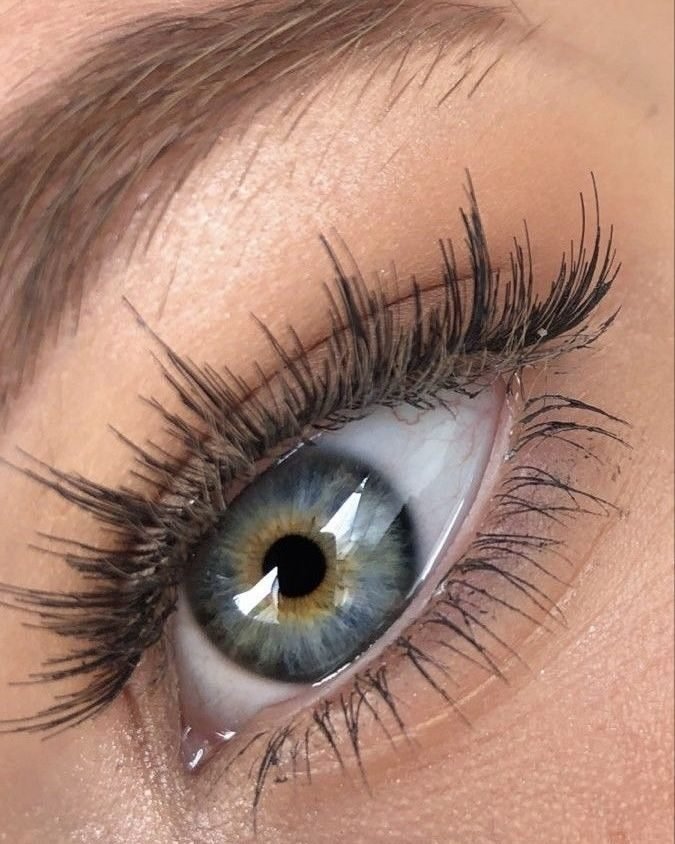
Dolly makeup lives or dies under the eye. Ordinary mascara that flakes or smudges will grey the aegyo-sal and undo the bright, clean under-eye the whole look depends on. Tubing and film type mascaras solve that in a different way from waterproof formulas. The product wraps each lash in a thin tube as it dries, and those tubes stay put through heat, humidity and happy tears. At night they slide off with warm water and gentle pressure, no rubbing and no black smear across the puff you worked on. The lashes in this close-up show the finish to aim for: dark from root to tip, separated, each lash reading on its own. Wiggle the wand at the roots first, then pull straight up. Use the tip held vertically for the lower lashes, with a light hand, since the dolly lower line should look drawn and fine, never heavy.
Build two thin coats, letting the first set for a few seconds.
Remove with warm water and patience, letting the tubes loosen and slide.
Scrubbing at the under-eye with remover pads, which drags the aegyo-sal shading away.
Pumping the wand in the tube, which pushes in air and dries the formula early.
7. Gradient Lip Tint For The Soft Centre-Faded Lip
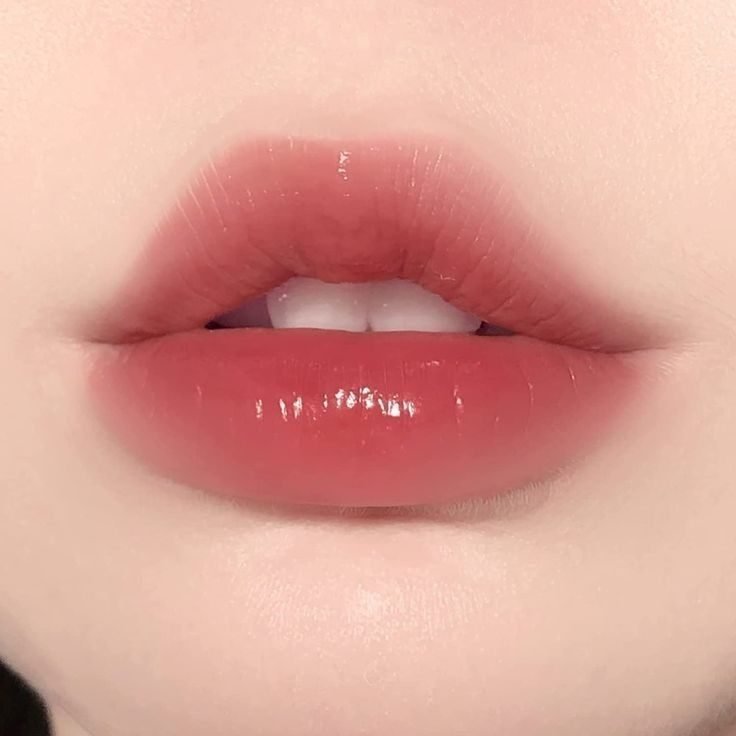
The lip in this photo carries its colour in the middle and lets it go at the edges. That fade is the gradient lip, and a tint is the product built for it. Tints stain rather than coat, so the colour melts into the lip instead of sitting on top with a hard outline. Start with bare, dry lips and a whisper of base product patted over the natural lip line to mute it. Place the tint at the centre of both lips, a little more on the lower one. Press your lips together once, then blur the edges outward with a fingertip or a cotton bud before it sets. The result should look like colour that came from inside the lip. Because it is a stain, it survives coffee and masks far better than a creamy lipstick, and the blurred edge keeps even strong shades reading soft and young.
- ▸Colour sits deepest at the centre of the mouth.
- ▸Edges are blurred while the tint is still wet, never lined.
- ▸A muted lip line underneath keeps the fade looking natural.
8. Lip Oil For The Wet, Juicy Shine On Top
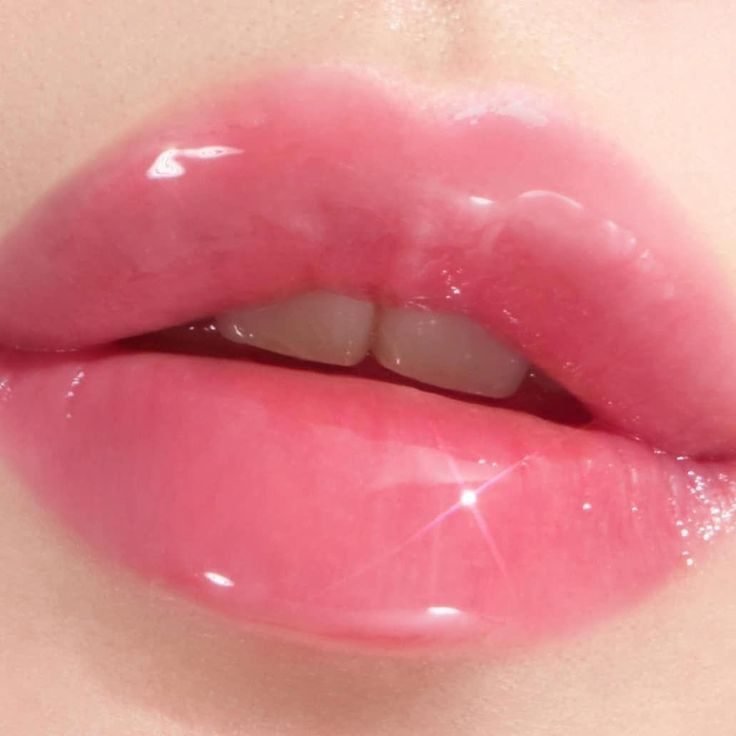
Shine this wet changes how big the lips read. The gloss in this close-up fills every fine line with light, so the mouth looks plump and soft even in a still photo. A lip oil gets you that finish with a lighter feel than a classic gloss. Oils spread into a smooth, cushioned layer and stay comfortable for hours, where thick gloss can feel sticky and catch hair. The dolly way to wear it is over tint: colour first, blurred at the edges, then oil pressed mainly onto the centre of the lips. Keep the oil inside the lip line. Shine that creeps past the edge blurs the gradient you just built and can look messy by midday. Expect to reapply after eating and drinking, since oils wear away faster than they stain. The trade is worth it. The tint underneath keeps the colour story going even when the shine has faded.
9. Cream Blush For Colour That Melts Into Skin

Powder blush sits on the skin. Cream blush becomes part of it, and this close-up shows the difference: the pink spreads high across the cheek with no edge and no powdery film, just colour and a slight sheen where the light lands. That melted finish is why cream is the dolly default. Placement runs higher than classic blush. Tap the cream onto the fullest part of the cheek and sweep it up toward the under-eye, close to where the aegyo-sal sits, so the face reads round and flushed. Fingers warm the product and give the softest blend. A damp sponge works too and sheers the colour out more. Build in thin layers, two light passes rather than one strong one, and judge the colour in daylight before adding more. Cream formulas can look quiet indoors and bloom outside. Leave powder for the T-zone only, so the cheeks keep their skin-like glow.
A finished base with no colour can read flat and a little tired, even with great eye makeup on top.
Cream blush tapped high on the cheek melts in, and the face reads round, warm and awake, like this photo.
10. Cushion Foundation For The Dewy, Skin-Like Base
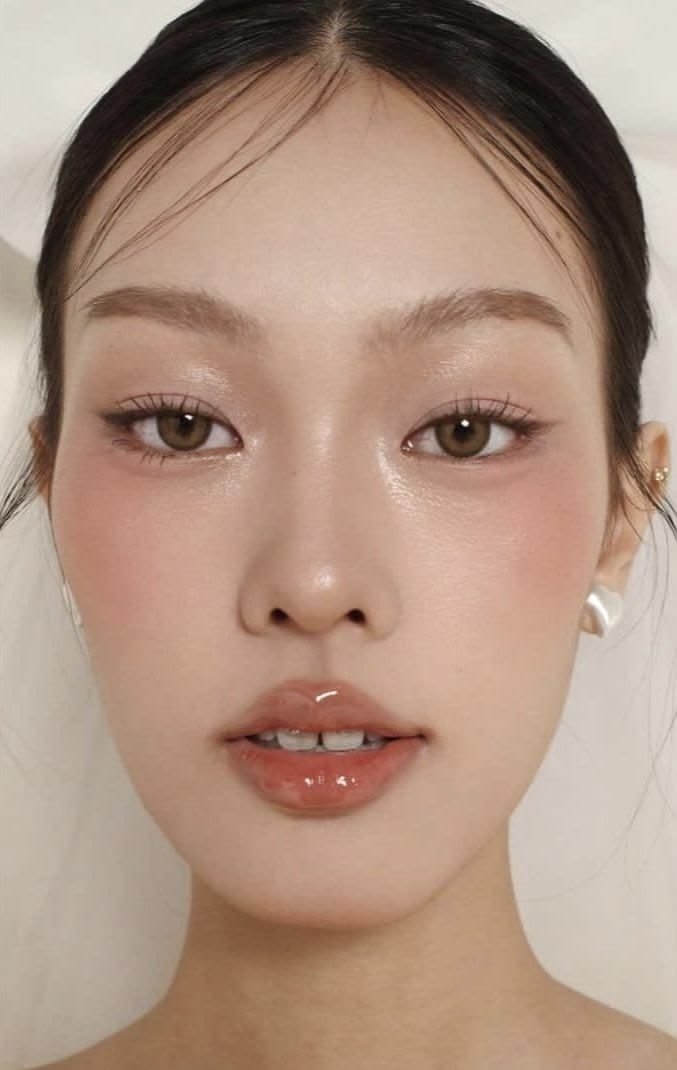
Everything in this routine sits on the base, and the base in this portrait is doing quiet, important work: even tone, a dewy sheen on the cheeks and nose, and skin that still looks like skin up close. A cushion foundation is built for exactly that finish. The formula soaks a sponge inside a compact, and you press the puff into it and pat the product on in thin layers. Patting, rather than rubbing, keeps the coverage smooth and stops it from streaking. The finish lands between matte and glossy, with light bouncing off the high points the way it does on bare healthy skin. Build only where you need it, usually the centre of the face, and leave the edges sheer. The compact also earns its bag space at midday: one pressed puff over the nose and chin refreshes the base in seconds, with no brush and no mirror gymnastics.
📌 Good To Know
Thin, patted layers keep the base looking like skin. One thick layer is where cushion bases start to read as makeup instead of complexion.
11. Brightening Concealer For A Lit-Up Aegyo-Sal Puff
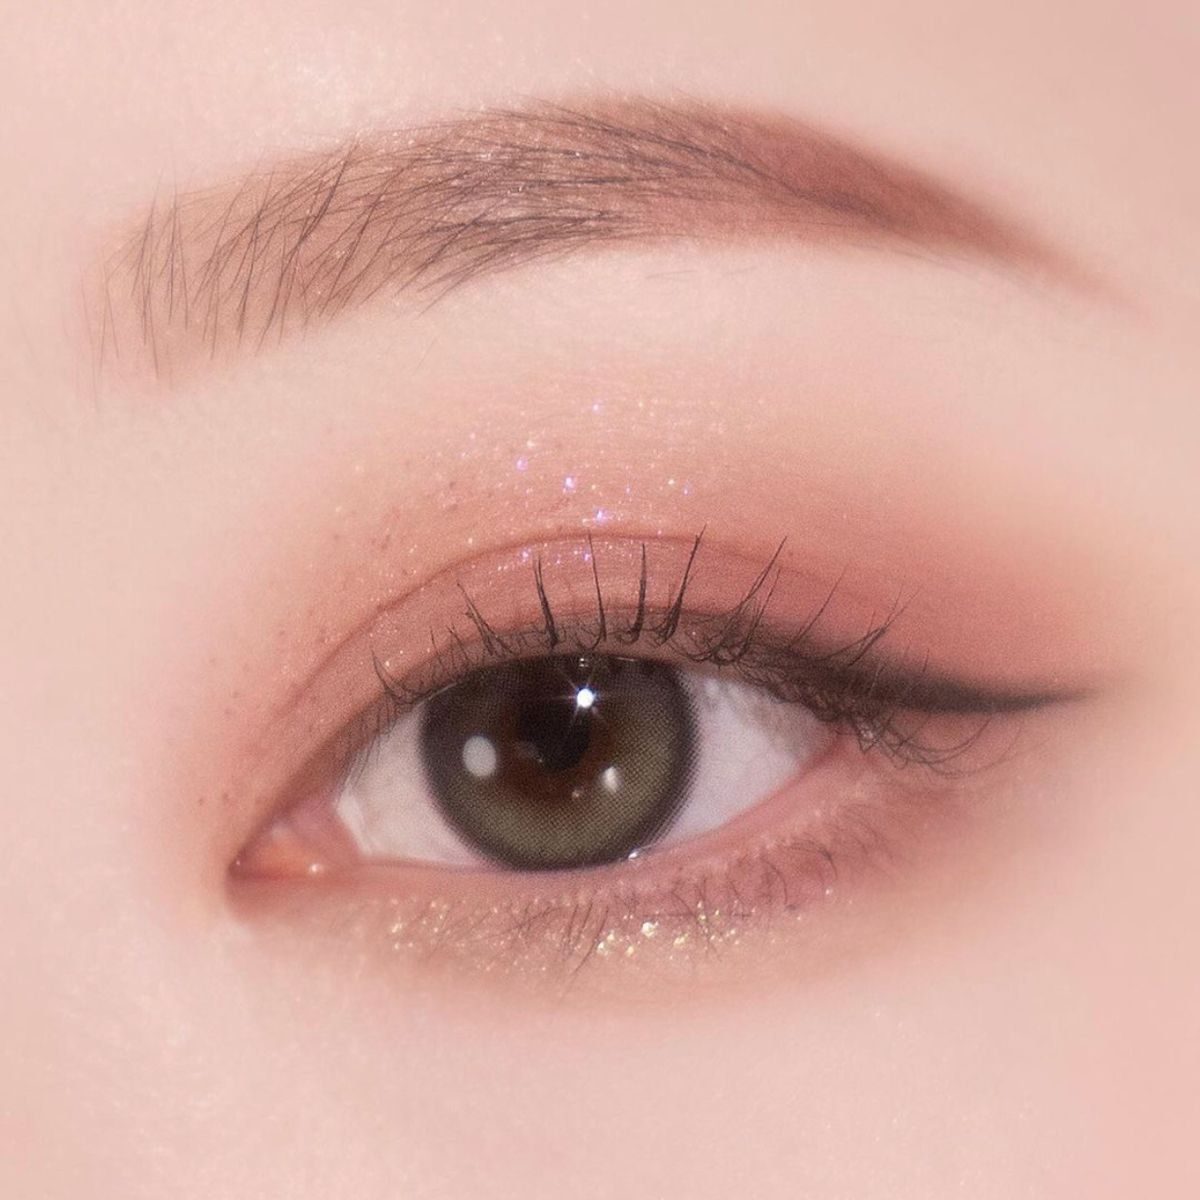
The shadow pencil from the first entry draws the shape. This is the product that fills it with light. In this close-up the puff under the eye is the brightest part of the whole look, pale and slightly shimmery, and it pulls the eye forward because of that contrast. A brightening concealer does that job in the routine. Pick a shade one step lighter than your base, with a pink or peach brightening tone rather than a yellow one. Pat a small amount onto the centre of the puff and blend the edges with a fingertip or a tiny brush. Add a dot at the inner corner, where brightness opens the eye fastest. Placement discipline matters: keep the concealer on the puff itself and off the shadow line below it. Cover the line and the contrast disappears, and with it the whole aegyo-sal effect. A thin layer is enough. Thick concealer under the eye creases by noon and photographs older than bare skin.
12. Soft Brown Gel Liner For The Downward Puppy Flick
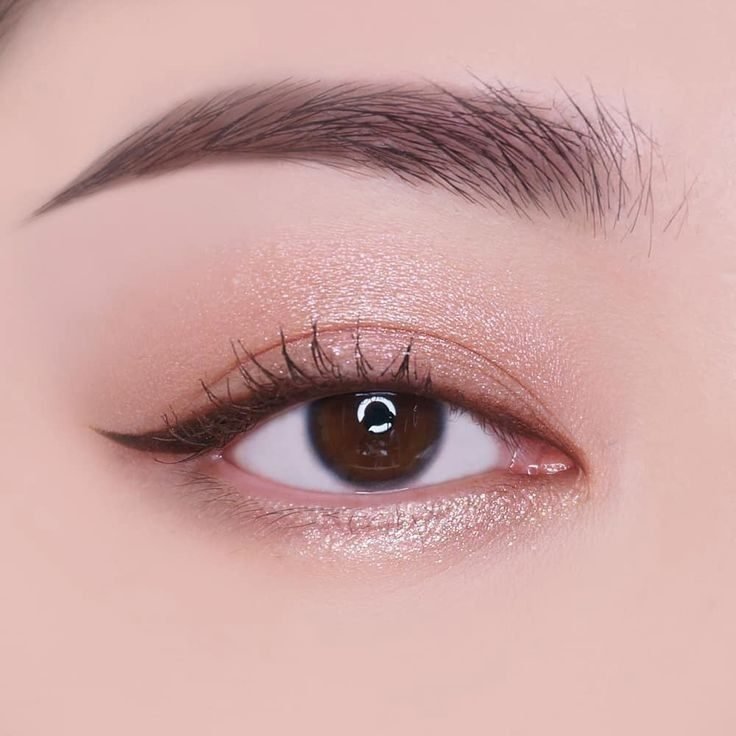
Winged liner lifts the outer corner and sharpens the eye. Puppy liner does the opposite on purpose, and this eye shows the shape: the line follows the upper lashes, then continues straight out and slightly down, so the eye looks rounder, larger and a little bit wistful. A gel liner in soft brown is the kindest tool for it. Gel glides without dragging, gives you a few seconds to fix the angle before it sets, and brown keeps the line gentle where black can turn the look severe. Work in short strokes along the roots first. At the outer corner, aim the tail along the angle of your lower lash line extended, pointing down rather than up. Keep the tail short, a few millimetres past the corner. Fill any gaps at the roots, since a dotted root line shows up in close photos. The same gel, smudged lightly, can deepen the outer third of the lower line for balance.
Line the upper roots in short strokes, keeping the line thin at the inner corner.
Extend the tail straight out and slightly down, following the lower lash line angle.
Soften the edge with a clean angled brush before the gel sets.
13. Pink-Toned Eyeshadow Palette For The Soft Pink Lid
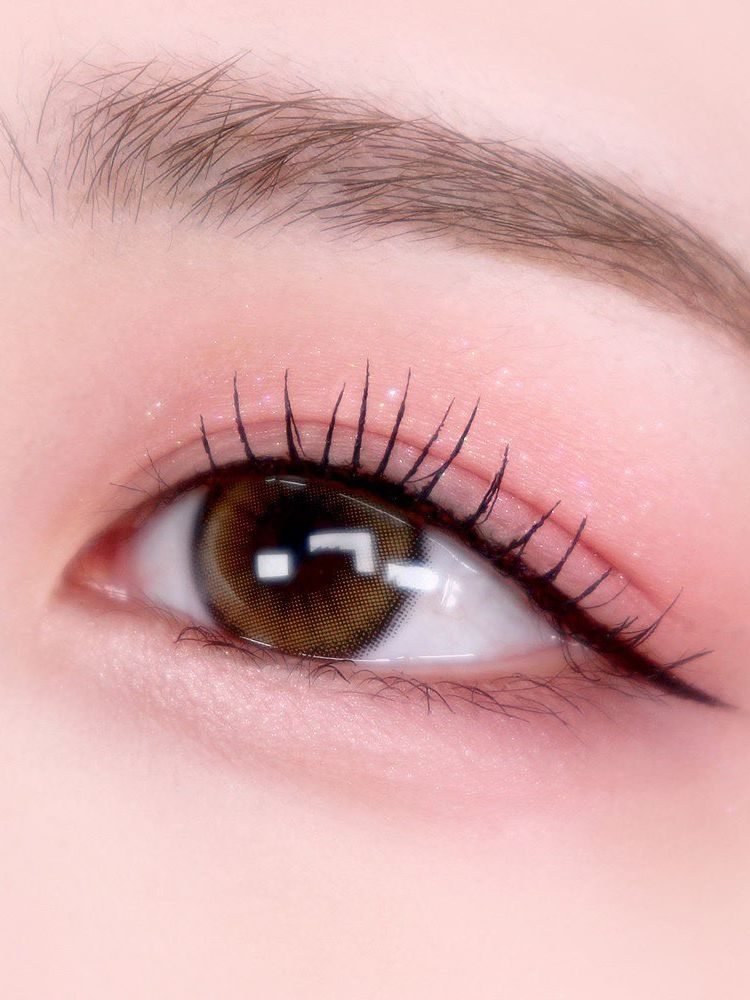
A dolly lid is pink more often than it is anything else, and this close-up shows the full recipe: a soft pink wash over the lid, the same family of colour under the lower lashes, and fine sparkle pressed on top. A pink-toned palette earns its place when it covers all three depths. You want a pale matte pink for the base wash, a mid rose for shape, and one deeper plum or brown-pink for the outer corner and the lower line. That deepest shade, run under the lower lashes, is what rounds the eye and ties the lid to the aegyo-sal below it. One shimmer shade in the mix handles the light-catching layer. When shopping the type, swatch for softness: dolly pinks should look rosy and a little muted on skin, not neon. Powders that blend without going patchy matter more than pan count, since most days you will reach for the same four shades.
Pink above the eye and below it wraps the whole eye in one colour family, and that wrap is what makes the eye read round and dolly.
14. Shimmer Highlighter For The Light Stripe On The Cheekbone
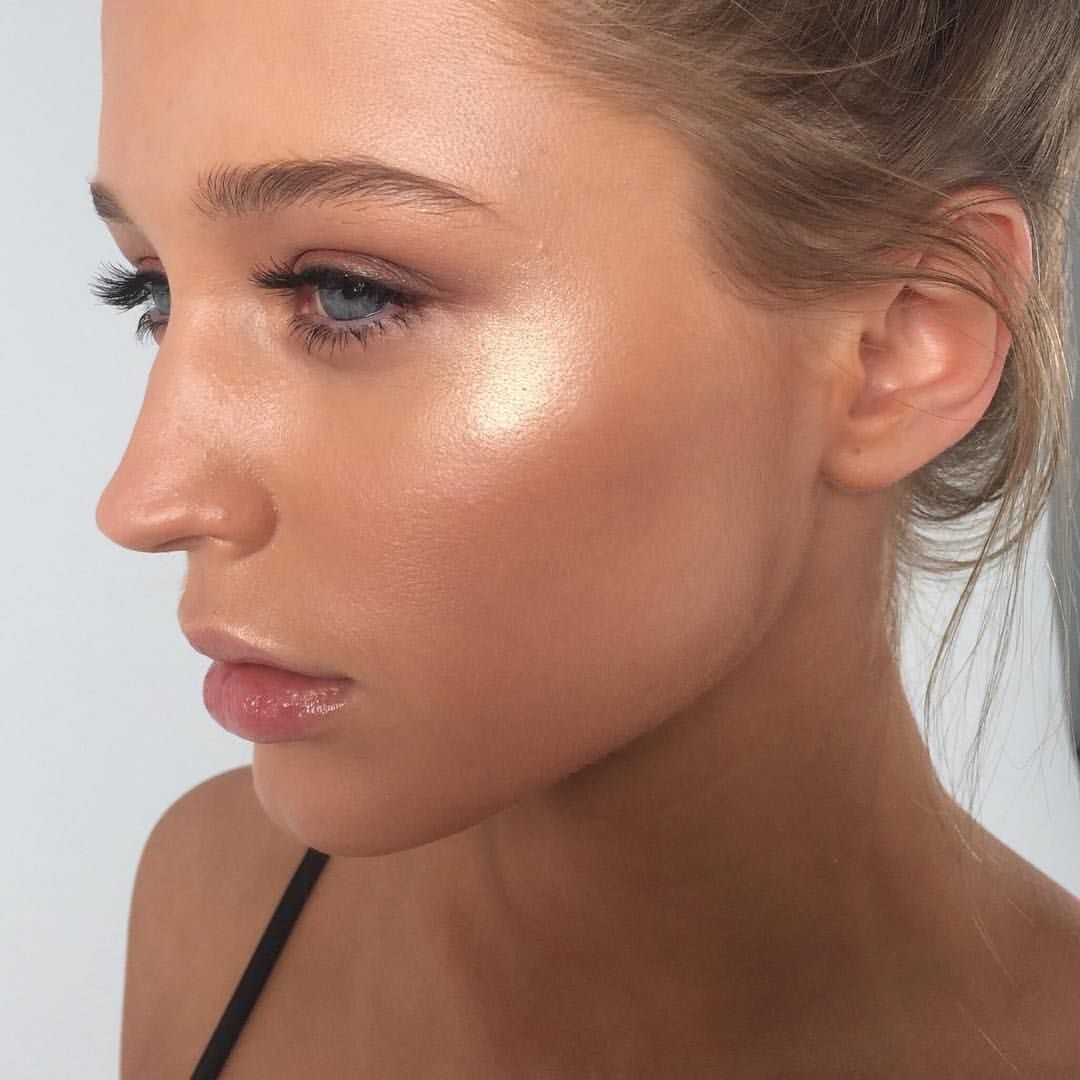
Turn a face to the side and the highlighter shows itself, exactly like the bright stripe running along this cheekbone. That stripe is the dolly glow at its most deliberate: a fine shimmer placed where bone sits closest to the skin, catching light every time the head moves. Fine is the key word when choosing the product. The shimmer particles should be small enough that the finish reads as lit skin, with no visible glitter flecks in daylight. Cream and liquid formulas melt in for a softer stripe. Powders give more punch and layer well over the cushion base. Sweep it along the top of the cheekbone in a short curve, then stop. From there, tiny amounts do the detail work: a touch on the nose bridge, a pinhead at the inner eye corner, the smallest tap on the cupid’s bow. Every extra placement should be smaller than the last, so the cheekbone keeps the starring role.
Recreate this look
15. Peach Colour Corrector For Under-Eyes That Read Awake
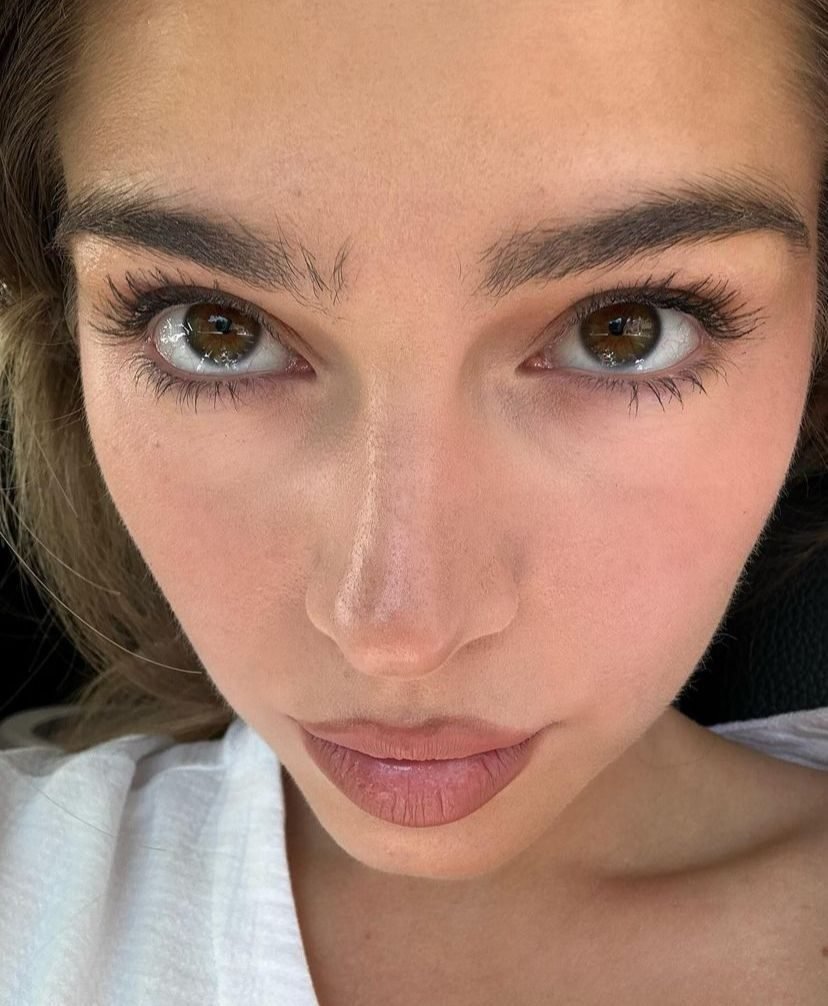
Some under-eyes stay shadowed no matter how much concealer goes on, and the reason is colour, not coverage. Blue and grey tones show through pale products and turn them ashy. A peach corrector works on the colour wheel instead of against it: peach sits opposite blue, so a thin layer neutralises the shadow before anything else goes on top. The face in this photo shows the end goal, an under-eye area that reads even, warm and awake with the rest of the makeup kept natural. Apply the corrector only where the shadow actually sits, usually the inner half and the deepest part of the hollow. Pat the edges out with a fingertip and let it set for a moment. Then add base or a light concealer over it, patting again rather than wiping, so the peach layer stays where you put it. Thin is the whole technique. A heavy layer trades a blue shadow for an orange one.
Place a thin layer only on the shadowed inner half of the under-eye.
Pat base or concealer over the top instead of wiping across it.
Painting the whole under-eye peach, which warms areas that never needed correcting.
Stacking thick layers, the fast route to an orange cast in daylight.
16. Brow Mascara For Soft Brows That Stay Light And Straight
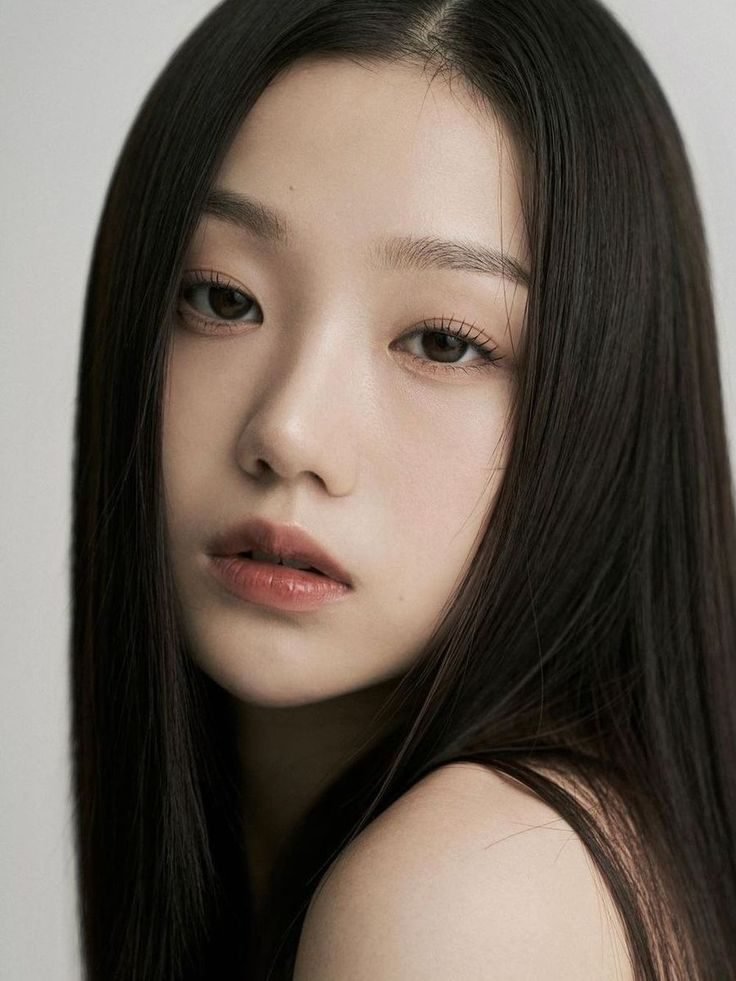
Strong, sculpted brows fight the dolly face. The brows in this portrait show the target instead: straight in shape, light in colour, each hair visible, nothing carved or darkened into a block. A tinted brow mascara is the easiest product for that finish. The small wand coats each hair with a wash of colour and a little hold, so brows look fuller and tidier while staying soft. Work the wand upward at the front of the brow, then across along the natural line, keeping the shape flatter than your instinct suggests. A straighter brow shortens the mid-face and keeps the focus on the eyes, which is the whole dolly plan. Choose a shade close to your hair colour or one step lighter. Dark brow product is the fastest way to make a sweet look turn stern. Wipe the wand on the tube edge first. Most brow mistakes are just too much product in the first stroke.
💡 Quick Tip
Brush against the direction of growth first, then smooth the hairs into place. Every hair gets coated, and the finish stays feathery instead of flat.
17. Lash Primer For Separation Before Mascara Goes On
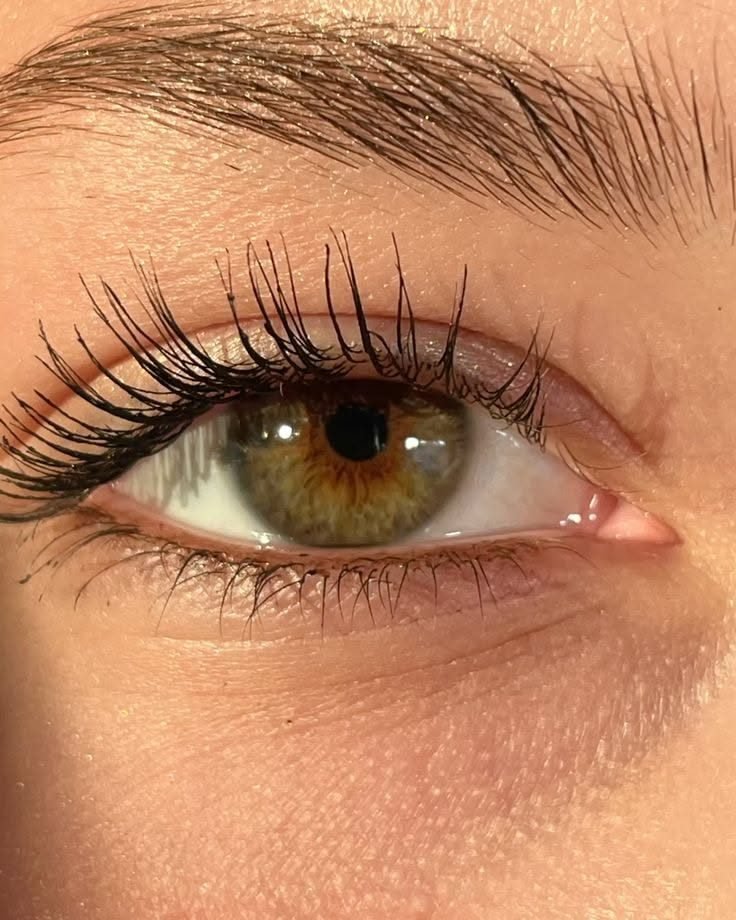
Clumps are a mascara problem that starts one step earlier. Look at how the lashes in this close-up separate strand by strand, right from the root, with no lashes stuck together in twos and threes. A lash primer is the product that sets that up. It coats each lash with a light base, often pale or clear, that gives mascara something to grip and keeps neighbouring lashes apart while the colour goes on. Apply a thin coat and let it turn tacky for a few seconds, then follow with mascara before it fully dries. Work lash by lash at the outer corner, where clumps gather first. Primer also helps straight lashes hold the curl from the curler step, since the mascara has a grippy layer to lock onto. Fibre types add a little visible length at the tips. Plain conditioning types suit sensitive eyes and anyone who finds fibres itchy by afternoon.
18. Fine Glitter Eyeshadow For A Lid That Catches Light
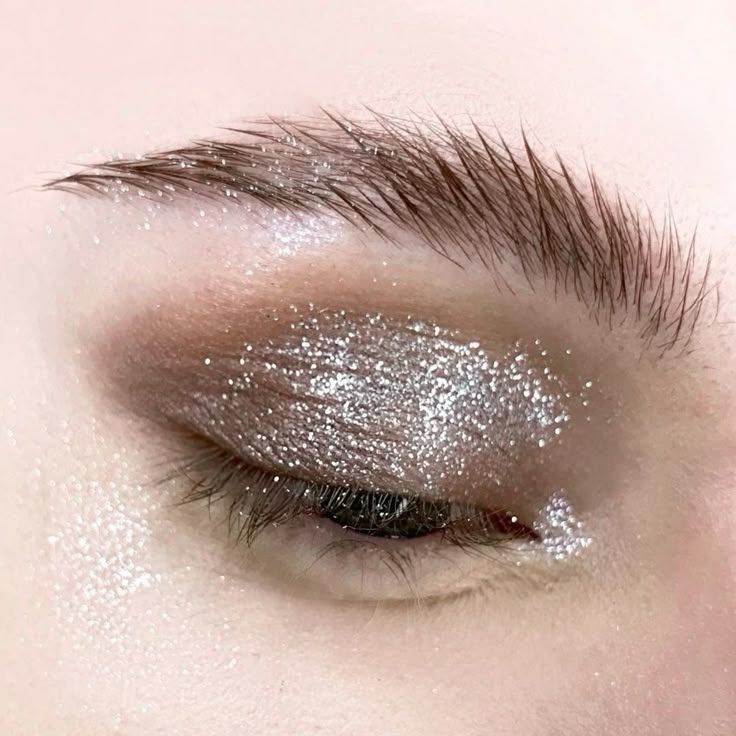
A closed lid tells the truth about glitter, and this one is packed edge to edge with fine silver sparkle that still reads smooth. That is the difference between glitter eyeshadow and the glitter liner from earlier in the list: the shadow covers the lid itself, turning the whole surface into the light catcher. Fine milling is what keeps it elegant. Tiny particles sit flat and flash as one sheet of sparkle. Larger flakes scatter, fall onto the cheeks and read as party costume by lunch. Pressed formulas are the tidy option for daily wear and travel well. Loose glitter gives the strongest flash and needs a sticky base or glitter primer under it to stay on the lid. Pat the shadow on with a flat brush or fingertip rather than sweeping, since patting keeps the particles dense and in place. Keep the heaviest concentration at the centre of the lid, over the iris, where the flash shows most when you blink.
- ▸Fine particles read as one sheet of sparkle, not separate flecks.
- ▸Pat it on over a sticky base so the glitter stays on the lid.
- ▸Centre of the lid carries the densest layer for the strongest flash.
19. Hydrating Setting Mist For The Fresh Dewy Finish
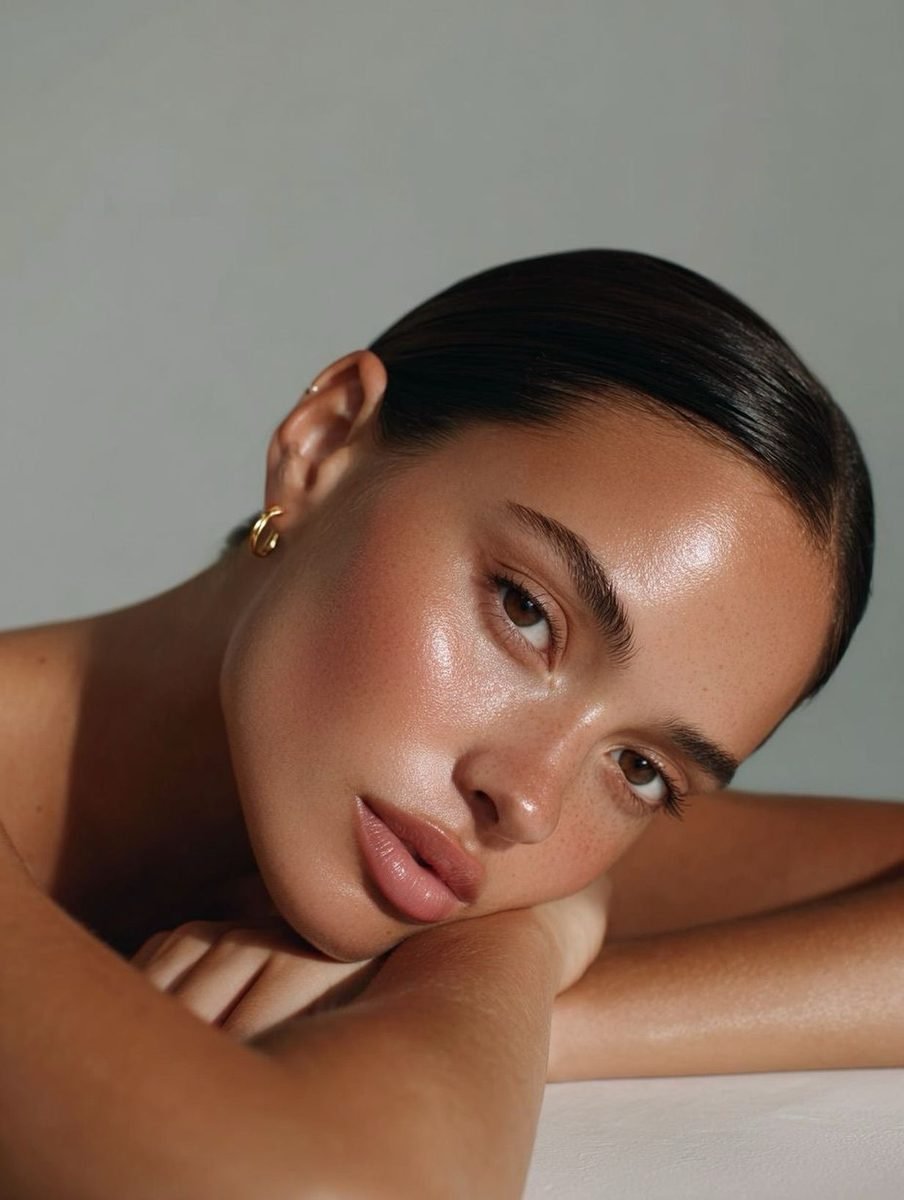
Powder can leave a good routine looking dusty at the finish line. The skin in this portrait shows what the last step should give back: a settled sheen across the forehead, cheeks and nose, with every product melted into one surface. A hydrating setting mist with a dewy finish does that melting. Fine droplets land over the finished face, soften the edges of powder, and leave the glow the cushion base promised. Read the finish on the label before anything else. Mattifying mists flatten the dolly glow you built on purpose. Hold the bottle at arm’s length and mist in a slow X across the face, two or three passes at most, then let it dry untouched. Fanning with your hands speeds it up. The same bottle refreshes the look mid-afternoon: one light pass wakes the base back up without adding a new layer of product.
Freshly powdered skin can look dry at the edges, with blush and base sitting in separate layers.
A dewy mist settles everything into one surface, and the finish reads like glowing skin, like this portrait.
20. Berry Lip Tint For A Deeper Stain That Still Reads Soft
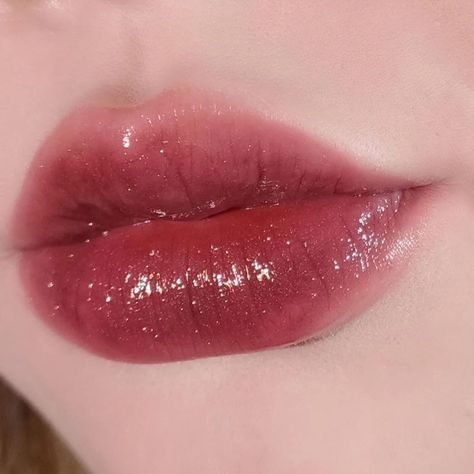
Every kit needs an exit from pink, and the berry tint is the dolly version of a deeper lip. The colour in this close-up is richer than the gradient tint from earlier in the list, a mauve berry with soft edges and a light gloss over the centre, and it still belongs to the same sweet family because the edges stay blurred and the finish stays juicy. A tint is the right format for the shade. Berry lipstick can look heavy and dated within an hour of wear. A berry stain sinks in, fades evenly, and never leaves a hard ring when the middle wears off. Build it in two thin layers, blotting gently between them, so the stain sets deep without going patchy. Keep the rest of the face a touch quieter when the berry goes on: the same blush and lashes, with the lip as the one deeper note. It is the evening version of the look, and it asks for nothing new from the kit.
Recreate this look
Twenty product types, and every one of them has a single clear job. That is the real secret of the dolly look: nothing in the kit is decorative filler, and nothing has to work harder than it should. Start with the base pieces and the aegyo-sal pair if your kit is empty, then add lashes and lip colour as your confidence grows. Keep these dolly makeup products together in one pouch and the routine turns into a short, repeatable sequence instead of a guessing game. Save this list for the next time you stand in a beauty aisle wondering what the look actually needs.